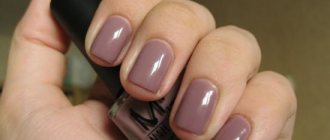
How to paint your nails beautifully and neatly?
Of course, it is very important for a woman to always look beautiful and impeccable. Particular attention is paid to the condition and appearance of the nails. Every detail is important: from the well-groomed ends to the quality of the coating. Unfortunately, not all girls manage to paint their nails perfectly - without streaks and unnecessary strokes on the skin. However, we dare to assure you that a neat manicure can be done at home. We will tell you how to paint your nails correctly for flawless nail art.

To make your manicure look perfect, it is not enough just to apply the coating carefully. It is very important to properly prepare your nails, starting with the cuticle and side ridges. You can use our recommendations, covered in articles about classic and European manicure. In them you will find a lot of useful information, supported by useful photos and video instructions. Be sure to align all ends to the same length. Next, we will talk about how to carefully paint your nails yourself at home. Believe me, this simple skill will be very valuable to you. You can constantly improve your skills, making every future nail art flawlessly beautiful.
Application of applications
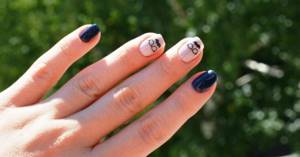
Nail painting can consist not only of applying decorative varnish, but also of applying additional decorative decorations to the nails.
The easiest and fastest way to decorate your nails is with stickers. You can buy them at any beauty salon. Often it is necessary to stick them onto slightly dried varnish, and then apply a transparent layer on top.
Foil for manicure looks very nice. It can be applied either to one part of the nail or to the entire plate. It is attached using special glue. Apply base polish to your nails first. Next, you need to remove the protective film from the film and cover it with clear varnish.
Tips to help you paint your nails correctly
To ensure that the polish applies easily and evenly and stays on your nails for a long time, consider the following points:
- A high-quality varnish, with which you can beautifully and even perfectly paint your nails yourself, cannot be cheap
- Instead of liquid to degrease the nail plates, you can use alcohol or alcohol tincture, this is absolutely not harmful
- Instead of the base, you can paint it with regular clear varnish. However, remember that in this case the nail will not receive the necessary moisture and nutrition, and the varnish will only become an obstacle to the penetration of pigment into the layers of the nail plate
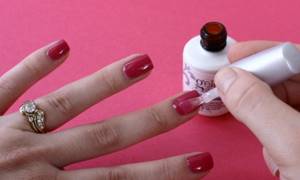
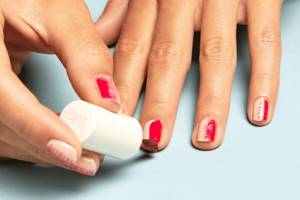
- You should not immediately correct the bad spots or wipe off the varnish that gets on the cuticle. During the manicure, fats were applied to the skin in the form of a special oil or nourishing cream, which will prevent pigments from settling on the skin. At the very end, the excess is carefully removed using a cotton swab dipped in liquid
- To make it look beautiful, all layers should be thin, but cover the nail without gaps
- The varnish should be allowed to dry naturally: do not wave your arms or put your hands in the oven - this is harmful to both your hands and the coating itself. Bubbles will appear on its surface and the varnish will come off very quickly.
These are not all the nuances. To get a feel for how to properly paint your nails with regular polish, you need to try this process.
What to do if the varnish does not dry?
This is a standard problem with all conventional varnishes - they often take a very long time to dry. For each layer to dry thoroughly, it takes, on average, 10 to 30 minutes.
If you don’t want to wait a long time, special sprays or liquids distributed over the plate using a brush can be useful.
It is also possible to use a drop of vegetable oil within a couple of minutes after applying the varnish; this greatly increases the speed of drying of the varnish.
Even taking a regular hair dryer and turning it on without the heating option, you can easily speed up the drying process.
Decorative coating technique
In fact, painting your nails carefully at home is not at all difficult. All you need is a little patience and skill. Since the good condition of the nail plates is very important for an ideal manicure, you may be interested in thematic articles about vitamins and nourishing baths for nails. All materials on our website are supported by useful video lessons and colorful photo galleries. Let's return to our topic. How to paint your nails beautifully so that people admire you?
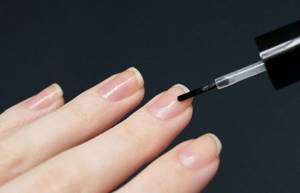
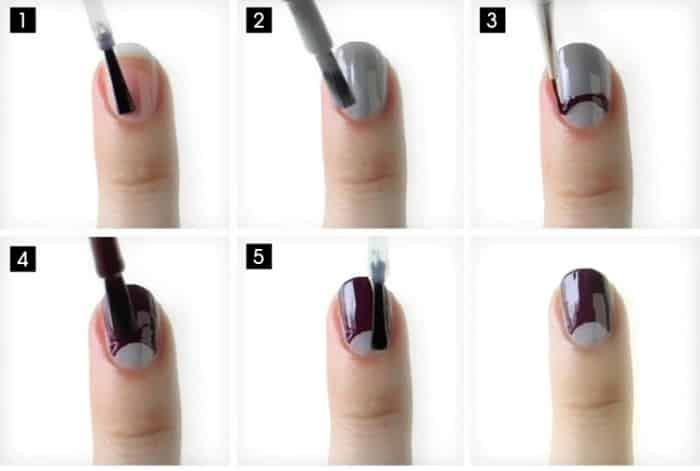
Step 1: Applying Foundation
The first step towards a perfectly executed manicure is a base coat. It is very important to pre-paint your nails with a clear base. Firstly, the base protects the nail plate from aggressive pigments of colored varnish. Secondly, the base evens out the surface, making it much easier for you to do a neat manicure at home. You can use a varnish from the strengthening series or apply a regular transparent base.
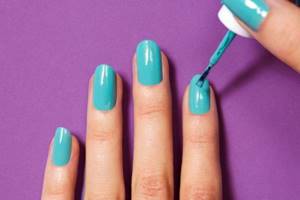
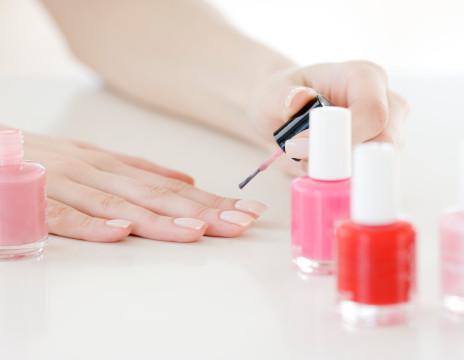
Step 2. Applying color coating
Before painting your nails with color, prepare cotton swabs, discs, toothpicks and nail polish remover to correct possible errors. Apply the first coat. To successfully paint your nails at home, use high-quality varnishes that spread more easily over the surface. Dip the brush into the bottle and remove excess by running it along the edge of the neck. Start painting from the central part of the nail plate, stepping back a little from the cuticle, as shown in the photo, and then distribute the polish to the sides.
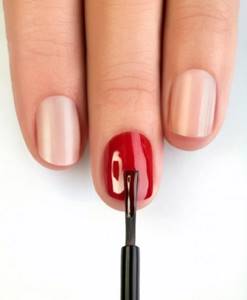
What is the second layer for? Since it is almost impossible to paint your nails accurately the first time, re-coating will mask all the imperfections. In addition, only two layers of varnish will allow you to reveal the full depth and richness of the shade. You can re-paint your nails only after the first color layer has completely dried. Otherwise, the varnish will take a very long time to dry. Sometimes you can get by with one layer of decorative coating: the exception is working with varnish of a very thick consistency.
Step 3: Top coat
The stage of painting nails with a top coat would correctly be called optional, especially at home. Of course, protective coating has many advantages, but not everyone likes it. Make sure the colored polish is dry before applying topcoat to your nails. Considering the fact that the protective coating is already 3-4 in a row, not all girls are ready to wait 30 or more minutes for complete drying. The exception is “drying”, which can be applied even at home using a pipette, spray or brush.
The advantages of the top coat include a glossy shine to the nails and a longer lifespan of the manicure. When applying a protective layer at home, do not forget to properly paint the ends of the ends. After the nail polish is dry, remove excess polish from the skin. To consolidate your knowledge, we invite you to watch an interesting video lesson. From it you will learn how to properly paint your nails at home, without the help of specialists. To ensure that the procedure gives you only positive emotions, we have prepared useful recommendations for you, which you will find immediately after the video.
Preparation
Manicure is a cosmetic procedure for caring for nails and hand skin . There are several types:
- Edged . This is a classic technique in which the hands are immersed in water with sea salt, soap or other emollient for a few minutes. And then they cut off the rough skin around the nails and remove the cuticle. The procedure is recommended for severely neglected but not damaged nail plates.
- European . A more delicate technique that does not use cutting tools. European manicure is suitable even for nails with diseases or injuries.
- Hardware . A modern method that is used in salons and beauty salons.
- Combined . A technique combining hardware and edged manicure.
For carrying out the procedure at home, trimming and the European method of nail care are suitable.
The types of manicure are described in the video:
Tools
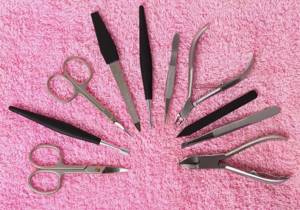
Before you start a manicure, you should make sure that you have all the necessary tools and materials at home. The standard set for trimming equipment consists of:
- Files for shaping.
Reference! For natural nail plates, especially those prone to splitting, it is better to choose a glass file. It will carefully seal the small scales that make up the nail without damaging them. - Tweezers (nippers) for removing cuticles.
- Manicure scissors.
- Buff for polishing.
- Spatulas used to push back the cuticle.
European manicure requires fewer devices:
- file;
- orange sticks used to remove cuticles;
- pumice to remove rough skin;
- buff.
Manicure tools are described in the video:
Preparing the surface of the nail plates
Before applying nail art, nails should be properly prepared:
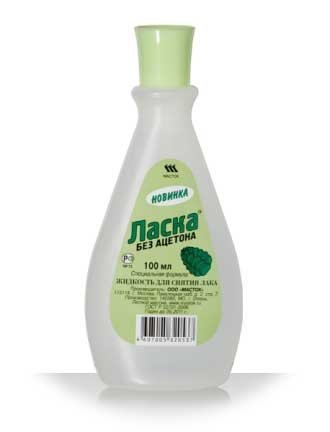
- Wash off the old coating using nail polish remover and a cotton pad . To remove it, it is better to use a liquid without acetone - it is safer for the nail plates.
- Polish with a buff . On the flat surface of the nails, the decorative coating applies more accurately and lasts longer.
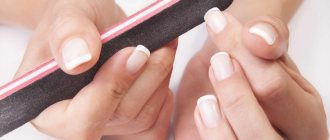
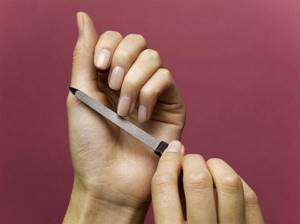
- File carefully .
The file needs to be moved only in one direction from the side edge to the middle. If your nails are wet, it is better to wait until they are completely dry, otherwise filing will damage their structure. Attention! When choosing a shape, it is better to focus on the natural outlines of the nail plates: this way your hands will look more natural and harmonious. - Apply cuticle cleaner . When the skin around the nail becomes soft and pliable, carefully push it away with an orange stick or remove it with tweezers.
- Degrease the nail plate with a special product . This way the coating will last longer.
Base for plain varnish
Base (base) is a cosmetic product that is applied to the nail plate before painting. To ensure a high-quality manicure, be sure to use a base . It has a number of advantages:
- smoothes the nail and hides its imperfections;
- increases adhesion between the nail surface and varnish;
- strengthens and protects the nail plate from the coloring pigments of the decorative coating.
When choosing a base, you should adhere to a few simple rules:
- Purchase products that contain vitamin supplements or other nutrients, such as proteins or silk.
- If your nails are uneven, then it is better to choose a thick base for varnish, which will certainly hide all the defects.
- When purchasing, pay attention to the expiration date of the product. After its expiration, the base coat should not be used - it can harm the nails.
The base for the varnish is applied after degreasing the nail plate in one thin layer, being careful not to get on the cuticle and the area around the nail. After the base has dried well, you can begin painting.
Top coating
Top coat (fixer, finish coat) is a cosmetic product that is used to cover finished nail art to fix it and protect it from external factors. With a top, the manicure lasts much longer . Many topcoats additionally have a drying function.
Attention! Manufacturers often produce a base, base and top coat at the same time. If you use all the products from the same brand, the manicure will be of better quality.
When purchasing a topcoat, you should pay attention to its consistency, density and tone. A high-quality fixative does not smear nail art, preserves the color of the varnish and contains vitamins or other useful additives.
Before applying the top coat, you should study the instructions for the correct use of the product. Because some fixatives are designed for a wet nail surface, others are applied when the polish is already dry. To fix the nail art, one thin layer of topcoat is enough.
Without a good polish there won't be a perfect manicure.
You can’t skimp on your beauty. Therefore, when you go for your next bottle of varnish, take its purchase seriously. We do not urge you to overpay for a well-known brand, because many good products are also in the budget category. However, you should definitely avoid buying cosmetics in passages, dubious stores and on trays in the middle of the street. The likelihood that you will be given a very low quality varnish is huge.
To paint your nails accurately, the polish must be uniform, fresh, and sufficiently liquid.
- The thick coating lays down unevenly, forming stripes
- The presence of small lumps in the varnish can ruin any manicure.
- If the varnish is expired or has lost its original appearance, feel free to throw it in the trash.
Remember that bad polish will not only leave uneven marks on your nails, but will also significantly deteriorate their condition.
Preparatory stage
Before painting your nails, you must carefully prepare their surface. Only a few people can boast of an ideal nail plate. In most cases, there are small cracks that will be clearly visible under the glossy finish. Simple manipulations will help you carefully paint your nails:
- Give your nails the desired shape using scissors and a nail file. Make sure all nails are the same length.
- Now it’s time to take care of the cuticle. We recommend steaming your hands in a warm bath with oil, and then pushing back the cuticles with an orange stick. It is better to do a trim manicure in a salon. If you don't get rid of the cuticle, the varnish will cover it and it will look terrible.
- Using a polishing block, thoroughly polish the surface of the nails.
- Degrease the surface of the nails with a soap solution or nail polish remover.
- Be sure to apply a base coat, because this is the key to an amazing manicure. The base heals nails, protects them from the effects of decorative varnishes and evens out the surface.
Don't forget to make masks for your nails to improve their health and bring them into proper shape.
How to paint the nails on your right hand yourself?
It often happens that after painting the nails on one hand (the left), we proceed to the right and observe a not happy picture of the result of our labors. The reason for this is not the careful development of the hand, because the working one is mainly the right one. But in pursuit of a neat manicure, it is important to know how to achieve beautiful painting of the nails on your right hand.
How to neatly paint the nails on your right hand?
In order for the manicure to be almost perfect, it is important to remember a few secrets:
- Start painting the right hand first. Of course, it’s more convenient to paint the left hand first and admire it, but it’s best if you spend all your strength and patience on the “difficult” hand
- Apply a thin layer of varnish, do not dip the brush into the bottle over and over again to pick up the thickest drop. The less varnish, the more accurate the first layer will be, and the second will be easier to do.
- Use a special corrector. It is not difficult to buy in cosmetic stores. Visually, it resembles a felt-tip pen, but its rod is soaked in nail polish remover. It most conveniently cleanses the skin of the finger from unnecessary “blunders” and makes the manicure neat
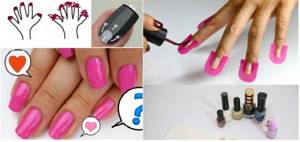
- Buy special “protectors”. They resemble stickers. they should be attached to the finger around the nail so that the brush with varnish paints only the nail and leaves excess varnish on the sticker
Subtleties and secrets of applying varnish
- Before painting your nails, be sure to degrease them or simply wash your hands with soap . This will extend the life of the manicure.
- To better remove the polish from the skin, first apply cream to it without touching your nails.
- The workplace for manicure should be well lit. It is very important to position your hands correctly on the table. Please note - elbows should not hang !
- Before you learn how to paint your nails, make sure that the varnish is of high quality and not old. Before use, warm the bottle in your palms and shake it.
- Start painting your nails from your little fingers. If you move in the opposite direction, you may accidentally touch the fresh coating on other fingers.
- To paint your nails at home not only correctly, but also beautifully, use our recommendation. When applying the coating, leave the edges of the nails unpainted on the sides. This little trick will help you visually make your ends longer.
- For short nails, it is better to use a polish with a liquid consistency. It will be easier for you to apply it. You can dilute thickened varnish with a special agent, but remember that after this it will quickly become unusable.
- Before painting each nail, re-dip the brush into the bottle. If suddenly the varnish is not enough, immerse it in the bottle again. However, you should not allow excess, since in this case you will not be able to paint your nails beautifully.
Choosing the right varnish
When buying paint, you should pay attention not only to the color you like or plan to use to create an image. There are a number of important factors that should be given priority attention. Painting your nails with polish is not just about decorating them, it is about applying a specific substance to a part of the body that can cause damage.
Try to choose a paint that does not have a pronounced specific odor. This is not only unpleasant, but also signals the presence of harmful substances. After prolonged use of this composition, nails may become brittle and yellowish.

Quality paint should be neither too thick nor too thin. To check, simply remove the brush and hold it over the bottle. In high-quality paint, after 2-3 seconds a drop should gather at the tip and fall. If the paint runs off immediately, this is a sign that it has been thinned. In this case, the manufacturing technology is violated. If the varnish turns out to be too thick, it does not lay down in an even and beautiful layer, there is a chance of ruining the manicure.
The brush of the selected product should also be uniform, without protruding fibers, and slightly rounded. It should also have a medium hardness. Otherwise, the coating will be uneven or the manicure will turn out sloppy.
Execution steps
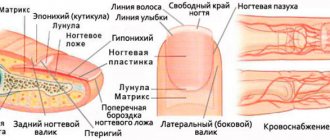
A manicurist needs to know the structure of the nail very well and understand exactly what movements, tools and substances can damage the nail plate. If you study the anatomical structure, many questions will disappear on their own. So, at the first stage, you should understand that the area under the cuticle is very sensitive, so you should not get into it with any piercing or cutting objects. Otherwise, the integrity of the nail is damaged, and in the future the client will have problems with the evenness of the nail plate.
The correct technique looks like this:
- The client's nails are being processed. This can be done in different ways: wet and dry. Be sure to remember that you cannot apply gel polishes to wet nails, otherwise the material will peel off. Therefore, you should either reserve time or perform a dry, unedged manicure.
- The cuticle may be cut or moved. In any case, the entire pterygium underneath must be removed. Removal of pterygium is possible using cutters. Since cutters can create cuts on the nails themselves if handled incorrectly, the manicurist must undergo appropriate training in working with different types of cutters (hardware manicure courses).
- When working with nail files and cutters, it is extremely important to turn on the manicure vacuum cleaner - it instantly draws in all the dust from filed nails and cut artificial material. Pay attention to Max manicure vacuum cleaners, as well as manicure rollers and pedicure stands from this Russian manufacturer.
- After processing the nails and moving the cuticle to the base of the nail, you can apply gel polish (in the usual sequence - after the primer and base). Movements should be smooth, and the cuticle should be pulled back so that as much as possible of the free space under it is exposed for applying gel polish.
- After the first layer has dried, the second layer is applied. In this case, the gel polish is applied to the brush from above, which allows you to paint the space under the cuticle more easily. Once a smooth edge has been outlined, the gel polish can be quickly and easily spread over the rest of the nail plate.
- After drying the second layer in the lamp, you can begin to apply the top and remove the sticky layer (if necessary).
Another way to apply gel polish under the cuticle is that the master works with an almost dry brush. The movements are performed at an angle of 45°, and the cuticle is also retracted. In this case, you can avoid the most important problem - gel polish wicking. If at least part of the pigment gets on the cuticle or forms an uneven edge, it will be much more difficult to correct the mistake. Therefore, novice artists choose the method of application with an almost dry brush, and if necessary, apply 3 layers of gel polish, drying in a lamp after each application.
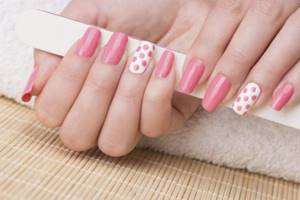
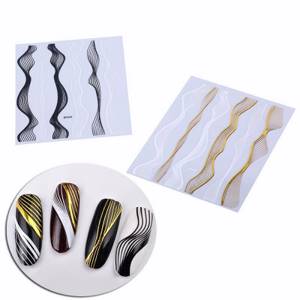
Stage 4. Nail design
Now you can move on to the designs. Since we make the coating at home and are not professionals, it would be logical to use the simplest designs. But don't be discouraged, they are very stylish and impressive!
For example:
- slider designs;
- stickers;
- foil.
Slider design Ibdi_Nails AIR FOIL 13
Stickers F660 Leaves gold
Foil for casting gold 4 cm*1 m RocheNail
In addition to the designs themselves, we may need a top coat to secure the sliders or glue for the foil.
Top for designs Factor Lianail 10 ml
Glue for foil ARTEX 15 ml
Now let's look at how to make each of the proposed design options.
Slider designs:
- Those nails on which we will attach slider designs do not need to be covered with topcoat;
- Soak the pre-cut slider design in water, dry it on a napkin, then separate the film from the backing;
- Apply the base coat. We do not dry it;
- We plant the design on an undried base coat. In order not to damage the slider design when smoothing it over the nail, you can use a brush or silicone hoof;
- Dry the base coat together with the slider design in a lamp;
- Apply a topcoat to secure the sliders. Dry it in a lamp.
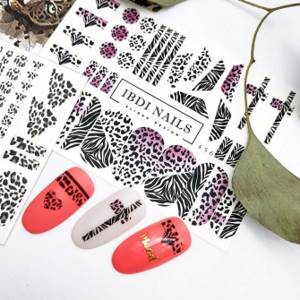
Stickers:
- If they are used, it is necessary to remove the sticky layer from the coating;
- Remove the sticker from the backing, cut it if necessary, and apply it to the nail plate;
- Cover with topcoat and dry in a lamp.
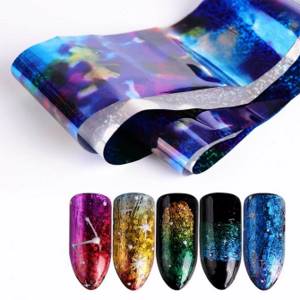
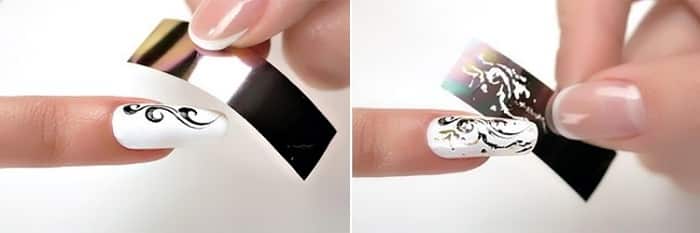
Foil:
- If you decide to use foil as a design, then after applying gel polish you do not need to use a top coat;
- We firmly press the matte side of the foil to the sticky layer of dried gel polish and sharply tear it off. Dry in a lamp;
- We apply the top coat and dry it again in the lamp.
TIP: if the stickiness of the gel polish is not enough and the foil does not print, then you should use a special glue for foil.
It's very easy to use. Remove the sticky layer from the colored coating, apply glue to the surface of the nail and wait until it becomes transparent. This means the glue has dried. Then we print the foil as described above, secure it with topcoat and dry it.
What should be on hand
First of all, these are sharp manicure scissors and a nail file. No woman's cosmetic bag should be without them. Try to choose a glass or plastic file; they are less damaging to your nails.
For trim manicure, metal tweezers are simply necessary. With their help, we will subsequently remove the cuticle. When purchasing, be sure to pay attention to what material they are made of. Surgical steel will remain sharp for a long time.
How to choose a tool for manicure and pedicure
We will need a metal spatula Some people use an orange stick instead.
We will also need various bath products. Which ones specifically are up to you to decide. These can be various oils, sea salt and much more. Choose nail polish remover without acetone. This way we will damage the nail plate less. You can add a little glycerin to a regular liquid containing acetone and save your nails from dehydration. Cotton pads (balls, just cotton wool) are indispensable assistants when removing polish from the nail plate and around. For more “jewelry” work, you can use cotton swabs. In stores you can easily find a special correction pencil. It's a pleasure to use.
We will also need cuticle remover, cuticle oil, hand cream, base coat and nail polish fixer.
Cuticle removal
This stage always follows the bath while the cuticle is still soft. We push back the cuticle with a metal spatula or an orange stick and begin cutting. To cut it off, use tweezers or curved nail scissors. Remove any remaining skin from the surface of the nail plate with a spatula.
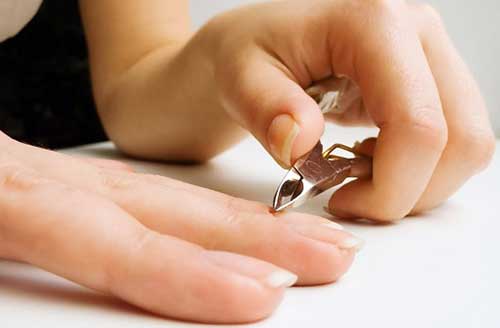
In the process of moving and cutting, try to ensure that your actions are as careful as possible. Otherwise, you may damage the skin or the base of the nail.
If you decide to do an unedged manicure, you won't need scissors or tweezers. Apply a special product to the cuticle and remove it with a stick.
What are the defining advantages of such a varnish?
Short application time.
Great choice - no need to combine nail design with clothes, since the color can be changed at any time. You can even do a manicure for the holiday - a New Year's manicure with regular varnish is a good idea, since there are plenty of examples on the Internet, both in photos and in tutorials.
Less damage to the nail plate - there is no need to heavily grind and polish the nail, or expose it to the rays of a UV lamp. Gel polish, on the other hand, means long wear and therefore firmly connects to the plate, thinning it.
Let's get to the main point
The preparatory work is over and we begin to create beauty on our hands.
First, let's apply the base. The base layer strengthens or vitaminizes the nails (depending on which one you use). In addition, it provides an even coating.
We begin to apply varnish. It's better to paint the nails of your dominant hand first. And that's why. If you are right-handed, then painting your right hand will be awkward. As a rule, in this case the layer turns out to be thick, and the color, accordingly, is more saturated. Starting with your dominant hand, you can adjust the layer thickness with your second. Thus, the manicure on both hands will not be different.
How to choose a color?
You need to choose a shade not only based on the colors of the clothes you wear (although this is also important!). Skin tone, as well as the length of nails and fingers, will be equally important. But first things first.
Depending on the length of the nails
It's simple here:
- on long nails , but dark tones are best avoided (they can turn your manicure into creepy claws);
- short nails , on the contrary, look good in dark colors (black, chocolate, blueberry, etc.), since such shades visually narrow and elongate the nail plate;
- if you have medium length , experiment with textures (metallic, glitter, matte effect), and choose any colors.
Depending on skin tone
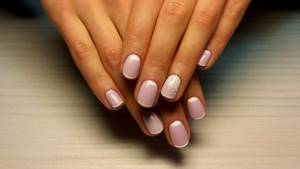
The most difficult thing is to choose a finish for a nude manicure, since it must be in perfect harmony with your skin tone. Proceed like this:
- if your skin is very light and pale, use cool pink or beige with a gray undertone;
- if your hands are a little dark or slightly tanned, with a slight warm tint, pay attention to sand or golden cream;
- dark-skinned girls should avoid excessively yellow tones - it is better to choose coffee.
And now about bright colors. The darkest colors look good on dark hands - deep wine, black, plum and others. On girls with light tanned skin, rich, pure tones without any admixture of gray or white look great: bright red, blue, turquoise. White-skinned girls, on the contrary, suit pastel and gray colors.
Be careful with red nail polish! Although this color is considered a classic, it can highlight the presence of wounds or inflammation on the skin.
Depending on finger length
Let's answer succinctly: if you have short or full fingers, to visually narrow and lengthen them, choose colors that are close to your skin tone. If your fingers are thin and long, any dark or bright shades will look great on your manicure. Girls who fall into a category somewhere between the previous two are completely free to choose their coverage (only with restrictions imposed by the length of their nails and skin tone).
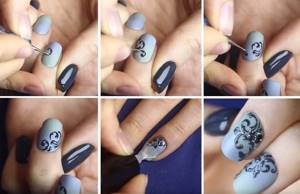
Lace manicure
Fashion trends for this type of manicure have been relevant for several seasons. If you want to create a romantic look, this nail design will be the perfect finishing detail.
- This manicure can be created with varnish and stamps, but there is another way. First you need to prepare 10 small pieces of thin lace. Their size should match the size of your nails.
- Apply a base coat of varnish – light colors work well. But to create a dramatic and fatal image, you can also use a dark shade.
- Place the prepared lace on your nail and straighten it using a toothpick.
- Apply several layers of clear varnish over the lace and wait until it dries.
Fashionable lace manicure with regular varnish
Interesting : Fashionable manicure and pedicure in the same style
How to paint your toenails beautifully?
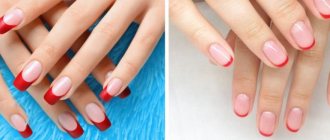
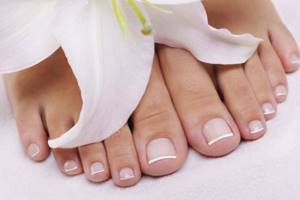
The most popular type of pedicure is French. perhaps this is the only way to “ennoble” your toenails and make them well-groomed, neat and clean.
Doing a French manicure on your legs yourself is difficult, but doable. Nails are not always large and perfectly straight. In order to get a French jacket, you will need either special stickers or tape.
Paint your nails with a neutral color, wait for it to dry, apply the sticker, cover the nail area with white and remove the sticker. Apply the sealer and wait until it dries again.
The most difficult thing is to try to do everything to keep your fingers as spread apart as possible at all times, in order to avoid damage and snags of the fresh varnish.
French on the legs
Several other options for a beautiful pedicure on the legs:
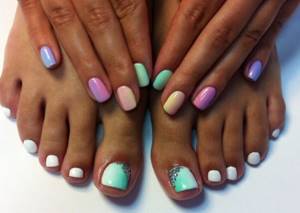
multicolor gradient
Pedicure also allows you to use gradients and paint your nails with multi-colored polishes. It is best to pursue this style in manicure.
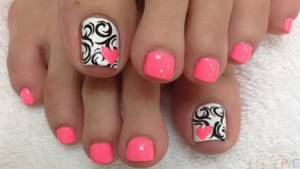
decorating the big toe nail
Pedicure also involves painting small nails with one solid color and decorating them, as well as painting the large nail on the big toe.
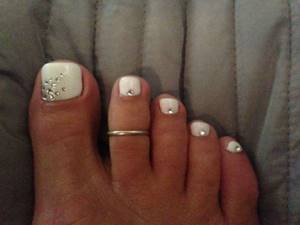
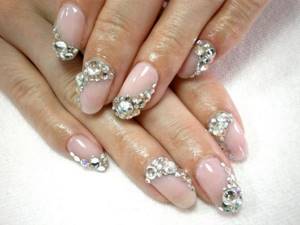
pedicure decoration with rhinestones
You can decorate your pedicure simply and tastefully using the most common rhinestones. The thumb “requires” the maximum number of crystals, and the small ones one at a time.

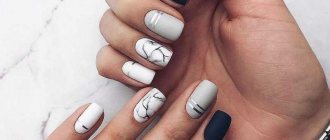
simple pedicure in dark colors
A pedicure in dark colors always looks advantageous and feminine, but for this it is not at all necessary to choose black. The best and most popular (and also incredibly fashionable for several years now) are cherry and plum tones.
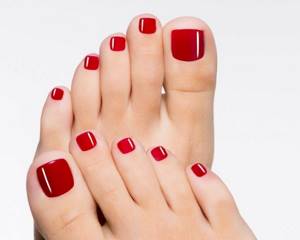
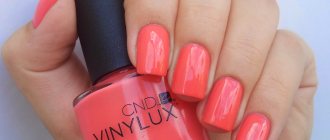
bright red pedicure
The most popular, most feminine and sexy in all years and at all times is considered to be a red pedicure.
It makes women's legs especially interesting, tender and sophisticated. Such a pedicure should be as neat as possible, without stains on the skin and with an even layer of varnish. Any shade of red will do. It is best to combine a red pedicure with a red manicure.
How to paint your nails beautifully and correctly

There are so many ways to do your own manicure that it’s impossible to list them all – you’re bound to miss one. However, the rules for preparing hands for the procedure and applying varnish are the same. Before you begin the process of coating the nail plate with varnish, make sure that you have gone through all the preparatory stages and the result of applying varnish will be a perfect manicure that can only be compared with salon manicure procedures.
Before opening a bottle of colored varnish, you need to remove the old coating, shape it, level the plate, remove the cuticle and finally treat the skin around it with nourishing oils:
- To remove old coating, try to choose high-quality products that do not contain acetone.
- The nails are shaped using a nail file. Everyone determines for themselves which type of this tool is more convenient to use at home.
- A nail file is also used to level the entire surface. A more convenient way is a manicure device with a special attachment, which in a matter of minutes will make the plate perfectly flat without damage.
- The cuticle needs to be removed very carefully using tongs or a special trimmer, which is often included in a manicure set.
- You need to treat the skin with vegetable oils (apricot, almond, olive) or special creams.
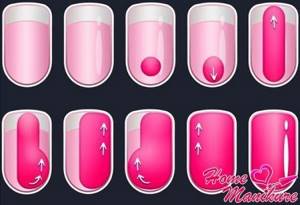
How to carefully apply varnish
The first thing worth noting is that before applying any type of varnish, it is necessary to cover the nail plate with a transparent base, especially for manicures for children. It will not only protect your nails from the harmful effects of the coating, but will also allow it to last much longer without chipping. To avoid having to worry about how to paint your nails evenly, there are simple step-by-step instructions for applying polish:
- Step back 3-4 mm from the base of the nail, draw a center line to the tip of the plate with a brush with varnish.
- From the same place, draw another line to the tip of the nail, but this time painting one of the sides.
- Repeat on the other side.
- Finish the procedure by drawing a horizontal line along the tip of the nail, thereby securing the polish.
- Let the coating dry on its own or use a hair dryer to speed up the process.
Gel polish
Shellac is a new way to give your nails a new look, while maintaining it for up to 1 month. The coating is so durable that you will not see chips or cracks for a long time, and the color of the gel polish will remain until the very end of wear. If you do not know how to apply shellac correctly, then the instructions above will help you, the only difference is that drying occurs under an ultraviolet lamp, the light of which causes the coating to harden in a few seconds.
Simple varnish
When purchasing nail polish, choose a quality manufacturer, otherwise you risk using paint from an unknown manufacturer. In addition, varnishes from well-known brands are easy and even to apply. You will no longer have a question about how to beautifully paint your nails. They allow you to enjoy the results of your manicure longer. Good coatings are often more harmless than their cheaper counterparts. Application brushes also have a certain shape, which contributes to a smoother and faster application.
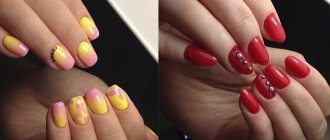
Color combination on nails
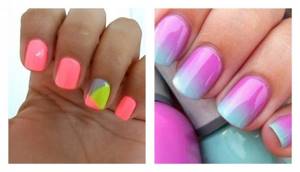
Recently, girls often choose multi-colored manicures. This trend has already firmly entered the fashion world, so the most famous brands specially produce sets of nail polishes so that you don’t have to think about which colors look best together. There are several types of combinations of varnishes that will help in the question of how to beautifully paint your nails in two colors:
- contrasting: yellow with purple, red with blue, etc.;
- monochrome: combinations of color shades, for example, pink with pale pink;
- related: similar colors, for example, blue and green, orange and red, etc.
How to draw a simple design on your nails?
You can draw different patterns using different materials. The simplest and most affordable are colored varnishes. But for those who are seriously interested in decorating their nails, it is worth trying other material options.
Gel polish
With gel polish you can create a variety of patterns and effects that will last until you have to repeat the procedure of covering your nails with this material. The technique of painting with gel polish can be different: on an undried coating and on a polymerized one.
The gel polish coating technology is as follows:
- Apply primer (base layer) to the nail prepared with a buffer. If necessary, dry in a lamp.
- Apply colored gel polish. It is at this stage that differences in further actions begin. This layer can be dried and then added with a design. But you can do this before the nail goes to drying. This technique is called “wet”. Only after designing the nail does it dry in a lamp.
- Apply fixative, dry, remove stickiness.
Drawing with gel polish step by step
Acrylic paint
Acrylic is a very convenient material for nail design. It dries quickly, has no odor, and retains pigment well. Apply acrylic paint to a dried surface (varnish, gel polish, shellac, even on a natural nail). To paint your nails, you will need a brush, preferably one with non-natural bristles.
Step-by-step drawing of a flower with acrylic paint
You can also make a French jacket with acrylic and decorate it with an original floral design. The acrylic painting technique is convenient because if the pattern doesn’t work out, you can simply wash it off with water before it dries and start painting again.
In order for the nail painting to last on the nail for a long time, a transparent fixative must be applied over the design.
Using shellac
Just as in the case of gel polish, you can decorate your nails with shellac using the “wet” or “dried” technique. You can use a French manicure as a basis, which is no problem to do on short or long nails. If your nails are still short, then you should not make the French “smile” too wide. When it comes to the design, it should not be too large so as not to visually enlarge the nail plate.
Using pieces of tulle
You can get an unusual manicure if you use simple tulle. Here you can use multi-colored varnishes for the base and pattern. A subtle effect will be achieved if you use a light varnish.
The technique here is simple:
- Paint your nails with a base color (it will act as the color of the final design). Allow to dry thoroughly.
- Place a piece of tulle tightly against the nail. Carefully apply a different color of varnish on top of it. Let the layer dry. Remove the tulle.
- Cover with clear varnish.
Using a piece of tulle with a different pattern, you can get ready-made designs, which is not difficult to do.
Using decorative elements
You can create your perfect manicure without painting on your nails, but simply by correctly using decorative nail material. The color base in this design is necessary in any case, but there are no restrictions on the use of decor.
Rhinestones, stones, and foil can give your nails a special shine that cannot be duplicated by any varnish.
In order for the rhinestones to stick well to the nails, it is better to place them on gel polish that has not yet been dried. After finishing the decoration, you can safely dry it. A layer of topcoat on top is required.
There is also a special foil that applies gel polish without a sticky layer or regular dried varnish. To get a design on your nails, you should glue the foil, iron it on top and carefully remove it. The design that was formed on the foil will appear on the nail.
There is another design option with foil. To do this, purchase special thin pieces of foil (they come in different colors). They are laid out on the nail with an applique, and then secured with a colorless varnish or top coat (for gel polishes). Only with foil you can create unique patterns on your nails.
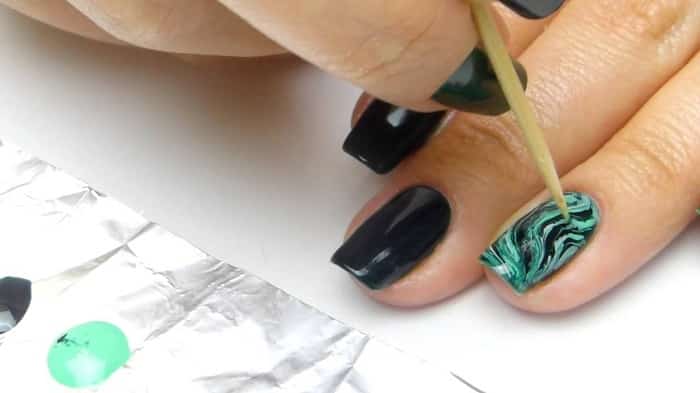
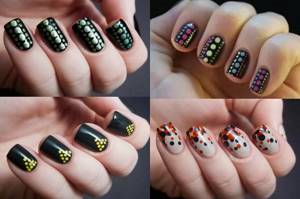
Using droplets and dots
The dot painting technique will help you create an unusual, but painfully simple manicure. This manicure can be done using varnishes of different colors, as well as gel polishes, shellac, and acrylic paints. The tools you will need are dots. An alternative is toothpicks, a needle, a ballpoint pen tip, etc.
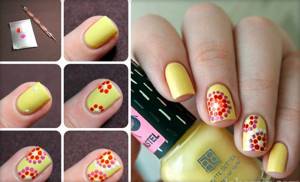
As in previous methods of decoration, you need to apply the main color to the nails, and after it has completely dried, apply the design. The manicure will last longer if you cover the resulting result with a fixative.
Design option for marigold using drip technique
If the varnish has not yet dried, then you should use the drip painting technique. Apply varnish of a different color onto the undried varnish and stretch it with a needle (dots, toothpick). Then they are allowed to dry and coated with colorless varnish.
Preparing nails before painting
In order for the varnish to last longer, and most importantly, for the hands to have a well-groomed appearance and attract attention, creating your positive image, you simply need to carefully prepare your nails for applying varnish.
Today there are many types of manicure, so everyone, even the most fastidious young lady, can choose the ideal method for herself. If we talk about salon conditions, then a competent master himself can clearly determine what type of manicure is right for you. Well, for home use, we recommend using a preparation or Japanese type of manicure. These are unedged methods, which means the technology is performed quickly, easily and safely.
If you want to know how to learn how to paint your nails, then you can’t avoid studying the theory.
Go through all stages of manicure carefully. The instructions also apply to those who have extended nails. In its simplest form it looks like this:
- Cleaned nails are given the required shape and length using a file.
- The cuticle and periungual tissue are softened using a special oil or soap bath
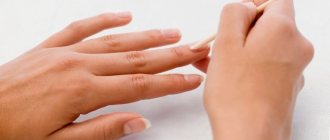
- Using an orange stick, the cuticle is carefully pushed back to the side ridges and base of the nail.
- The nails are polished with a special nail file.
- Apply a strengthening serum or nourishing cream to your own or extended nails.
It is very important to polish your nail plates well so that the polish lasts longer. But if you decide to do a shellac manicure on your nail extensions or your nails at home, then the process looks completely different, more on that a little later.
How to paint your nails to make them appear longer?
Among all the secrets, of course, there are those that allow even the shortest nails to be made a little longer visually.
To do this, you need to resort to special nail painting secrets, aimed at stretching the area of the nail plate using drawings, lines and other techniques.
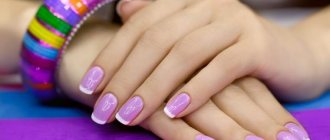
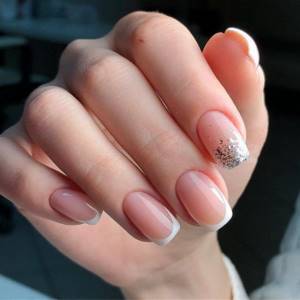
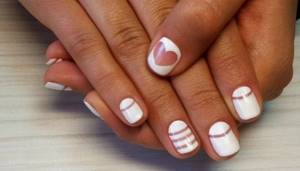
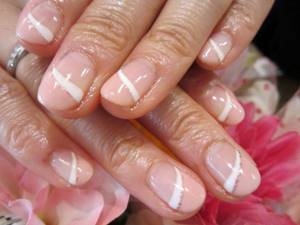
The simplest French manicure will help you visually stretch your nails. To do this, you need to paint the entire nail with a neutral beige or pink color and only paint the outermost part of the nail, three to four millimeters, white.
This manicure is coated with a fixative varnish for durability and gloss. It is noteworthy that over time the nail will grow and become more and more beautiful with the help of such a manicure.
French with decorative patterns on ring fingers for short nails
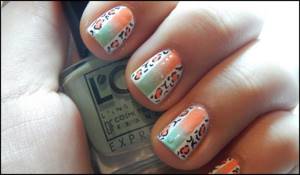
Another tricky, but unusually effective technique is the oblique French. This jacket has not a horizontal, but a beveled strip on the nail from one edge to the other.
Visually and on the one hand, the white part of the nail becomes longer and therefore it seems that the nail itself is much larger than it actually is. The oblique French jacket can also be decorated with rhinestones, sand or sparkles.

beveled French option
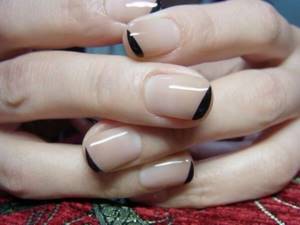
avant-garde oblique french
Drawing oblong lines or patterns on the nail will also help to visually . The pattern or strip must stretch from bottom to top or diagonally so that the nail becomes visually larger and longer.
Such a design can be safely decorated with sparkles or rhinestones to give it elegance and festivity, as well as to remove simplicity.
longitudinal line on the nail - a pattern to visually lengthen the nail
manicure that visually lengthens nails
geometric designs on nails and gradients also visually lengthen the nail
Video: how to make a beautiful manicure at home
Doing a manicure yourself is not difficult, especially when you have video tutorials from the best masters at hand, where the process is described step by step. By following all the recommendations from the video instructions, you will learn how to carefully paint your nails at the cuticle, how to beautifully paint short nails, and others. Photos of manicure options will help you quickly decide on a color or style, and you will see how to properly paint your nails in different colors. A little patience and everything will start to work out for you.
Easy manicure
Smooth and neat around the cuticle
On short nails
Beautiful painted nails
How to save the coating if it is chipped or damaged?
In the evening you painted your nails, and in the morning you woke up with some kind of “crumpled” manicure. Admit it, did this happen? The recipe for this disease is simple: you need to apply a finish to the coating. It will even out everything and the varnish will look like new again.
It's worse if a chip appears on the nail. If it is just beginning to appear, sand the area with a polishing file and apply topcoat. But if the coating has already chipped... Well, also file down the chipped area, and then just change the design! The ideal option is to apply glitter. Their texture will hide the unevenness of the manicure.
By the way, if the varnish has already begun to chip, do not delay removing the coating (how to remove shellac yourself at home?). This means that it has already served its purpose on your nails and it’s time to replace it.
That's all! Now you can paint your nails at home no worse than a professional would do in a salon. Let your manicure cause only admiration!
What should be on hand
First of all, these are sharp manicure scissors and a nail file. No woman's cosmetic bag should be without them. Try to choose a glass or plastic file; they are less damaging to your nails.
For trim manicure, metal tweezers are simply necessary. With their help, we will subsequently remove the cuticle. When purchasing, be sure to pay attention to what material they are made of. Surgical steel will remain sharp for a long time.
How to choose a tool for manicure and pedicure
We will need a metal spatula Some people use an orange stick instead.
We will also need various bath products. Which ones specifically are up to you to decide. These can be various oils, sea salt and much more.
Choose nail polish remover without acetone. This way we will damage the nail plate less. You can add a little glycerin to a regular liquid containing acetone and save your nails from dehydration. Cotton pads (balls, just cotton wool) are indispensable assistants when removing polish from the nail plate and around. For more “jewelry” work, you can use cotton swabs. In stores you can easily find a special correction pencil. It's a pleasure to use.
We will also need cuticle remover, cuticle oil, hand cream, base coat and nail polish fixer.
Newspaper manicure technique
Nowadays the so-called “newspaper” manicure is gaining immense popularity. It's not that difficult to do. To do this, you need to cut ten small pieces from the newspaper. Nails should be coated with white (or any other light varnish) and wait until it dries. Dip the newspaper in alcohol for a few seconds and apply it to your nail. The letters must be imprinted on the nail plate. In this case, you should not use the same part several times. Apply clear fixing varnish to the top of the print and wait for it to dry completely.
When using this technology, you can apply your own variations, complementing and combining this idea, creating new interesting designs.
Cuticle removal
This stage always follows the bath while the cuticle is still soft. We push back the cuticle with a metal spatula or an orange stick and begin cutting. To cut it off, use tweezers or curved nail scissors. Remove any remaining skin from the surface of the nail plate with a spatula.
In the process of moving and cutting, try to ensure that your actions are as careful as possible. Otherwise, you may damage the skin or the base of the nail.
If you decide to do an unedged manicure, you won't need scissors or tweezers. Apply a special product to the cuticle and remove it with a stick.
Neat manicure with several polishes
If a girl wants to create a pattern on her nails using two or more colors, she needs to be even more careful. Now an additional problem arises - one color should not overlap another. There are two ways to solve this issue:
- The use of stencils and stickers that will cover a certain part of the nail or become part of the design.
- The choice of nail design is a gradient, in which it is not at all necessary to maintain clear boundaries between different colors.
Let's get to the main point
The preparatory work is over and we begin to create beauty on our hands.
First, let's apply the base. The base layer strengthens or vitaminizes the nails (depending on which one you use). In addition, it provides an even coating.
We begin to apply varnish. It's better to paint the nails of your dominant hand first. And that's why. If you are right-handed, then painting your right hand will be awkward. As a rule, in this case the layer turns out to be thick, and the color, accordingly, is more saturated. Starting with your dominant hand, you can adjust the layer thickness with your second. Thus, the manicure on both hands will not be different.
It is advisable to start painting your nails from the little finger. This way you won't smear the polish on the rest of your nails.
Finally, you must apply a sealing layer to your nails. In this case, the manicure will please you longer. And don't forget to apply cream and moisturizing cuticle oil to your hands.
Doing a classic manicure
A few more tips
- If you first apply one layer of white coating, and on top of it - a layer of bright, the color of the latter will appear better.
- To do a French or moon manicure, you don't have to use special strips. They can be replaced with regular tape.
- You can make a polish with glitter at home by adding a little highlighter, eye shadow with shimmer or blush with a radiant effect to a bottle with a transparent coating.
- To ensure that there are no traces left on the skin around your fingers from removing colored or shiny nail polish, first apply a rich cream to your hands, and only then remove the coating. This advice will come in handy when you decide to quickly change one manicure option to another.
Step-by-step instruction
Before you begin the process of applying varnish, you should consider that the girl has 40 minutes of free time, eliminate or minimize distractions, and also think through the design. In addition, you need to check the shape of the brush; it should not be narrow and dense. Instructions for creating the perfect manicure:
- Apply wax or oil to the periungual area without touching the plate. This will help you subsequently easily remove excess material from the cuticle and rollers.
- It is recommended to apply a coat of base to facilitate subsequent application of colored varnish.
- Take a brush of colored varnish and wipe it on the edge of the bottle so that very little varnish remains on it, literally on the tip. This way it won't bleed onto the skin.
- We paint our nails with regular polish, starting with the little finger. You should place a drop in the center of the plate, then carefully “adjust” the varnish with a brush to the base.
- Then, with slow movements, holding the brush confidently, you need to apply the varnish to the side surfaces of the plate. Thus, the varnish does not flow onto the cuticle.
- You need to complete the manipulations with the brush by sealing the end of the nail. Thanks to this, the varnish will last longer.
- Apply another coat of varnish to deepen the color.
- When performing movements, the elbow should rest on the table and the hand on which we are applying the varnish should also lie on the table; you should not apply the varnish while holding your hand suspended.
- Apply a quick-drying top coat.
This item is optional, but it will extend the wear time of the coating and make the manicure perfectly glossy. On the left is a top coat applied to the nail, on the right is a nail without topcoat. Finished manicure with regular varnish.
Caring for colored nails
To make your new manicure last longer, follow these simple recommendations.
- For the first time after a manicure (at least an hour), avoid contact with water. The varnish has not yet fully set, and water can shorten its wear time.
- The main enemy of the coating is household chemicals, so do all housework (even washing dishes!) strictly with rubber gloves.
- Remember to use a cuticle oil (such as almond, coconut or castor) daily. This will make it easier for you to remove it without damaging your manicure.
- Moisturize your hands with cream morning and evening.
The skin suffers after using nail polish removers, even if it looks normal. The cream will help her recover quickly.
- Wear gloves if it's cold outside. Choose natural materials. This way you will protect your nails and hand skin from drying out, and your manicure will look more well-groomed.