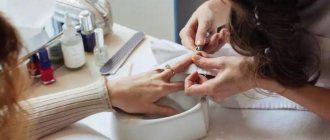
After adjusting the shape, you can start soaking. It is strongly not recommended to cut cuticles at home. At best, you will leave a “fringe” of the cuticle, and at worst, you will cut yourself.
To remove cuticles, use a special remover. After soaking, apply the product to the cuticle area and wait a couple of minutes. The remover will soften the skin, and you can easily remove the residue with an orange stick.
If the cuticle is naturally thin and does not “stick” to the nail, then it is enough to push it away with a metal spatula or the same orange stick before applying the coating.
Where to start preparing for work?
Of course, it’s worth getting all the necessary materials:
- Base coat is a clear strengthening or nourishing varnish.
- Varnish of the desired color.
- Removal fluid.
- Cotton pads and cotton swabs.
- Hand cream.
- Tassels.
- File and buff.
Now, as it would seem, the question of how to do a manicure with regular varnish at home should not arise, however, when doing it for the first, second, or even fifteenth time, problems still arise that can be solved by following the instructions given below .
The most important thing is that this kind of activity should take place a long time after taking a shower, bath or simply washing dishes. The thing is that moisture on the nails prevents the material from applying properly. In this regard, the result obtained will not please the hostess.
Long nail plates
It is easier to paint medium and long nails than short ones. And absolutely any shade will suit here. We do everything as described above, but completely immerse the varnish in the bottle, and carefully run one side along the wall in order to remove the excess. It turns out that on one side of the brush there will be almost no varnish, but on the other there will be plenty of it - this side should be painted. Before painting each subsequent nail, you should renew the varnish on the brush.
Editor's choice: New nail art: manicure with butterflies
The varnish is applied to extended nails in exactly the same way as to long nails. The main thing to remember is that you should not use acetone on gel nails, as it destroys it.
How to prepare your nails for a manicure?
It is necessary to erase traces of the previous varnish from the nails, if any, and begin to create the desired shape for them.
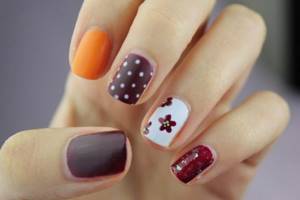
Choosing the shape of the nail plate is easy; it is important to adhere to several criteria:
- Oval nails are suitable for those with long fingers, giving them a graceful and graceful look.
- For wide nails, a round nail shape is perfect; besides, it is durable and, due to its slight protrusion beyond the contour of the finger, rarely breaks off.
- Round nails will be very useful for ladies with thick fingers. However, in this case, you should abandon the square shape - this will shorten your fingers even more and make them coarse.
- Square ones will be much more appropriate for women with thin and long fingers. Pointed nails are also suitable for them.

Next, having decided on the shape, you need to look at the condition of the skin around the nails - if it is dry, you should take a bath and soften the cuticle, and then carefully trim it.

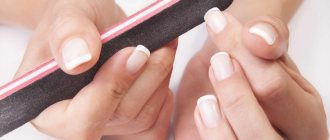
Having sharpened the nails to the desired shape, the surface of the nail plate is sanded and polished with a file and buff. The resulting dust is washed off and the nail is degreased (alcohol is also suitable for this).
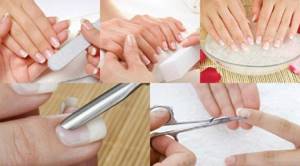
Preparation
Before you start applying polish, it is important to pre-treat your nails with a sanding file. Thus, the nails will acquire the necessary shape, and their surface will become more even. The latter is necessary so that the varnish lies evenly. It is important to treat the side of the nail and the cuticle.
You should also remember to degrease your nails. You can even do this by simply washing your hands with soap and water.
How to start direct painting?
It is very important that the elbow does not hang down; support is needed; a table is best suited. This is important because it is difficult to do such work while suspended, and the final result may suffer greatly.

At the very beginning, a base is applied - a transparent coating that promotes a better connection of the varnish to the nail, preventing the colored varnish from being absorbed. This will allow you to remove the coloring agent after some time without turning your nail yellow, red or purple.
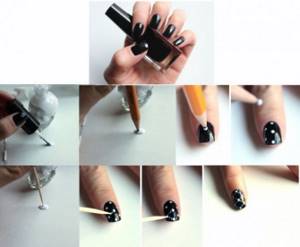
It is better to start applying the color layer with your working hand - left for left-handed people and right for right-handed people. What is important is that you need to start with your little finger. This will make it much easier to achieve the result without spoiling the already applied coating in the process.
It is better to warm the tube or bottle of varnish in advance in your hands or shake it (not too much). Do not overdo it with shaking, because the resulting bubbles can subsequently spoil the quality of the work being performed even before it begins.

If, upon reading, the reader thought that this is all there is to know about how to do a manicure with regular varnish, then no. There are a couple more nuances.
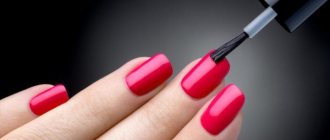
You need to paint this way: take a little viscous liquid onto the brush, leave some of it on the neck of the bottle and draw the brush from the middle of the nail plate to the end and back to the hole. Then go along the sides and finally paint the main middle part of the nail.
If varnish remains on the skin, you can wipe it off with a cotton swab dipped in the solution or with the nail of the other side and immediately wipe it on a cotton pad soaked in acetone.
If the varnish becomes faded, you can also apply a second or third layer. When the nails are dry, take a clear setting varnish and apply it using the same technique discussed above.
Varieties of nail painting methods
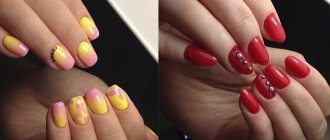
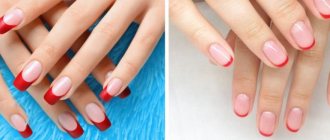
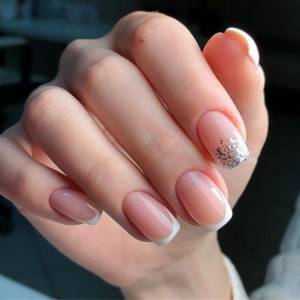
Sometimes the monotony of the same tones gets boring and you want something new and bright. This is where variations of French manicure will come to the rescue. In fact, this is covering your nails with two colors of varnish. One goes as a base - it covers the entire nail. And the second (brighter) one is to paint the tip of the nail plate with stripes. The stripe at the end of the nail can be either straight or oblique. The closer summer is, the brighter your version of French manicure can be.
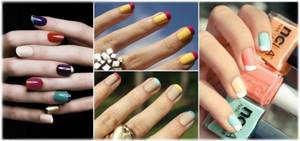
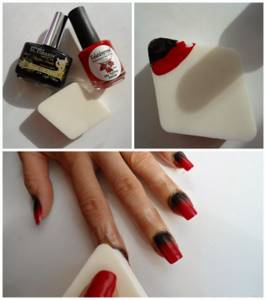
If with such a clear transition from color to color everything is quite clear and understandable, then how to make a smooth transition is not very good. So, let's figure it out:
– First, you should choose two varnishes that will be combined with each other - a base and a secondary tone. It is necessary to cover the entire length of the nail with the main varnish;
– Using a toothpick, mix two varnishes on any surface, in the order in which they should go;
Editor's choice: French nail design with a pattern 2022: photos of fashionable new items of the season
– It is necessary to lubricate the entire skin adjacent to the nail with a rich cream;
– Next, the mixture of varnishes is applied to the nail using a sponge. It is first blotted in mixed varnishes, and then the color scheme is transferred to the nail with light touches;
– Use nail polish remover to remove excess nail polish from the skin;
– All that remains is to apply the top coat.
What to do if the varnish does not dry?
This is a standard problem with all conventional varnishes - they often take a very long time to dry. For each layer to dry thoroughly, it takes, on average, 10 to 30 minutes.
If you don’t want to wait a long time, special sprays or liquids distributed over the plate using a brush can be useful.
It is also possible to use a drop of vegetable oil within a couple of minutes after applying the varnish; this greatly increases the speed of drying of the varnish.
Even taking a regular hair dryer and turning it on without the heating option, you can easily speed up the drying process.
How to paint your nails at home correctly
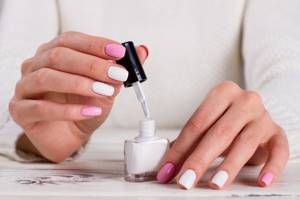
Any girl can learn how to paint her nails correctly - it will turn out no worse than in a prestigious salon. The main thing is practice and desire. It's better to practice with clear polishes first rather than colored ones. Gradually your hands will get used to doing everything correctly and accurately.
Home manicure has advantages over salon manicure:
- costs less;
- you can express yourself and create any masterpiece on your nails;
- When you learn how to do a manicure correctly, you will have the opportunity to earn extra money. What if this is your calling?
—>
How to make an unusual manicure?
Of course, the Internet is full of manicure ideas with regular varnish, but some of the simplest ones will be written here:
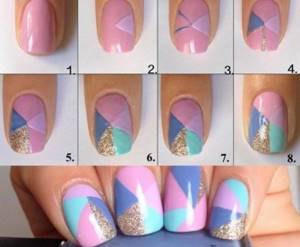
For this option, use a newspaper. The nails are covered with a strengthening transparent layer and then with white varnish. After letting it dry for 10-15 seconds, pieces of newspaper are moistened in water and immediately applied to the nail, pressing down slightly. Immediately after, a layer of clear varnish is applied.
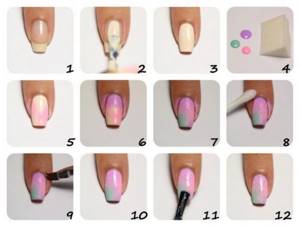
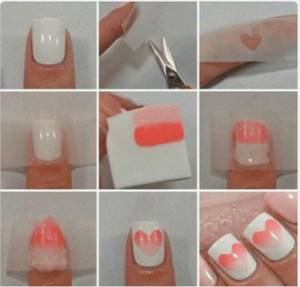
The gradient effect can be achieved with an ordinary small kitchen sponge. To do this, it is dipped in several varnishes of different colors. The surrounding skin is protected with PVA glue or cling film with a nail shape already cut into it. After making the prints, the nail is covered with transparent varnish.
Using a toothpick, you can make some kind of pattern on your nail. Having applied a little varnish of a color completely different from the main one, it is applied to the nail at different angles and distributed in an unusual way over the surface. For example, the thickest points are at the edge and decrease towards the middle of the nail.
Related materials:
varnish | nail polish | Nails | Strengthening nails | nail products | Nail care | manicure | nail coloring
Articles
- Lady fingers, or Doing a manicure at home March 03, 2011, 00:00
- Bouquet of violets: purple nail polishes October 11, 2014, 00:00
- Halloween nail-art: 15 ideas for manicure October 26, 2016, 12:00
Video
- Children's manicure from Mavala September 01, 2009, 00:00
- 3D ombre manicure from MAVALA January 31, 2014, 14:30
- MAVALA: Fashion trends in the spirit of the 80s February 15, 2022, 16:00
What are the defining advantages of such a varnish?
Short application time.
Great choice - no need to combine nail design with clothes, since the color can be changed at any time. You can even do a manicure for the holiday - a New Year's manicure with regular varnish is a good idea, since there are plenty of examples on the Internet, both in photos and in tutorials.
Less damage to the nail plate - there is no need to heavily grind and polish the nail, or expose it to the rays of a UV lamp. Gel polish, on the other hand, means long wear and therefore firmly connects to the plate, thinning it.
Preparatory stage
Before any manicure - at home or in the salon, you need to prepare the surface for the procedure. This way you will prevent premature removal of the decorative coating, ensuring long-term preservation of the work result.
Before using the varnish, it is recommended to prepare tools and consumables; be sure to treat them with an antiseptic for complete safety of the technique.
After this, start working with the surface:
- Wash your hands thoroughly and use an antiseptic to degrease them.
- Remove the previous decorative covering. If regular polish was applied, use a cotton pad soaked in the solution to remove it. Treat all nails; there should be no color left on them.
- Remove the overgrown free edge with a file and adjust the shape of the nail. You should not use scissors, as they can disturb the location of the stratum corneum.
- Use a buff to polish your nails.
- Clean the natural nail from excess filings.
- Apply a cuticle softener (it can be replaced with hydrogen peroxide) for 3-4 minutes.
- Use an orange stick or pusher to push back the epidermis and then cut it off with wire cutters.
- Remove dead particles from the nails, wipe them with a cotton pad soaked in an alcohol degreaser.
As a standard, preparation needs to be given the most attention, since insufficient surface treatment can reduce its adhesion to the decorative coating, causing the design to last less.
Photo of manicure with regular varnish
How to carefully paint your nails with gel polish - the best ways
If you want to learn how to beautifully and carefully apply varnish, it would be a good idea to try to master different techniques, and then choose the ones that work best for you.
- Repeating the anatomical shape of the nail with a brush - this technique is the simplest, even an amateur can handle it. To begin with, the instrument is placed sideways closer to the epithelial film on the edge of the nail fold. Then it is passed along the very edge on both sides, after which the central part of the nail is painted. If necessary, you can make a few more strokes to make the layer uniform. If you are using gel polish, then immediately place your hands under a UV lamp and wait 2 minutes. Then carefully apply another layer of varnish and dry again. The main secret to the success of using this method is a comfortable brush.
- Using a tool with fine bristles—how to carefully paint your nails with it—we’ll figure it out now. In this case, the varnish is first applied to any surface, then a part of the material is taken from it with a thin brush and transferred to the surface of the nail. You need to start painting in the cuticle area, you should get a translucent hole. Then take a regular brush and paint the entire plate. Again, if you used gel polish, dry it under a special lamp.
Such methods are acceptable for those who have decided to do their own manicure for the first time, or are doing this at the beginner level.
