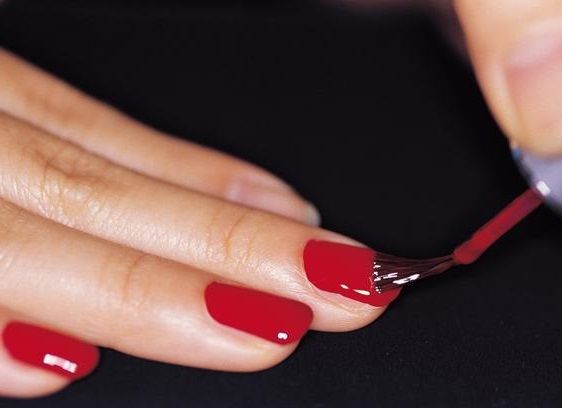
There are always a lot of questions about nail art; can gel polish be coated with regular polish?
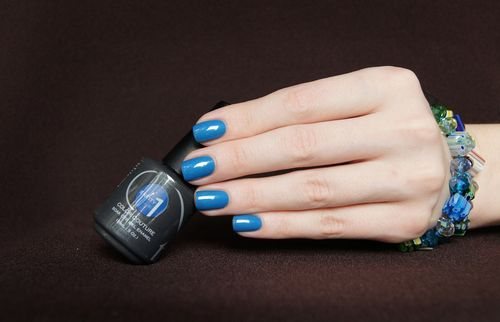
Of course, modern manicure is performed mainly with shellac. A certain color spectrum, and most importantly durability, and the ability to implement interesting ideas for decoration make such coatings leaders. But ordinary ones also have their advantages, the main one of which is an affordable price. You can put together a whole collection of colored and nude bubbles. But it is not always possible to purchase a helium composition every time. Another advantage of such combinations is the limited palette of high-quality helium compositions. Finding a compromise between variety and pricing is quite simple.
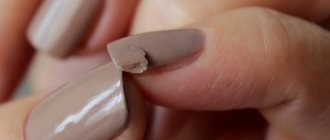
Can gel polish be coated with regular polish? If we consider it as a decorative option, but the base will still have a more reliable composition, why not. This decor will last for about 7 days. But this is still better than working for 2 hours, drawing patterns with ordinary varnish, only to end up with fragments on the free edge the very next day. With modern compositions, this effect will not work, even if you perform a manicure at home. The only concern is the financial issue.
Buying cheap Chinese bottles means putting yourself at risk of allergies, but for a well-known brand with impeccable quality, you will have to pay 3 or even 5 times more. You can also apply regular drawings; you get interesting three-dimensional 3-D compositions.
Preparation
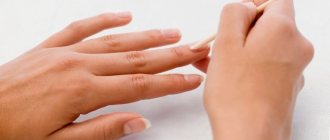
Whatever decoration method is chosen, it is important to get your hands in order. Beautiful and well-groomed, they will tell everything about their owner. Therefore, it is necessary to eliminate all defects, always maintaining an ideal condition. Hygienic manicure goes through the following stages:
- push back the cuticle with a spatula, do this to the maximum distance, because the coating is quite durable and the base will last about 3 weeks, cut in a single line so as not to leave hangnails, you can also use a special grinding machine;
- file down the top keratin layer with a buff; if there are delaminations or a very thin sensitive plate, it is better to first strengthen it with salt baths and oils, and only then proceed with color design;
- Use a brush to remove sawed-off dust particles; additionally, you can wipe with lint-free wipes;
- treat with primer, covering with a thin layer, and wait about a minute; it is important not to touch the plates during this period in order to further ensure the strongest possible fixation;
- then it’s the base’s turn, spread in a thin, even layer, paying special attention to the free edge, and cure in a UV lamp, usually the manufacturer specifies 1-2 minutes;
- use lint-free wipes to remove the sticky layer; there are no other analogues, but cotton pads can seriously ruin your manicure;
- then cover with colored gel and dry in a lamp for 1-3 minutes; if the shade seems too faded, apply another layer; an important rule is to polymerize each separately;
- and at the end the plates are covered with topcoat, dried, and the sticky layer is removed with napkins.
That's it, the helium manicure is ready to be decorated with regular varnish. It is not recommended to apply a layer of colored gel without a finishing coat; the appearance will not be very good, and the practical properties will also be disappointing. Any manicure does not like the first day after active actions with water, so all housewives and lovers of relaxation near bodies of water should wait. When decorated with regular varnish, the design will last about a week, but a durable color coating, of course, will delight everyone.
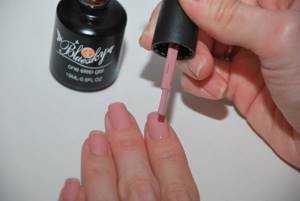
How to properly apply regular polish to gel polish
To prevent the gel from settling, it is necessary to apply it correctly. To do this you will need the following tools:
- acetone;
- alcohol;
- base coat;
- fixative;
- gel;
- tassels;
- UV lamp.
Instructions for applying shellac:
- Make relaxing hand baths. Add a couple of drops of your favorite essential oil to warm water. Place your hands in the container for a couple of minutes. Remove the cuticle on each finger one at a time.
- Give your manicure the desired shape.
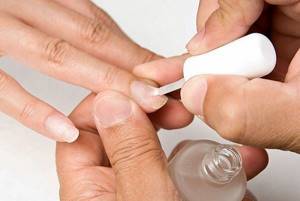
- Degrease.
- Apply foundation for 2 minutes.
- Cover with gel. Dry the finished result under the lamp for 2 minutes. Do not apply a thick layer, this will slow down the drying process.
- Repeat the procedure.
- Cover with finish and place under ultraviolet rays of a lamp.
- Wipe the top layer with a cotton pad soaked in alcohol.
You can master the gel coating technique with a little practice.
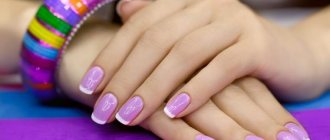
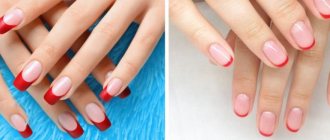
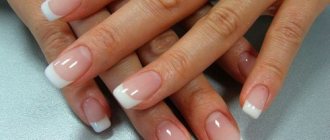
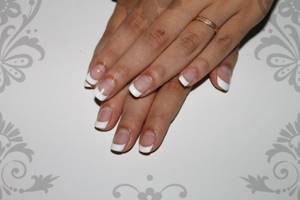
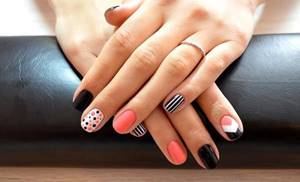
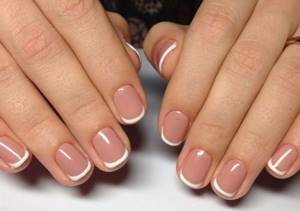
French
Not only the classic pink and white palette, you can use any contrasting combinations, in one palette, and even in one color, using matte and glossy finishes. A very simple technique that always looks stylish and impressive. This is done as follows:
- you need to cut strips of adhesive tape, it is better to use painter’s tape than stationery tape, giving the shape of a smile with curved nail scissors, you will need 10 pieces in total, according to the number of nails;
- then secure it in such a way that the free edge with the gel remains sealed, and the free area, right up to the cuticle itself, is covered with regular varnish;
- wait until it dries, this may take about 20 minutes;
- then cover with topcoat and cure in a lamp, remove the sticky layer.
Using adhesive tape, you can create stripes and also use it as a stencil for drawing stars, symbols, figures and other ideas.

Recommendations for applying shellac
If we take into account the above characteristics of shellac, its application requires special consistency and adherence to certain rules. First you need to do a dry manicure: carefully trim the cuticle and give the desired shape to the nail plate. Natural gloss can be removed using a buff or nail file. Once you have removed the dust particles, your nails must be additionally treated with a special degreasing compound. Only if these procedures have been completed can a base coat of shellac be applied. It must be dried under the rays of an ultraviolet lamp for two minutes, and only then apply a colored layer. After drying, apply the last layer of finishing varnish, which will evenly cover the entire surface of the nail.
Using a degreasing liquid, it is necessary to remove the top sticky layer of varnish. As for applying shellac to regular varnish, numerous experiments have shown that the result of such a coating is similar to applying shellac to a greasy surface. This happens because the oils contained in regular varnish are incompatible with shellac resins. However, shellac works great on gel or acrylic nails.
As for applying regular varnish to shellac, there are several nuances. Firstly, regular varnish contains toxic substances that are also incompatible with the natural components of shellac. And, secondly, these products have different textures. Shellac has a porous texture, which allows the nail plate to breathe and maintain a healthy appearance. Conventional varnish covers the nail plate with a dense, continuous layer, and therefore completely blocks the access of air. Likewise, regular polish will clog shellac, which can lead to cracks and chips within the first few days of application.
However, this rule also has an exception. Regular varnish can be applied to shellac as decorative elements. A small amount of regular varnish applied to the shellac before the topcoat will not spoil the beauty of the manicure. Of course, it is necessary to take into account the composition and brand of both products. Applying regular varnish follows the principle of adding sparkles or rhinestones to shellac. Decorative elements are added to the sticky surface of the second layer of shellac, then everything must be covered with a finishing layer and dried.
Ombre
Designers are creating coats and cardigans where similar transitions are used, hairdressers are improving their coloring of curls, and manicurists are improving their nail design. It’s easy to create at home and choose bright, rich colors for spring and summer, and a calm, warm palette for autumn-winter. The gradient is made like this:
- first you need to prepare a tool, it can be a piece of foam sponge or a cosmetic sponge, the second one is more suitable as it has a denser structure;
- then you need to choose 2-3 varnishes of a suitable range, that is, the transition should be smooth, for example, if the base is red, you can take lemon and orange, for blue - pale pink and purple, it is worth remembering that the free edge always remains helium, it should be either the lightest or darkest in the composition;
- apply regular varnish in strips to the foam rubber, print first on paper to remove excess;
- then transfer to the nail plate, leaving a distance of several millimeters from the free edge uncovered;
- when pressed repeatedly, the borders of the stripes shade themselves;
- clean blots from the skin and cuticles; for this it is convenient to use a cotton swab soaked in removing liquid;
- wait 20-25 minutes until the regular varnish dries;
- then treat with top coat and cure for 1-2 minutes in a lamp.
Read more in our article “How to make ombre nails with gel polish?”.
Main characteristics of shellac
Ladies who often prefer to paint their nails, changing patterns and colors depending on their mood and occasion, very carefully study the composition of the coloring liquids. After all, the product, first of all, must be safe for health and not harm the beauty of the nails. Only secondarily do they take into account the ease of application, length of coverage and aesthetic appearance. Shellac is a new product that has simply revolutionized the art of beautiful and long-lasting manicure. This unique hybrid of gel and varnish quickly won the trust of fashionistas. Shellac does not cause any damage to the nail plate due to natural resin components, provides a durable, high-quality coating, strengthens the nail plate, protecting it from the adverse effects of environmental factors. The high characteristics of the varnish are due to the absence in its composition of formaldehyde and its resins, toluene, dibutyl phthalate, as well as monomers hazardous to nail health. In addition, shellac does not have a strong odor and is hypoallergenic, and therefore does not cause discomfort. Brittle and soft nails with this coating gain strength, and hard nails become more flexible.
In order to apply shellac, you need to quickly and at the same time evenly distribute it over the entire nail plate. Because of this, shellac is produced not in jars, like gel, but in bottles with flat brushes. Then just dry your nails with the rays of an ultraviolet lamp for 2 minutes so that the shellac is completely dry. The coating must be applied in two layers, but thinly, otherwise it may curl when drying. Thus, the coating will be smooth, uniform and noticeably light, which distinguishes this innovation from the already familiar gels. The main principle of shellac is simple application - durability - instant removal. Shellac does not need to be cut off, just soak it with artificial nail remover for 10 minutes. The varnish will break down into particles that can be easily removed with an orange stick.
Since shellac can not be removed for 14 days, and its resistance to chipping and mechanical damage, the likelihood of injury to the nails is virtually eliminated. Thanks to shellac, you will be able to visit a manicurist only twice a month, but this will not in any way affect the beauty and well-groomed appearance of your nails. Shellac offers a rich and varied palette of colors, so the most demanding representatives of the fair sex will be able to choose “their” color - to suit their mood or dress.
If the technology for applying shellac is followed, the coating will last long enough. But, first, it is necessary to exclude any contact with any creams or oils. Even if even one drop gets on the coating, it will not last even a week: cracks and chips will appear. The varnish may even wrinkle. Shellac can only be applied to dry nails. Water softens the nail plate, and therefore after applying the coating, when the plate finally takes its natural shape, you will have to forget about a perfectly flat and smooth surface.
Ladybug
You can create multi-colored funny circles, imitate water bubbles, place them chaotically, or set the direction of the spiral and then increase it. There are a lot of ideas for such decor, the main thing is to have a special tool - dots. It is similar to a crochet hook, only the tip is in the form of a metal ball, the dimensions of which help to make circles of various diameters. A very simple technique is done like this:
- dip the dots in regular varnish, and then make an imprint on the ready-made helium coating;
- after the invented ornament is implemented, you need to wait for it to dry, so that this happens faster, you can put a bottle of varnish in the refrigerator before decorating;
- then cover with topcoat and cure in a UV lamp for 2-3 minutes.
For decoration, it is always better to choose contrasting colors so that the mugs stand out well against any background, use 3-5 shades or stick to 2 close ones, for example, a nude palette.
Do not throw away bottles with multi-colored coatings. A rich color palette and texture allows you to realize all your fantasies. Can gel polish be coated with regular polish? If solely for decoration, using interesting color schemes - of course. It is important not to forget to cover with a finishing topcoat. On such a strong base, and even with a protective coating, nail art will last about a week, and then you can start applying designs and ornaments again.
Is it possible to apply regular varnish over shellac?
It often happens that the gel coating is in perfect condition. But many girls want to change the color and update it. The fair half begins to wonder whether it is possible to cover gel polish with regular polish. Opinions differ on this issue.
Manicurists believe that the product will not last long and will begin to peel off. The gel is a polymer, each layer of which is sticky and clings to each other. The conventional product does not have it, so adhesion will not occur. But practice shows that the procedure is possible if you wear regular varnish for 1-2 days.
Advice! You can cover your nails with gel and apply a finish (artificial polymer) on top. After drying, paint the nail plate with colored varnish.
Making a drawing, the easiest option at home
Below is an accessible lesson that will answer all questions on how to paint with shellac using acrylic paints. Some masters create video presentations where you can clearly see each stage. This nail art technique has gained popularity because girls can make simple drawings and create original designs.
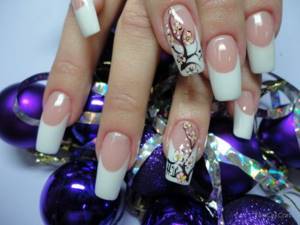
Manicure twigs
It can be done with yellow or green paint in strict sequence:
- application of base and main coating;
- from the bottom corner you need to draw two stripes with bends;
- small leaves are drawn in the same color;
- the middle of the sheet can be painted over with a light shade;
- a finishing coating is applied as a fixing agent;
- Each layer is thoroughly dried in an ultraviolet lamp.
The photo shows one of the painting options:
Shellac and nail extensions
Women, as a rule, always have a manicure. These can be your own beautiful nails or extensions using gel. And when such nails already exist, the question arises whether shellac can be applied to the gel. In principle it is possible, but it does not make any sense:
- Gel nails lend themselves perfectly to decorating with regular varnish.
- You can apply different colors to them just as you wish.
- Shellac is not cheap, so it is better to apply it to biogel.
- There is no need to use a durable coating if you have extended nails.
If you apply shellac to biogel, you get double protection for the nail. In addition, biogels are presented in a small range of colors; you can complement the colors with the help of shellac.
To properly apply shellac manicure, you must use a base and top coat. The base coat creates the desired surface for the gel polish, then the shellac itself is used, after which you need to apply the top coat - the final fixing of the manicure. The question of whether shellac can be applied to a top coat does not sound entirely correct, since the resin product is treated with a finishing agent, and not vice versa.
Advantages and disadvantages, features
The color palette of varnishes allows you to choose any shade to create beautiful designs on your nails with shellac. Representatives of the fair sex can combine different colors and textures. The following features of shellac can be distinguished:
- durable coating;
- no chipping, cracking or peeling;
- safety;
- no pungent odor.
Shellac paintings do not cause allergic reactions and do not harm natural nails. Even when worn for a long time, they do not deplete and remain healthy.
The coating has virtually no disadvantages, except for some listed below:
- Expensive. If you do a manicure at home, you need to buy a basic set and an ultraviolet lamp.
- Duration and complexity of the procedure. To remove the old coating you will need to use special products and film.
- Using sanding after removing shellac.