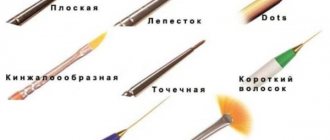
If you are tired of lunar nail art, decorating your nails with rhinestones, feathers and other decor, you can do a water manicure. This type of design is so simple that any girl/woman can do it on her own. To do this, you do not need to have specific skills or special equipment, however, a little experience in working with varnishes and preparing nail plates is still desirable.
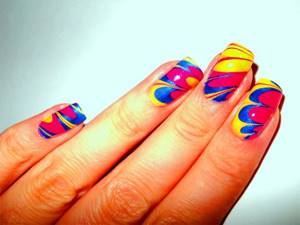
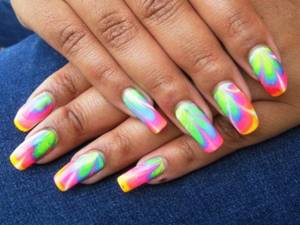
Water manicure at home is not only a fun activity, but also a fantastic result. This type of painting on nails is also called the marble effect. This manicure is created using water and several colored varnishes. By dissolving the varnish in water, you can create a truly magical, original nail decor, decorating them with curls, spirals, streaks, stripes and other ornaments.
[yandex1] [google1]
What you need for a manicure
Before you make a beautiful manicure at home, you need to prepare your nails: remove the cuticles, softening them with aromatic oils or steaming them in a solution of sea salt. Then give your nails a certain shape using a file or, if necessary, sanding. Remember: unkempt nails will negate all your efforts to create the most exquisite patterns and unique coating.
To ensure that everything is at hand for performing water manicure at home, prepare the following materials and tools:
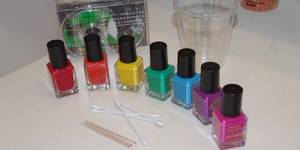
- dishes, preferably transparent;
- clean water at a temperature not higher than 38-40°C;
- varnish base;
- transparent fixative;
- nail polish of two colors or more - at your discretion;
- toothpicks;
- nail polish remover;
- greasy cream, tape or glue to protect the skin around the nail plate.
Video master classes on creating nail art “Tin on nails”
Well, now that you know absolutely everything about the new trend, it’s time to try your hand at creating this beauty on your own fingers.
And before that, we invite you to get acquainted with several informative master classes on creating designs on various types of coatings. Video author: Julia Crazy Nails Video author: Karina Korn Video author: Best Nail Video author: @nika_nagel “Tears of a unicorn” in any of the design options - the manicure is quite bold, daring, but very original and attractive. Go ahead and experiment with your nail artist’s arsenal, choosing the variation that will suit each specific client of a particular age. We are sure you will succeed! And you can find all the necessary materials in our catalog of the Odiva online store.
How to do water nail art at home: step-by-step instructions
An important component of the image is style, so it would not be amiss to mention colors. So, what kind of varnish do fashionistas need:
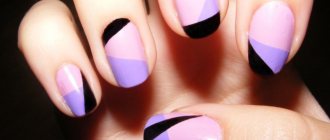
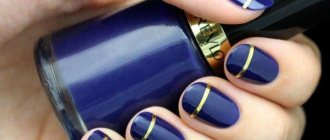
- For lovers of bright manicures, varnishes of contrasting colors are recommended; patterns with them have clear transition lines and a more pronounced pattern.
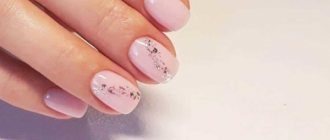
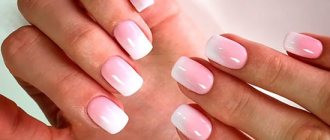
- For those who prefer “marble” coatings, shades of the same color scheme are suitable. For example, the use of blue, turquoise, and emerald gives a delightful malachite tone. An interesting manicure is also obtained by mixing pink and powdery shades - you get very delicate, romantic designs.
After checking the water temperature again and opening the bottles, you can begin to study the principle of creating a manicure:
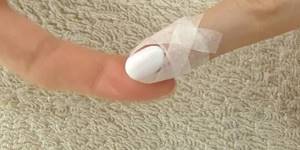
- Protect your skin in any way convenient for you. In most cases, a thick layer of thick cream or Vaseline is used. Using tape is also effective, but labor-intensive, and even after removing it, sticky marks remain on the skin. Russian fashionistas apply glue, which provides a dense, elastic film and is then easily removed. It is important that the protective agent does not flow onto the nail plate, otherwise the varnish will not lie evenly.
- The next step is to apply a transparent base or white varnish, which will emphasize the brightness of the main pattern. Wait for the coating to dry completely.
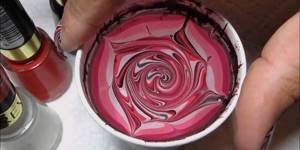
- Start creating your own unique water manicure at home: place the first drop in a container of water and wait a little. After it spreads, drop a varnish of a different color into the center of the stain. Repeat the procedure another 5-10 times.
- Use a toothpick or the tip of a wooden stick to create a pattern. In this case, after each dipping of the instrument, it must be wiped with a cotton pad or cloth.
- By bending your hand and finger so that the nail plate falls parallel to the water surface, dip your nail. Pull it out slowly so that the pattern lies evenly, while the remaining varnish is removed with a toothpick while still in the water. Do this with all the nails one by one.
- After the coating has completely dried, remove the protective layer from the skin around the nail and clean it with a cotton swab slightly moistened with nail polish remover.
- If desired, glitter and rhinestones are applied to the manicure, and additional details are added to the resulting pattern. When finished, the nails should be coated with a fixative.
Subtleties, difficulties and life hacks of nail art “Gold Ingots”
Not every craftswoman who boasted of a new design on her Instagram account turned out this original image as beautiful the first time as in most tutorials and photographic works. Some people are not satisfied with the result of imprinting foil onto the base; others get very blurry blots (because they put a lot of pressure on the foil when fixing it on an undried base). And other clients complain about the low wearability of such decor (drops chip off). We know how to deal with this! Find valuable tips on taming “unicorn tears”:
- We are fighting chips.
A top for fixing sliders will come to our aid. They need to cover the entire nail with the finished teardrop before you begin to increase its volume. This topcoat is dried in a lamp, then the nail is covered with a matte finish, polymerized and the effect of liquid lava is created. After drying the volumetric drop, its edges are coated with a thin brush dipped in topcoat. - We are struggling with uneven (bald spots, ugly shape) transfer of foil.
The solution here is simple - we try to make a drop of uniform shape and thickness for the stroke. If the droplet is large in size and there are bald spots or empty areas (without foil) around the edges of the droplet, coat them with a sticky topcoat, dry it and add additional foil onto the sticky layer. Don't worry about the edges of the joints, under a voluminous top the droplet will look like textured lava! There is also a second option to solve this problem. If you don't like the result of tearing the foil off the drop, you can use the classic method of transferring the foil. A pattern is created with a brush and base, dried in a lamp, and foil is imprinted onto the sticky layer of the base or special glue.
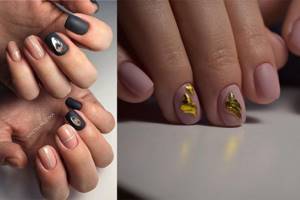
Photo by: @nastya.muzyka.nailmaster/@__mari__arti__
- Getting rid of unnecessary gloss
. If, after printing the foil along its edges, you see glossy areas from the base spreading under excessive finger pressure, take a “zero” brush and coat the gloss with a matte top coat. - Making the design more comfortable to wear.
In most reviews, craftsmen emphasize this point: you need to make sure that after tearing off the foil, its borders do not stick out beyond the polymerized base drop. This reduces the durability of the decor and promotes rapid chipping (especially if you do not fix the design with additional layers of topcoat). Also, the fact that the design is created with a rubber-based base and top works well for wearability. - We create the volume of the drop correctly.
The first droplet with which you create a 3d volume should be small. Carefully spread it over the foil in a thin layer, extending slightly beyond its edges onto the colored coating. The second and further layers can already be created in large drops that will spread over the wet surface. - We work with convenience.
If the glare from a glossy topcoat prevents you from drawing a droplet(s) of the desired shape, you can buff it slightly, achieving a semi-matte finish. And already on such a surface to create a teardrop pattern. Either we cover the gel polish with a matte top, transfer foil to the drop base, polymerize it, and re-coat it with a matte top. And only then do we begin to increase the volume of the drop.
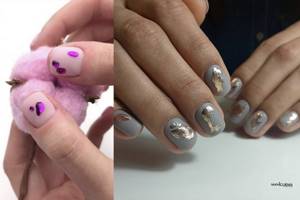
Photo by: @nina_fadeeva_studio/@kochet_olesya
Possible mistakes when creating a manicure
Sometimes things go wrong at first, especially if you have never done nail art at home before. Here is a list of common problems and how to fix them:
- A drop of varnish does not spread, but sinks. The reasons for this are unsuitable water temperature or the brush is located above 2 cm from the surface of the water.
- Spreading stains do not form patterns well and are difficult to apply. The problem is that the composition dries quickly, so it is easier to work with liquid varnishes. It is difficult to make drawings on the surface of too warm water, but at cold temperatures any varnish will dry out very quickly.

- Unsuitable container. When doing a water manicure yourself at home, it is more convenient to use wide bowls, but in this case the consumption of varnish increases. However, it is difficult to carefully place your finger into a narrow glass.
- Fuzzy drawing lines. The reason for this is a poorly cleaned toothpick, on which particles from the previous mixing remain. Just make sure to thoroughly clean your instrument before each dive.
- Uneven distribution of varnishes of different colors. The reason is the different structure and density of the varnishes used. To get a high-quality manicure with water, you will need fresh varnishes, preferably from the same manufacturer.
Find out what European manicure is.
- What foods contain magnesium?
- Hercules porridge: recipes
- Flatbread in a frying pan: recipes with photos
Ideas for the most expressive images of “Liquid Metal”
The new trend for express design with casting foil allowed craftsmen to make the most of decor that had previously been impossible to tame, or to use it more often. Now even the most capricious foil is used to create weeping metal. Chrome (mirror) type rubs do not lie dead weight; colored pigments are used in full swing (they are mixed with the top and droplets of foil are painted in the desired color to match the selected gel polish). Such a variety of creative approaches has given rise to a lot of images in which “liquid tin” on nails of any shape looks truly stylish, fresh, interesting, expressive and beautiful. Let's look at the top 10 most spectacular works:
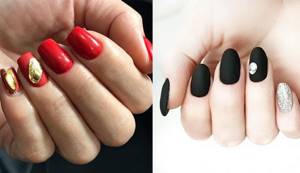
- “Tears” adorn the matte gel polish on a pair of fingers.
One of the most “discreet” varieties of this design. The color scheme, as well as the shape of the nails, can be absolutely any. If you don't want to wear completely matte nails, choose tops with a slight satin glow. Then the decor and the effect of the top will complement each other beautifully.
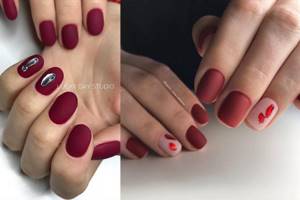
Photo by: @lucky_day_studio/@nail.residence
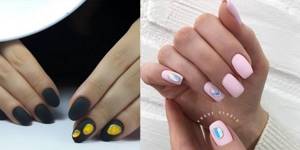
Photo by: @yana_nailtemruk/@amazing_nail_ideas_
- “Precious drops” decorate all nails.
A manicure in which each finger has a drop of gasoline or a precious drop is a very bold image. To ensure that the handles do not seem overloaded with decor, it is worth supplementing it with drawings with gel paints or gel pastes, or choosing the most rich colored shades of foil. Also a good solution would be a short length of nails, on which the tears will be scattered in flat, small droplets.
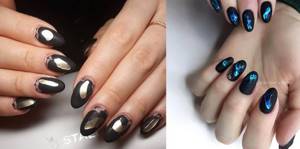
Photo by: @annapetrenkohappy/@lucky_day_studio
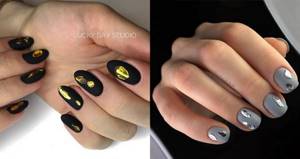
Photo by: @lucky_day_studio/@vionails_art
- “Burning lava” on matte nails complements the glossy design.
A variant of nail art, when the decor echoes the effect of the main material, looks stylistically organic. The design is especially charming, where the shiny droplet matches the color of the selected gel polish. If you don’t have such foil, you can tint it with colored pigment.
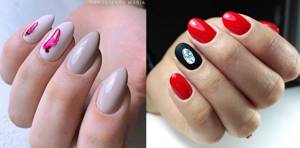
Photo by: @forostenkomaria_nails/@mashadikaya_nail
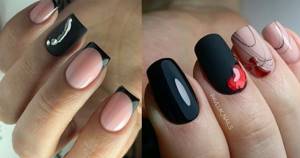
Photo by: @karin/@pavluk_nails
- “Liquid gold” decorates the multicolor look.
Complex nail decoration fits perfectly into a strict image, or, on the contrary, can be adapted to a specific ensemble from your wardrobe. When choosing this option, do not forget about the combination of colors and try to avoid too sharp color contrasts, otherwise the highlight of the design will be lost and it will look tacky.
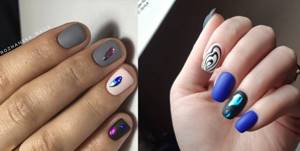
Photo by: @rozhanska_nails/@annakorobchilkina
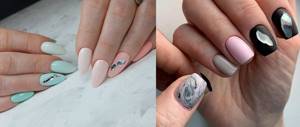
Photo by: @kronmanicurkronzagar/@pilka_ua
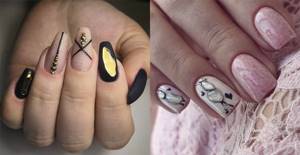
- “Liquid tin” is supplemented only with painting, or drawings with textured decor (broths, rhinestones, etc.).
A significant part of the craftswomen (and their clients), who fell in love with the new type of design), accept it only as a detail of a more complex piece of art, as its main accent. In such images, two directions stand out: masters either emphasize the carelessness of the shape of tears with similar decorative elements (strokes of gel pastes, gel polishes with a spreading effect, watercolor drops on the coating, etc.). Either they include “liquid lava” in a painting or make it part of a popular geometric design.
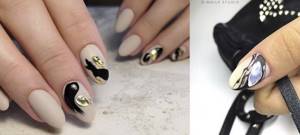
Photo by: @nail.ketrin/@_d_nails_studio
Author of the photo: @gordeeva_nails_irkutsk/@radost_nails
- The decor shines on the completely glossy design.
Girls who do not accept the restrained beauty of velor-velvet nails are inclined to decorate their nails in this way. But you need to shine with “unicorn tears” correctly - on a couple of nails at most, and it’s best to come up with a way to play up the gasoline decor with your outfit, jewelry or prints on accessories. In addition, sparkling nails attract special attention, which means that the owner of a manicure needs to keep both the skin and cuticles in tidy condition (do not forget to use nail oils daily and periodically resort to using spa preparations for hand care).
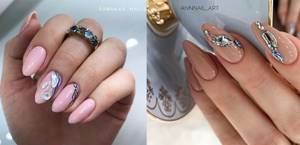
Photo by: @sobakar_nails/@annnail_art
Photo by: @victoria__zvonova/@nail_couture.kz
- The Molten Metal design combines with lettering into one look.
The trend for verbal nail decoration remains as relevant in 2019 as it was last year. If you know how to draw, write messages directly on “liquid metal”, then covering it with topcoat (a stylization that evokes an analogy with flowers and insects in amber). Well, for those who are new to using brushes for painting nails, sliders will come to the rescue. Fortunately, last year 2022 there was a real boom in them, both for shocking and democratic inscriptions in planar or 3D design.
Photo by: @witchcraftnail/@leranailszp
- “Naked” manicure with dew drops (transparent/translucent nude finish).
One of the main directions in the development of manicure this year remains naturalness, naturalness and minimalism. But even if you have a strict dress code at work, or you basically don’t like to paint your nails with anything other than French tints or camouflage coatings (gel polishes or bases), there are options for combining the simplicity of a manicure and the spectacle of a design. Especially if you opt for a “unicorn tear” on nails in the “Baby Boomer” style, or choose a coating color that blends as closely as possible with the color of the skin of your hands (then you will have the visual illusion of a naked manicure with drops of precious metals on your nails).
Photo by: @oksinails_/@minsk_nails_art
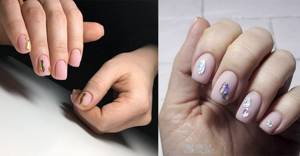
Photo by: @ana_neils/@serkova_nails
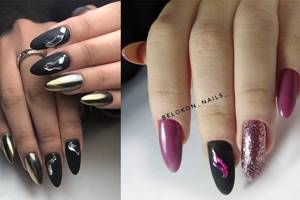
- “Mercury on nails” plays in the same image with shining coatings and decor (“liquid mica”, rubs, paired with transfer matte/glossy foil.
Stunning with sparkling nails decorated only with rhinestones (even if it’s the “Tsar Nail”) is no longer as fashionable as if you combined the most popular finger sparklers in one work. Namely, the famous gel polishes and gels with the “Liquid Mica” texture, decorative materials with bright and iridescent hexagonal sparkles, or incredibly beautiful new items in the form of rich colors of matte or glossy foil. The main rule of such a prefab manicure is not to overdo it with glitter and to compose the idea of the image so that the “mercury” decor does not get lost against the background of other decorations.
Author of the photo: @amazonka_nails_/@t.belyan_nails
Author of the photo: @nail_couture.kz/@belokon_nails_
- "Terminator" in a duet with a leopard
.
Animal prints are back in fashion! Of course, such designs need to be worn skillfully, demonstrating not only a craving for outrageousness, but also a sense of taste. If you know how to balance between extravagance and the trends towards laconicism, carelessness, simplicity, on which the trends of the year 2022 are based, the combination of liquid metal and an animalistic theme will make your hands the main decoration of the image as a whole.
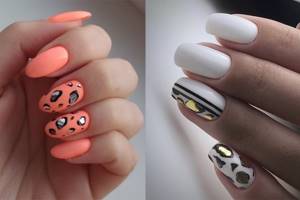
Photo by: @swm_nails/@little_world_of_nails
Author of the photo: @v.m__nails/@elena_nail.vlg
Video tutorials: water manicure technique for beginners
Having received some theoretical knowledge about the correct application of water manicure, watch short videos that will help you better consolidate your acquired skills and independently carry out each stage of the work. In addition, a visual image will help you navigate the choice of colors for the varnishes used, and will introduce you to the basic techniques for creating popular patterns and unique designs. At first you may not be able to do it as skillfully as experienced craftswomen, but you will gain inspiration and ideas for manicure.
How to make gel polish
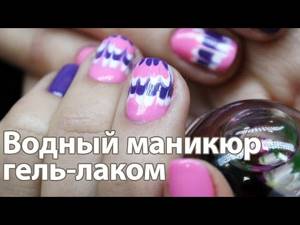
Water manicure with gel polish
Marble nail art with water and varnish
Marble manicure
Hole nail design using water
Water Manicure in Hole
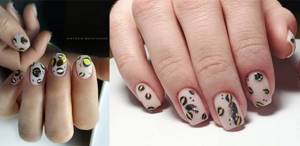
Photo ideas for nail design with marble effect
The most important thing that is needed to create a marble effect on nails is imagination. Using a toothpick, you can not only make cuts in the film from the edges to the center, but also vice versa. Spiral cuts will also look great, which allows you to create the effect of marble. In fact, any chaotic manipulation with a thin tool will result in a creative nail design idea.