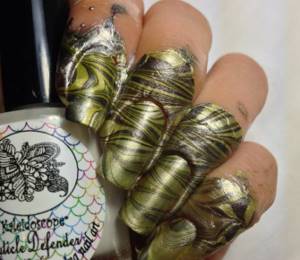
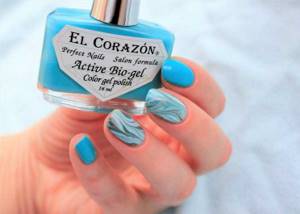
This article explains in detail what water manicure is. It turns out that a similar effect can be recreated at home.
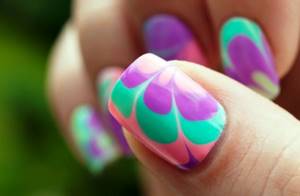
This type of manicure is also called “marble”. And for good reason, because the pattern is very similar to the smooth patterns of the surface of marble. At first it seems that such beauty can only be done in salons, but this is not so.
You will probably be surprised when you find out that all the necessary tools and materials are available to any girl. Just like the application technique itself.
Let's take a closer look at what is needed to master a marble manicure, why it is called water-based, and what design ideas you can adopt.
water manicure
Water manicure at home
It's no secret that half the success of a manicure depends on the quality of the material. What should you arm yourself with if you want to design your nails in this way yourself?
- Container with water - it is recommended to use disposable containers or cut off the top of a plastic bottle. It’s easy to work with disposable tableware, because after the procedure you can simply throw it away
- There is, of course, a danger that the plastic cup will tip over, but this can be easily avoided if you put a few coins on the bottom or prop it up on the sides with something. The water poured there must be at room temperature. Some people advise dissolving the varnish in ice water, but you are unlikely to achieve anything with this
IMPORTANT: Don’t even touch the bowls and cups, otherwise you’ll think for a long time about how to wipe off any remaining varnish from your favorite dishes.
We stock up on everything we need
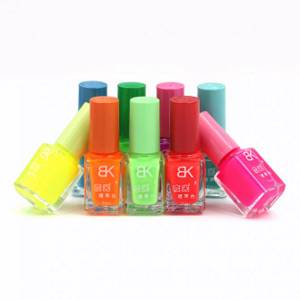
- Nail polish is the main component of a manicure. It’s worth saying right away that in this case not just any varnish is suitable. Unfortunately, many girls have to go through more than one type of varnish before finding the right one. But then, believe me, the result will be worth it. In your search, start from the fact that the varnish must certainly have a liquid consistency
- Over time, the varnish in a bottle tends to become more viscous, so it is preferable to use only purchased material. Keep in mind that the structure of the varnish may change if you dilute it with acetone, so this trick is not suitable
- Another secret is good pigmentation. In other words, if one layer covers the natural pigment of the nail, the polish is good. Stop choosing one brand so as not to suffer due to texture mismatch
Thick texture varnish
- It is very important to take care of something that will protect not only the cuticle, but also the fingers. Please note that a water manicure is not a regular application of varnish and is not a gradient, after which there is not much excess left.
- Be prepared for the fact that in this case, about half of your finger may become dirty. Of course, manual cleaning will be quite troublesome, so it’s better to prevent this trouble. This can be done using paper masking tape or a thick cream, preferably for children.
- If you have manicure wax, use it, it also helps a lot. If the choice fell on tape, stock up on scissors
Cream
- Cotton pads and nail polish remover - even if you protect the areas near your nails, there may still be excess left, so place a bottle of special liquid nearby and put some cotton wool
Nail polish remover
- Toothpicks or a needle are also a necessary tool; you will use them to draw varnish patterns on the water surface
IMPORTANT: It all depends on what you are ready to make a choice in favor of - accuracy or saving time. If in favor of the first, then it is better to take a needle, but it will take a long time to wash it after each nail treatment, so to save time it is recommended to choose several toothpicks.

A set of toothpicks must be present
- Base, top and drying agent are all equally important. The base can be either transparent or colored, depending on your personal preferences.
- The top will give the entire manicure a complete look. As for drying, everything is clear here - it is indispensable for saving time, because water manicure itself is already a rather lengthy process
drying and top
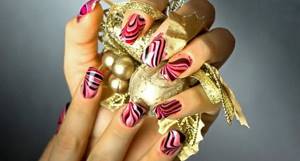
Ideas for creating aqua manicure with dried flowers
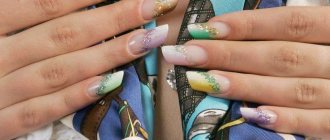
One of the most original aquarium manicures is considered to be a design option, the creation process of which uses dried flowers or a herbarium - all kinds of twigs, flowers or miniature leaves, dried and painted in different colors. The basis for such decorative material is a transparent or colored base, and glitter, fragments of foil or small stones can be used as an addition. The decor can be placed randomly on the nail plate or in the form of a specific pattern. In this case, it all depends on the desire and taste preferences of the young lady.
Water manicure technique
The water manicure technique requires careful adherence to some subtleties. What secrets does such a technique conceal?
- As we wrote above, a large part of success depends on the temperature of the water. Make sure it is strictly at room temperature. Varnish in warm water is unlikely to be transformed into a design, and in cold water it will become lumpy
- Select the container carefully - one that is narrow, but at the same time deep, is ideal. The fact is that the varnish will spread in a wide area in such a way that you will have to apply many drops, but after a certain time it hardens. However, the nails should not touch the bottom and walls either, otherwise the entire pattern will be smeared.
The container must be selected carefully
- Of course, you can make a design on two or three fingers at the same time if you wish, but it is recommended to treat each nail separately. It will be expensive in terms of materials and time, but the result is worth it, and you will be absolutely sure that the nail plate will be covered with a pattern
- If you decide to choose a cream as a means of protection, but it gets on the nail plate, hurry up and carefully remove it with a napkin. Otherwise, the polish simply won’t stick to the nail.
IMPORTANT: Be sure to have paper napkins nearby - they may not be needed, but if cream gets on your nail, you should not wipe it off with a towel or rinse it off with water.
- The basic principle of water manicure is that the nails should be decorated in the same style. The patterns themselves will be unique, but one single style is simply necessary
Nails decorated in the same style
- It may seem that a base varnish is not needed here, because there will be stains and patterns anyway. However, in fact, the design will only benefit from it - it will turn out to be more interesting and rich
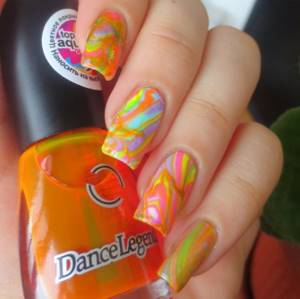
- The base can be either pastel or bright shades - it all depends on the idea. In the case of bright shades, keep in mind that the patterns should be no less bright. Some will say that it will turn out a bit clumsy, but in summer or spring such variegation will be quite appropriate
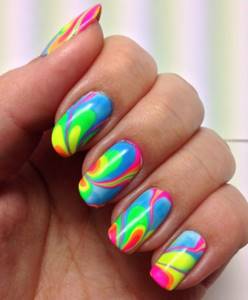
Bright summer manicure
- Be sure to clean the needle or toothpick after each use. This is done using nail polish remover. However, if you have stocked up on several toothpicks, you can safely throw one away and pick up another. If you neglect this technical nuance, the drawing is unlikely to turn out attractive.
- Does nail length matter? Not significant, but it does - on short or too long nails, the marble design will not look quite beautiful
IMPORTANT: The average length of nails is the “golden mean”.
Nails that are not too short and not too long are best
- And once again about the toothpick. It is important to take into account that you should only use the tip to mark patterns, otherwise you risk blurring all the lines. The maximum that a needle or toothpick can be immersed is 5 millimeters
Aquadesign - advantages and disadvantages
In addition to the fact that aquarium manicure looks equally beautiful and impressive on nails of any shape and length, like any other nail art, it has a lot of advantages and has some disadvantages. The positive aspects of aqua manicure include the originality and visual volume of the parts located “inside” the nail. And also versatility, which consists in quickly covering the nails with regular varnish and its subsequent removal without damaging the plate, if the need arises. An equally important point is practicality, which we have already mentioned today, and the durability of the design.
With timely correction of the nail plates, an aquarium manicure can decorate the nails for more than two months. At the same time, it is not necessary to file down an overgrown nail. As it grows, existing patterns can be modified and supplemented with new details. And most importantly, such a design looks like a real work of art and attracts attention. In the list of disadvantages of aquarium nails, we put first place its high cost and a rather long process, since the entire procedure usually takes from 2 to 3 hours. In addition, it can be difficult to find a truly experienced craftsman who can perform such labor-intensive work not only beautifully, but also efficiently.
Water manicure step by step
- So, the first thing you need to do is prepare your nails for manicure. Preparation includes trimming the cuticle, filing the nail plate, and applying base. If you neglect this preparatory stage, the result may not be the most joyful.
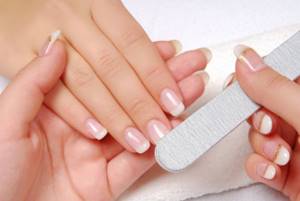
nail preparation
- Apply base coat. Before doing this, you should degrease the nail plate with nail polish remover. How to choose a base? It is allowed for it to be transparent - if your varnish for the design is sufficiently pigmented, then why not? If you are not sure about pigmentation or just want to be guaranteed to get a bright manicure, opt for a white base. It is also suitable for designs in pastel colors or neon shades. If you intend to have a dark manicure, apply a black base or one of the colors that will be used to apply the pattern.
IMPORTANT: If your nails need treatment, choose medicated varnish as a base.
Basic white coating
- Now wrap the area around the nail with tape so that your fingers are protected from the varnish film on all sides. Even the pad of your finger is worth treating. However, the nail itself should not be under the tape or cream, otherwise the varnish will not attach
Protecting skin with tape
This is how dirty your fingers get
- Unscrew the caps of the jars with varnish - believe me, during the process of applying a manicure you will have absolutely no time to constantly unscrew and tighten them
- However, you should not completely remove the caps so that the varnish does not dry out. Place the jars closer to you - even such a small thing will significantly save time, but with us it’s worth its weight in gold
Everything should be at hand
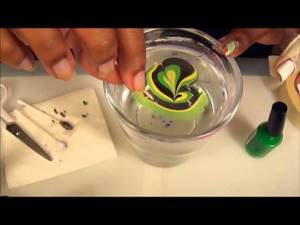
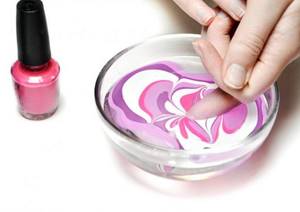
- Now you can begin the creative process with a clear conscience! Take the varnish and drop it into the water. It is best to bring the brush as close to the surface of the water as possible. If the drop spreads, everything is great, you are on the path to success
- And don’t be alarmed if the first one simply spreads over the entire surface, since over and over again the boundaries will be outlined more clearly. Drip strictly into the center of the container - nothing should prevent the drop from spreading
- Alternate colors as desired, each time bringing the brush to the center of the circle. You can lightly tap the container with your finger if it seems that the circle is not expanding well enough
IMPORTANT: Keep in mind that you have very little time left, after which the varnish film will begin to resemble oil, that is, it will stop spreading over the water. Now you understand why it is so important to prepare everything for work in advance and perform all actions quickly and accurately.

Drop varnish into water
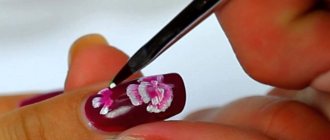
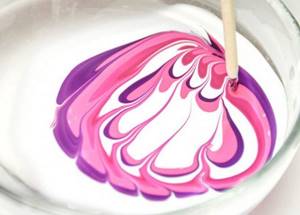
- Now quickly take a needle or toothpick and start drawing patterns. Carry out these actions carefully, but quickly, because the varnish dries quickly, turning into a film, and in this case it will simply crumple
- However, rough movements are also not permissible, because the outer layer should not tear. What patterns should you draw? But here there are no strict rules - draw what your imagination suggests
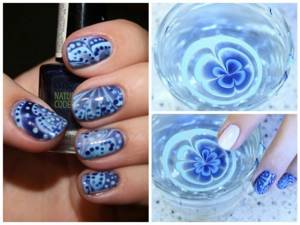
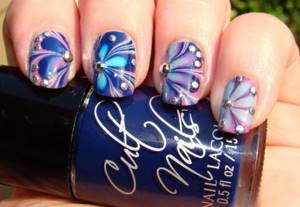
- Please note that by moving from the center to the edge, and then in a circle, you will get a star-shaped pattern. If you move from the outer edge to the center, you get a flower
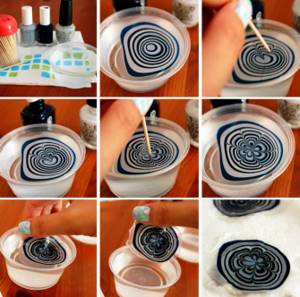
When the varnish dries, it looks like this:
Forming a pattern with a toothpick
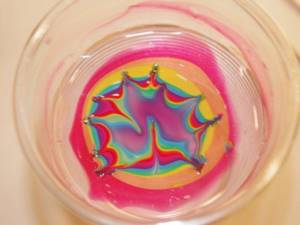
You might even end up with such a cute blot Coffee design
- After completing the pattern, with a smooth but confident movement, lower your finger with your nail down to any place in the pattern that you like. Be sure to lower the nail parallel to the surface, otherwise, if vertically immersed, the polish will simply turn into an incomprehensible lump on the nail
- You can manage to lower several fingers at the same time, but we advise you to do this only if you have a certain skill
Lowering the nail
- Use the toothpick or needle again, but this time to carefully twist the excess polish left in the water onto it. This procedure will allow you to remove less paint from your fingers than would otherwise be the case.
- If the water around your finger becomes clear - great, you have achieved the desired result, you can remove it
IMPORTANT: How long should you keep your nail in water? On average, 15 to 20 seconds are enough.
- Repeat the procedure for each nail. Don’t forget to use a different toothpick each time or wipe the needle with nail polish remover.
Repeat the procedure for each nail
- Do not rush to remove the tape right away - you need to let the varnish dry. And only then carefully free your fingers from the cream or tape. Please note that water manicure takes much longer to harden than usual, so be patient. Then moisten a cotton swab or cotton pad with nail polish remover and treat the area around the nail
Removing excess varnish
- Now you can move on to the final stage, which consists in covering all this splendor with a fixing varnish
Mistakes when creating a water design
- If you touch the wall of the container with your finger, then it is not selected correctly.
- If the varnish droplets do not spread in water, this indicates that the varnish is not liquid.
- If the gel polish immediately becomes crusty in water, change the water to warmer water.
- If the pattern doesn’t work out or is unclear, use a needle instead of a toothpick and don’t forget to clean it.
- The stains must be done lightly; the maximum immersion of the toothpick or needle should be 5 mm.
Water manicure with gel polish
We have to disappoint fans of gel polishes - they are not suitable for water manicure. The same smooth gradient transition may well be achieved, but elegant marble manicure patterns will not work out no matter how hard you try.
Remember the main rule of this technique - the consistency of the varnish must be liquid, otherwise it will not spread over the surface. The only way to create streaks using gel polish is to paint them manually, but in this case you will only get an imitation of a water-based manicure, and it’s also quite troublesome.
However, do not rush to get upset, because the material consumption is high, and gel polish is more expensive than usual.
Water manicure with shellac
The situation with shellac is the same as with gel polish - unfortunately, fans of this product are better off abandoning it in the case of water manicure. Not only does shellac not spread properly, but it also dries very quickly.
This means that you won’t be able to go through all the stages of applying a marble pattern with it. You can use shellac, perhaps, to cover the finished manicure so that it lasts longer. In this case, take transparent or translucent shellac, maybe with glitter.
Shellac neutral
Reviews
According to reviews from girls who did water manicure with gel polish at home, it is quite difficult, but you should not give up. The main mistake was incorrectly selected varnishes and too hot or cold water. As previously mentioned, all this affects the process of formation of the varnish film.
According to reviews from women who had a manicure using this technology in a salon, the result exceeds all expectations. The process is interesting and fascinating, as each time an interesting and unique mixing of varnish colors occurs. Manicure looks good even on short nails. The only drawback is the duration of the procedure.
Water manicure is beautiful and fashionable, but the process takes time. Follow all the rules, and the result will not take long to arrive. If you don’t succeed the first time, try again, and everything will definitely work out. Let your nails always have a beautiful manicure!
Water manicure ideas
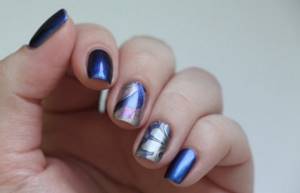
Since water manicure is quite complicated to apply and requires special care, it is recommended to start simple - do an accent manicure, that is, paint one or two nails on each hand with patterns.
It’s also worth not trying too many colors at once—it’s most convenient for a beginner to work with two shades. Believe me, you can create a fantastic and unique picture from them.
Accent manicure Two colors
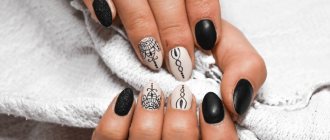
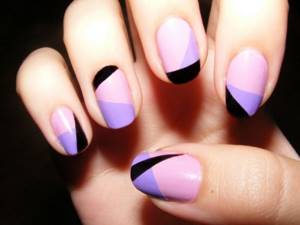
Excellent combination of two shades Classic - black and white Graceful lilac shades
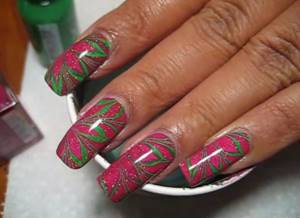
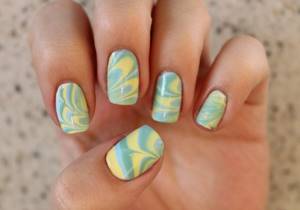
Pink and green
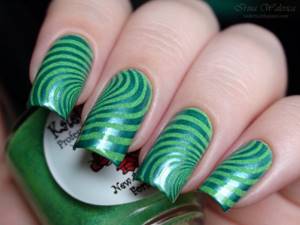
Green shades - simple and elegant Bright red and white design And green again
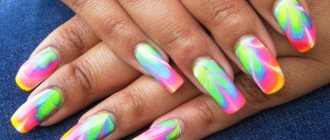
In general, marble manicure is a real art. Feel like an artist who can create real canvases on your nails.
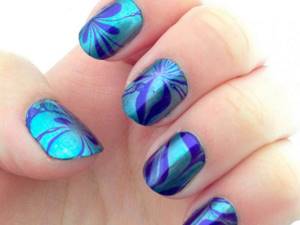
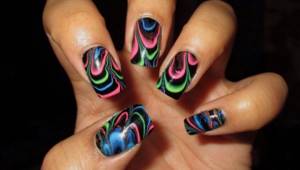
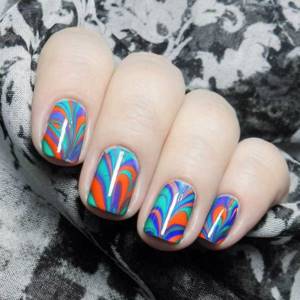
This means that the design is practically unlimited. Transitions of contrasting colors look especially stylish - such patterns will fit perfectly into your spring or summer look.
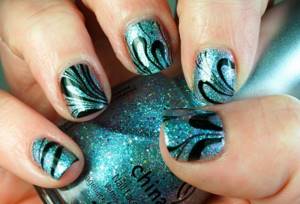
Emerald and black - charming brightness
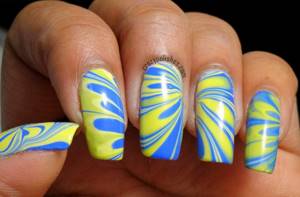
Summer variegation
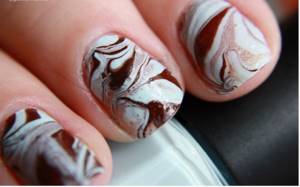
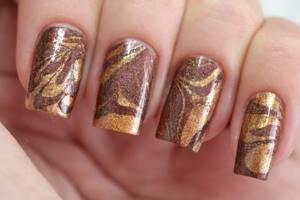
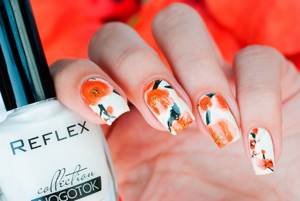
On a white background, even coffee shades look contrastingly bright
Bright summer colors
If you want to try something unusual, it is recommended to use varnishes with shimmer, that is, with tiny shiny particles. This coating will look quite interesting when exposed to sunlight.
The situation is the same with holographic materials. And what can we say about varnishes with a thermal effect, in which exposure to heat changes the color of the coating!
Water jacket with shimmer Hologram
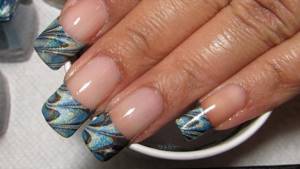
What shades should be combined? Experiment and don't be afraid. The most popular combinations are white and black, yellow and blue, purple and red, pink and white.
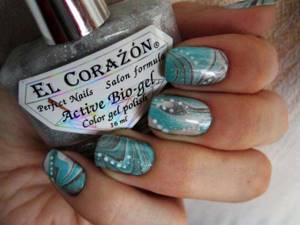
The combination of pastel colors is incredibly beautiful - it makes the nail plate look like marble, and such a manicure would not be considered flashy for the office. It is also possible to visually recreate the surface of agate and malachite.

Agate Malachite
Delicate pastel colors Accent manicure in muted tones Light colors Pleasant herbal shades
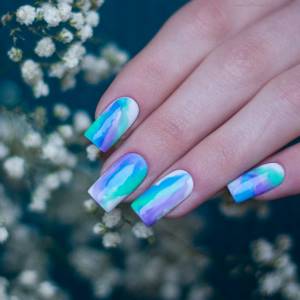
Soothing water design
Texture can also be combined in a wide variety of ways. Enamel, metallic, and mother-of-pearl look good.
IMPORTANT: The most important thing is that the varnishes are of the same brand. Otherwise, the manicure may simply not work out.
Matte enamel mother of pearl
The shades can be anything, but the brand must be the same.
It should be said that water manicure itself is already quite bright and unusual, so additional decorations in the form of rhinestones do not need to be used, but sometimes they look quite interesting.
Such brightness does not require additional decorations
But even a bright manicure can be decorated with rhinestones. Pastel manicure can also be with rhinestones.
Preparing the nail plate
Before starting any manicure, including water manicure, your nails should be prepared. Otherwise, the design will look sloppy and sloppy.
- First you need to remove the old coating.
- Then you need to do an unedged hygienic manicure, in which the cuticle must be pushed back using an orange stick. Orange wood does not split during operation and has a soft structure, so it cannot damage the skin. In addition, orange wood has antiseptic properties, which eliminates inflammation of small wounds and scratches.
- After this, using a nail file, you need to trim the edges of the nail plate.
If the nails were previously in a bath to soften the cuticle, they should not be filed immediately: this can lead to their delamination.
Water manicure varnish
So, what is worth remembering when choosing a varnish for water manicure?
- High quality is the most important rule. It is unlikely that you will be able to save money on water manicure. The thing is that poor quality varnishes contain a lot of acetone, which is unacceptable in our case. For the same reason, you cannot dilute viscous varnish with acetone - in this case, the varnish will simply spread through the water, not forming circles, but as if dissolving
- For the same reason, strong solubility and subsequent transparency, you cannot use varnishes that are too liquid, which are good for French manicure
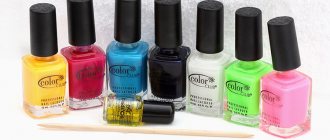
- It is better to buy small jars, since usually after two or three uses the material becomes too viscous. Therefore, there is no need for extra expenses in the form of large jars.
- Varnish with large sparkles is extremely undesirable - it curls up on the surface quite quickly. It is better to give preference to shimmer
It is advisable to select jars of varnish in a small format
A beautiful manicure can be achieved without large glitter.
Features of choosing a suitable varnish
To apply a beautiful design at home you will need at least four varnishes - two colored, white and one transparent. To obtain the desired pattern, you should first decide on varnishes, because not all will suit.
White varnish serves as the base for the main nail art, so in this case any high-quality varnish will do. But when choosing varnishes that will be used to create a unique pattern, you should pay attention to a number of nuances.
To create a water manicure at home, varnishes with a thick consistency or varnishes with glitter are absolutely not suitable. They will not spread over the water and will sink to the bottom under their own weight. Therefore, fresh liquid varnishes are best.
But even if the varnish of your favorite shade thickens at the wrong time, you can use it if you add a couple of drops of solvent to the jar and mix the contents thoroughly.
Manicure with water stickers
Water-based stickers are very popular, which is not surprising, because they do not stick, do not stretch, do not bubble or curl.
These slider stickers are a thin film that can either partially cover the natural pigment of the nail or an existing design, or completely. Using them is not at all difficult. For this we also need water:
- First of all, be sure to treat the nail plate with a degreaser and antiseptic. Light shades are preferred as a base - this will add brightness to the design.
- Take the stickers you like, cut them along the required contour and lower them into water for 5 or 10 seconds. Then gently blot the decorative element and transfer it to the nail
- If you choose regular varnish as a base, then you don’t have to wait for it to dry, but in the case of shellac, you can apply the picture directly to the sticky layer. The secret to the longevity of this design is that the image is located at a distance of approximately 1.5 millimeters from the cuticle and side edges of the nail
IMPORTANT: You should do this all with tweezers - thanks to it, the sticker will not tear.
- Well, the final stage is applying a finishing coat, which will add shine and allow the manicure to last longer. If you cover your nail with regular varnish, then do it in two layers, and if with gel, one thin one is enough. In the latter case, due to treatment in an ultraviolet lamp, the varnish will polymerize, and the manicure will be perfect.
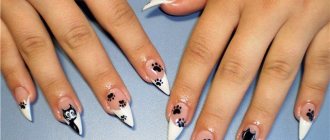
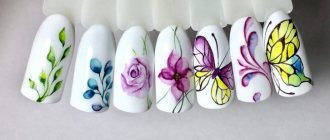
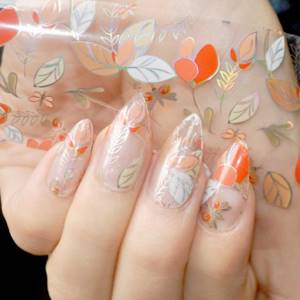
Accent manicure with floral sticker
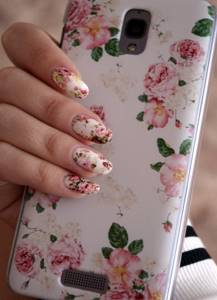
Floral design
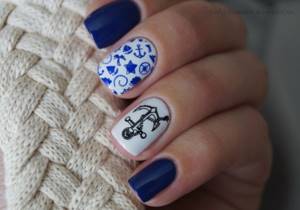
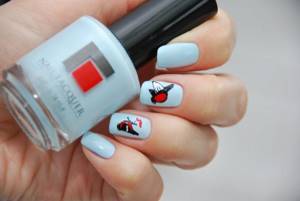
Marine theme
Bright floral option Predatory design
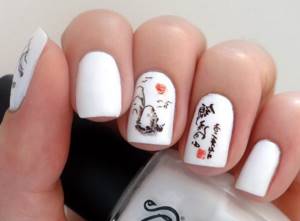
Oriental theme Cute owlets
Bird accent
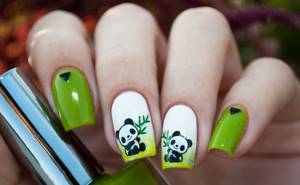
Pandas A cat theme loved by many These are the unusual stickers
As you can see, in order to become the owner of a beautiful and unique manicure, it is absolutely not necessary to visit a beauty salon. With some skill and knowledge of the nuances, you can become your own master.
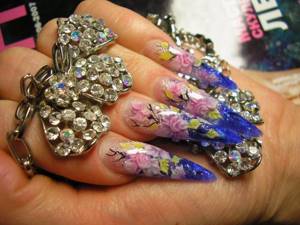
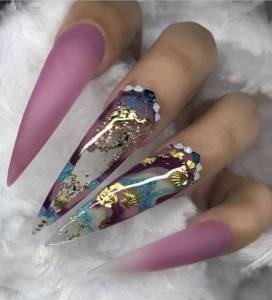
Aquarium nail design - manicure features
The main feature of an aquarium manicure is the design creation process itself, namely the step-by-step application of drawings or patterns from various decors to the nail bed and their subsequent coating with several layers of varnish. In this case, materials that are completely different in size and texture can be used, for example, mica, sand, voluminous rhinestones, sparkles, dried flowers, beads or broths. The surface of the nail ultimately remains even and smooth, and the patterns and compositions look voluminous.
An aquarium design is created, as a rule, in the process of nail extensions. However, an experienced master will be able to perfectly create an “underwater” effect on medium or short length nails. And most importantly, such a manicure can be afforded by housewives and women whose direct activities involve working with their hands; all decor and decorations in this design option are quite reliably “hidden” under several layers of coating, so the risk of damage to the integrity of the compositions is completely eliminated.