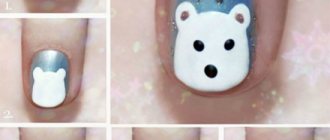
Step-by-step instructions for applying shellac:
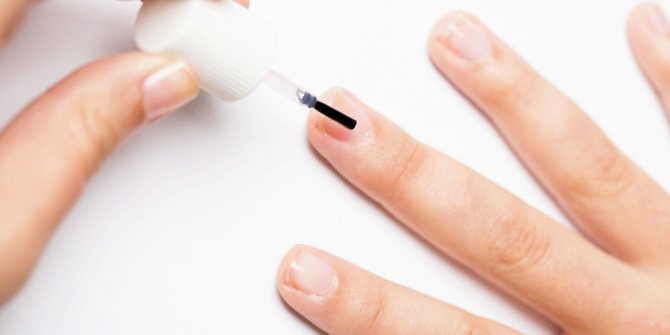
- Apply a base coat to protect the nail plate. In this case, you should follow the rules for applying the base so that the layer is not too thick: first the edges of the nail are painted, then the middle and the tip of the nail is sealed with the final touch. This way the layers will stick better. Moreover, this rule also applies to the application of other coatings. After applying the base, dry the nails in a UV lamp for 1 minute. The UV lamp should ideally have a power of 36 W, so you can dry all the nails in one go, which will significantly save time;
- The main coating is applied according to the same rules as the base one, only you no longer need to paint the ends. Try to keep the layer of shellac as thin as possible. Recommendation from the masters: before applying shellac, roll the bottle in your palms several times for better pigment distribution;
- Next, dry the color layer in a lamp, the drying time will be 1-2 minutes. If the gel polish coating swells during drying, everything applied will have to be removed and the whole process will have to start all over again, with thorough degreasing;
- Apply a second coat of base to create a brighter, more saturated color. However, if you require a translucent effect for your manicure, then this step is not necessary. The second layer should be slightly thicker than the first;
- Dry the new layer in a UV lamp for 2 minutes;
- The last thickest layer is applied with a finishing or top coat. The layer also takes 2 minutes to dry.
The sticky layer formed on the coating is removed with a lint-free cloth and a professional product. It is not recommended to use alcohol for this; it can deprive the shellac coating of its shine and gloss.
Types and ideas
Shellac is a gel polish that can withstand almost all known aggressive factors. It can stay on the nails for 2 weeks, sometimes longer, it all depends on the speed of nail growth. At the end of its life, shellac should not chip or flake off - it’s just that the hole near the nail demonstrates the transition from the natural plate to the painted areas, which is not an aesthetic sight.
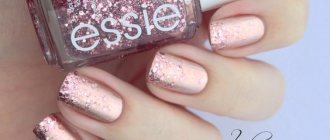
Shellac comes in matte, glossy and glitter. Now some companies have also introduced original varnish, in which the coating changes texture after hardening. It becomes velvety, grainy or sandy.
Shellac manicure options are so varied that it is almost impossible to single out one of them. Every day new ways of decorating nails are being invented. Let's look at the most popular types:
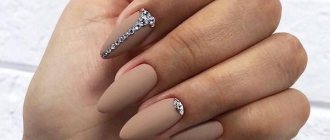
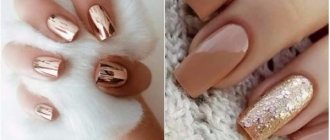
- Classic . This includes a monochrome coating using one color, French and other familiar options;
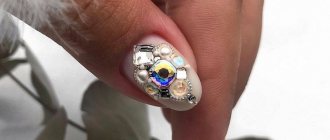
- Design is a very broad subcategory. It includes decorating one nail with polish, two or all, creating patterns with sparkles, rhinestones, knitting techniques, lace and patterns;
- Non-standard ones are matte, textured options, patterned technologies and with a pattern (cat's eye, liquid stones) and other types of Shellac manicure that attract attention from the outside.
This type of varnish has a huge number of advantages . Firstly, you can easily grow your nails with it. Together with the varnish, plate strengthening technology is used, which prevents the appearance of peeling and eliminates brittleness and flaking. Secondly, it does not require maintenance. You painted your nails and walked like that for two weeks, not worrying about their appearance at all. Thirdly, any girl can do a beautiful manicure at home. All you need is a set of varnishes, an ultraviolet lamp and a little patience.
But there is one drawback. Many girls like the eclecticism of the water design style, but, alas, it is impossible to do a water manicure with gel - it sinks in water due to its high density.
Let's take a closer look at the various shellac techniques.
Base coat agent
Buying a base coat product will not cause any difficulties at all, since in modern stores there are no problems with the choice. In most cases, the bottles are very dark; neither the color nor the consistency of the contents can be seen through them. This is done so that the base application does not dry out under the light of the sun.
When choosing a base coat, you need to pay special attention to the information provided by the manufacturer. As a rule, the description always indicates the color and name, and in some cases also the consistency.
It is not recommended to buy products that are too liquid, as they will spread quite quickly over the surface of the nails, making it very difficult to create a high-quality manicure. The video in question uses a database from, whose products are extremely popular among both professional craftsmen and beginners.
Manicure for short nails
Ideas for designing small nails are very diverse. You can draw a pattern, glue liquid stones, add rhinestones, sparkles, stripes, etc. to the plates. Let's look step by step at how to make a delicate gradient manicure with shellac (ombre) for short nails :
- We suggest using white and red, which are very suitable for festive gel nail designs. First, a degreaser is applied to the nails, then they are lubricated with a base and dried in a lamp;
- After this, the most interesting part begins - drawing the gradient. The peculiarity of working with gel is that each shade will need to be dried in a lamp;
- First, apply the base and let it dry. After this, the extreme gradient is painted over. To do this, apply a few drops of varnish to the sponge. Then dry again. This is repeated until the moment of complete sketching;
- The materials can be applied immediately - if, for example, the gradient is not complex. In other words, spread all the polishes one by one onto the sponge, and then apply it to the nail. This will save a lot of time, although the pattern will not be as beautiful as when drawing each gradient level separately;
- Afterwards you need to fix the design and dry it with a lamp. The sticky layer can be wiped off with alcohol.
You can also make a mirror shellac manicure, it is perfect for a wedding or just a festive one. This is the easiest technique for beginners. To make it yourself you won’t need anything other than a lamp, foil and varnish fixer. The nail is cleaned with a buff, then a base is applied to it. Foil is glued to the base. It is trimmed around the perimeter and leveled. The second layer should be applied with a fixative. Afterwards, the nails are dried in a lamp.
Peculiarities
Shellac on extended nails
You can apply shellac to gel or acrylic nail plates. In this case, the order of work with the coating will be the same. However, there is an important nuance. The extended nail should be thin and graceful. This cannot be achieved when applying extensions under varnish on tips with a body. The new nail often looks excessively thick and unnatural.
Shellac, when applied according to the technology (base - color - color - top coat), gives a fairly thick layer of coating, so thick that it even prevents breakage if applied to natural nails. In this case, you risk making the nail plate almost twice as thick. This will have an extremely negative impact on the aesthetic value of the manicure.
Thus, the answer to the question of whether it is possible to paint gel nails with regular polish and gel polish, although it will be affirmative, nevertheless, its expediency remains in question. But acrylic nails, due to the fact that they are thinner and more natural, look great under shellac and varnish.
[yandex2] [google2]
Lunar manicure with shellac
The lunar version of nail design never goes out of fashion. It can be done on nails of any length, and the holes can be located at the tips or in the hollows of the nails, painted over or not. To choose the right type of hole, you need to look at the examples and take into account some features:
- An unpainted hole grows less noticeably than a painted hole. This means that such a manicure will last longer;
- During the application process, several transitions are formed, so if 2 or more holes are made, the last one will rise slightly above the rest - not everyone likes this;
- It is best to do this design in contrasting colors: red - black, blue - white, etc.
How to make a moon manicure using shellac at home:
- You need to clean the plate and apply a base on it, then dry it under a lamp;
- The outline of the future hole is drawn. This is done either with a thin brush or with a stencil. The first “frame” of the hole is made of the main color;
- Afterwards drying is carried out;
- A hole appears. Professionals prefer to work “live”, without stencils;
- All that remains is to fix the varnish, dry it and wipe it with alcohol.
This technique is performed by any salon, because of all the design options it is the simplest and most elegant. You can do a pedicure in the same way.
Video lesson: how to do a shellac manicure at home
How to store a primer and how to tell if it is spoiled
Any coating has its own shelf life.
To preserve shellac primer, special storage conditions are needed. Why should it be placed in a dark and dry place. The period of use of primers can be 1-3 years.
If white flakes begin to appear in the nail product, this indicates that this product is unsuitable for use.
When purchasing a primer, you should pay attention to the date of manufacture and the period of use during which the cosmetic substance can be used.
It is impossible to answer definitively whether an expired primer will be damaged. If the expiration date has recently expired, you can check the primer by applying it to your nails. If the primer spreads during application or, on the contrary, is poorly applied, for example, in clumps, the product is definitely damaged.
Also, evidence of a damaged primer will be peeling, rolling, or uneven application .
When talking about using a primer for personal purposes, every lover of a spectacular manicure can individually decide for herself whether it is worth covering her nails with a primer if it has expired.
This substance has a rather high price, so some people do not dare to throw away the product. This is why you need to know that expired shellac primers can cause various allergic reactions and even harm the health of your nails.
Manicurists do not advise risking your own health and beauty for reasons of economy.
Let your nails always be well-groomed and beautiful.
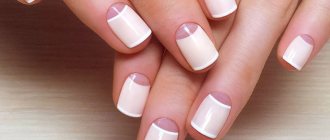
French shellac
French manicure coated with shellac is a recognized classic manicure. It is suitable for any season and holiday. Let's look at how a classic French manicure is done using shellac varnishes:
- The nail is treated with a buff and base. Then it is dried under the rays of a UV lamp;
- The main part of the plate is painted pink or beige. Of course, you can use black or red, but it is recommended to leave dark colors for the cold season (autumn-winter), when the contrast with the skin will be more noticeable;
- Next, the tip of the selected shape is drawn with a brush. It can be straight, oval, triangular. Drying is in progress;
- You can stick rhinestones along the contour or draw a pattern. Afterwards the fixative is applied.
You can complement this style with any pattern or stickers.
Instructions for strengthening nails
Strengthening with gel under gel polish is best done in nail salons. For those who decide to carry out the procedure themselves, it is important to strictly follow the instructions:
- Nails are pre-cleaned and degreased, and a primer is applied.
- Apply gel in 2 layers, drying each layer in a lamp.
- The material is applied to each finger separately and dried immediately.
- If necessary, adjust the shape with a file and a buff.
- Cover the nails alternately with a base layer, gel with pigment and top coat. After each layer, dry in a lamp.
At the end, treat the cuticle with oil and apply a nourishing cream to your hands.
Winter and New Year's
New Year's and winter shellac is a stylish holiday manicure that seems to bring the holiday closer to us. Its difference from other options is variations on the theme of drawings. Patterns can be very different: Christmas tree branches, cones, balls, bows and others.
Let's look at how to make a cool beaded manicure for the New Year:
- The beads are made of black, red and white varnish. The base is applied and dried, after which the base is painted white;
- Use red dots to draw a kind of moon at the base of the nail. Also, the point is located in the center of the plate. Everything is dried;
- Then take a brush and black varnish, with which you need to evenly draw petals around the central point. Inside these petals are painted white, but so that the black edging is visible;
- Dots are drawn around the petals;
- This is done on one of the fingers. The rest are decorated with dots. Your goal is to draw a diamond-shaped dotter pattern where the four tops of the diamond are larger than the side points;
- If desired, this manicure can be used for summer or spring, just with different colors.
If you prefer to draw patterns, then you can make a simple jacket, and then draw a Christmas tree or a snowman along the edging of the white tip.
How to use primer
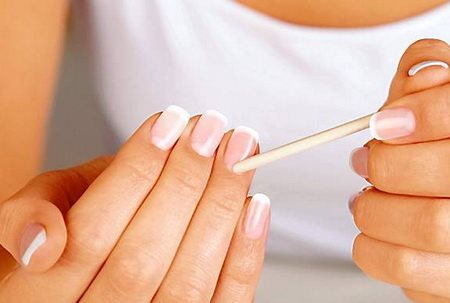
Before applying the primer, the cuticle is pushed back.
Regardless of the type, for what and for what manicure you need a primer for shellac, the method of application is the same for any of them. The final result of the manicure and its duration of wear depend on how the primer coating was applied.
To apply the primer, there is a special application technology. Nail primer is very easy to apply even if you are new to manicure.
The most important thing to focus on is to use safe application methods when interacting with the product, as well as accurately follow the sequence of coating the nails with the product. Application of the primer takes place in the following 3 stages :
Preparation for application.
You should immediately prepare a napkin. Can be paper or lint-free. When opening a bottle of primer, first wring out the brush and remove excess liquid from it on a napkin. the nail plate is also .
To do this, the cuticle is removed or moved away from the surface of the nail, and the nail surface itself is treated with a special file, the rigidity of which should be minimal. This is done to eliminate natural shine if present.
Application of primer.
Using small strokes of a special brush, apply the product to the nail in the center, without allowing the substance to come into contact with the cuticle or lateral skin folds of the nail.
After applying the primer.
At the end, after treating with primer, the nails should be completely dry. Depending on the quality and its variety, the primer gives a different appearance when the nail plates are dry.
Manicurists apply primer twice. This is done for high-quality and complete protection in order to increase adhesive capabilities.
Knitted
Photos of knitted shellac manicure surprise with their beauty and grace. But it seems almost impossible to accomplish it. In fact, this is a very simple technique that you don’t need to be a super manicurist to implement. You will need polish, brushes, lamp and powder (sand for nails). Steps:
- Gel polish is applied to the prepared nail. The first strip should be thin, but voluminous, i.e., rise above the plate. If the varnish begins to spread, then you need to quickly apply a strip and sprinkle it with powder or sand;
- The following patterns are located symmetrically on both sides of the plate. Draw several letters “Z”, how to draw them becomes clear after watching the video;
- Next, powder is poured onto the shellac. It is very important that the varnish is not dried;
- The nails are dried and then cleaned of any remaining powder using a brush. That's it, no fixings or re-patterning required.
The price of shellac depends on where and by whom the manicure is performed. Naturally, the services of fashion salons will cost much more than home craftsmen. Novice specialists often offer to design their nails for free or literally for consumables, which is relatively inexpensive. But if you buy yourself a lamp, you can conduct sessions for free.
How to choose the right primer for shellac
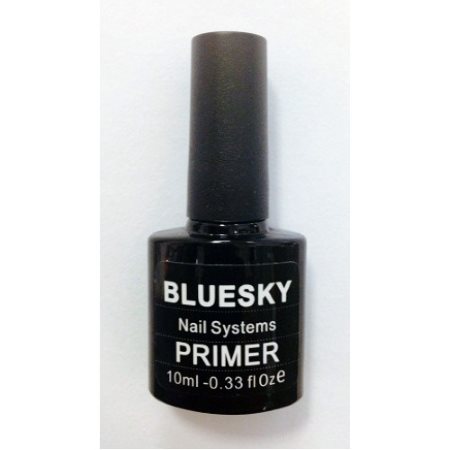
Bluesky primer is used quite often
. Stores now offer a wide range of different primers. The choice of the necessary product will depend on your preferences, the characteristics of your nails, your financial capabilities and the popularity of the primer brand.
You can also choose the consistency of the primer. Each brand produces primers of different thicknesses. When choosing a nail product, try to get a thick primer so that it can be applied easily and safely. After all, liquid primers can spread too much over the nail, which is unsafe.
The most famous professional nail extension products are the LeChat or RuNail brands.
Some of the most popular and proven primers include Bluesky, Le Vole Ultra Bond and Lady Victory.
Primer Bluesky belongs to the most frequently used products in this group. It is used to treat the nail surface, since it ensures the best coverage of the solution over the entire nail.
Bluesky primer components do not contain harmful chemical elements, such as toluene or formaldehyde.
Because of this, Bluesky Primer will not cause burn reactions or redness of the skin if it comes into contact with the skin. But it is still necessary to apply such a primer in compliance with all basic recommendations.
Le Vole Ultra Bond is an acid-free primer. This type of primer is safe and, if accidentally applied to the epidermis, does not cause irritation or burn reactions.
Thanks to its special acid-free composition, the product will not cause destruction in the structure of the nail and its layers and will not disturb the water and fat balance of the nail.
Important to remember! The most important thing to focus on is to use safe application methods when interacting with the product, as well as accurately follow the sequence of coating the nails with the product.
Lady Victory is often used for biogel nail coating, which is so popular now. The primer contains safe substances, which makes this primer absolutely harmless.
It will perfectly protect against any harmful effects of aggressive substances. Lady Victory is also used as a nail treatment.
Before using the selected primer, you should familiarize yourself with the composition presented on the label, and also determine the technique for applying the product.
Imitation of water manicure
To get a semblance of a water manicure using gel polish, you need gels of different colors and dots:
- On prepared and primed nails we draw stripes with gels of different colors.
- Without placing your nails under the lamp, we make smooth marks on them using dots.
- Now we dry the nails and cover them with the finish.
In the Manicurof salon chain you can order any type of manicure with Shellac gel polish. To find out the cost and sign up for the procedure, you need to call us at the number provided.