Everything changes quickly, and fashion changes rapidly. Whether this applies to hats, dresses, trousers - it doesn’t matter. The nail industry is developing so successfully that girls do not have time to try, see, and evaluate all types and techniques.
We haven’t yet had time to get used to monograms, three-dimensional designs, and rhinestones that were recently in trend, but here we go, they moved aside. The classics are relevant and irreplaceable. And not only the well-known French, but a more elegant gradient.
What it is?
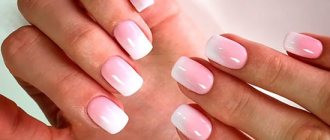
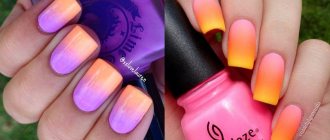
If a French manicure is a clear distinction between colors, then a gradient manicure is a coating when a shade gradually, smoothly flows into another. Even using one color (usually pastel-colored polishes: pink, peach, powder, base) the result is excellent. If you have long nails, you can take several, if you have short nails, two are enough. It is made horizontal and vertical. Ombre design - lightening the ends in a nude tones, DipDye - when done with completely different, bright colors.
Combination with other types of design solutions
This coating is universal, so it can be easily combined with a variety of clothes. Often girls analyze their wardrobe and then select a manicure to match it. In summer, bright colors emphasize your mood and bright dresses. If you want to maintain a more neutral style, use pastel manicure colors. Then you don’t have to worry about the color scheme of your wardrobe at all. Natural colors are popular in winter because they are easy to match with winter clothing.
During open-toe season, take care of your toes. They should also look neat. For a pedicure, choose neutral, pastel colors, or keep them in the same color scheme as the manicure. In this case, ombre can be done only on the thumb, and the rest can be maintained with the main shade.
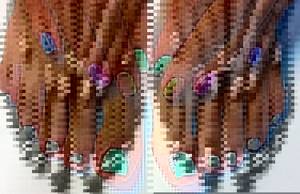
Any jewelry will complement your look. If you combine manicure, pedicure, and accessories in one palette, you can easily show off your great taste. At the same time, accessories can combine several colors at once to be more versatile.
It is very popular now to do makeup in the same color scheme as the nails. If you prefer a red palette, then use red nail polish and red lipstick. Shadows can be of any color to complement the nails.
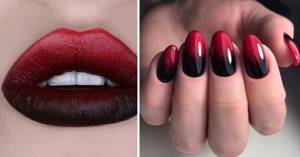
Now you know what a gradient is and how to make it at home in different ways. Share your reviews and comments. You can choose any photo, show it to your master, and he will repeat the decor on your nails. Write, what criteria do you follow when designing your nails?
Author of the publication
Fashion trends
You can play with sharp and smooth tints of shades, add patterns, drawings and plant motifs. Geometric stripes, brush strokes on a matte or glossy background, and a combination of different coating textures will look original. A beautiful spring-summer outfit will be complemented by combinations of red, mint, lilac, orange, and coffee. Autumn-winter - done in cold colors - green, blue, wine, purple, black.
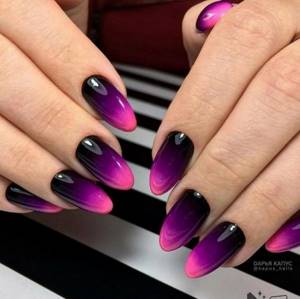
Features of gradient manicure
Nail art with an ombre effect is easy to do yourself. Its feature is versatility, because several colors will suit a larger number of clothes, and not just one set. Depending on the season, choose appropriate tones and shades, then the result will not look boring and thematically appropriate. It’s difficult to make a mistake when choosing a palette, but it’s better to study the ideal combinations that will suit your taste.
Before a manicure, you should get your fingers in order. You will need an orange stick, nail scissors, wire cutters, and a nail file. In Europe, the technique of gentle nail art is more often used, when the cuticle is only pushed back, without cutting. If you like this method, then at this stage you will limit yourself to an orange stick. Use clippers to cut your nails into the desired shape, and use a nail file to sharpen sharp corners so as not to touch or break the plate. Having completed the processing procedure, proceed to choosing colors.
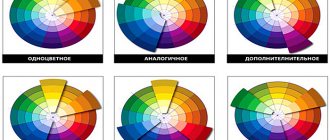
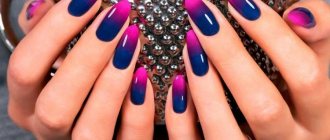
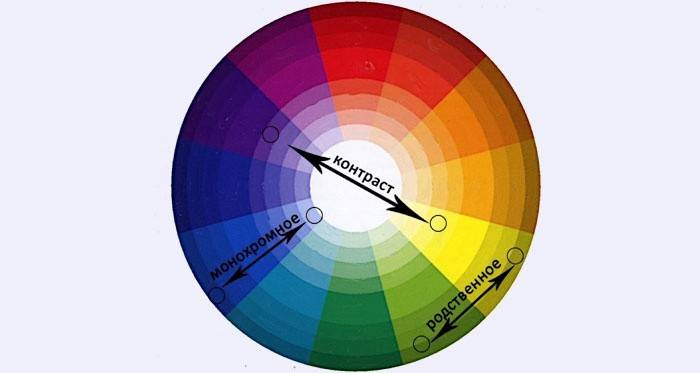
With a monochrome manicure combination, coloring occurs with two varnishes with a change in tone. Example: from blue to cyan (white is gradually added to the first color, changing the shade) or from bright crimson to delicate pink (using the same method). This manicure emphasizes a gentle, romantic image or a catchy eccentric one. If related combinations are chosen, the gradient is made with varnishes that are located nearby in the color palette. Examples of combinations: bright yellow and orange, deep blue and sky blue, dark purple and scarlet, fiery orange and red.

The most daring manicure combination is a contrasting gradient. Examples of combinations: sunny yellow and lilac, deep blue and orange, purple and emerald green, blue and pink. Combinations come in warm, cold, bright hot shades. Experiment by combining light and dark colors, pastel and rich palettes. A two-tone manicure in contrasting colors will suit any mood, style or event, you just have to express your desire correctly.
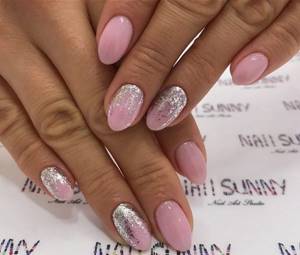
Another festive manicure combination is varnish and glitter with sparkles. It’s up to you to decide whether combination rules apply to them or not. Here you rather need to rely on the festive outfit you will be wearing and your makeup. A dark, evening dress with red lipstick inspires bright scarlet polish and purple or blue sparkles. If you are a bride and have a wedding ceremony ahead, then white and silver glitter are the perfect combination for a manicure.
Rhinestones and glitter
For a wedding celebration or evening reception, stylists use these elements. The shine of stones and the shimmer of gold foil will add grace and luxury to the overall festive look. Select a few fingers, decorate everything - as you like. It is important to practice moderation. Ombre design for long and short nails with a color transition stretches the sparkles over the entire surface and requires a little time to execute. The end result is great.
Method three
If you still dare to make more than two colors, you can apply the required number of shades to the sponge or proceed as follows.
- Apply the base color to the entire surface of the nail.
- After the first layer has dried, use a sponge to apply the second color from about the middle of the nail plate. Try to make the border between the colors a little blurry.
- Using another piece of sponge, apply a third coat to the outer edge of the nail, making sure the edge is blurred.
- Apply topcoat.
Angular Gradient
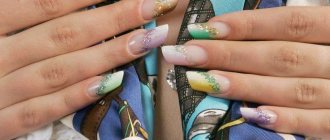
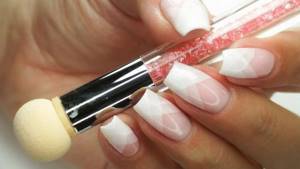
Its difference is that the stretching is done diagonally, and the design of the center is on a white or milky background. Another option is to flow from one to the other until the tip. The harmony of such an unusual coating attracts many girls.
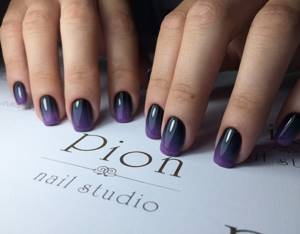
Nail design gradient gel polish
- As for design, it all depends on your imagination. Improvisation is welcome here. Even stripes can have different directions - not only horizontally, but also diagonally and vertically
- The colors can be either the same palette or contrasting - the only important thing is to create a smooth transition. You can also create transitions not within one nail, but paint each nail a slightly darker or lighter shade than the previous one.
- Lovers of rhinestones, stickers, and patterns will also have plenty to roam around - all these elements will fit perfectly into the design. Instead of a glossy fixer, you can try using a matte one - maybe it turns out to be something you like
Summer brightness
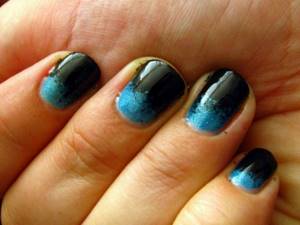
Delightful contrast Subtle gradient with rhinestones
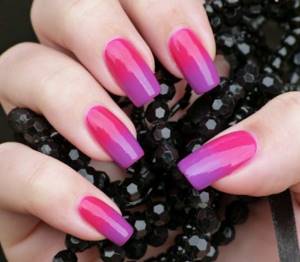
Pink gradient Romance of the night city
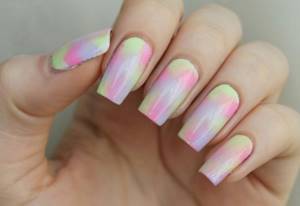
Delicate transitions Delicate vertical gradient with rhinestones
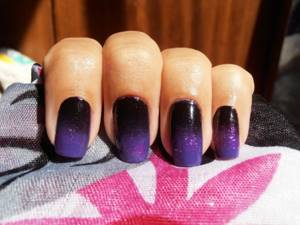
Mysterious dark gradient Delightful black and blue Winter version Arc gradient
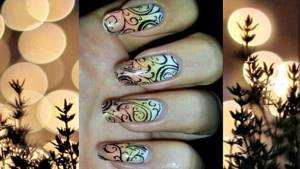
Summer motley

Match the color of the clutch
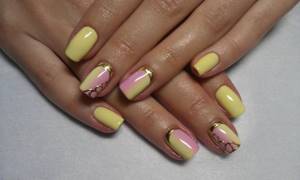
Delicate gradient with patterns
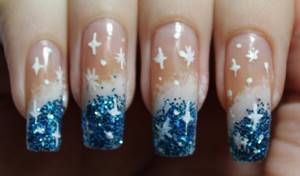
Another option for winter
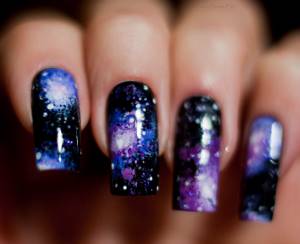
Space Sober and elegant
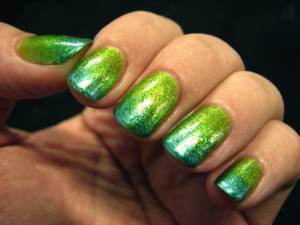
Herbal brightness
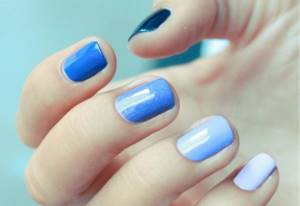
Smooth transition on nails
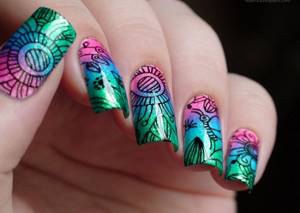
Variegated patterns Predatory
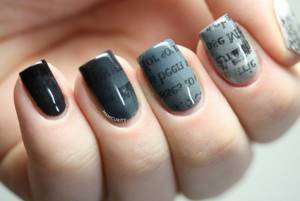
Newspaper Ombre Diagonal Gradient
Patterns
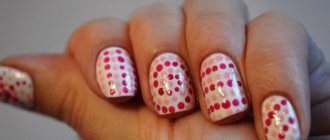
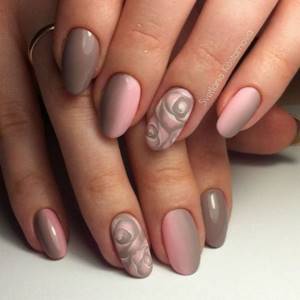
Each finger is painted with drawings on any basis - matte or glossy. Curls, vignettes, hearts, birds - everything will be appropriate in a manicure with a color transition. Maintaining a sense of proportion is the main condition for a beautiful gradient.
How to make at home
The materials used are quick-drying products, so it is better to choose ones with a dense structure and high-quality pigmentation - then the design will be made with a minimum of application layers.
You will also need:
- several shades;
- soft sponge (can be cut from a regular one used to wash dishes), sponge:
- toothpicks (orange sliver);
- cotton buds;
- liquid or acetone to remove excess;
- foil, cut into pieces. Can be replaced with film, glossy paper;
- top coating;
- Ultraviolet lamp.
Video: how to make a gradient manicure with a transition
A detailed master class on gradient manicure in white and blue - what do you need? Watch the video to learn the intricacies of applying varnish. In the video tutorial, the main tool is a sponge. In any case, it will cause stains on your fingers, but this should not scare you away from this bright idea. A little hint - if, when wiping with a cotton swab, you touch more than necessary, then take a thin brush, dip it in the color of the varnish near the cuticle, draw a thin line.
Manicure "Gradient". How to do a Gradient manicure? (Gradient Nails)
General stage
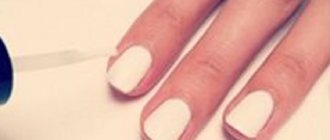
Before making a nail design with a gradient, remove the cuticle, give it the same shape with a nail file, and treat it with a base to protect it from pigments that color the surface. Then apply white or the lightest varnish and wait until it dries completely.
Method one:
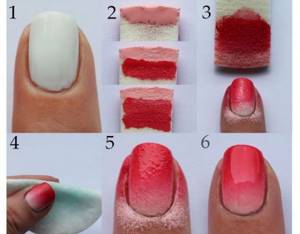
- apply the enamels that suit your design one by one in strips on a sponge;
- press several times until the colors smooth out;
- repeat until the desired effect is achieved;
- if there are bubbles, make test prints using paper;
- Secure the finished design with a top.
Second:
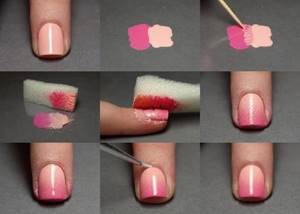
- the gels are placed on foil, the joints are mixed with toothpicks;
- retype with a sponge;
- points 3-5 from the previous method.
Third:
- degrade manicure is performed by rolling directly onto the plate;
- press with a sponge, patting lightly, trying not to move;
- After achieving the desired result, the final stage is finishing treatment.
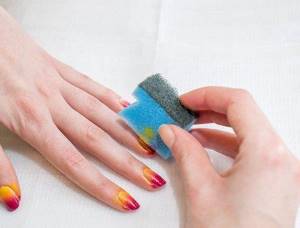
How to make ombre nails with gel polish
We are sure that we were able to not only interest you in such an original way of transforming a manicure, but also convince you of the need to immediately try to translate the chosen design into reality. If this is the case, then hurry up and read the instructions below and prepare everything you need for such an exciting process.
Tools:
- nail file Used to correct the length and shape of natural or extended nails. Remember that the lower the degree of abrasiveness of the tool, the harder the working edge it has;
- metal pusher. With the flat side of the pusher you free the nail bed from overgrown skin, and with the sharp edge you carefully move the side ridges away;
- scissors or tweezers. They have super-sharp, sharpened edges, which need to be used to evenly cut off the cuticles with the trimmed method of manicure, and with the untrimmed method, simply push back the epidermis with an orange stick;
- polishing buffs. Due to their rapid wear, it is recommended to buy several pieces at once. Using elastic, soft, textured fabric, the buff removes roughness and smoothes out unevenness of the nail plates;
- dots. A metal or plastic stick with round ends that is used for basic nail art techniques. Especially for painting polka dots on your nails;
- a synthetic, moderately porous sponge or a set of standard brushes, which includes a flat brush, a hair brush, a petal brush and a fan brush.
Materials:
- remover. To eliminate previous manicure delights on your nails;
- nourishing, natural oil or special softening gel for cuticles;
- varnish base with a self-leveling effect;
- acid-free primer if your nail plates need to be degreased first;
- several gel polishes in the shades you like;
- acrylic paint for nail art or colored stains;
- glossy or matte topcoat to consolidate the result of your efforts.
As you can see, you don’t need much to do a stylish manicure at home. The main thing is to stock up on endurance and patience, “set your hand” on the training cards and carefully read our step-by-step instructions.
Ombre nails with a sponge
Step 1. It is necessary to cover the nail plate with a base and dry it. Step 2. The next step is to apply the background gel polish. It can be white, pink or any other suitable color. Step 3. Now that the background is done, you need to apply strips of varnish very close to each other on the foil plate. The shades can be any, depending on what style you choose. Then you need to shade the borders. Dip a damp sponge into the resulting palette. It may be noted that the use of foil is not necessary. With the right approach and the necessary experience, varnishes can be applied directly to the sponge. Step 4. After this, you need to apply the polish to your nails with a patting motion. Carefully wipe off any remaining residue with a napkin. Dry in a lamp and repeat this step as necessary. Step 5. The culmination of the manicure will be covering with a transparent top.
This method is the most common. At the same time, the transitions are quite smooth and neat.
Ombre nails with a brush
Next, we’ll look at how to make ombre nails without a sponge. To do this we need a special flat brush, as in this photo:
The preparatory steps will be the same as in the previous paragraph, only the gel polish needs to be applied directly to the nail, and then with a slight movement of the brush from side to side, shade the gel polish. Repeat this action as long as necessary, each time drying a new layer in the lamp, and at the end fix the gel polish with top coat.
Ombre nails with airbrush
An ombre airbrush is one of the new inventions that makes the work of nail artists easier. The principle of its effect is similar to airbrushes for cars - shellac is poured into the device’s reservoir, after which it is sprayed onto the nails in the form of a spray. This manicure is very simple to perform, especially in comparison with the two previous methods. With this tool you can realize even the most vivid fantasies and incredible color schemes. It is very easy to use, you just need to practice on paper and learn how to regulate the pressure. After this, you can start manicure. Drying and coating occur in a standard manner.
How to make a gradient with regular varnish
An ombre manicure at home can be easily done with regular polish. To do this you need to use the above methods, the technique remains the same. The only caveat is that everything needs to be done quickly, before the polish dries, otherwise you risk getting a very sloppy manicure.
Nuances to consider
Any path to the desired result is thorny and full of obstacles. Didn't manage to create the cutest gradient on your nails the first time? Don't despair and rush to try your hand at the second attempt. And tips and life hacks collected from practicing masters will help you avoid mistakes in the future and reach the pinnacle of nail art:
- It is not advisable to use chameleon varnishes, since it is impossible to predict their behavior when they come into contact with the nail. And the result may differ significantly from what was planned;
- for matte shades, only application with a sponge and mixing on the palette is used, otherwise the coating will look unaesthetic;
- for glossy varnishes it is recommended to use 2-3 layers of fixative - in this case they will not fade over time;
- if you have short nails, then replace the standard horizontal gradient with a vertical stretch, visually adding length to the free edge;
- remember that the transition from dark to light in the direction from the nail bed to the free edge is more suitable for long or extended nails;
- if you create a really bright transition by combining contrasting shades in a color block style, then do not forget to carefully blur the boundaries, otherwise you risk getting a “dirty” effect;
- If you don’t have a brush or sponge at hand to create a trendy ombre, then use a regular eyeshadow applicator as a decorating tool.
Many of these methods, as well as simple but effective tips, help you adjust your work and achieve a truly stunning result of your efforts. Find more life hacks in the video below:
Secrets and tips
To avoid staining the skin around your nails, you need to protect it. There are several ways:
- Before starting the procedure, stick the tape on and remove it after use;
- spread with thick cream, then remove it with a cotton swab;
- use specially produced products for performing manicures with a gradient.
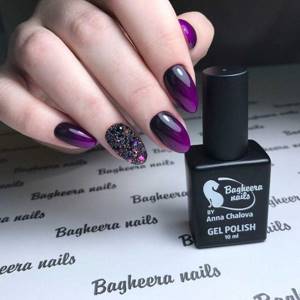
To eliminate bubbles:
- change the sponge to a finer-grained one;
- make 2-3 prints as a test on paper or foil;
- increase the number of layers. Then the points merge more strongly.
Problems with the transition are solved as follows:
- if the colors are contrasting, it is difficult to smooth out the border between them;
- treat the final layer with finishing varnish. It gives smoothness and levels the surface;
- use the base.
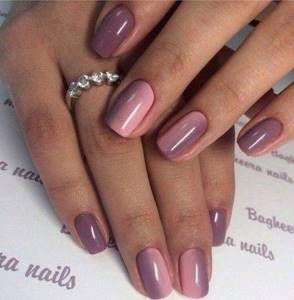
Varnish gradient
So, what should the varnish be like so that you don’t have to worry about damaging your nails? After all, a gradient manicure will certainly captivate you so much that you will want to constantly experiment. First of all, it must contain a large percentage of cellulose, since it is a natural product. You don’t need to look far for an example: cellulose is found in many plants, and 90% of cotton consists of it.
It helps strengthen your nails, and you don’t have to worry about their strength. And for nutrition and hydration, the content of camphor oil is necessary. Betonite is saturated with sea minerals, which whitens nails and helps to moisturize them. Brightness, shine and polishing effect are provided by silk amino acids. And, of course, you cannot do without vitamins, especially vitamin E, which helps strengthen, maintain health and beauty.
IMPORTANT: What should not be in the varnish is toluene formaldehyde, which has a destructive effect on the nail plate. In other words, it is a carcinogenic substance that it is better not to mess with.
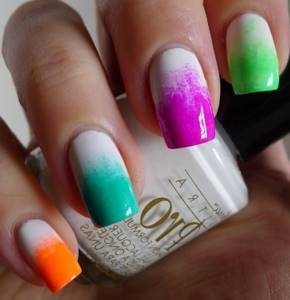
There is a little trick to preserve the varnish longer - you should shake it, roll it between your fingers - then, due to the formation of air bubbles inside, its service life will be longer. Store the bottles in a warm place, but under no circumstances in the light. For a perfect manicure, be sure to use a manicure base and a quick-drying product along with the polish itself.
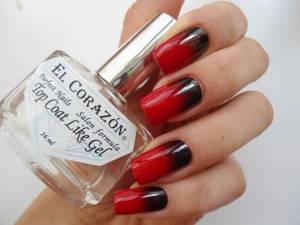
Use a base and dryer
As you can see, any fashionista can master a gradient manicure. The effect is no worse than the salon one. A little skill, accuracy and patience - and now your unique manicure is ready! Please yourself and others, but do not forget about purchasing a quality product.
Special brush
It is made of long and short pile, mixing enamels to achieve an imperceptible flow of shades. This is a special tool specially selected for the ombre style. Designed for vertical and horizontal gradient manicure. Sequence of actions:
- apply two desired colors;
- Use a “comb” to carefully move along the joint, shading the paint;
- to get a more blurred background, you can move it in different directions;
- consolidate the result with the finish.
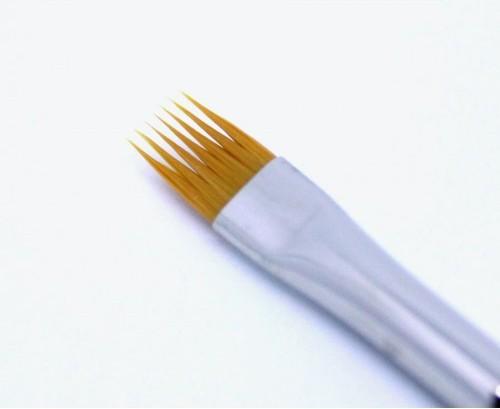
Using Brushes
Let's conduct a short master class in which we will look at the professional technique of applying a gradient.
Vertical Gradient and Flat Brush
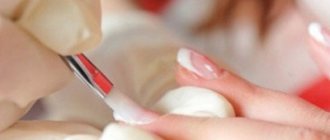
For this design we will need a special synthetic brush with a straight tip.
- Apply a thin layer of two shades of varnish in equal proportions.
- Wet a straight brush in degreaser and squeeze it out a little, since you won’t be able to do this with a wet brush.
- Carefully draw the brush at the junction of two colors (while holding the brush parallel to the nail so as not to leave marks).
- When the gradient has become smooth, send the nails to a UV lamp.
- We repeat the procedure until rich shades are obtained, periodically cleaning the brush on a napkin.
- We fix it with a finishing coating.
You can verify the originality of the resulting effect by looking at the photo on our page.
Ombre with a fan brush
To achieve a high-quality result, you need to perform the following actions.
- Apply the base color of gel polish to the nail. Light gradient tones are better suited as a background.
- Mix two colors and cover the middle of the nail with it (we outline the transition of colors).
- Cover the tip with a darker tone.
- Take a fan brush, slightly moistened, and begin to blend the colors with light touches until the desired effect is achieved.
- Dry the layer in a lamp.
- We repeat the procedure twice, applying the background color only to the base of the nail plate.
- We fix the resulting “Ombre” effect.
The manicure done looks very attractive, the transition is smooth and harmonious. There are quite a variety of shade options: both pastel colors and bright combinations. You can choose the most suitable one by looking at a good selection of high-quality photos on our page.
iridescent gradient
The development of the art of manicure gradually transformed the gradient from ordinary varnishes into an unremarkable design. This gave impetus to the development of an iridescent “Ombre” based on gel polish and using professional glitter.
- Apply a base coat to the prepared nail and dry it.
- Using a brush, cover with pigment up to the middle of the nail (at the base the layer should be denser, and closer to the middle it should be more transparent).
- Apply the second pigment color in the same way, starting from the end of the nail. The coating should be thin, but dense in structure.
- We cover it with a finishing coating and dry it in a UV lamp.
This manicure expresses the festivity of your image and a wonderful mood. The beautiful design, which you can find in the photo on our page, will help you choose the best options.
"Baby Boomer"
If you want to get a “gentle” (childish) effect, follow these rules:
- the surface is treated with white gel polish;
- beige is applied with a fan brush;
- the result is mixing;
- closes with a top.
After processing, each layer must be thoroughly dried.
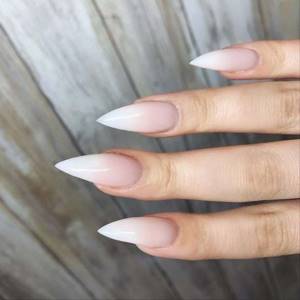
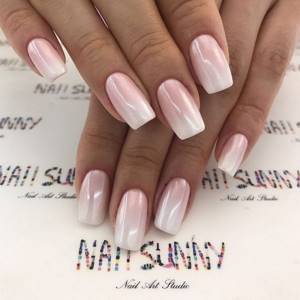
Babyboomer is a type of French that combines several techniques and will not leave any girl, especially the romantic one, indifferent. This sophisticated, elegant nude ombre manicure in light colors looks elegant on short and long plates. The main emphasis is a smooth transition from the white edge to the hole, which gives naturalness and a natural look is ensured.
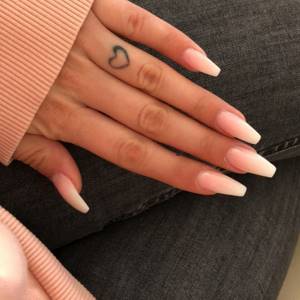
Gradient gel polish brush
It is advisable to choose a flat brush with a semicircular or straight tip, made of synthetic materials. The brush you will use to apply the base will also work. So, the principle of operation of such a brush is as follows:
- Paint half of the nail plate with one tone, then the other half with another. Try to make the layers as thin as possible - they will be easier to shade
- Now take a flat brush and moisten it in the cleaner so that it is barely wet. While it is still wet, swipe several times from the cuticle to the tip. In this case, the brush should be as horizontal as possible to the surface of the nail - this will allow you to achieve smoothness when smoothing out the lines. After this procedure, you can dry the nail
- Now it's time for the second layer for each shade. Again, use a slightly damp brush to soften the lines.
IMPORTANT: Between stages of brushing your nail, wipe it with a napkin. Also soak a napkin in the clinser.
Flat brushes
If working with a flat brush seems difficult for you, but the brush application technique itself is attractive, you can try starting with a fan brush. The transitions, however, are not so smooth, but this method is quite easy:
- First, apply a base coat of your lightest shade. Dry it with a lamp
- Since the shading will not be very smooth, it is advisable to create a third transition shade yourself. You can make it on a piece of foil and apply it to the middle of the nail plate between the two main shades
- Moisten the brush in the clinser, then mark with it until you get the expected effect
- Dry the nail
- Repeat the procedure, creating a second layer of coating
Fan brushes
Aeropuffing
A tool for classic and stencil (from small designs - stars, snowflakes, leaves) gradient on nails with gel or shellac. Easy to use, but first you need to stock up on additional sponges. It's done like this:
- Pigments are applied to a metal (plastic) palette (sold in a set with the tool);
- dip a sponge there, remove excess material, apply to the surface;
- dried.
Method two
This method is more complex and involves mixing varnishes. The transition is more extended and smooth. But implementing a “gradient manicure” nail design in three or more colors, as in the video and photo, is much more difficult using this method. However, it looks impressive and unusual, and also seems much more complex and professional than other options. The video shows several options for color compatibility and manicure style for every taste.

Gradient step by step
- We repeat all the steps of the first method until the base dries;
- Pour varnishes of two colors into a small container and get a third color. It should turn out to be transitional between the two main ones;
- We apply varnishes to the palette in the correct order - from dark to light, through medium. We apply them tightly to each other without gaps between the colors;
- Mix the varnishes with a toothpick along two borders. Thus, we get a smooth gradient from dark to light on the palette;
- Dip a wide sponge into it;
- Transfer the imprint from the sponge to the nail;
- Dry the coating;
- We apply the top.
This method can also be used to create a gradient with gel polishes, as the master class shows in the video clip. It is not necessary to mix varnishes initially to obtain the third shade; you can make the transition in two tones. However, the transition to three colors looks smoother. Varnishes must be dense or applied to a single-color dense layer.
Sequins
Stretching is a type of beautiful ombre manicure. Here, foil film, chopped into pieces, is taken as the basis. They come in colored, transparent, silver, and gold. To create a smooth transition, they can be placed in any direction. Apply this way:
- Gel polish is applied to the prepared plate;
- the powder is poured closer to the cuticle;
- shade with a flat brush;
- After covering with top, keep it under a lamp.
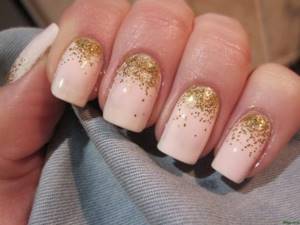
It should be noted that working with dry material is a troublesome task; you must handle it very carefully, otherwise you will have to clean the entire room. It is more convenient to buy enamel that already contains glitter, and use this product in a gradient on nails of any length.
Method one
Below we will describe how a gradient manicure is performed, how to make a smooth color transition, and also post a step-by-step photo explaining the entire process. So, according to the first method, manicure is performed in stages. Thus, it can be made in two or three or more colors.
Gradient step by step
- We prepare the nails in the standard way. We make a bath for our hands, moisturize them with cream and do a manicure in the usual way. Can be done either edged or unedged. Polish the plate a little;
- Apply the base for the varnish. Let's dry it. It is important to apply it in a thin layer;
- Apply one layer of color coating of the tone that will be located closer to the cuticle. The entire plate is covered with it. Dry it;
- Now let's move on to how to do a gradient manicure at home. Apply a second tone to the plate from the middle to the tip;
- Quickly, before it dries, use an applicator, sponge or sponge to blot the border between tones. First once, then a second time, but a little closer to the cuticle and with the clean side of the sponge. Dry the second color;
- If desired, you can apply a third color to the very tip of the nail in the same way;
- After the color coating has dried, apply the top coat and dry it;
- Using a cotton swab dipped in nail polish remover, remove excess coating around the nail. To avoid having to do this for too long, you can seal the pre-nail ridges with masking tape before starting the manicure.
Below is such a gradient, as well as how to make it on your nails; the instructional video is supplemented with several photos for your inspiration. Please note that to perform a manicure using this method, the varnishes must be thick. This is necessary so that the manicure can be “read” more clearly.
Gradient
A variation of manicure using this method is the application of a dense white background coating, which turns into a different rich color. However, not very dense colored varnishes can sometimes be used as an auxiliary color. This design looks almost weightless.
Below is a gradient shellac manicure and tips on how to do it, as well as video tutorials and photo results. The process differs only in that drying must take place under a lamp, and after each layer has dried, the sticky layer must be removed with a lint-free cloth. Some difficulties may arise due to the difference in the consistencies of simple varnish and shellac, but they will only be at the initial stage, and then you will get used to it. This video can be a great help in how to do a gradient manicure at home even if you are working with gel polish, since the process is completely similar.
[yandex2] [google2]
Ombre manicure with rubbing
You can see in the photo that metallic pigments remain in fashion in 2020. They are indispensable for home use; it’s so easy to decorate your hands with them without any special talent. Mirror looks good on dark, pearl on light.
We do it ourselves:
- we prepare, degrease to enhance the adhesion of the material to the surface;
- select a pigment, apply with an applicator or finger and rub in;
- excess is removed with a brush and covered with finish.
French ombre manicure
White gradient French on nails - stylish, interesting, sophisticated. It combines with classics, business style, and country. Any image chosen by a woman will benefit from such an element. Beginners in this technique will appreciate the simplicity and accessibility:
- the plate is prepared;
- a degreasing procedure is carried out;
- drop light varnish onto the lower part and stretch it with a brush until a smooth transition is achieved;
- Apply beige gel to the upper area, gently pull down;
- cover with topcoat and dry.
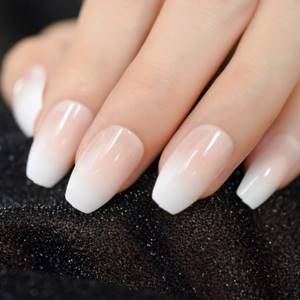
Application technique
There are interesting methods with which you can make a smooth color transition. You can choose some of them for yourself and use them successfully.
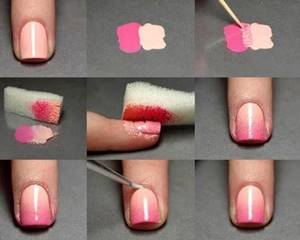
The Ombre effect can be achieved as follows:
- Using a sponge.
- Using a flat brush.
- With a fan brush.
- Using pigment.
It should be remembered that before applying a gradient with gel polish, you need to lubricate the skin of your hands with a moisturizer to make it easier to remove any droplets that accidentally fall on the skin. But do not overdo it, as oily cream that gets on the nail can cause the polish to chip.
Sand
Another name is velor. It looks very unusual, especially since a person without special skills can achieve this effect. To make an impression, it is enough to decorate one or two fingers. Let the rest be matte or glossy.
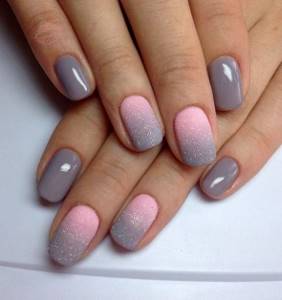
Standard procedures for ombre nails are performed:
- preparation for processing: cuticle removal, degreasing;
- apply a layer of gel polish, not allowing it to dry;
- spread velvet coating over the surface of the plate with a brush;
- use monochrome, smooth flow - as you like;
- remove excess;
- cover areas without sand with the finish.
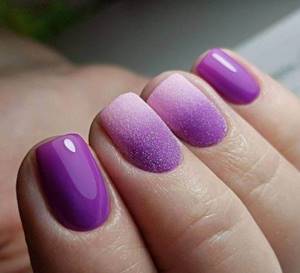
Gradient using a fan brush
A fan brush is used here. The result is not entirely soft, but most people like this simple and instant method:
- The basis for design should be a non-dark gradient color.
- After application , dry using a lamp.
- Mix 2 colors on thermal paper until mixed, paint the center of the nail. Get a neutral zone.
- Cover the edge with dark.
- Take a brush slightly soaked in the cleanser and apply it in different directions, without moving, until you acquire the required option.
- Dry under a lamp.
- Apply the 2nd coat using the same sequence. The main color should be applied directly to the top part so that the gradient does not overlap.
- Dry using a lamp.
