Every representative of the fair sex knows that a good manicure is an essential attribute of a finished look, reflecting individuality and a special style. French manicure is a classic option that will look great both at a business meeting and at a noisy party. Therefore, he has not yet lost his popularity.
However, the progress of nail design does not stand still, and skilled masters have come up with a new variety of classic manicure - reverse French.
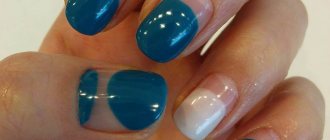
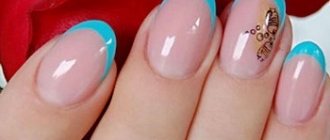
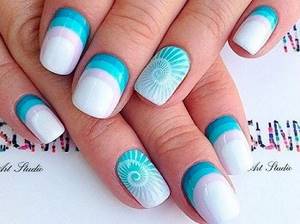
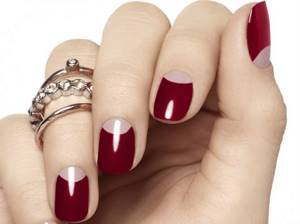
Drawing of a classic reverse French
Performing a classic anti-french is very simple, even for non-professionals. To do this, you will need standard equipment for a French manicure performed with gel:
- a set of tools, including a UV lamp;
- nail base;
- degreasing agent;
- gel polish in two shades.
Performing a manicure occurs in several stages:
- Preparation. At this stage, it is necessary to completely prepare the nails - give them the necessary shape, remove the cuticle, etc.
- Degreasing. Produced in a standard way using a special tool.
- Application of gel base. The entire length of the nail is covered to protect it from possible negative influences.
- Application of the main color. It also covers the entire length of the nail. More experienced masters try to make a small indentation from the base of the nail, if the design allows it. Usually, for a classic manicure, pastel colors are chosen - beige, ivory, etc. It is very important to know that a simple transparent varnish will create an unfinished image, so for this type of jacket it is recommended to choose a shade.
Types of reverse manicure
The reverse French is often confused with the moon design due to the presence of a “smile” at the base of the nail. However, unlike the lunula, it has the shape of a narrow arc and is located near the bed, rising upward in a narrow line .
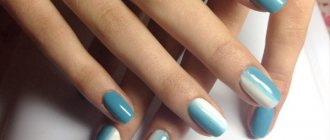
Beautiful reverse French
French manicure, on the contrary, unlike classic French manicure, is performed not in pastel, but in rich, bright colors. First, the lower part of the nail is highlighted in a similar or contrasting color, then the rest of the surface is covered with varnish. This design looks bold, youthful, and very stylish. Often craftsmen create anti-french for a wedding or special event, decorating it with painting, rhinestones and various designs.
The shades of varnishes for a special occasion are selected to match the color of the outfit and makeup, thinking through an organic image.
Two types of reverse manicure
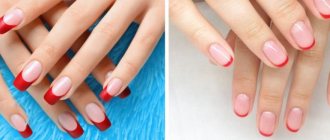
- Classical.
- Multilayer.
Classic involves applying only one or two layers of varnish , as a result of which the strip along the inner edge of the nail remains transparent or painted with one layer of a different color.
Multilayer anti-french
Multi-layer manicure is popular due to the alternation of several layers , different in coverage area. The first option is easier to implement and is accessible even to beginners at home. It is much more difficult to create multi-layers, however, if you have the tools and desire, you can also do it yourself.
The reverse French looks spectacular not only on oval or almond-shaped nails, but also on square nails, attracting attention with its strict lines and transitions. It is also used in pedicures, especially in the summer, when it is possible to show off well-groomed toenails.
All these variations should be selected taking into account your own style, paying special attention to the combination of colors and decorative elements.
Drawing a smile
Done in a way convenient for you. There are two possible options - painting with a thin brush or using special strips for a French manicure.
The second option is a simpler method. These strips have a self-adhesive layer, which allows them not to move off the surface of the nail while applying varnish. They should be removed immediately after application and before drying.
The first option is suitable for you if you already have experience painting your nails with a brush. It is the most difficult, but it opens up new opportunities - extending the “smile” along the edges along the nail. When using it, it is best to choose a material for work that does not have quick-drying properties, so that it remains possible to correct deficiencies.
Tools for creating anti-french
You can perform a reverse manicure with either regular or gel polish. In the second case, you will need much more equipment, so it is advisable to have at home:
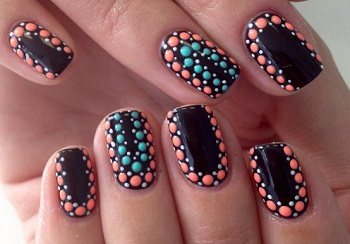
An original version of the reverse French, to perform it you will need a dots
- a set of manicure tools for processing cuticles and polishing nails;
- transparent base for varnish;
- means for removing polish residues and degreasing the nail plate;
- colored gel polish or simple polish of at least two shades;
- thin brush (you can buy special strips - stencils for French paint );
- fixative for better color retention;
- various devices, decorations (foil, self-adhesive strips, rhinestones).
For the first time, it is recommended to do a classic two-color anti-french to test your skills and gain some experience in drawing a smooth line.
Tips and tricks for beginners
To make the reverse French look fashionable and stylish, you need to have some experience in its implementation. For beginners, it’s better to start with the classic version using sticky strips. Techniques with foil, brush, and decorative rhinestones should be used if you already have certain skills.
Recommendations for applying varnish
- The line along the edge of the nails should be clear and neat;
- when using gel polishes, dry each thin layer;
- the shape of the smile can be oval, triangular or even curly if desired;
- the dark contour cannot be applied with strokes, otherwise it will be uneven;
- You can use white or pink as a base for reverse French;
- For the convenience of drawing lines, it is customary to stick sticker strips.
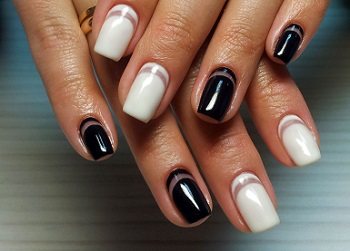
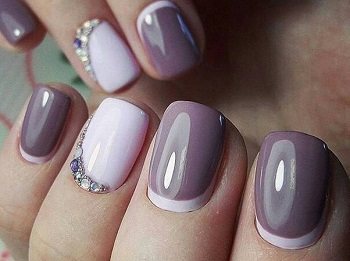
The original version of the French on the contrary
Tips for color combinations
- It is better to make the “smile” light, painting the rest of the surface with a bright color;
- rich shades of red gel polish are usually combined with golden, black or white smiles;
- pastel colors do not go out of their fashion: pink, milky, peach, complemented by juicy wine tints;
- The combination of orange varnish with blue, pink with blue, burgundy with black looks bold;
- for summer, combinations such as coral + malachite, mint + light pink, milk + coffee tones are suitable;
- Mixing shades such as blue + silver, gray + pink, white + purple is considered fashionable;
- black color can be combined with any other color and looks impressive in a matte version.
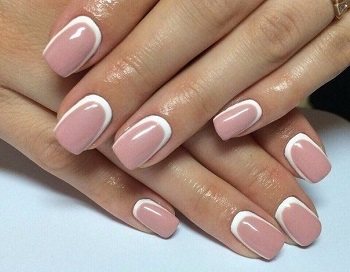
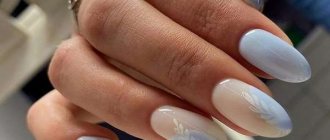
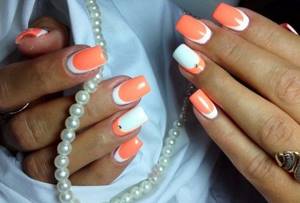
Classic version of reverse French
By choosing a reverse jacket, any fashionista will not only be able to feel stylish and elegant, but will also be able to easily do it herself at home without spending much time and money.
More interesting articles:
Design
Reverse French
The popularity of the reverse French, as in photos and videos, has not decreased at all for several years, despite the emergence of many new trends. Moreover, it combines quite well with them. For example, a reverse French manicure, as in the photo, will look great if you do it on one or several nails, highlight it with a different color from the main one, or swap the colors of the base and top.
A beautiful and original solution would also be to use a color gradient or a simple geometric pattern, rhinestones or nail applications in combination with anti-french, as in the photo. In the end, it is not at all necessary to limit yourself to only two colors in this type of nail art, because in fact there are no restrictions in it.
Depending on the selection of colors, it can be made casual, festive, luxurious, modest, or strict. For work, for relaxation, for celebration. It’s easy to choose a combination of colors and details according to the season, or for a specific occasion, and most importantly, it’s not difficult to bring it all into reality. Show a little imagination and you will get a bright and unusual design that suits your image.
Peculiarities
Painting the hole in a reverse French design can be done in different forms. The most common are:
- Crescent shape.
- Triangle.
- In the form of a rhombus.

To get the perfect desired result, you can use ready-made templates that are sold in specialized stores. If desired, you can make the templates yourself by cutting out the desired blank from tape or fabric.
When choosing a reverse French design, you should remember that the color of the gel polish, the shape of the hole and the texture of the compositions used are important in this matter. If you do a reverse French polish with gel polish without thinking through the details, the result may be disappointing.

Application
The technology for performing this design is presented in the video, it is not at all complicated, you just need to prepare all the necessary materials in advance and decide what colors your manicure will be. For a design in the reverse French style, as seen in the video, you will need: a base varnish, at least two colored varnishes and the so-called top coat, that is, the final coating. It can be done quite quickly.
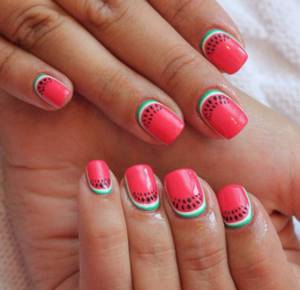
French style Watermelon
First, apply a base coat to the nail plate and let it dry. Then you can apply the first layer of decorative varnish. Cover the entire nail plate with it and let it dry again.
Applying the next coat of varnish in a different shade or in contrast to the base color will require patience and a steady hand. You need to apply it, stepping back a few millimeters from the edge of the cuticle and the sides of the nail plate. Carefully paint over the area, trying to outline it so that the top decorative layer follows the natural (or manicured) shape of the nail. In this case, the effect of a “grown” nail is achieved with a varnish of a different color peeking through from under the top layer. If necessary, each shade of decorative varnish can be applied in several layers - two or three, to achieve the desired color density.
For those who are quite confident in their abilities, there is a more professional way to make this design, when different colors are painted sequentially with a thin brush. But this method requires a certain level of skill, so at first it is better to use the simpler method described above. Don't forget to let each layer dry before applying the next one, this is an important condition for a beautiful and neat manicure.
Finish your manicure with a top coat and let it dry thoroughly. Your reverse French style manicure, as in the photo, is ready!
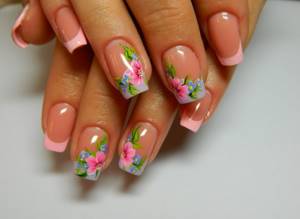
French manicure with a pattern
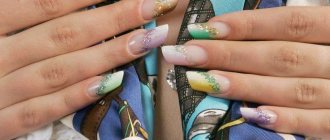
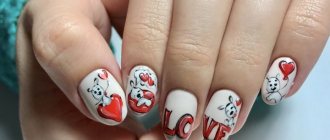
This trend occupies a special place because of its originality. Flowers on nails, such as roses, daisies or lilies, will be popular in 2018. It is better to apply cute flowers on a transparent background. A geometric jacket and a multi-color stripe that follows the line of a smile will remain fashionable. Young fashionistas can decorate their nails next year in a marine theme or with animal faces, for example, put Mickey Mouse on the edge of the nail. Ethnic designs and abstraction will also look stylish next year.
Nail length
Another controversial issue. Girls often argue about how long they need to grow their nails to get a moon manicure. There is no consensus. Some are convinced that nails must be long, while others believe that a reverse French manicure will look just as good on short ones. Much depends on the chosen design.

Not all girls manage to grow the desired length due to increased fragility. On short nails, the reverse French will last longer. So why deny yourself a beautiful coating?