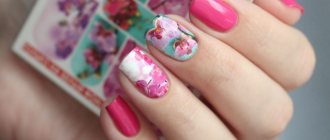
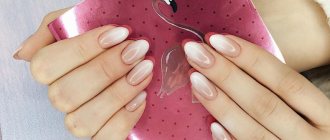
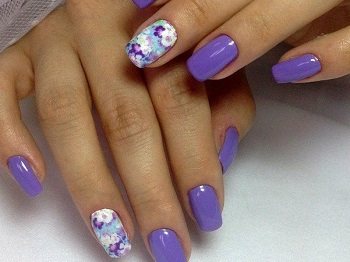
What is thermal film for nails
Manicure with thermal film
This product first appeared in the United States as a replacement for hand-painted nails. Initially, it was less durable and was used as a disposable manicure material. With the development of new technologies in the nail industry, thermal film has changed and become much stronger. Now it holds firm on natural and extended nails .
Currently, film is produced by a wide range of manufacturers, and the most popular are Omnia, NCLA and Minx. Thermal films of the latter have gained such popularity that their name has become a household name. The principle of minx manicure is that the thermal film becomes elastic under the influence of hot air, easily lies on the nail, freely repeating its shape.
Advantages and disadvantages of minx manicure
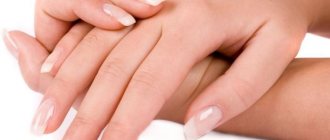
Manicure using thermal film has a number of advantages:
Manicure with thermal film has many advantages
- Thermal film does not cause an allergic reaction and does not have an unpleasant odor.
- Withstands any mechanical damage and retains the effect for several weeks.
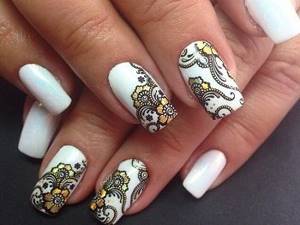
- A huge palette of thermal film designs makes it possible to create a manicure to suit every taste.
- The film is easily removed from nails and does not require the use of chemicals.
- The technology allows you to do a manicure no more than once every 3 weeks . Now you don’t need to paint your nails regularly and be afraid of damaging the polish.
The minx manicure has no disadvantages, except perhaps the high price for the work of a master in a nail salon and the need for some skill when applying at home.
Which fingers to stick stickers on (design)
When choosing a design for a manicure, pay attention to the length of the nail plates. Design selection principles:
- Don't sculpt too much.
- If the nail plane is long, then you can decorate it at the base on all fingers.
- If your nails are short, then you shouldn’t pile them up; it’s enough to apply the design on several fingers, for example, the middle and ring fingers, or on one ring finger.
- If you plan to use rhinestones and sparkles, you shouldn’t overdo it, as it will be cluttered and the feeling of superiority will disappear. It is enough to decorate one ring finger.
Methods for creating film manicure
A fashionable manicure can be done in a beauty salon or at home. Let's take a closer look at each option.
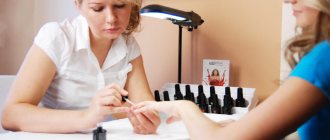
Salon procedure
The master does a regular manicure, removes the cuticle and gives the nail plate the desired shape. After this, he heats the thermal film under a special lamp, then applies the material to the nails. Excess parts of the film are carefully removed from the plate with nail scissors. The entire procedure takes approximately half an hour to complete.
Manicure with thermal film at home
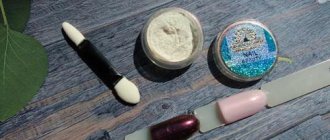
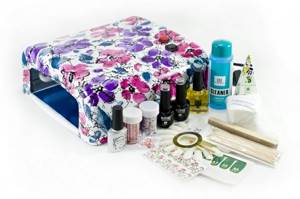
You can easily create a fashionable manicure at home. To do this, you need to stock up on the following tools and resources:
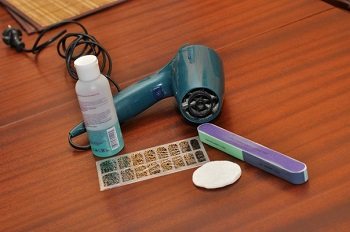
Tools and materials for applying thermal film to nails
- Nail file.
- Orange stick for removing cuticles.
- Nail scissors.
- Ultraviolet lamp for heating thermal film or hair dryer.
- Thermal film.
- Tweezers.
- Base coat.
- Nail degreaser.
- Finish coating.
Step-by-step instructions for home manicure with film consists of the following steps:
- Prepare your nails for a manicure: take a relaxing bath and carefully remove the cuticle. Poor quality nail treatment leads to the thermal film quickly peeling off the nail plate.
- Give the nail the desired shape .
- We adjust the thermal stickers to the size of the nail plate . If necessary, trim the thermal film with scissors.
- Degrease the nail plate and apply a base coat on top.
- Immediately peel the film off the paper using an orange stick. Carefully take the material with tweezers and apply it to the nail.
- We press the thermal adhesive onto the plate, paying special attention to the area near the cuticle. Immediately place your hands under an ultraviolet lamp for a few seconds, or you can direct a stream of hot air from a hairdryer onto your nails. When heated, the sticker will become soft and can be easily placed on the nail or moved in the desired direction.
- Gently smooth the surface with an orange stick. It is important to get rid of air bubbles that have formed under the film.
- If the edges of the sticker extend beyond the border of the nail, trim them using a nail file.
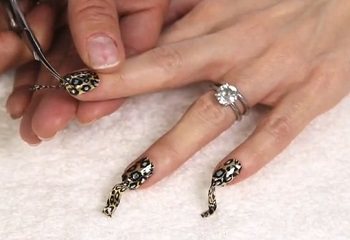
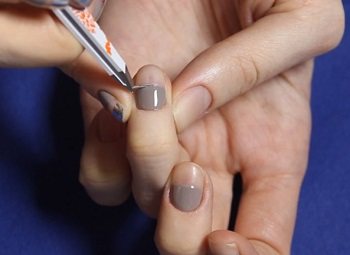
The process of manicure of nails with thermal film
At the end of the manicure, it is recommended to apply a finishing coat to the surface of the nails; thanks to it, the film will last up to 3 weeks.
You can do a manicure according to the proposed scheme, or you can apply thermal film to your nails, preheating it as shown in the video tutorial:
How to apply foil to gel polish?
Required:
- lamp for drying gel;
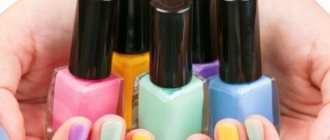
- several shades of varnish;
- top and base coatings;
- foil of the desired type;
- spatula and cuticle cutter;
- buff for polishing;
- glue;
- an orange stick, with which the film will be distributed over the surface.
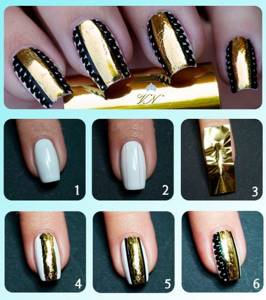
How to print foil on gel polish:
- Remove the cuticle.
- Apply degreasing agent and wipe it thoroughly.
- Apply primer and wait until it dries completely.
- Apply base coat, seal tip, and place in lamp. Dry for 2-3 minutes.
- Coat the plate with varnish in several layers, drying each layer for at least 2 minutes.
- Remove the sticky layer using a special product and lint-free wipes.
- Cover the nail plate with glue and wait 10-15 seconds for it to dry. Once it dries, it will become transparent and will not stand out from the overall design.
- Place the foil on the nail plate with the matte side and wait for the adhesive base to dry completely. Use a pusher to smooth out the material and press it so that the design transfers better.
- Remove the film with a sharp movement. If everything is done correctly, the drawing will be clear.
- Apply top coat to the nail plate, sealing the end. Dry in a lamp for 3 minutes.
- Apply special oil to the cuticle and rub it in with massage movements.
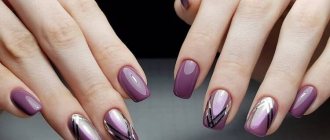
Manicure ideas with thermal film
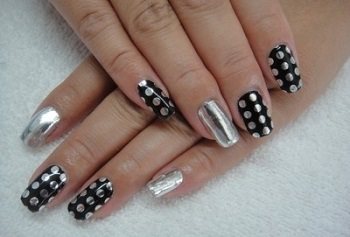
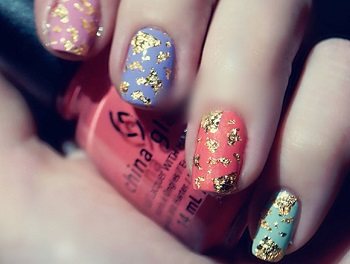
Manicure for a glamorous party
For such an event you need to use thermal film with glitter. It usually resembles gold or silver foil. This material will shimmer elegantly at a party and create a bright effect. You can use this film only on individual nails.
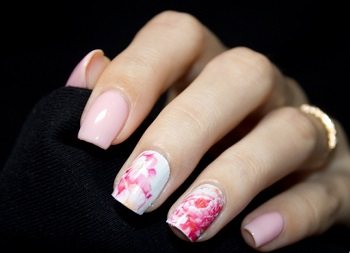
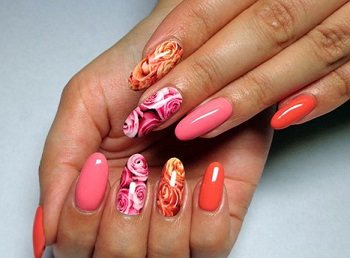
Vacation idea
If you are going on a beach holiday, then for nail design you need to use material with various bright prints: yellow, red, pink. A great idea would be to purchase thermal film with beach designs. For example, this could be a wave pattern in rich blue, bright tropical flowers or images of palm trees.
French manicure
Using thermal film you can create an original French manicure. To do this, you need to apply a “smile” of thermal film to the tip of the nail plate.

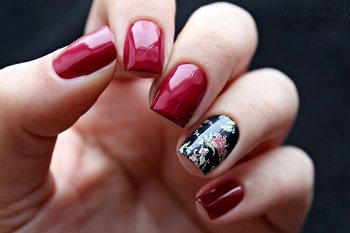
Manicure with stones
To do this, you need to choose a thermal film with a “casting” effect; with its help you can create precious stones on your nails.
Craquelure
There is a special nail polish that allows you to make a marble manicure even easier than described above. It is called “Crackelure” or varnish with a cracking effect. To make an effective design using it, you will need:
- The base varnish is glossy.
- Craquelure varnish.
- Base and fixer.
After preliminary preparation, the nails are covered with a manicure base. One coat is enough and dries in just a few seconds. The base polish is applied to the entire nail plate. Here, too, one layer is enough, since it will still be covered on top. Therefore, the color will not “strip”.
When the base is dry, a varnish with a craquelure effect is applied to it. It will crack in the gloss, creating a fancy ornament and pattern. This is how you get a marble manicure, when your nails look like pieces of real stone.

The finished design is covered with a fixative. Sometimes a matte fixative is also used to give the manicure a velvety feel.
The color scheme can be anything: from natural to bright and rich shades. For example, a combination of green and pink colors looks impressive. The manicure turns out bright and original.
Useful tips
- After a manicure with thermal film, you need to avoid contact with hot water . Otherwise, you can ruin the composition of the material, and the manicure will only last a couple of days.
- If during wearing the film begins to peel off, you can try to restore it. Just warm up your nails for a couple of seconds with a hairdryer and press the film onto the plate again. After this method, your manicure will be as good as new.
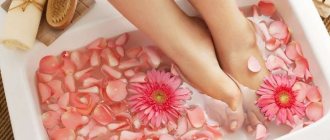
- Removing the film from nails will not be particularly difficult. You need to take some hot water into a bowl and dip your nails in it for 1-2 minutes. The film will come away from the plates on its own without the use of force.
- Always apply a topcoat to your nails . It will provide the film with additional protection. Otherwise, the thermal film will only last a week, especially if you use chemical cleaning products or frequently come into contact with hot water.
- not recommended to do this manicure before going to the sauna or solarium. Under the influence of temperature, the film will begin to peel off and become deformed; it will no longer be possible to restore such a manicure.
- Before doing the procedure at home, we recommend visiting a salon specialist. Then you can carefully follow the process of creating a minx manicure, learn how to use film and gain visual experience.
- Combine several colors of thermal film to create original and fashionable solutions.
Removing thermal film from nails is not difficult
Before performing a manicure yourself, we recommend visiting a specialist.
Manicure using thermal film is simple, and the benefits of its use are obvious. Having mastered the technique of manicure with a minx coating, you can easily create it at home. Experiment and create bright masterpieces using thermal film for nails.
More interesting articles:
PVA glue for manicure around the nail as a liquid tape
When performing stamping, water manicure and other nail art options, you can use PVA glue for manicure around the nail.
It would seem that this is a completely irrelevant substance in this case. However, experienced craftsmen will tell you that the properties that such an adhesive composition has are very beneficial to use to protect the skin from the risk of becoming contaminated with residues of varnish, gel polish or gel. We recommend: How to paint your nails according to Feng Shui rules
PVA glue does not need to be prepared or mixed with other components; just open the tube cap and squeeze the product onto the skin. Gently spread it over the skin with a thin brush, not forgetting to check the space close to the nail. Next, the composition should be allowed to dry thoroughly; when this happens, a thin but very reliable protective film will remain on the skin, which will not allow decorative varnish, gel polish or gel to stain the skin around the nail and thereby ruin the appearance of the entire manicure.
After the glue has dried, you can create a nail art design. And when it is completed, you only need to remove the remaining glue from the surface of the skin. This is not difficult at all, just use tweezers; with this tool, the adhesive film is removed from the skin.