The sliders should be glued onto the gel polish using 1 or 2 layers of flower bed and an undried base as a base, and covered with a top coat. The sticker itself is soaked by placing it on a napkin well moistened with water. Then the base is shifted, and the film with the pattern is placed on the nail plate and carefully smoothed.
This is how all types of decor are fixed: transparent, metallized, with image fragments, on the entire nail. The latter need to be cut to the size of the plate, and after gluing, you still need to remove the excess with a file and a damp cloth. It is important to carefully smooth out 3D sliders and finally cover only the convex areas with topcoat. All types of decor are available from BPW Style, Vogue Nails, Freedecor and many others.
How to glue sliders onto gel polish: tools and materials
In order to glue sliders onto gel polish, you must have:
- primer, degreaser, base, flower bed, top;
- a set for performing hygienic manicure (file, buff, pusher, cuticle nippers, orange sticks);
- lamp for drying the coating;
- tweezers, silicone brush;
- lint-free wipes;
- some water.
Nail preparation should be carried out as usual, that is, a hygienic manicure is required.
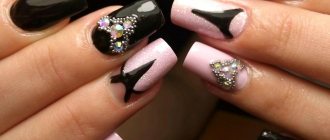
Volumetric 3D
It is important to secure the volumetric 3D decor so that it does not lose its texture and the design is preserved:
- The nails are prepared properly, that is, they are filed, the excess part of the cuticle is removed, the surfaces of the plates are treated with a buff, and wiped with a degreaser.
- For more reliable adhesion of the material, a primer is used.
- The next layer is the base; it is applied first thinly, rubbing in, then in drops and leveling.
- The coating is dried in a lamp, if necessary, the sticky layer is removed.
- Apply gel polish, bringing it as close as possible to the cuticle using a thin brush, and polymerize.
- A second layer of the flower bed is also necessary for the density of the shade and the absence of bald spots; this is also dried.
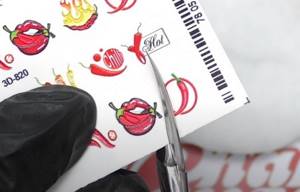
- Cut out the 3D slider and place it on a damp cloth with the pattern facing up.
- Apply a thin layer of rubber base to the nail, do not dry it.
- The soaked slider is removed from the substrate, moving the part with the pattern.

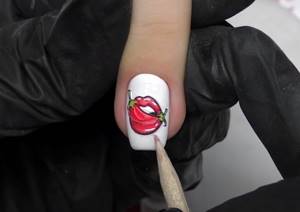
- It is applied to the nail plate.
- You can wait a little so that the film dries a little and does not slip on the nail.
- Smooth out the decor with an orange stick, very carefully, but so that there are no wrinkles.
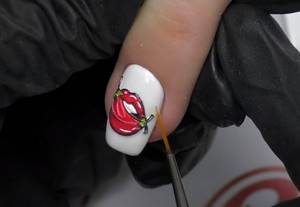
- Place a drop of base on the palette, take it with a thin brush and brush the edges of the slider around the entire perimeter.
- The hand should be placed in a drying lamp.
- The last layer is the finish, which is applied with a thin brush to the surface of the nail not covered by the sticker, as well as to the most convex parts of the slider.
- The coating must be dried again in the lamp.
Correctly step by step for the entire nail
Step-by-step instructions will help you correctly glue sliders onto the entire nail:
- Nails are prepared as usual.
- They are covered with a base and a flower bed, both layers are polymerized in turn.
- The base product must be applied again in a thin layer to the nail on which the decor will be attached.
- The slider is cut approximately to the size of the nail plate.
- It must be placed on a napkin moistened with water.
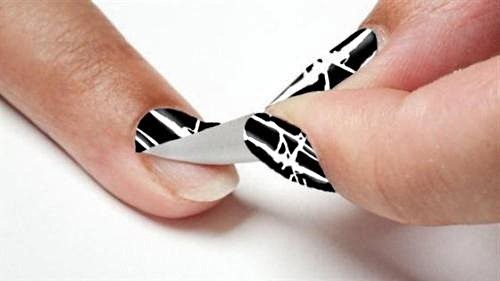
- When the decor backing gets wet, remove it with a sliding motion.
- The slider is placed on the nail.
- Use a pusher to press down its edges so that they are in close contact with the nail.
- Apply a thin layer of primer along the perimeter of the decor, then apply it over the entire sticker.
- The end of the nail is treated with a nail file.
- The plate is coated with a finishing agent and the hand is sent into the lamp.
- Using a wipe moistened with a degreaser, remove excess slider from the skin.
Watch the video on how to attach 3D sliders:
Gel polish on the nail on which the decor is glued can be applied in 1 layer.
How to apply if the base is transparent
Transparent sliders should be applied in much the same way as any other, but there are some nuances:
- they should be cut out slightly from the outline of the drawing and following its lines;
- gel polish on the nail on which the sticker will be attached is coated in 2 layers;
- it should be chosen in a light shade, otherwise the picture will not be visible unless it is white;
- the slider for soaking is also placed on a napkin moistened with water, but moved and removed from the substrate, grasping the edge with tweezers;
- It is best to smooth out a thin film with a silicone brush so that it does not tear;
- The decor is fixed with a base, polymerized, and then the top layer is applied - top.
Metallized
The principle of using metallized sliders is exactly the same as all the others, but they should be especially carefully smoothed. Otherwise, the color and shine will be erased from the surface, and you will have to redo the design.
However, it is important that these types of sliders are well smoothed. The metallic glow makes all errors in the form of wrinkles and folds especially noticeable and sloppy.
Types and benefits
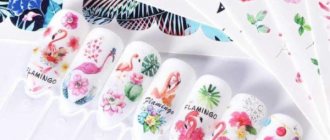
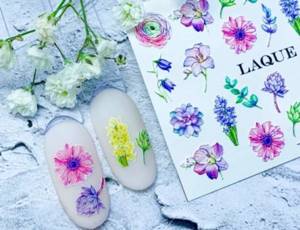
Sliders are a thin film with an image applied to it for nail design. Allows you to create a bright nail design even without artistic skills and with minimal time investment.
Types of stickers:
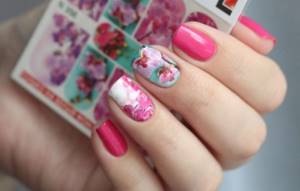
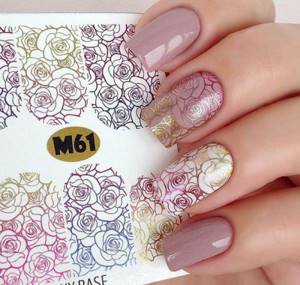
- with a dense pattern covering the entire nail or photo design. They are a dense pattern covering the entire surface of the nail plate. It is recommended to use a white background for the background of such pictures;
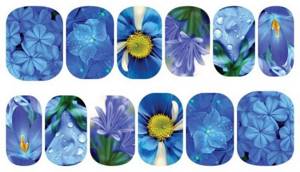
- with a transparent pattern on the entire nail. Although the pattern covers the entire nail plate, it still requires a background color, as it is translucent;
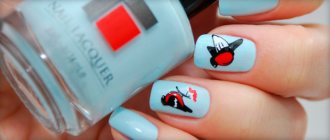
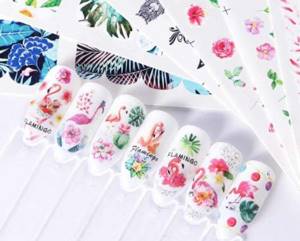
- with single fragments. Slider with individual pictures - text, flower, heart on a transparent background.
In addition to the varieties according to the type of pattern, there are 2 more types:
- flat – lie tightly on the nail, without forming relief or bulges;
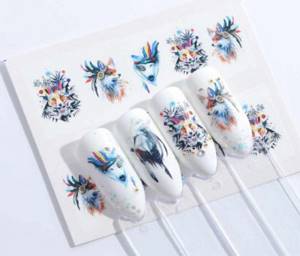
- 3D – three-dimensional drawings with pronounced relief.
All varieties are placed on a cardboard backing, and they can only be separated by wetting the desired fragment with warm water. Below we will look at step-by-step instructions on how to create a manicure with a slider design.
Advantages:
- ease of use . Even a beginner can use ready-made drawings - the main thing is to carefully separate the image from the base and transfer it to the nail;
- speed . Transferring the finished drawing is much faster than drawing it with a brush;
- big choice . The range of sliders is so wide that it forever solves the problem of inventing a design. All that remains is to choose an image from hundreds of submitted ones.
Flaws:
- due to the characteristics of the material, the film with the image often forms folds on the nails , since it cannot repeat the convex shape of the nail plate;
- the thin film breaks . The slightest carelessness or sudden movement and the film breaks. For this reason, it is important to choose a trusted manufacturer who cares about quality. To avoid making a mistake with your choice, see the selection at the end of the article.
Overview of stamping technology
Difference from classic stickers
- Lack of adhesive base . The stickers have an adhesive backing that allows you to place the image on the nail without first soaking it;
- Adherence to the nail . The stickers have a dense base, which can wrinkle and create folds when transferred. For sliders, the film is very thin and rarely leaves folds that spoil the design.
A subjective, but still significant difference is the assortment. Classic adhesive stickers are becoming less and less common on sale, and the range of sliders is constantly growing.
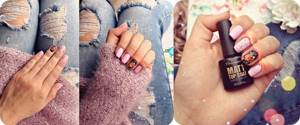
How to glue sliders on nails to create fashionable designs
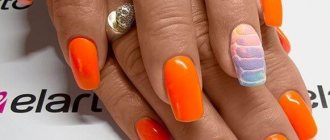
To get a fashionable design, many women prefer to glue sliders on their nails in small quantities - 1-2 plates on each hand. But now minimalist pictures, inscriptions, stripes, broken lines are very common, they can be used for all nails. In short, there are a lot of options for current manicure:
- Nails are covered with a white camouflage base in one color. Sliders with portraits made with black lines are attached to the middle, ring and little fingers.
- Three nails are covered with translucent beige gel polish, two with snow-white. Abstract spots are painted on all of them, on the first - in gold, on the rest - in pink. Sliders in the form of branches made with thin black lines are glued to each nail.
- Perform a colored jacket, making the smile line angular with yellow and red gel polishes. A minimalist picture is pasted onto each nail. The images should fit in the center and be different.
- Cover the plates of the index and middle fingers with a camouflage base. Stickers in the shape of fern leaves are attached in the center. And around them you need to print blue transfer foil. The remaining nails are covered with gel polish of the same shade.
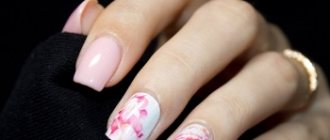
- Perform a white-pink gradient, using very delicate shades so that the transition is barely noticeable. And stickers of bright colors or other designs, but also noticeable, are attached to the nails of the ring and middle fingers. They should take up about a third of the plate.
- They combine French manicure, moon manicure and negative space in one design. The “smile” line on each finger needs to be made special - traditional, square, angular, using bright pink and white colors. The holes are also highlighted with both shades, making wide and narrow strokes. The sliders should be glued to 2 nails on the hand so that they are in the negative space.
- Blue gel polish is used for the little finger and thumb, and yellow for the index finger. For the middle and nameless, the main shade is milky. But on the first one, a vertical yellow line is drawn a little further than the middle. And on the second there are 2 stripes close to each other (also yellow and blue). Sliders with drawings in black are fixed on the middle and ring fingers.
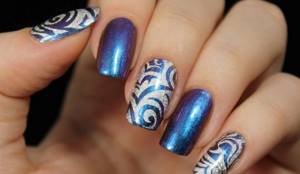
- Two fingernails are painted white, the rest are painted with blue gel polish. On the first ones, 2 different sliders, made in red tones, are attached. They should be transparent and cover the entire plate. A slider with a white pattern is glued onto one of the blue-painted nails. The rest in the same shade are covered with a glitter top.
Watch the video on how to make a summer design with 3D sliders:
How to make a continuous coating
Nail sliders, the design of which is that they are applied to the entire surface of the nails, have some features:
- the film covers the entire surface of the nail;
- it fits tightly to the nail, and the ornament extends to the entire nail plate.
A continuous film stays on the nail longer than one that occupies only part of it, made using the applique technique. After the film has dried, a fixing layer is applied.
How to make sliders
You can make sliders using stamping, regular varnish, several gel varnishes, plastic film, these are well-known and easy methods. Decor made from polymer clay will be even more interesting:
- Pieces of material of different colors are rolled into “sausages,” each slightly thicker than the refill of a ballpoint pen.
- They are cut into small slices.
- Each particle is first rolled into a ball and then turned into a drop.
- These parts are flattened a little so that they become flatter, but the volume is maintained.
- In the upper, widest part of the drops, a toothpick is used to make a notch so that each one becomes a heart.
- You can use your finger to correct uneven lines.
- The hearts are transferred to a sheet of paper using a dry knife blade.
- They are baked at 110 degrees for 25 minutes.
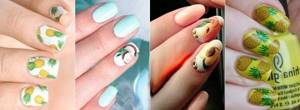
From the same droplets, but in different shades, you can make voluminous flower petals, leaves, fruit slices, and berries. For those who don't want to spend a lot of time, there are fimo sticks. They can be cut thinly and glued to your nails. Decor comes in the form of ready-made lemon and orange slices, slices of watermelon, berries, etc.
It is better to attach this type of sliders not to the base, but to glue for rhinestones. If you still take the base product, it should be thick.
Combining slider design with other types of design solutions
Needless to say, with the help of sliders you can create a design that suits any wardrobe.
- Business style does not tolerate numerous curls and intricate nail designs. A laconic monochrome design can be emphasized with small fragments of lace or small patterns.

- For a fashionable party, there are stickers with a holographic coating. They, like chameleons, they take on any color.
- It is very convenient to create any thematic design with sliders. Marine, children's, funny, dedicated to the holidays or simply with portraits of your favorite characters. Several clear and expressive pictures enough to create a complete image.
- Flowers, ornaments, butterflies – choose the color and size of the pictures to suit your mood and wardrobe. Lovely funny cartoon characters will help girls feel like little princesses at any event.
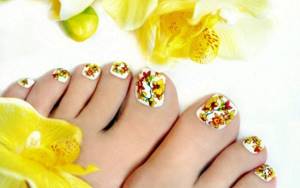
- The number of sliders on one substrate allows you to also make pedicure in the same style.
How often do you use slider designs in your manicure? What patterns do you prefer, or maybe you have your own favorites? Write comments, we will be grateful to you.
How to use sliders without making mistakes
To use sliders, it is important to consider the following points:
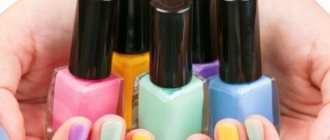
- You need to choose quality material. Cheap stickers are usually more difficult to apply, this applies to other products used.
- You should not dip the entire picture into water. If its outer side gets wet, it will be difficult to smooth out the decor on the nail, and the film will easily tear.
- The sticky layer must be removed from the dried surface on which the slider is attached. Otherwise, the decor will not be able to be smoothed out well, and it will fall off faster.
- There should be no air bubbles under the slider. This is not only unsightly, but will also interfere with long-term wearing of manicure.
- The slider should be smoothed with an orange stick or a silicone “hoof” or a brush. If this is uncomfortable, you can use your fingers, but you should wear gloves on your hands so as not to leave sweat and oil on the surface.
- The decor on top must be fixed with a top. The product will hold it securely on the nail.
Work on mistakes

- The slider was too small.
Gently stretch the image, which has not yet dried and is not fixed, from the center to the side rollers. The soft whip will “corrode” a little and cover the defects. Of course, this technique will help if you are 1-2 mm short. If the error is larger, it is better to transfer the image again.
- The image has gone beyond the nail.
To remove the protruding part of the sticker, soak a flat brush in nail polish remover and carefully remove it as described in the instructions above. Do this before you apply the topcoat so that the edges of the picture are eventually sealed;
- The film with the picture does not come off the substrate.
The first thing you need to do is make sure that you have a slider design in front of you. Look at the set in the light - the sliders do not have any embossing near the pictures - the images are printed with a continuous film. Perhaps, instead of a slider, you have a set of ordinary stickers - you just need to separate them from the backing and stick them on the nail.
To make the slider come off, place it with the paper side on a wet cotton pad. After the paper softens a little, the slider can be easily removed.
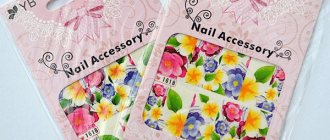
Companies producing decor
Interesting sliders can be found from many little-known manufacturers, but the following are distinguished by great variety and good quality:
- BPW Style. The company produces decor that is durable. She has stickers in the form of geometry on the entire nail, with animals, fruits, flowers, fragmentary images and 3D.
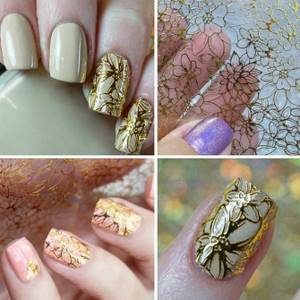
- Freedecor. Here the choice of designs is even richer - more than 500 types. In addition to those from the previous manufacturer, there are sliders that imitate gold and silver plating and airbrushing. The colors of the designs are mostly soft, which is fashionable in the 2022 season.
- Vogue Nails. The company has a wide variety of emoticons, current abstract and classic clear drawings, and inscriptions. Film decor from Vogue Nails is made of ultra-thin but very durable material, which allows you to use it comfortably.
Modern sliders often look like hand-painted designs. And using them is easier and faster than making drawings. Therefore, decor is in great demand. But the manicure will be perfect only if you learn how to carefully and reliably stick film pictures or inscriptions.
When building up
In this situation, there is also no problem in applying this design to your nails:
- Before gluing, the extended surface is wiped with a pusher.
- The sticker soaked in water is applied to the surface of the nail with tweezers. Here it is very important to immediately accurately apply the sticker to the nail, since in this coating option it can no longer be moved.
- After application, the slider is secured with a fixing varnish.
When applying gel extensions, be sure to dry your nails with a lamp and only then start gluing the sticker.
Children's manicure
For little girls, stickers are produced with images of their favorite characters from cartoons or fairy tales. A series of children's sliders are designed specifically to fit children's nails.
Sliders will not harm a child’s nails if aggressive gels and bases are not used. All you need to do is make a pastel background and paste the selected picture. Every girl will love her new look.
Children attending kindergarten are recommended to use water-based drawings, without using a base or gel fixative.