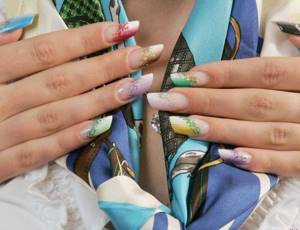
Surely you often look at pictures of manicures on the Internet and try on designs for your nails. Do you think that you will never be able to make one yourself, but that a craftsman will cost you as much as an airplane wing? We asked the experts, and now we know exactly how to do a French manicure yourself. Read the article and put your knowledge into practice.
In this article we will tell you:
- Types of French
- How to make French polish?
- How to make French gel polish?
- How to make a French jacket with a stencil?
- How to make a French jacket without a stencil?
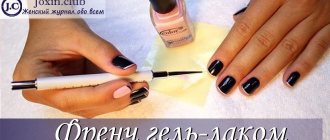
How to make French gel polish?
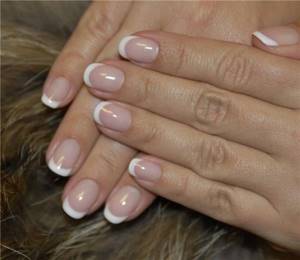
French manicure with gel polish is the optimal combination of durability and speed of manicure.
Making French gel polish is not as difficult as it might seem at first glance. The main thing is to follow the instructions and do not forget about the rule: base + top. Otherwise, the coating will begin to chip off within 3 days.
You will need:
1.top and base; 2.gel polish peach and white; 3.orange stick; 4.dehydrator; 5.primer; 6.files and buff; 7.stencils; 8.UV lamp.
How to remove old coating with a special liquid for gel polish?
- Push back the cuticle with a wooden orange stick.
- Use a 240 grit file to file the free edge of the nail and give it an oval or square shape. The weaker and thinner the nails, the higher the abrasiveness of the file. For natural nails 180-240, for artificial nails 100-180 grit.
- Degrease your nails with a dehydrator. This will extend the life of the jacket.
- Apply primer to improve the adhesion of the gel polish to the nail.
- Don't forget about the base. Dry the coating in a UV lamp for 2 minutes.
- Apply the main color of the gel polish (camouflage) and do not forget to dry it in a UV lamp for 2 minutes.
- Place the stencil on each nail one at a time, draw a smile line and dry.
- Apply the top coat in a thin layer and do not forget to dry.
- Remove the sticky layer from your nails.
Finally, apply a special oil to the cuticle to soften and nourish. French manicure with gel polish is ready!
If you don't understand something from the instructions, watch the video to do a French manicure with gel polish:
Shellac kit
The only downside to this type of opening is that it requires some special tools and materials. They are not cheap, however, by purchasing them once, you can systematically save on the services of nail technicians, since this equipment is often necessary in various types of procedures. The video at the end of this section will tell you how to make a French jacket with shellac and what materials you may need.
French manicure with shellac
- Ultraviolet lamp with a power of at least 36 watts. Shellac polymerizes under it, since it simply does not dry in air. Power below 18 watts is unacceptable, since shellac, as well as gel, etc., do not dry under it;
- Standard manicure set and necessary products. That is, everything that you usually use to prepare plates for coating;
- The degreaser can be replaced with acetone-containing nail polish remover or pharmaceutical napkins for injections soaked in ethyl alcohol;
- Primer is a special product that dries the plate and opens its scales. It acts as a primer, thanks to which the coating will last longer. Many masters neglect the stages of applying primer, but it can significantly extend the life of your manicure;
- Lint-free wipes for removing the sticky layer remaining after drying shellac. It is impossible to replace them, since cotton pads leave lint, just like paper napkins;
- Actually shellac. You will need three bottles - a transparent base, a fixative, white or another color for painting the free edge;
- Stencils for French manicure.
No special preparations are required for applying shellac. Make a hand bath with nourishing oils for the skin (for example, chamomile), the same as always before a manicure, and you’re ready to start. The training video below will tell you more about how to make French shellac and what materials are needed.
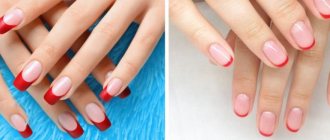
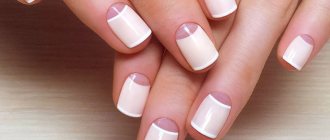
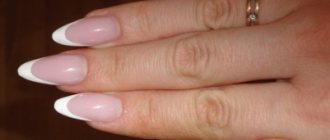
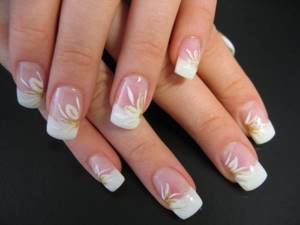
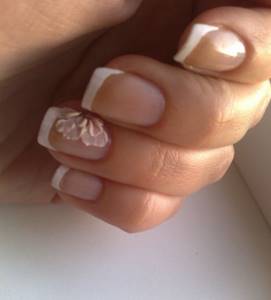
How to make a French jacket with a stencil?
If this is your first time making French stencils, then this is what you need! With their help, you can easily apply even the most intricate designs.
Stencils are not only semicircular for the classic French jacket, but also with lace, wavy and oblique patterns. They are made from paper, vinyl film and even metal or plastic.
Vinyl stencils are easy to use. They fit tightly to the plate of the nail and allow you to draw an even pattern.
How to make a French jacket with a stencil?
- After you have applied the base color to your nail, wait until the polish dries completely.
- Carefully peel off the stencil from the plate and stick it on the nail, stepping back a few millimeters from the edge of the nail.
- Press the stencil firmly with an orange stick.
- Using a brush, gently apply the polish to the tip of your nail and let it dry.
- Peel off the strips and apply topcoat.
French manicure with shellac
Shellac French
As mentioned above, Shellac French, the implementation of which is shown in the video, suits almost any style of clothing and any situation, and therefore there is often no need to change such a manicure. However, it quickly loses its attractive appearance and has to be remade often. But this task is far from easy and requires quite a lot of time. This is where shellac comes to the aid of fashionistas!
This unique composition combines the minimal harm of nail polish and the excellent characteristics of an extension gel. It stays on the nails for up to three weeks and strengthens them mechanically (that is, due to its own layer). They make the nails less likely to break, bend, and peel.
Exactly how long shellac will last on nails depends on many characteristics, such as the initial condition of the nails, compliance with manicure technology and mechanical wear. But this coating will never last less than a week. Proper use of this manicure involves the use of rubber gloves when cleaning, washing and washing dishes. This can significantly extend the life of your manicure. In addition, it is strongly recommended to wear gloves or mittens during the cold season, as sudden changes in temperature can cause the shellac to wear off quickly and cause bubbles to form.
Shellac lessons at home do not introduce many restrictions for those who want to use this coating, however, some precautions are worth considering. It is strictly forbidden to apply shellac to peeling nails, as well as to those affected by fungal diseases. Any traumatic damage to the plates should also be considered as a prohibiting factor. However, in rare cases, its application is possible even with such damage.
[yandex2] [google2]
How to make a French jacket without a stencil?
- Drawing a “smile” with a brush is a little more difficult. Start by preparing your nail.
- Correct the shape of the nail.
- Use a buff to remove any imperfections on your nails.
- Treat your nails with a dehydrator and primer.
- Paint your nail with your base color and let it dry.
Afterwards, you can move on to painting a “smile” with a thin, hard brush.
- Draw a horizontal line along the edge of the nail.
- Draw small lines on the side to give the design a curve.
- Draw a semicircle with your brush, connecting the top point of the line at the side edge and the center of the nail. Repeat this on the symmetrical side of the nail.
- Then paint over the “smile” line and let it dry.
- Cover the jacket with a French top.
Ready! Now draw “smiles” on other nails just as beautifully.
To prevent the drawing from being accidentally blurred, draw a “smile” on each finger in turn and dry it.
Have you learned how to make a stunning French coat so that your friends ask in unison for the contact details of the artist? Or do you still dream of learning? Then you have a direct path to the nail industry. But before that you need to complete the courses and get a certificate.
At the manicure school, you will study in detail and practice on models all stages of classic and French manicure, learn the secrets of perfect coverage and creating stylish nail designs.
Course duration is 1-2 weeks, 4 hours each . The average cost in Moscow and St. Petersburg is from 15,000 rubles . In the regions from 5,000 rubles .
Models, varnishes and materials for design will be provided to you by the school at the time of training. But sometimes you have to buy something yourself. Therefore, carefully read the rules and curriculum at the school. It is possible that there is no “all inclusive” clause in the contract.
Students are the most important indicator of a teacher’s professionalism. Look at their work on social networks, Google reviews about the school. Look for information on third-party resources, not just on the school website.
After completing the course, you will be given a certificate confirming that you can now do your nails like a goddess! Many salon doors are open to you. Go for it!
We have told you all the secrets of the perfect French coat, and now take everything you need and start practicing on your friend, mother or aunt.
This training may be right for you:
- Best Online Manicure Courses from 1,000 Rubles
- 10 Best Manicure Training Courses in Moscow
- 10 Best Manicure and Pedicure Courses in St. Petersburg
- Best Nail Extension Courses in Moscow from 1,000 Rubles
- 10 Pedicure Training Courses in St. Petersburg
- 10 Best Nail Extension Courses in St. Petersburg
Choose the Best Courses in Your City: Yekaterinburg , Krasnodar , Nizhny Novgorod , Novosibirsk , Rostov-on-Don , Perm , Krasnoyarsk , Voronezh , Omsk .
Tell us in the comments how you feel about a black or red jacket? Do you think it looks bright and aesthetically pleasing or, conversely, inappropriate? Repost the article, these instructions will be useful to you!
Why is manicure called French?
Soon, Jeff Pink went to Fashion Week in Paris, where he offered a new manicure to models, who had to change their outfits even more often than actresses. The models and couturiers really liked this nail design, it was a triumph for Pink.
Returning to the United States from Paris, right on the plane, Jeff decided to rename his brainchild “French manicure,” because France is a symbol of fashion and the cradle of fashion ideas.
We fix
In order for the nails to become a beautiful glossy shade, we perform the final touch - apply a top coat. Apply the fixative to the entire surface of the nail and remove the gel from the cuticle. Dry at this stage for about 2 minutes. Any remaining stickiness must be removed. Then we treat the cuticle with a special moisturizing oil.
It is better to buy only high-quality products that remove and fix gel polish, otherwise you may get the opposite effect to the expected one. French design, made according to all the rules, will continue to delight you for at least 2 weeks.
Removing gel polish
So we need the opposite result. Is it possible to remove the gel at home? To remove the coating we cannot do without:
- Cotton pads;
- Foils;
- Sanding file;
- Special liquid or standard product;
- Shoulder blades.
Removing gel polish at home is done by filing off the gloss from the surface, followed by a compress on the surface of the nails. Cover the nail surface with a cotton pad moistened with a special product. Then wrap all nails separately in foil for 15 minutes. The gel polish, softened after this, can be removed using a spatula or an orange stick.
Preparatory activities
A video on how to carry out French gel nail extensions clearly presents all stages of the procedure. However, the instructions presented below will help you understand some of the nuances that may not be clear after watching the video. So, first you need to prepare your hands for the procedure.
- Disinfect your hands. If you are not doing the extensions for yourself, please note that you need to disinfect not only the client’s hands, but also your own;
- Gel nail extensions with a French manicure design, as seen in the video, are performed on nails that have undergone basic preparation. Such preparation involves removing or sliding the cuticle and polishing the plate. It is also very important to reduce the length of the free edge of the nail to the optimal length. That is, one in which they will not interfere with the procedure of extension onto forms, but will allow it to be carried out;
- Before performing nail extensions on the upper forms with gel, as in the video, the nail must be degreased. For this purpose, a special bond is used, which is applied to a lint-free cloth. The plates are then processed with it;
- Apply a dehydrator to remove excess moisture from the plate. In this case, the new nail will hold as tightly as possible;
- Cover your nails with primer. It is very important to do this carefully. You should not skip any areas, including the nail cut. However, it is recommended to avoid contact with skin if possible. It contains quite aggressive acids that can cause peeling and irritation;
- As soon as the plates acquire a whitish tint, you can proceed to perform gel nail extensions on French forms with glitter, as shown in the video. The primer acts as a primer and the whitening of the nail indicates that the scales of the plate have opened, which means that the adhesion of the gel to it will become as strong as possible.
All steps are mandatory.
Neglecting at least one rule can not only reduce the durability of the manicure, but also cause serious harm to your own nails. Whereas, on the contrary, strict adherence to the advice given in this article and video “Nail Extension French Manicure” will reduce the risk to your plates without sacrificing the durability of the manicure. [yandex2] [google2]
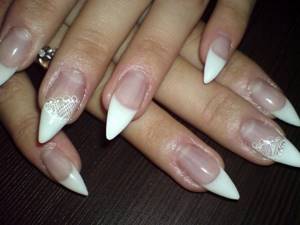
Advantages of laid-out French
The laid-out French coat has a number of advantages that make it even more attractive in the eyes of clients of nail artists. The key advantage of this design lies in the ease of nail care after the procedure. There is no need to fret over them, be tender and worry that suddenly some nail will cause trouble and break. The laid out jacket has other advantages:
After the procedure, the nails are quite strong and even retain some flexibility. If the manicure was done with high quality, then they can withstand average mechanical loads.
The time between procedure and correction depends entirely on the growth rate of the client’s nails. Most women wear this design for about 3-4 weeks on average.
French suits nails of any length and shape. It looks great on both natural and extended nail plates.
The design offers a wide variety of jacket shapes: pointed, pointe, square, almond.
During the correction procedure, at the request of the client, the master can easily change the usual laid-out French manicure to an art French one. It is difficult to find another type of design that would so conveniently adapt to the type and tastes of the owner as the French display design. Young girls can rely on bright colors, unusual shapes and long lengths. Business ladies choose medium length and a strict shape, while ladies of Balzac age will like short nails and a laconic white color.
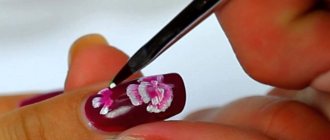
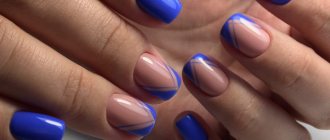
Combination with other types of design solutions
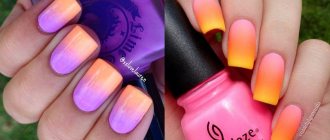
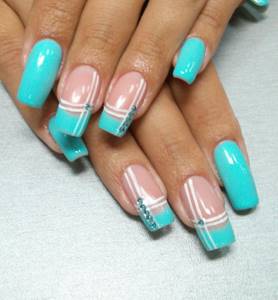
Undoubtedly, a French coat made with gel polish looks very luxurious and bright, but if you combine it with other techniques, you can get an interesting and unique result. The main thing is to be able to choose the right colors. Let's take a look at some impressive design combinations.
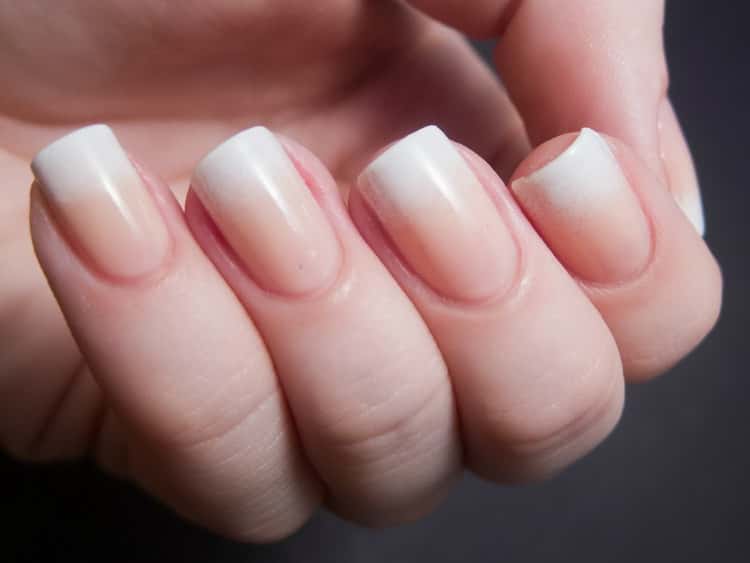
- The combination of a French jacket and the ombre gel polish technique looks very stylish and gentle.
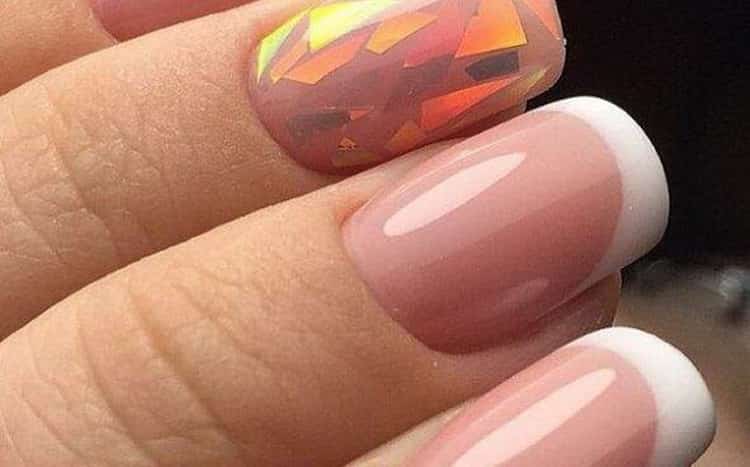
- An interesting and unusual result is obtained by combining French manicure with the “broken glass” technique.
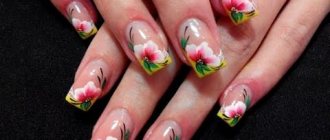
- The combination of a colored jacket made with gel polish and a print on your smile will refresh your look and make it more vibrant.

French, made with gel polish, has become very popular among girls and women. And this is not surprising, because such a manicure can look presentable for three weeks. In addition, it can be complemented with a variety of prints, or combined with other techniques and result in a unique design. If you liked this article or want to share your experience, please leave a comment.