- 1 Three non-standard options
- 2 Rules for applying the gel
- 3 Which gel to choose
- 4 Gel extensions on forms: master class
- 5 Gel extensions are not an easy procedure
- 6 How realistic is it to learn this using videos?
- 7 Features of extension technology
- 8 Collection of photos of nails extended using tips
- 9 What is included in a basic manicure course
- 10 Minimum required set of tools and materials for gel extensions
Three non-standard options
Tanya Strelova tests online lifehacks by conducting experiments on herself. In this video, she will try to do her nails in three atypical ways, armed with available materials. Viewers will find out how the experiments ended while watching. You will use cotton wool (the workpiece turns out to be sloppy, you will have to spend a lot of effort on filing), the bristles of a toothbrush (a long, painstaking task - impractical, but it looks decent), a tube of cream. The last method has the most right to life - a stencil is cut out of an old soft tube in the manner of a paper one. The device is convenient, easy to remove, and can be used repeatedly.
Rules for applying the gel
The gel is applied in three stages.
- The first layer, the base layer, is very thin and dries quickly, only 30 seconds. under an ultraviolet lamp.
- The second layer will become the main one, so it is applied tightly, from the edge of the nail to the cuticle. Drying is carried out within 3 minutes. If correction is required, it is carried out with a buff and a nail file.
- Finish - the gel is also applied in a thin layer, but dries for 3 minutes. If it is sticky after drying, you can remove the top film with an acetone-free remover.
You can apply layers using different compositions, but the “from one jar” option is allowed, observing the technology and drying time.
Applying the base
You can clarify the questions from the video and attached photo. Careful implementation of all manipulations in stages will gradually give the necessary skill and excellent results in the form of well-groomed nails, as well as possible additional income if you want to receive clients and perform gel coating at home.
Tips from the professionals
- It is necessary to use high-quality varnishes from trusted and well-known manufacturers.
- To prevent your manicure from becoming covered in bubbles, it is important to apply the gel polish in thin layers.
- To prevent the gel polish from peeling off, when applying it, you must step back from the cuticle by one millimeter .
- If you are using white gel polish, keep it under the lamp for one and a half minutes, not two - this way you will avoid a yellowing tint.
- To get the perfect, truly desired manicure, it is better to apply several thin layers of gel polish than one thick one.
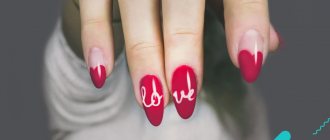
- If you want to make a design on your nail, apply it to the top coat before drying.
- Attach rhinestones or stones to the nail immediately after applying the colored layer of gel polish, then be sure to dry .
Before you start applying gel polish, you need to get your nails in order - they should be in perfect condition. To get a flawless manicure that will give others a good opinion of you, it is important to take seriously the choice of nail shape and careful removal of cuticles and hangnails. Otherwise, your efforts may turn against you, since the manicure will look sloppy and sloppy.
Which gel to choose
The gel extension procedure has more advantages than the acrylic one. The gel is odorless and applies much faster, which is why nail technicians love it so much. The only drawback that may scare you away is the removal method. The gel is only cut off and dried in an ultraviolet lamp. Acrylic sets instantly and is removed with a solvent.
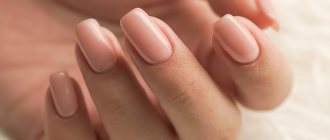
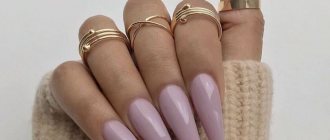
Gel short nails look so natural that they can often be confused with natural ones. This effect can be achieved using camouflage gel, which is represented in a palette of pink shades. It can also be colored or transparent.
Any gel performs the function of a base coat, a modeling tool and a protective surface coating. Thus, its application is carried out in three phases, so it can be one-, two- or three-phase. Each type of gel is applied step by step, which is dried each time in a UV lamp. An overview guide will help you choose the right material:
Single-phase has a three-in-one function. From one jar you can use the gel three times to apply the base, do modeling and give the surface a glossy shine. This is a very economical option
It is important to remember to dry each layer of gel with a lamp. Two-phase consists of two components: base and modeling. In extensions it is used less often than single- or three-phase gel. Three-phase is a set of three components for extensions: base gel, modeling and glossy.
Which type of gel seems more convenient and economical for you is up to you to decide. Experienced nail technicians most often prefer to work with a three-phase system, but if you are a beginner, start with a single-phase system. Gel nails will look good when applied with any material.
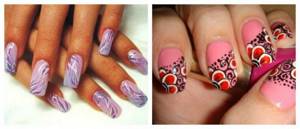
Lessons: gel nail design for beginners
More recently, a new technique has appeared in the manicure world, called stretching or gradient manicure. For a beautiful transition from one color to another, you need a thin brush.
Step-by-step operating principle:
- Apply a base coat to prepared nails and let it dry in a lamp for 1-1.5 minutes.
- One color is applied up to the middle of the nail.
- Cover with a different shade from the middle to the tip.
- The colors are combined using a thin brush, from left to right, creating vertical strokes (drying lasts 2-2.5 minutes).
- Next, the finished result is fixed with a top coat (drying in a lamp for 2 minutes).
A manicure with gel polish always looks impressive, and it lasts quite a long time, up to 2.5 weeks.
Tutorial on how to create a smooth gradient on your nails
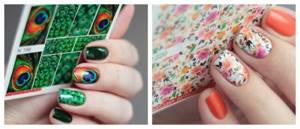
Slider design for beginners
Slider design is a technique that uses special transfer stickers. The images are printed on a film that peels off by soaking. The film, due to its plasticity, perfectly follows the shape of the nail plate.
Nail design lessons for beginners using a slider include several main steps:
- The nails are prepared, the surface is degreased and the base varnish is applied.
- An image is selected that matches the size of the nail plate.
- The sticker needs to be soaked in water for 40 seconds, during which time the adhesive base is activated.
- The image is transferred with the adhesive side using the shear method.
- The pattern is carefully smoothed to remove any remaining air and water.
- After drying, the nails are covered with fixing varnish. If desired, the design can be diversified with various decor (sparkles, rhinestones, colored or shiny dust, etc.)
A lesson on the correct use of sliders
Lessons: nail design with paints
Acrylic paints can be used to create stylish and bright nail designs, which are very popular in 2016. Before you begin the registration itself, you must complete the following steps:
- Cover your nails with varnish and, after drying, apply a base coat of the desired shade.
- After the base has dried, drop acrylic paint onto the coating and use a thin brush to draw the desired pattern. The easiest ones to make are curls.
- Using dots you can draw even dots.
- After drawing patterns and ornaments, cover the nails with a fixative.
Lesson on manicure design with paints
Step-by-step manicure tutorials
Nail design video tutorials
[pro_ad_display_adzone id=”9403"]
Today there are a lot of design variations: with glitter, gel, shellac, paints, etc. Here you can watch detailed video tutorials on nail design, which present the latest trendy items in the world of nail service. Enjoy watching Also see the article Nail design video.
Gel extensions on forms: master class
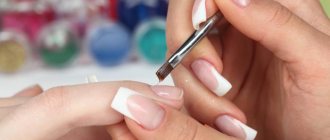
Gel extensions on forms are great because they can be done very quickly by experienced craftswomen. Depending on the length of the base, you can extend your nails to any length and shape: these can be delicate short nails or daring stilettos. By looking at the step-by-step photo, you can see how easy it is to do form extensions at home.
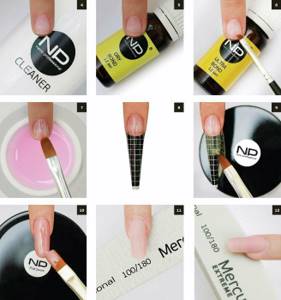
Prepare your nails for extensions. Polish them with a nail file, give them the desired shape and push back the cuticle. The gel will stick to a length of 2mm. Nails that are too short are not suitable for extensions, and nails that are too long may show through. Cover sanded nails with degreaser.
Before doing this, it is important to remove all dust with a brush or towel. Apply primer. Cover the top of the nail plate with bonder and air dry for a few minutes. This is the junction between the natural nail and the gel. Apply a base coat to the natural nail plate and place your hands in a UV lamp
Remove the sticky layer after each drying. Make a backing from extension tape. It should fit snugly to the back of the nail. Using gel, lay out a shape of any length. Keep in mind that a certain part will be cut down, so the length should be generous. Place your nails under a UV lamp. Apply a natural colored gel to the stock. Otherwise it is called camouflage. Dry your nails and remove the sticky layer, sand with a buff. The final procedure before nail design is shaping. Make sure your nails are thick enough and very strong, as you will be wearing them for several weeks.
The step-by-step diagram is described so clearly that you should not have any questions. The only difficulty you may encounter is working with gel, which can spread and get under the nail. When the drying process is carried out, you may feel a strong burning sensation. If you still have questions, you can always watch the video tutorial, which will tell you step by step about gel extensions.
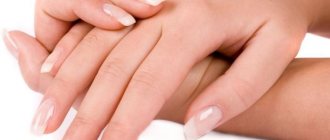
Nail preparation process
- polish remover to remove old polish from nails . The liquid should not contain acetone - it negatively affects the nail surface and in the future will make it brittle and peeling.
- We wash our hands with scented soap or gel, then wipe our hands dry.
- Pour hot water into a bath or small ceramic bowl and dip your fingers in it - this will allow us to painlessly remove the cuticles. In addition, I recommend adding a few drops of iodine or a pinch of sea salt to the liquid - this will help strengthen the nail plate and make nail treatment more comfortable.
- After about seven to ten minutes, we pull our hands out of the water and pat them a little with a towel.
- Using nail scissors with rounded ends or cosmetic clippers, carefully remove cuticles and hangnails. If the cuticle becomes rough again, dip your fingers in warm water again.
- Using a buff, remove the glossy layer from the nails and remove any remaining dust with a damp cloth. This action makes the nail plate more durable.
- After completely treating the nail plates, massage in a couple of drops of essential oil , paying special attention to the areas that have been cleaned. The oil protects the skin on the hands from infection from the outside after treating the fingers.
- After the oil is completely absorbed, use a nail file to adjust the length of the nails and give them the desired shape.
Gel extensions are not an easy procedure
To learn how to do a beautiful manicure on short nails, you need to take a gel extension course. If you have no experience working with molds, then peeling and unevenness on the surface of the plate are inevitable.
This manipulation consists of stages.
- We disinfect our hands.
- We lift the cuticle using a pusher and clean the pterygium.
- Carefully remove the natural gloss, wash off the dust, and dry.
- We adjust the length and shape of the base.
- Apply primer, then base.
- We decide on the shape and size of the tips so that they become an extension of our own nails.
- We attach the tips. We make sure that there are no gaps. This is to ensure quality.
- We take the gel with a special brush and decorate the nails. Dry in an ultraviolet lamp (30 seconds). Then, while the mold is hot, press it to the natural one.
- Place a drop of gel closer to the base, distribute it over the surface, not reaching 1 mm from the side rollers.
- Let's dry it.
If desired, you can use design elements for decoration. On the day of the procedure, you should not take on dirty work. In the future, use gloves.
How realistic is it to learn this using videos?
It's no secret that in order to learn how to skillfully do such a manicure, you need not only drawing skills, but also a great desire and enough time. You can’t learn how to grow nail plates in one day, so be prepared that all your free time will be spent on learning. But if you still have some basic skills, then you can easily master this wonderful type of manicure art.
If we evaluate it realistically, then, in principle, watching video lessons may well replace professional courses. But do not forget that if you attend courses, at the end you will receive a diploma that will confirm your qualifications and real skills. In this case, with this diploma, you will be able to take a position in some salon, when self-taught via video does not give you such an opportunity, and you do not have confirmation that you know how to do nail extensions. If you still decide to train yourself, then search the Internet for step-by-step videos in which the actions of the master are clearly visible. This way you can practice alongside it.
The second way to learn is to attend special master classes, which are periodically held in almost any city. You can find out their time and location from local newspapers, as well as search on the Internet with a specific request for the location of the courses. In this case, you will learn more information and secrets of the masters, but you will also have to pay for it.
You can also find a lot of videos that show not only the technique itself or the extension process, but also all kinds of designs. With their help, you will be able to expand your skills and ultimately become a true master of this difficult but fascinating task.
Combination with other types of design solutions
What and how to combine manicure with? It all depends purely on the design on your nails. If you use discreet art, then you can safely place accents on your outfit and choose a bright decoration. If you use rich colorful designs, try to choose plain dresses and suits without excessive shine.
Whatever design and technique you choose, be guided by your taste preferences and skills. And remember: training and more training. Over time you will succeed! What do you think of our recommendations? Will you use any technique in your nail art? Tell us about it in the comments!
Author of the publication
Features of extension technology
Tips are plastic tips that imitate natural nails. They differ in shape, size, and colors. The tip is glued to the nail itself and becomes part of it. Covered with a special gel. The good thing about this method is that it suits girls with short nails.
Forms (plates) are attached to the base. They are easier to build up with gel and can be removed. The result is amazingly natural.
A three-phase expansion system requires components, each of which performs its own function. The first ensures safe contact between artificial turf and natural turf. The second one models the body of the nail. The last layer protects against external influences and provides gloss.
Two-phase consists of a gel responsible for reliable adhesion, and a second one for strength. Single-phase - universal material. It contains all the necessary characteristics: it connects, models, makes it durable.
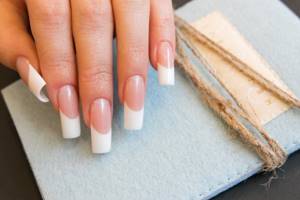
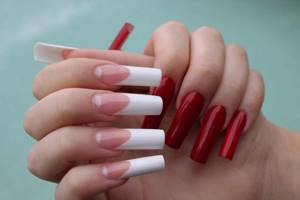
Collection of photos of nails extended using tips
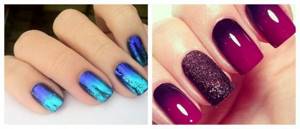
Neat and durable tips, modeled with tips and strengthened with gel, look great if decorated with a beautiful design. An experienced specialist, having done the extensions, will intuitively select for you the appropriate nail art that will give you elegance. The laconicism of a lunar manicure or the classic severity of a French manicure are not inferior in beauty to an aquarium nail design coated with transparent gel. Volumetric compositions, abstract drawings or a simple monochromatic coating on tips - the choice is yours. Our photo gallery will give you creative inspiration and help you decide on a design.
Continuing your training, watch another video lesson on how to extend nails using liquid tips. This unique innovative technology opens up more possibilities, allowing you to save time on the nail modeling procedure. Enjoy watching, dear girls. Don't forget that a beautiful manicure is the highlight of your look!
What is included in a basic manicure course?
The basis of the manicure course “from scratch” is theoretical knowledge and practical skills in creating a classic manicure.
Issues covered during training:
- preparing the workplace in accordance with sanitary standards;
- prevention of infectious diseases;
- sterilization of equipment;
- correct selection of tools and materials;
- study of anatomy, structure of the nail cornea, skin;
- consideration of common diseases of nails and skin;
- demonstration of classic manicure;
- leveling the nail plates with a base, bio-gel or manicure gel;
- massage techniques, SPA treatments;
- applying varnish, gel polish to the nail, under the cuticle;
- simple design with gel paste, gel paint, gel polish;
- price list of manicure services;
- formation of the image of a master;
- studying ethics and psychology of customer service;
- practical lessons on models.
Upon completion of courses and passing exams, students receive a certificate (diploma) from the educational institution. It is also possible to issue an international certificate from KSSC and assign qualifications.
Minimum required set of tools and materials for gel extensions
Today, manufacturers of nail care products regularly supply products to the market, which makes it easier for you to find the necessary materials and tools for extensions. Among them are the following:
- UV lamp. Used to dry the gel. If possible, choose a lamp with a built-in timer so that you can adjust the time for the gel to cure.
- Gel. Most often, extensions are made with transparent or camouflage gel, but if necessary, you can purchase colored ones.
- Application brush made of artificial bristles. As a rule, it should be flat.
- Sticky layer remover. Must be used after irradiation in a UV lamp.
- Primer (degreaser). With its help, the nail plate adheres to the gel.
- Forms for laying out the gel. Used as a substrate.
- Tips. Glue over natural nails. Recommended for use in extensions by beginning craftswomen.
- Glue. Used for gluing tips or any decorative details on extended nails.
- Tip cutter. Allows you to get rid of unwanted length.
- Gel coating (finish or top coat). A transparent coating that is applied at the end of the extension. Adds shine and ensures design fixation.
- A set of files of different hardness.
- Polishing file (buff).
- Disinfectant.
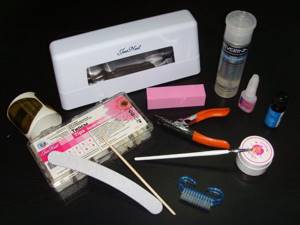
Materials and tools in the photo.
Required Tools
- manicure set;
- buff;
- non-acetone nail polish remover;
- ultraviolet lamp - used to dry the varnish (I recommend purchasing a 36 W lamp - the varnish hardens in 2-3 minutes or an LED lamp - it is expensive, but the varnish hardens in 7-10 seconds);
- degreaser (can be replaced with boric alcohol );
- primer;
- pigmented varnish – used as a base coat;
- cotton pads or cotton wool (can be replaced with wet wipes);
- gel polish – top coat ;
- fixer – transparent or colorless gel polish.