Home page » Beauty » Nails
Author of the article
Svetlana Pavlikhina
Reading time: 5 minutes
AA
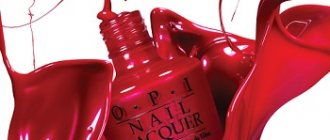
It's time to update your manicure, but the plug won't come off? Don't worry about this. We offer many life hacks on how to open nail polish if it won't open.
The cap has dried on tightly, or it is an unused bottle, do not rush to throw away the bottle, because one of the above methods will definitely give a positive result.
Hot water
- Try a simple technique before committing to a full-blown operation. Turn on the hot water so that it flows with high pressure. Put on rubber gloves and hold the bottle in your hand. Quickly place the neck (the drying area) under the tap, then wrap the tube in a towel. Try unscrewing the lid; in cases where the hardening is not strong, these measures will be sufficient.
- If the first technology was unsuccessful, use the following recommendations. Turn on the hot water so that it flows in a thin stream. Put on thick rubber gloves and take the jar of varnish in your hand. Place the lid under running water and wait about 2 minutes. Throughout the procedure, slowly turn the tube so that it warms up evenly. Make sure that hot water does not get on the glass container, otherwise the varnish will dry out in the bottle itself. As in the previous case, wipe the cap with a towel and try to unscrew the tube. Under the influence of high temperatures, the plastic will expand slightly, due to which the lid will “sit” more freely on the neck.
Under what conditions will you have to get rid of varnish?
To prevent the varnish from harming your nail plate, you need to know under what conditions you have to get rid of it:
- the varnish changed color and developed a specific smell;
- the consistency of the varnish has changed, it has thickened so much that it is no longer possible to save it or, on the contrary, has become very liquid;
- the varnish became heterogeneous, flaked, grains, flakes, and lumps appeared in its structure.
You should also immediately stop using the polish if you notice an unwanted reaction to it on your nails. And if the symptoms do not go away, you need to consult a doctor.
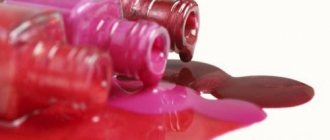
The best assistant is nail polish remover
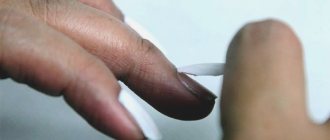
To dissolve dried varnish, use acetone liquid. First, use nail polish remover to remove any traces of nail polish on and around the cap. The order of your actions should be as follows:
- Take a cotton swab and dip it in nail polish remover or acetone.
- Turn the jar upside down. Using a cotton swab, carefully apply nail polish remover into the gap between the cap and the bottle.
- Give time for the varnish to dissolve under the influence of the liquid, then carefully unscrew the lid. If necessary, repeat all steps.
- There is an open jar in front of you.
- Take a cloth and soak the tip generously in nail polish remover.
- After this, carefully wipe the neck of the bottle with this cloth.
- To prevent liquid from remaining on the bottle, wipe it again with the dry side of the napkin.
- The neck threads should remain clean and dry.
To prevent the lid from drying out in the future, use the following trick:
Chemical compounds effectively dissolve dried varnish on the bottle neck and cap.
Application of acetone
If the bottle is tightly closed due to a large amount of dried product under the lid, the method using acetone will help:
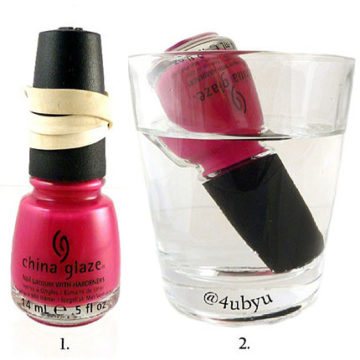
- Pour solvent into the container.
- Place a bottle in it. To save money, place the bottle on its side and turn it over occasionally. Remove the tube from the cup.
- Wipe with a dry cloth.
- Unscrew the top of the bottle.
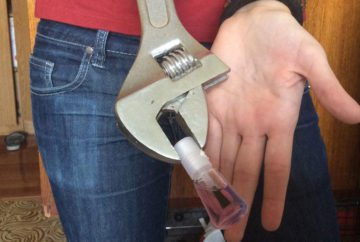
Use special tools
If the two methods above did not help you deal with the problem, then try using special tools: tongs, pliers. There is no need to use too much force, because the massive tool can crush the bottle, which will lead to the varnish leaking out. Here are three methods with tools you can use if you don't know how to open polish:
- Take tongs, pinch the lid with them and turn it.
- Pliers and an adjustable wrench will help you. Use it as a lever to turn the lid.
- Turn the bottle upside down and secure the cap with a vice. Start turning the jar, but as soon as it opens slightly, turn it over immediately, otherwise the varnish will leak out.
Now you are armed and know how to open dried varnish with tools.
Fix the problem with regular rubber bands
To make it more convenient to unscrew the varnish cap, you can use regular rubber bands. After all, the lids are often quite thin and difficult to wrap your fingers around. How to open varnish using such a simple device? To solve this problem, put one or two rubber bands on the lid, wrap them quite tightly, this will help to fit the lid well. The rubber texture will make it easier for you to turn the cap.
How to open varnish if previous methods did not work
When nothing helps to open the dried varnish, you can resort to the last method - using physical force. To do this, you need to hit the junction of the bottle with the cap firmly on the edge of a hard surface several times. Upon impact, the varnish film that prevents opening should come off. It will be easier to unscrew the lid if you use pliers.
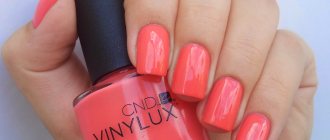
How to prevent varnish from drying out?
To avoid problems with opening the varnish, it is better to prevent it from drying out. To do this, you need to follow the storage rules:
Read also: How to cook oatmeal with milk
- Store jars of nail polish in a cool place away from direct sunlight and heaters. High temperature worsens the structure, color and speeds up drying.
- The bottles must be in an upright position so that the varnish does not flow into the place where the cap is screwed on. The contents must be stirred periodically.
- Before screwing on the lid, you need to clean the neck of the jar from the varnish coating. This will ensure free movement of the connecting elements.
Expiration dates and recommendations
Typically, nail polish has a shelf life of 1 to 2 years.
But it all depends on the manufacturer. The budget line, as a rule, has a shelf life of up to 1 year, and premium varnishes - 2 years or more. Expensive brands use quality additives to make their products last longer after opening. Where can I see the expiration date of nail polish after opening? Branded bottles are stamped with a label with two dates: the first date is the period when closed, and the second is after opening. If the date label has worn off or is missing altogether, how to determine that the varnish is missing:
- the product has thickened;
- delaminated.
Basically, these are two typical cases that indicate that this material can no longer be used. Let's consider options with gel polish:
- consistency changes (stratifies);
- lumps appear;
- becomes very thick or liquid;
- The drying process becomes long or the coating does not dry at all.
In any case, cosmetologists do not recommend using expired products. Why:
- an allergic reaction may occur;
- the keratin layer is damaged;
- the applied material will quickly peel off and crack.
There is no point in diluting and mixing varnish with shimmer, acetone or glitter. The best way to save slightly thickened varnish is to dip the bottle in a container of warm water for a while, but this method is not always effective.
We recommend that you always check the expiration date of your nail polish before purchasing and applying it.
Important: expired varnish contains many chemicals that can have a negative reaction for our body.
Where is the best place to store varnishes?
Now we suggest considering options for where to store nail polishes so that they do not deteriorate ahead of time.
- Buy small baskets and put varnishes in them. Just keep in mind that they need to be stored at optimal room temperature and preferably in a slightly cool and dark place.
- Avoid storing polishes near heat sources or direct sunlight.
- Do not leave the material in the bathroom, as this room has high humidity.
- Use small racks or simply store varnishes in a desk drawer, but only in a vertical position.
- If you stored polishes in the refrigerator, forget it and better place these items in a small box.
Basically, these rules are about where you can’t store varnishes and what points you need to adhere to. Knowing these recommendations, you can easily find a new place for varnishes.
Basic mistakes to avoid
Very often, if they don’t know how to open the polish, they start banging the bottle on the table. We assure you, this will not work! The fact is that the lid of the bottle with varnish is made of plastic, and it does not deform upon impact like metal. Even a strong blow will not change the shape of the plastic cap. But there is a risk of breaking the bottle.
Long agony when opening a jar of varnish can make you lose patience. Many people often use incredible force, but this requires cunning. After all, it’s very easy to rip off the lid with pliers. Some even try to use a screwdriver. But the best method for removing the cap is to unscrew it, so use our above methods with hot water, rubber bands, liquid or tools.
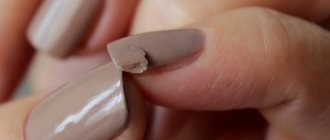
Why does it happen that the bottle dries out to such an extent that it cannot be opened? This happens because you leave the unscrewed jar open for some time. Such actions lead to air getting inside the bottle. After this, the varnish begins to dry on the surface of the neck.
Try to store jars of varnish in cool places where there is no direct sunlight or high temperatures. Make sure that the bottles with varnish are always in a vertical position, then the product will not flow into the places where the cap is screwed on.
How to deal with a dried-on lid
Due to the contact of varnish or gel on the neck, the cap is firmly glued to the bottle. There are several ways to solve this problem.
Soaking in water
If the options for opening the bottle do not produce results, soaking the nail polish in a high-temperature liquid will help open the nail polish:
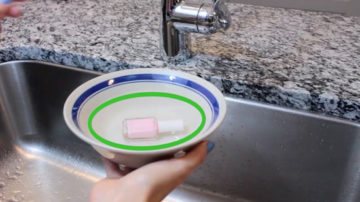
- Pour hot water into a shallow container.
- Place the bottle cap down in the water.
- Leave for 5 minutes and remove the bottle from the water. Now the bottle will quickly unscrew.
Only the plastic part is placed in water, because upon contact with heat, the structure of the product changes, becomes sticky, and delaminates.
Hot water
Dried particles of a cosmetic product under the lid soften using a simple method:
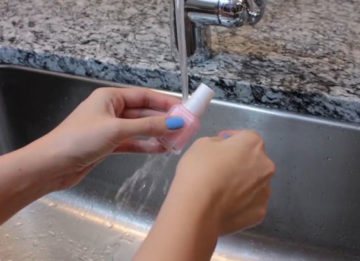
- Place the top of the bottle under running hot water (the higher the temperature, the better).
- The bubble should be rotated slowly.
- The procedure takes from 30 seconds to 2 minutes depending on the water temperature.
- Dry the lid from moisture so that it does not slip.
- Under the influence of water, the material of the cap expands, the dried particles soften, try to unscrew the jar.
Important! Part of the bottle with dye must be protected from the stream so as not to spoil the contents.
Available means
Increasing the grip force will help unscrew the bubble. To increase retention, an ordinary elastic band is used.
If you don’t have it on hand, use tape or a fabric bandage. Take adhesive materials with a minimum width of 1 cm.
A rubber band is placed on the cap of the bottle. It will take more than 3 coats to eliminate slippage. This will help grip the cap and make it easier to turn.
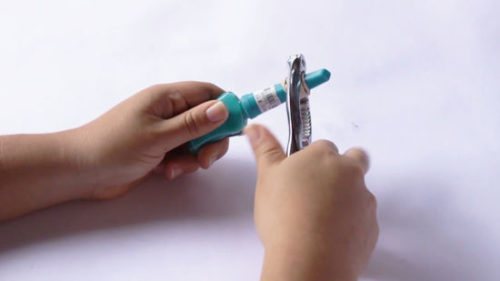
Application of tools
None of the methods helped to unscrew the bubble? Use physical strength. The most powerful life hack if the cap is dry is to use special tools, but with caution, because there is a risk of stripping the thread and damaging the bottle.
Algorithm of actions:
- Wrap the cap in cloth.
- Take pliers and grab the lid tightly.
- Turn the pliers carefully before the first movement so that the contents do not leak out. You can rotate the jar.
Instead of pliers, use any metal tool with a clamp - pliers, tongs, wire cutters.
You need to act carefully, without damaging the jar and preventing the contents from spilling.
What can I do to make the lid easy to open in the future?
To quickly open the jar at any time, you should follow simple recommendations for using and storing manicure products:
- Always seal the tube tightly after use. When applying gel polish, do not leave the bottle open for a long time.
- Dyes should be stored in a standing position - this will limit the penetration of liquid under the cap.
- When painting your nails, do not leave excess product on the neck.
- You can prevent drying by thoroughly wiping the threads on the bottle; to do this, use nail polish remover. Soak a piece of cloth in solvent, treat the outside of the bottle, and dry with a dry towel. Repeat the procedure until completely cleansed. Tighten the bottle only after the surface has completely dried.
- Store in a cool and dry place away from direct sunlight. Heat and light help thicken the contents.
Sources
- https://www.furnishhome.ru/article-4244-srok-godnosti-laka-dlya-nogtey-chto-delat-esli-on-isportilsya-i-kak-pravilno-ego-khranit.html
- https://tn-club.ru/instrumenty/kak-hranit-gel-laki.html
- https://salon-lime.ru/manicure-and-pedicure/kak-hranit-lak-dlya-nogtej
- https://kakxranit.ru/raznoe/kak-xranit-lak-dlya-nogtej.html
- https://potrebitelinfo.ru/tovary/sroki/skolko-sostavlyaet-srok-godnosti-laka-dlya-nogtej.html
- https://jawoman.ru/krasota/nogti/kak-otkryt-lak-dlja-nogtej.html
- https://city-glam.ru/raznoe/ne-otkryvaetsya-lak-dlya-nogtej.html
- https://www.wday.ru/dom-eda/soh/tri-sposoba-otkryit-zasohshiy-lak-dlya-nogtey/