Hi all! Today I have not the most standard article on the blog, since it will not concern manicure, but a topic very close to it. As you may have guessed, what could be closer here than pedicure! And for him I’m opening a new separate section, where I will write about fashion trends, design, nail treatment methods, foot skin care, tools and much more. If this topic is relevant to you, then write in the comments applications on topics that interest you, and I will put them in the plan, agreed?
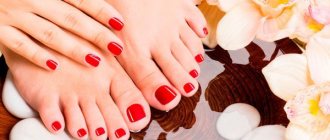
I’m sure that if you devote time to the care and design of your fingernails, then don’t forget to do this on your toenails, especially since now the most important time for this is summer, when you can show them off by wearing beautiful sandals!
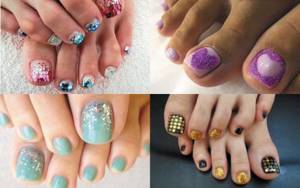
In today’s material, I invite you to read all those who want to learn how to do a pedicure with gel polish on their legs and a simple summer design with rhinestones at home. Let's conditionally divide this article into two parts: pedicure and gel polish coating. We will not consider the currently fashionable hardware pedicure (I can make a separate post about this if you ask in the comments), but we will talk about how to do a pedicure yourself at home.
Benefits of gel polish
This coating is preferred if you do not want to injure your nails. When applying it, you do not need to cut down the nail plate much.
Gel polish is also chosen for the following advantages:
- long service life;
- beautiful appearance of nails;
- variety of color solutions;
- additional protection;
- ease of application and removal.
If all rules are followed, the coating will last for at least a month.
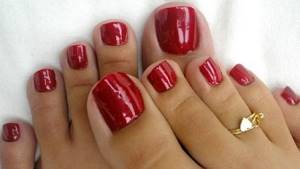
Red rich gel polish
Tips to help you maintain results for a long time
There are some recommendations, taking into account which when working with shellac, you can keep your pedicure in perfect condition for as long as possible. Experienced professionals recommend:
- Apply all products to the nail in a thin layer and carefully. The structure of shellac allows even a small amount to be applied evenly. If you generously cover the nail plate with gel polish, there is a risk that after a couple of days the coating will come off the nails in layers. When doing a French pedicure, the free edge is covered twice.
- Take your time when drying your nails. The varnish should only be dried under a lamp.
- Each product (including base and top coat) should be applied not only to the plate, but also to the end of the nail. This will protect the color coating from damage.
- It is better to do a hygienic pedicure without using water. Otherwise, the shellac will quickly peel off. After doing a pedicure using water, you must wait at least two hours before applying gel polish.
- Nails need to be well degreased.
- During the first 24 hours after a pedicure, long contact with water (visiting a sauna, swimming pool, taking a bath) is not recommended.
To avoid causing harm to the nail plate, you should adhere to the following recommendations:
- There is no need to completely grind off the top layer of your nails. It will be enough to sand them a little with a buff (a special rectangular file that is used for polishing).
- Do not use metal objects to remove shellac. Do not try to remove it using force. This will damage the plate and give your nails an unaesthetic appearance. The gel polish should be removed carefully, using soaking and orange sticks.
- After removing Shellac, you should apply a special treatment coating for 2-3 days, which will nourish the nails with useful elements, protect them from delamination and brittleness, and make them strong.
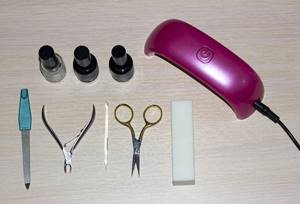
What you need to apply the coating
If you decide to do a pedicure on your feet with gel polish at home, you need to purchase special equipment and products.
The list of what will be needed in the process includes:
- UV lamp. It is intended for drying the coating. If your budget allows, opt for equipment with a power of at least 36 W. In such a lamp the gel will harden quickly. A more expensive option is an LED lamp that dries your nails in seconds.
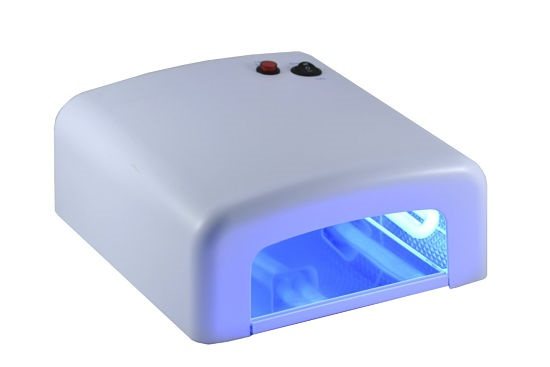
UV lamp
- File. It is worth purchasing a professional buff with high abrasiveness. A regular sanding file will also work.
- Degreaser. Professional products have worked well, but you can use alcohol or nail polish remover. Instead of cotton wool, use synthetic napkins that will leave no lint.
- Bondex or primer. They are used after treatment with a degreaser to ensure that the coating lasts even longer. But at home you can do without them.
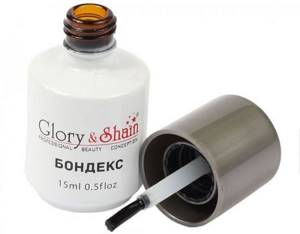
Bondex for pedicure
- Base. This is the first element of the future pedicure. It is worth purchasing a professional product that contains vitamins that prevent damage to the nail plate. There are also cheap bases, but when buying them, be prepared for the gel polish to peel off quickly.
- Colored varnish. This is the main element of a pedicure. There is a huge selection of shades and manufacturers. You can purchase a set that includes the main colors. These are usually used by beginners.
- Finish (top). You can’t skimp on it, as well as on the base, because if you buy a low-quality product, you can quickly notice chips and scratches on the surface of the nail. The finish is available with and without a sticky layer, as well as glossy or matte.
#6 Winter pedicure: current new products of the season
Toenails require attention and care not only in the summer, when they are in plain sight. In winter, you can pamper yourself with delicate and discreet winter designs. In winter, the shades become lighter and more laconic, as does the decor.
Current winter trends include:
- white pedicure with “knitted” decor – the design with acrylic powder looks chic
- pedicure with silver or gold glitter
- pedicure with foil or rubbing
In winter, it is better to perform a discreet nail design without voluminous decor. Large rhinestones, charms, mica are prohibited. With them, your design will undoubtedly look beautiful, but walking in boots with such a pedicure will be difficult.
How to prepare for application
Before you do a nail pedicure with gel polish, you need to prepare for it. To do this, steam your legs, then remove the cuticle using tweezers or move it with a manicure spatula.
Steaming legs
Nails must be treated with a buff or file. This will ensure high-quality adhesion of the coating to the surface.
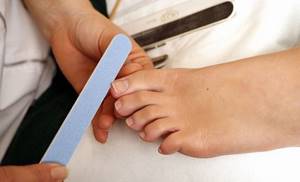
Finishing nails with a file
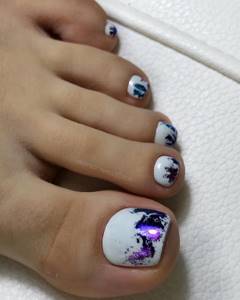
Fashionable plain pedicure
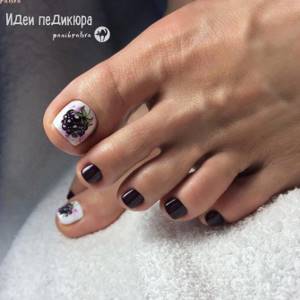
Single-color pedicure has rapidly entered the list of stylish trends and is now increasingly found in pedicures. This design will fit perfectly into a festive, casual or business look. In addition, minimalism and naturalness are back in fashion. For a modest design, use a moderate and restrained palette of pastel or nude tones. For a more eye-catching design, pay attention to dark and bright colors. It is very fashionable to perform a monochromatic manicure with a pedicure. Also, the pedicure may differ from the color scheme of the manicure itself. In any design, a plain pedicure will look irresistible and fashionable.

Applying gel polish in stages
After preparing the nail plate, it is necessary to degrease the surface. This will prevent peeling.
Pedicure is done in several stages:
- if you purchased bondex or primer, treat your nails with them;
- Apply the base, trying to do it so that it does not come into contact with the skin. If the product gets on the cuticle, carefully remove it with a wooden stick. Dry the base in a lamp;
- Apply colored gel polish using the same technique. Dry in a lamp. If several layers are needed to obtain an even tone, each is dried separately;
- a topcoat completes the pedicure. The top is also dried in a lamp. If you are using a finish with a sticky layer, remove it with a degreaser;
- After that, you can apply a little base oil to the cuticle.

Applying gel polish
Pedicure at home step by step
Those who have ever had a pedicure in a salon should remember this bliss of caring for your feet: there are baths of various kinds, massage and peeling of the skin with rubbing of cream, scrubs... A home pedicure, of course, if you wish, you can also do it by analogy , if you want to fully devote time to your feet and provide quality care. But such a procedure will be very time-consuming, and if you also want to apply gel polish, it can take half a day! Therefore, here we will consider a simplified version of it.
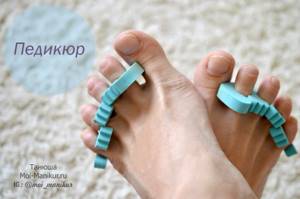
I recommend having separate sets for manicure and pedicure, especially since fingernails and toenails are very different. It is enough to do a pedicure once every 1-2 weeks, and if you cover your nails with gel polish, then once a month.
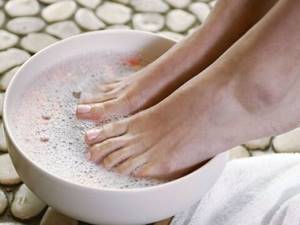
Skin softening
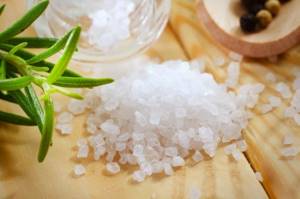
The first step is to steam your feet to make the skin soft. The easiest way to do this is to use a bath of warm water, into which you add a soap solution (shower gel, shampoo or pieces of soap). To enhance the effect, you can also use sea salt, a decoction of chamomile or calendula, or special products with a softening effect. Keep the legs like this for 15 minutes until the skin softens, periodically adding water to keep it warm (not hot!). After this time, remove the legs and wipe them with a dry towel.
Cuticle treatment
While the skin is soft, use a manicure spatula or an orange stick to push back the cuticle in the same way as you do on your hands. The difference here is that cutting the cuticle on the legs with cutting tools is not recommended - it is easily injured and grows back quickly. In addition, you are unlikely to be able to do this efficiently, since it is difficult to see all the nuances from afar on your own, unless you are proficient in yoga techniques :)
You can use a special product to soften and remove dead skin: apply it for 5 minutes, and then remove the remnants with the same orange stick. We use it under the nail, cleansing it of impurities.
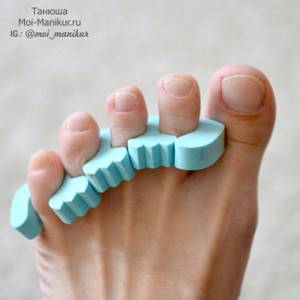
Correction of nail shape and length
When half an hour has passed after softening the skin in the bath, you can begin to treat your nails. If you do this earlier, your soft nails may begin to peel.
The length of the nail is removed with manicure scissors or pliers in a straight line, or slightly beveled, but not too deep, as this will promote the nail to grow into the skin. We straighten the cut and seal it with a file, directing it from the edges of the nail to the center. It is most convenient to use a glass file here: it is not very thick, like Teflon and plastic, and does not harm the nails, like metal ones.
Final stage
The following steps should be performed only if you do not further apply gel polish to your nails.
Polish the nails so that their surface is smooth and shiny. To do this, we use a polishing file and pay special attention to the cuticle area. After this, you can apply nail polish.
Well, we complete the nail care by rubbing special oil into the cuticle area.
Main mistakes
Beginning masters often violate pedicure technology. Because of this, the gel polish quickly begins to peel off. Most often, people forget to treat the nail plate with a buff or apply a degreaser. Another common mistake is using a thick layer of gel polish. It must be distributed evenly. A thick layer does not dry well and often forms uneven surfaces.
Important! Do not shake the bottle of cosmetic product, otherwise the risk of small bubbles will increase. Sometimes beginners do not seal the nail from the end. This threatens the formation of chips. It is also prohibited to remove the sticky layer from the colored coating.
To properly do a pedicure at home, we recommend watching a training video.
Why is this necessary?
Today, unpainted toenails are considered bad taste and instantly ruin an attractive image. But not everyone can afford to apply varnish every day, which will instantly lose its appearance. Isn't it much easier to give yourself a gel pedicure? It looks neater than regular varnish, allows you to easily create a design of any complexity, and retains its appearance for several weeks.
Of course, this coating also has its drawbacks.
- You need special compounds, tools and a UV lamp, which is quite expensive.
- If you do a gel design on your legs in a salon, the cost will start from 1000 rubles, depending on the complexity of the design.
- Such a pedicure, in fact, like a manicure, is not suitable for ladies whose nails grow quickly, since the nail near the cuticle will soon be visible, and this instantly kills all attractiveness.
- If you decide to get rid of the coating, you are unlikely to be able to do it yourself; you will have to go to the salon again.
- After long-term use of gel polish, natural nails require long-term recovery.
And yet, even with all these shortcomings, the convenience, time savings and attractiveness that such coverage provides are worth choosing.
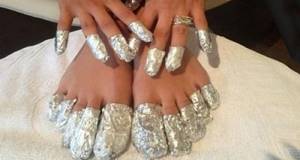
How to remove gel polish
To remove the product, you need foil, a removing solution, cotton pads and a manicure spatula.
- To begin with, the surface is lightly treated with an abrasive file to ensure better penetration of the liquid.
- Cotton pads are cut into several small pieces. Each one is blotted in a special professional solution. You can use plain nail polish remover, but it should contain acetone for best results.
- Pieces of cotton pads are placed on the nails and tightly wrapped with foil. You need to keep the product for 15 minutes. After this, the discs are removed and the remaining coating is removed with a manicure spatula.
Removing gel polish from nails
Tools
It is better to purchase tools in a professional store for manicurists. This way you will be sure that it is new and well sharpened. Nowadays it’s very easy to do this online: you can buy everything in one place, choose a palette, read reviews, look for cheaper prices and get your order delivered.
To perform a manicure you will need the following tools:
• Cuticle pusher (also called a spatula or scraper). This tool is needed to lift and push back the cuticle. An orange nail stick is often used as an alternative to a pusher. Its price is much lower, but it is a disposable tool, which is more likely to be consumable.
• Mills. They are needed only for hardware manicure with gel polish and removing long-term coating using a machine. For classic manicure, cutters are not used. A set of attachments along with the device is rarely purchased for independent use at home, since training is required to use it correctly. And the cost of the device is not so small.
• Nippers and/or nail scissors. They are used in classic and combined (using a machine) manicure to cut off raised cuticles. What is better to use, wire cutters or scissors, you can only determine by trying both at work - the choice is individual.
Thus, the only mandatory tools for processing the cuticle when performing a manicure followed by gel polish coating at home are a pusher and nippers/scissors. Don’t rush to buy cutters with a machine at the initial stage. Even experienced professionals recommend first learning how to perform a classic edged manicure.