Rating: No rating
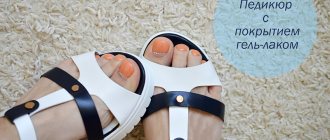
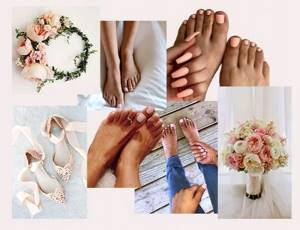
Representatives of the female half of the population make considerable efforts, spend a lot of free time and material resources to create an ideal image. At the same time, pedicure plays no less important role than a stylish hairstyle, delicate makeup and fashionable manicure . The need for pedicure especially increases with the arrival of warm days, when you can present your neat and well-groomed feet in a favorable light, which like a magnet attract the admiring glances of others. However, in order to look stunning, you should not neglect pedicure even in the cold season - a real woman strives to look impeccable at any time of the year.
Specialized salon procedures will help restore a well-groomed appearance and give grace to your legs, but this is associated with considerable financial costs that not every woman can afford. In search of saving money, I found out that there is absolutely nothing difficult in learning how to do a pedicure yourself at home, and with the advent of such a unique product as gel polish, nail care has become much easier and more economical. In my opinion, there is no alternative to a more effective and durable nail product than gel polish.
Today I would like to share my knowledge about pedicure with gel polish, which may be useful and interesting for beginners , and also, perhaps, experienced ones will be able to find something new for themselves. Let's jointly discuss photos of examples and fashionable new products of pedicure with gel polish coating, and also step-by-step analyze the process of creating a simple pedicure on the feet with video tutorials.
Features of pedicure with gel polish
- Before directly applying gel polish to your nails, you need to put them in perfect order : remove cuticles and hangnails.
- For a flawless pedicure, it is important to take the choice of nail shape and length very seriously, otherwise your efforts will turn against you.
- To increase the durability and maintain the original attractiveness of the pedicure, use only high-quality varnishes from trusted manufacturers.
- to apply the gel polish in a thin layer , retreating one millimeter from the cuticle - then the gel polish will not peel off or bubble.
- To get a truly beautiful and rich pedicure, apply several thin layers of gel polish.
Required materials and tools
In order to get your toenails in order, you should go to a good salon and see a trusted nail technician. The procedure for creating a gel coating is quite complex and requires some experience. If you want to try to make a nail design yourself, then you need to carefully study the technology, be patient, be prepared for the fact that not everything will work out the first time, and buy the following things:
- a set of tools with which you will do a pedicure;
- degreasing liquid;
- base gel;
- basic gel coating;
- finishing coating;
- a special lamp for drying the coating;
- brushes for drawing;
- rhinestones, sparkles, foil - optional;
- cuticle oil.
These are the basic materials and tools that will be needed in the work. For shopping, it is better to go to a specialized store where professional craftsmen purchase. This way you can be sure that you are buying good materials. And the choice in such places is really good. As soon as you buy everything you need and can allocate a couple of hours for creativity, you can start.
Advantages
- strengthens the surface of the nail plate;
- protects nails from splitting and brittleness;
- protects nails from negative external influences;
- gives your image a finished look;
- toes acquire a neat and tidy appearance.
Frequently asked question: how long does a pedicure with gel polish last on nails? The answer is very pleasing: the unique strength of gel polish allows you to maintain the original appearance of the pedicure for up to three to five weeks. In addition, if all the rules are followed, the pedicure acquires a unique, charming shine that lasts up to fifteen to twenty days.
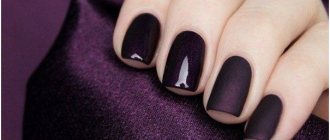
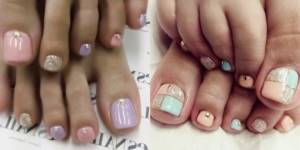
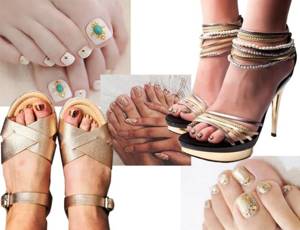
Fashionable pedicure ideas with gel polish
cat's eye
The harmonious combination of unusual shimmer and muted shade creates a feeling of something magical. The “Cat's Eye” coating technique is based on the principle of working with magnetic gel polishes, which contain metal particles. To achieve a clear and beautiful cat-eye effect, you need to apply magnetic gel polish on a black base. The fewer layers of magnetic gel polish, the softer and blurrier the effect.
Photo of pedicure with “Cat's eye” gel polish
Pedicure with a pattern
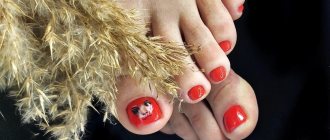
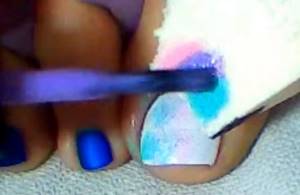
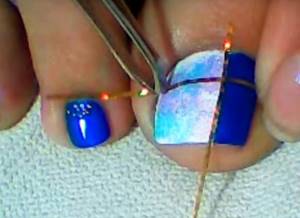
One of the ways to give a pedicure both light tenderness and provocative audacity is drawings. They can be placed either exclusively on the big toe, or on the surface of all nails - it all depends on your desire and mood. Today, performing even the simplest pedicure has become a creative process - it is done using intricate patterns, curls, abstractions, geometric shapes and various images that can diversify any boring design.

Photo of pedicure with gel polish with a pattern
Ombre
A soft and smooth transition will look harmonious on the legs only if no more than two to four shades are used when creating the ombre. When choosing shades, be very careful about their selection - they must be in the same color scheme and applied in increasing order : from dark to the lightest or from light to the darkest. The essence of this design is a smooth transition of one color to a darker another.
Photo of pedicure using ombre gel polish technique
French
If you have difficulty choosing a design for a pedicure, pay attention to the stylish classic - French. This pedicure design is unique in that it looks great on the fingers of both young girls and respectable ladies . In addition, it’s easy to do a French coat yourself at home, and believe me, it will be no worse than a salon one.
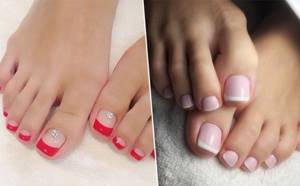
Photo of a pedicure using French gel polish technique
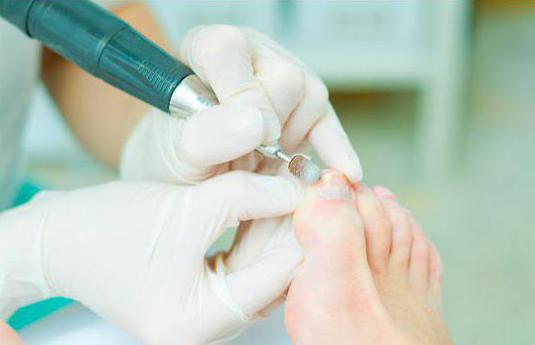
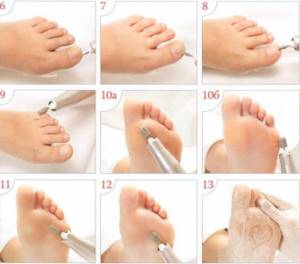
Skin care using the device
Take the coarsest nozzle and treat especially problem areas with it. These are heels, dry calluses and corns. After this, use the nozzle to gently go over the entire skin. Remember that when doing a hardware pedicure, you can’t stop at one place. A rotating file can severely damage the skin. That is why all movements must be made carefully, moving slowly in a certain direction.
Once the rough layer of skin has been removed, you need to put on the sanding attachment and complete the pedicure. This type of file can be used to process the inside of the toes and the center of the foot.
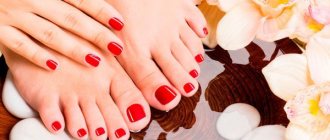
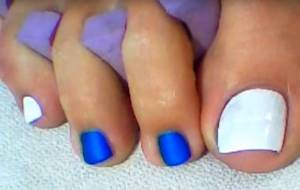
Single-color pedicure with gel polish at home
A plain classic pedicure always looks juicy and elegant, and also gives your legs not only a well-groomed, but also a chic look. Due to its brevity and restraint, it will be appropriate for any outfit or event in your life. I bring to your attention a simple and very stylish pedicure made with blue gel polish. Blue is the most “calm” color, and its positive and calming effects on others have been known for a long time.
We will need:
- pedicure set;
- pumice;
- nail polish remover;
- degreaser or boric alcohol;
- cotton pads or wet wipes;
- blue gel polish – top coat;
- pigmented varnish – used as a base coat;
- (I recommend a 36 W lamp - gel polish dries in 2-3 minutes, or an LED lamp - it is expensive, and gel polish dries in 6-10 seconds);
- fixer – transparent or colorless gel polish.
Nail preparation process
- Wash your feet thoroughly and remove the old pedicure with nail polish remover. highly advisable to use a nail polish remover without acetone , since this drug contains components that negatively affect the nail surface and contribute to brittleness and delamination.
- Pour hot water into a bath or regular basin and add 5 mg of baking soda, 3-4 drops of lemon juice, 2 drops of iodine and a pinch of sea salt. This helps to steam the feet and subsequently painlessly remove cuticles and hangnails.
- Place your feet in the bath for approximately 15-25 minutes until they are completely steamed. If necessary, as the water cools, add a little more boiling water .
- Dry your feet with a towel.
- Shortening too long nails in a straight line. Experts recommend giving your nails a square shape - this will help prevent nails from growing into the skin.

- Using a file, we carefully process the edges of the nails : we give them the desired shape and make the edges smooth, removing all the irregularities along the way.
- Use pliers to carefully remove cuticles and hangnails . If the cuticles become rough again, soak your toes in warm water again for a few minutes.
- We carefully treat the heels and feet with pumice stone : we get rid of rough, dead skin, corns and outdated calluses.
- We fix the result with a scrub and then massage a nourishing and moisturizing cream or essential oil into the skin of your feet.
Another advantage of gel polish is that various decorations stick to it very firmly and for a long time. If you want to decorate your pedicure with rhinestones, beads, stones, etc., attach them to the nail after applying the last layer of top polish and before drying.
Gel polish application process
- Apply degreaser to the nail surface and wait until the product is absorbed.
- For that so that the main color goes on easily and evenly, cover the nail with a thin layer of base coat and dry under the lamp for two minutes.
- After drying cover the nails with gentle and smooth movements apply a thin layer of top coat and dry the layer under a lamp. The thinner the applied layer, the more natural your pedicure will look.
- For a more saturated and rich color Apply the second layer of blue gel polish in the same way. You can safely apply several layers of gel polish, but remember that after application each layer must be dried under a lamp.
- To consolidate our result, apply clear gel polish and dry under a lamp.
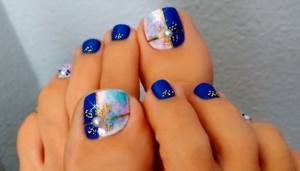
Photo of a pedicure done with blue gel polish
Softening rough skin
Pour the softening liquid into the bowl. After this, lower your legs into it. Some people prefer to use refillable formulations. They look like varnishes or pencils. These products lubricate the cuticle around the nail plate. Under the influence of the unique composition, the skin softens. After this, you can remove it without much difficulty.
Softening the cuticle with the help of special means requires a strictly specified time. Some formulations require exposure to the skin for 15 minutes, others act after just 5. If you do a pedicure at home with your own hands (an easy way for beginners), you will most likely choose softening with water. This effect on the skin should occur within 20 minutes.
Video of pedicure with gel polish
Gel polish has a multifaceted palette of color shades, which allows you to create absolutely any fashionable design on your nails, and given modern trends, it has become possible for even inexperienced fashionistas to perform a pedicure at home. However, remember an important axiom: you need to make the same design on your fingernails and toenails; it looks very aesthetically pleasing. Otherwise, if the design on the hands and feet is different, it indicates a lack of taste in the person wearing it.
For those who don’t like to spend time reading, I offer several educational videos, after watching which you can be convinced of the ease of creating a unique pedicure , and in the future it will not be difficult for you to spend some of your free time on such a pleasant and necessary procedure as a pedicure.
Videos for beginners
Video tutorial No. 1: Single-color pedicure from start to finish
Video lesson No. 2: French to yourself
Video tutorial No. 3: Do-it-yourself pedicure with rhinestones
Master class video
Master class No. 1: French gel polish inside and out
Master class No. 2: Trim pedicure + cat eye
Master class No. 3: Combined pedicure
What does gel polish pedicure go with?
- A beautiful pedicure is appropriate everywhere, the main thing is choose the right design and color harmony for the entire image as a whole.
- For those with dark skin stylists recommend choosing pastel colors, but for ladies with milky skin color – bright and provocative shades.
- Choosing shades for a pedicure, pay attention to the color of the shoes and the clothes you will wear, and when choosing a design, focus on the upcoming event.
- Pedicure has no boundaries related to age, occasion or style of outfit.
I will end here. It seems that I told about everything and forgot nothing. Use the information for your health! If you have any questions while reading the article, feel free to ask them, I will definitely answer. Share your successes with me and show the result in photographs, if possible - I will be glad to see that you succeeded. Good luck with your experiments!