The cost for Ruffian nail art in a salon will depend on the type of coating, on average up to 1,500 rubles
At the moment, it is very stylish to highlight the hole in a manicure using different methods, and Ruffian is one of them. What is the essence of this technique? In this case, highlighting the base of the nail with a contrasting color is done with a narrow crescent-shaped strip, reminiscent of a kind of “frame” or substrate framing the nail.
This design opens up the possibility of new tests with textures and materials for decorating a certain part of the nail plate. Let's talk about possible DIY decor options and look at some of them step by step as an example.
What is Ruffian
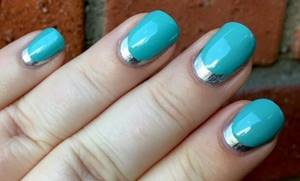
Ruffian is a mirror image of a French coat, which is achieved by additionally highlighting the line in the area of cuticle growth.
Do not confuse Ruffian and classic moon manicure. In the first case, the emphasis is on the area of formation of the epithelial growth, while in the second, the light hole at the base of the nail is highlighted.
Exquisite moon manicure: instructions, ideas, spring trends and tips
Ruffian is a variant of the lunar and French design with its own characteristics and rules.
This design can be done in two ways:
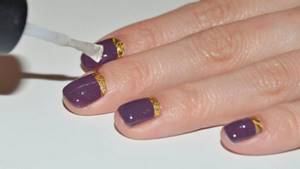
- Using a stencil. A special paper-based blank is glued to the nail before applying the second shade. The sticker serves as a barrier for the varnish to flow through, and helps to achieve a clear and even border between colors. The main thing in this method is to remove the stencil before the varnish is completely dry.
- Using a brush . The transition is corrected with a special brush with a thin tip, but artistic skills are required to achieve the result.
How to do a manicure
Ruffian manicure has several options. It won’t be too difficult to repeat a simple drawing on your nails. Let's take a closer look at how to make this unusual coating.
By hand
A thin brush and your magical hands can work wonders. The brush should have long bristles; you can purchase it at any stationery or art store. The drawing technique is very simple. It is enough to scoop a little varnish onto the brush, and then draw a neat edge along the entire cuticle. Next, all that remains is to draw small “antennae” at the end of each arc. You can draw a hole both before and after applying the main color.
Stencils
Special stickers and stencils will make your task easier. Most often, girls choose arc-shaped stencils. First you need to apply the base shade of the base. And after complete drying, glue the stencil closer to the middle of the nail. A special hole is formed, which will only need to be painted over with the desired tone of varnish.
Peculiarities
The technique owes its name to the company CND, which developed a new version of nail decoration for a fashion show at the Ruffian house. From then on, the original design became known as Ruffian and was adopted in salons and nail salons around the world.
- Ruffian does not tolerate untreated cuticles and uneven surfaces;
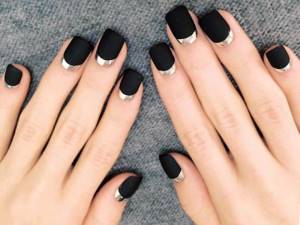
- The goal of the design is to focus attention on the line at the base of the nail, highlighting it with contrasting varnish. The desired effect is achieved by layering coatings of different colors or textures;
- You don’t have to limit yourself to just one accent – the technique allows you to create several contrasting stripes. The main thing is not to overdo it with the thickness of the varnish coating;
- Ruffian manicure is suitable for women of any age, profession and status - depending on the combination of colors, the design turns out to be businesslike, gentle or funny.
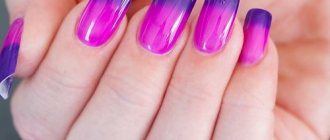
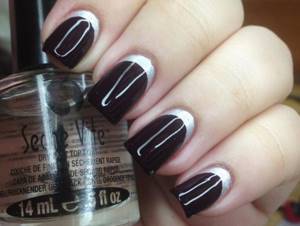
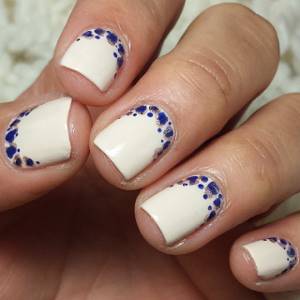
- The line at the base contrasts with the main shade of the coating. The most successful combinations are:
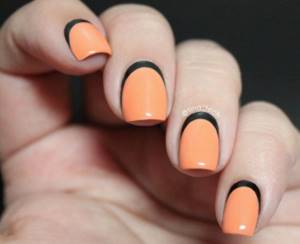
- Red and black;
Yellow and black;
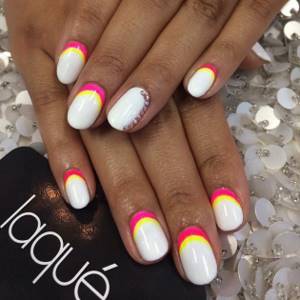
- Pink and white;
- White and black.
But don’t limit yourself – come up with original combinations yourself!
Conclusion
The reverse French jacket is very stylish and laconic; it will reveal your everyday look in a new way without attracting unnecessary attention. We tried to do a very simple design option that any beginner can master.
The video in this article with detailed visual instructions will also help you. Feel free to ask questions in the comments.
Did you like the article? Subscribe to our Yandex.Zen channel
Text \ Photo Victoria BOLSHOVA Posted 12/25/2017
0
share:
To favorites
To print
If you want to thank, add clarification or objection to the author - add a comment!
Currently being discussed:
- Lyubov Burkina
20.08.2018
What hair color should I choose? Please give me some advice. I don't know which one I have...
- I
19.08.2018
I had eyelash extensions for 6 months and took a break. After 3 months I increased it again...
- Vasilisa
18.08.2018
Cool hairstyle
18.08.2018
Hi, can I dye my bleached hair (currently red) bright purple...
16.08.2018
Hello! I am a dark girl with black eyes. I want to dye my hair dark...
15.08.2018
The photo shows young beauties. Can older ladies have their eyebrows done? Age...
Comments »
Rules
- To make the lines clear, it is better to use special stencils. Paper blanks will save time and help in creating strips of the same width and shape;
- It is recommended to choose varnishes for decoration from the same company. Products from the same manufacturer have the same density and drying speed;
- It is better to draw the line by repeating the shape of the free edge of the nail plate. This manicure will look neat and concise;
- Before applying a new layer, it is important to make sure that the previous one has dried. Haste will result in damage to the decor beyond the possibility of restoration;
- Nails are the same length and shape and should not have obvious damage, bumps or dents. Ruffian will highlight all the defects and make the manicure untidy;
- It is not necessary to use only glossy or matte varnish. The combination of different textures will make the manicure look sophisticated;
- Do not use too many layers - the coating will look too thick and artificial;
- It is better to choose proven means. A low quality product may lie unevenly or cause streaks. Applying several layers will help correct the situation, but the overall thickness of the design will increase.
Instructions for regular varnish
Instructions for performing Ruffian with regular varnish:
- Carefully treat the nail surface. Polishing will help to cope with minor irregularities, and a pusher will help to treat the adjacent area. Get rid of dirt, carefully remove burrs.
- Give your nails the same shape, file them to the same length;
- Cover your nails with a thin layer of transparent varnish and wait until completely dry;
- Apply a drop of colored varnish and lightly “press” the drop so that the dye falls closer to the cuticle.
- Carefully but firmly stretch the color coating from the center to the edge of the nail;
- Work the area at the base, carefully filling the entire cavity. Wait for it to dry;
- Apply a varnish contrasting with the first layer on the nail, retreating from the base exactly as much as you want. Carefully paint over the main area of the plate, leaving a thin line at its base. If necessary, adjust the edge of the line with a thin brush or use a stencil. The paper blank is placed before applying the second varnish and guarantees a clear line.
- Make sure all layers are thoroughly dry and apply a protective coat or clear coat. Do not forget to “seal” the nail on its protruding part.
Gel polish instructions
Stages of performing a manicure with Ruffian gel polish:
- Get a manicure - edged or not, decide based on your own preferences. Carefully treat the cuticle.
- Carefully cut off the lipid layer with a buffer and wipe the plate with a primer;
- Apply the base and distribute it evenly, dry it in a UV lamp for 120 seconds;
- Cover the nail with colored gel polish, carefully working the base, and dry it in a lamp;
- Apply contrasting gel polish, leaving a strip of the desired width from the base. You can adjust the border with a thin brush, but if you don’t have the skills, it’s better to stick a stencil before applying the second layer;
- Distribute the dye and seal the ends. Place your hand in the lamp and dry it;
- Secure the design with topcoat and dry thoroughly. If there is a sticky residue, remove it with a special product.
Rhinestones, stickers and other decorative items will help make your manicure bright and original. Just place them on your nail before applying the sealer.
Expert advice
- If you use rather liquid gel polishes when doing a Ruffian manicure, then it is better to dry each finger separately: when you finish the nail, go straight to the lamp. Prompt drying reduces the likelihood that different colors will spread a little and, as a result, the border between them will no longer be smooth and clear.
- It is best to use gel polishes from one manufacturer. This is convenient and practical - firstly, they have the same consistency, and secondly, materials from the same line are dried in the same time.
- It is not always possible to create a neat coating of gel polish close to the cuticle in one layer. Therefore, it is better to do this in two stages. In this case, the first layer can be applied not very tightly, just for pigmentation. And with the second layer we apply the coating perfectly close to the cuticle and finalize all the small details. In this case, for convenience, you can use an additional thin brush. Since the pigment is already distributed, there is no need to make a second layer thick.
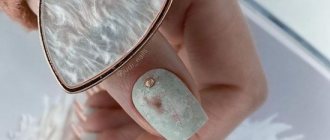
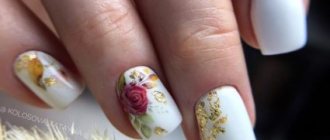
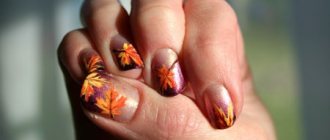
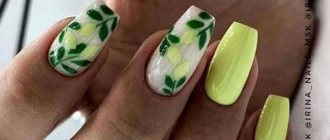
Design ideas
A line of contrast is not all Ruffian has to offer.
Possible design options:
- Classical. A thin border of contrasting color remains along the base, close to the place where the cuticle grows. The shape of the strip follows the free edge of the plate. For a neat manicure, beginners should use special stencils;
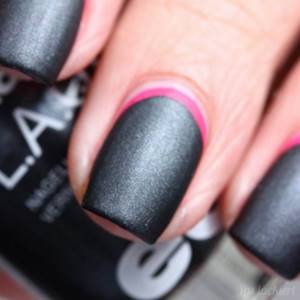
- Multilayer. Two or more stripes of different colors located from the base towards the middle of the nail plate;
- Gradient. Lines are drawn in a certain sequence. From lightest to darkest or vice versa. A correctly selected palette creates the impression of a gradient color. Buying the right shades of varnish is not the only option - you can simply dilute the base dye;

Gradient manicure: preparation, ideas, materials, 6 methods of execution
- Rainbow. The stripes repeat the rainbow. Creating a rainbow design will require artistic skills and considerable experience;

- With an uncolored line. The line at the base is not covered with dye and remains natural. To add gloss, the empty area is covered with a transparent varnish or base;
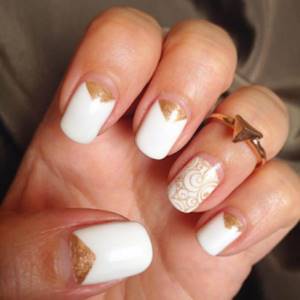
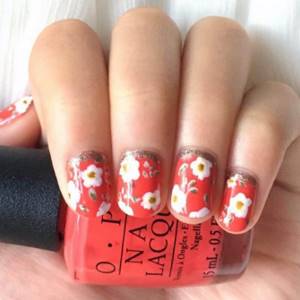
- Additional decor. Not only the cuticle area is shaped, but also the main nail plate. The final result here depends only on the artistic skills of the painter;

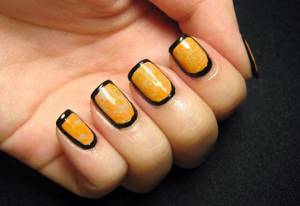
- Frame. Not only the area along the cuticle is decorated with a contrasting color, but all edges of the plate parallel to the side ridges;
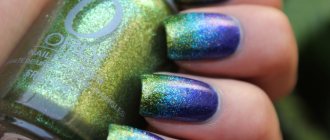
- Using foil. A special foil will help make a narrow strip bright. The main thing in this case is to maintain a clear boundary;
- Rubbing decoration. Mirror shimmer looks advantageous with dark shades of varnish. It is better to use the rub to decorate not the entire nail plate, but a thin strip at its base;
Rubbing: what it is, how to use it and all application methods with step-by-step instructions
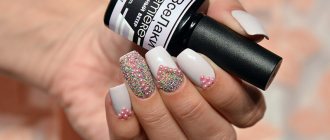
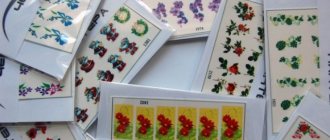
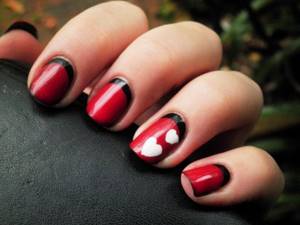
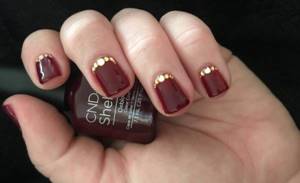
- Rhinestones. You can add an accent with rhinestones, beads or stickers of the desired size;
- Non-standard lines. The accent can be not only straight, but also wavy, triangular or semicircular. Stencils will help you achieve symmetrical and equal-sized figures.
- With a side accent. In this case, not only the area near the cuticle is highlighted, but also the edge of the nail from one of the side ridges.
Little secrets
Stylish and unique Raffian manicure has its own little tricks.
- It is best if coatings of the same brand are used to complete the design of the nail plate. Since varnishes of different brands have different densities and drying times.
- Stencils are ideal for drawing holes. They can be purchased at a specialized store, or you can make them yourself at home using scrap materials. This will save a lot of time and ensure perfect arc alignment.
- It is very important that all nails have the same shape and length. Otherwise, the manicure will look ridiculous and ugly.
- It is best to perform an arc strictly according to the shape of the cuticle.
The cuticle area, in turn, should be in contrast with the main coating of the nails.
Options for short nails
Ruffian looks great on short nails if the color palette is chosen correctly.
You can achieve an effective design by following these tips:
- Red looks great on short nails. The specific shade is selected based on skin color;
- All natural shades will be harmonious, the main thing is not to choose simple, standard colors;
- Varnishes with a metallic effect look great. It is worth paying attention to gold and silver dyes;
- Frame design visually reduces. On short nails, this type of Ruffian is best avoided;
- Oversaturation with rhinestones, drawings and other decorative elements is also not the best solution.
- A white line in the area of cuticle formation, on the contrary, visually lengthens the plate;
When choosing a color for short nails, it is important to rely not only on fashion trends, but also on the features of the nail plate. Incorrectly selected shades will make the design less harmonious and impressive.
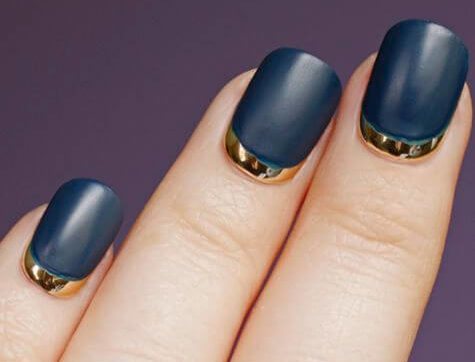
- The classic design of the cuticle growth area with a tri-tie and a dark matte finish create an ideal manicure using the Ruffian technique;
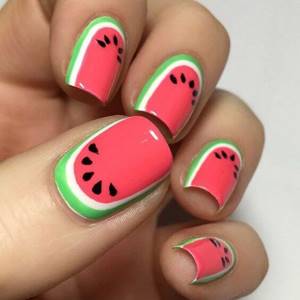
- Juicy watermelons in an original design with stripes along the side ridges and cuticle growth line are an excellent alternative to a frame accent;
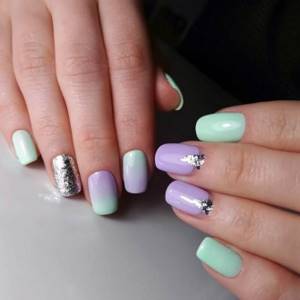
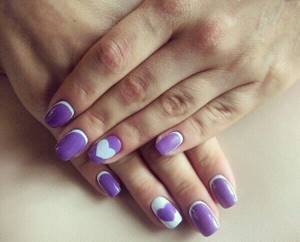
- Delicate lilac in contrast with white stripes and a simple pattern is a wonderful combination of simplicity and style.
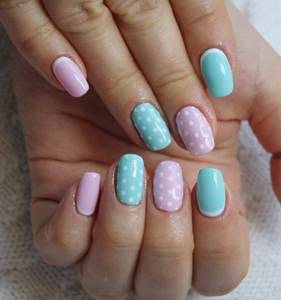
- Another delicate option for combining white, mint and soft pink colors. Additional proof – beautiful, does not mean difficult.
Best color combinations
Among the many shades it is very difficult to choose exactly the right one. Experienced manicurists have calculated that a woman can spend up to 30 or even 40 minutes choosing the appropriate shade during one visit to a beauty salon. It is worth noting the most interesting and “profitable” color combinations of Ruffian manicure. The photos presented in our article will surely inspire you.
- Black with yellow. This combination is ideal as an addition to a classic business look.
- Black with red. This classic color combination will ideally complement the image of any representative of the fair sex, regardless of her age and status.
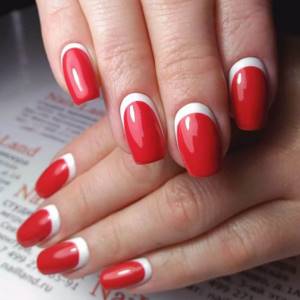
- Red with white. Also a classic combination.
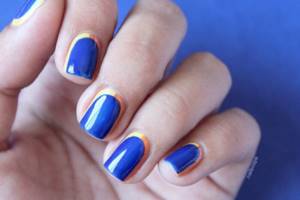
- White with blue is a fairly laconic and calm option.
- Red and blue is an interesting combination that is ideal for bright and passionate girls.
Such combinations will not only demonstrate a woman’s incomparable style, but will also favorably highlight any image of the fair sex.
Selection of colors for the moon jacket
Nail design ideas using bright colors or dark shades are everyone's business. But without your own style and taste, there is a risk of making a completely tasteless and irrelevant manicure.
Light shades of varnishes
Combinations of light shades in a reverse jacket with each other are almost always a good option. They can be selected according to the same color scheme, look for opposites, or combine with white. With light tones, the manicure looks gentle, so you should not burden the design with complex bulky decorative compositions.
Contrasting and bright shades
Playful bright colors in manicure are dazzling in the summer. But there are also countless people who want to stand out even in the cold season. It's all about the right color combinations, allowing the design to always look fresh, and at the same time stylish. For reverse French, any combination is acceptable: contrasts between colors (yellow and blue, green and pink, etc.), as well as the use of the same color, but in different shades. For example, light mint and rich green look impressive.
Dictionary for a beginner nail designer
Fashion blogs, communities of nail designers, and social networks are simply full of new interesting nail art techniques, but there are no fewer incomprehensible terms on these sites than beautiful designs.
Especially for you, we have prepared a small dictionary that will help you understand unclear terms - franken, shimmer, ombre, marble design and other terms will become clearer and closer.
3-Free
- nail polish that does not contain toluene, dibutyl phthalate and formaldehyde, as well as their components.