- 71978
- 08-04-2021
- Author: Mysekret Team
- 0
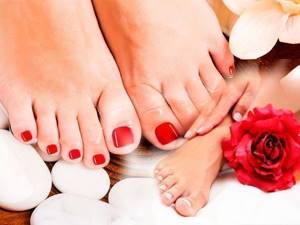
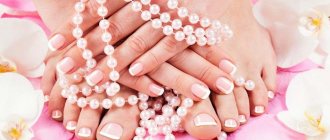
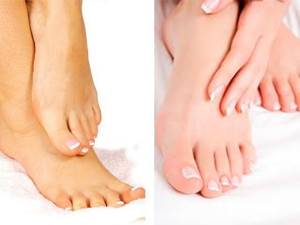
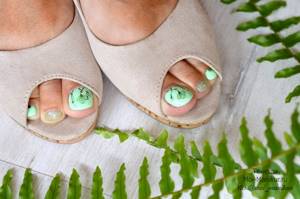
Girls always want their legs to look beautiful and well-groomed - both in summer and winter. But few people know that you don’t have to go to a salon for a beautiful pedicure; you can do it yourself at home. This is especially true for those who like to wear sandals in the summer - beautiful and well-groomed toenails are especially important for them.
If a girl has beautiful, well-groomed nails, then she feels confident. Our article will tell you how to properly do a pedicure step by step. We will not use special equipment to perform it at home, which will allow you to enjoy this activity at any time.
If you want to have a skincare procedure done in a salon or beauty center, then pay attention to OLA centers.
See also...
✅ Light manicure is trending this year: 100 gentle ideas
✅ You need to be modern: we study the signs of outdated makeup
✅ The bob has grown: how to get a haircut when salons open
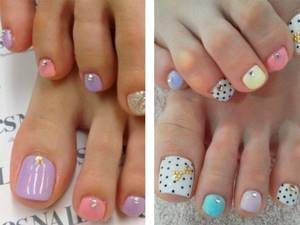
✅ It's time for a pedicure: fresh and stylish ideas for spring-summer 2021
50+ ideas for a fashionable pedicure here.
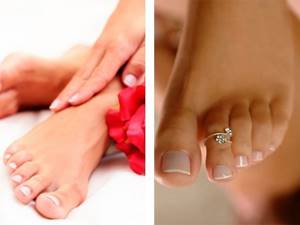
Pedicure at home: instructions
This is a completely simple procedure, it won’t take you much time, and the result will make others admire you! There are many ways to do a DIY pedicure at home. We'll look at step-by-step instructions on how to do it right!
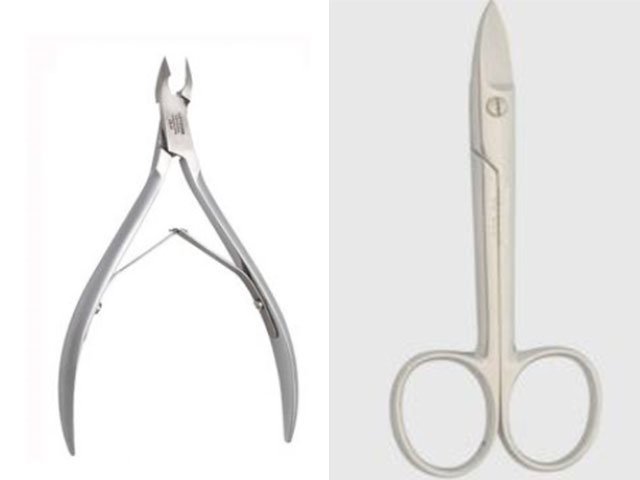
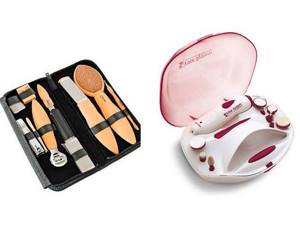
Required Tools
For this you will need:
- high quality scissors and tweezers,
- orange stick,
- wire cutters,
- brush,
- file,
- cotton pads,
- and nail polish remover.
In addition to the above tools for pedicure at home, you must have a bath, scrub, callus and corn remover and, of course, foot cream. You can take any cream that you use daily, be it moisturizing or deodorizing.
If you have all these tools, then you can easily repeat the salon pedicure process. The main thing is to store them correctly. It is better to do this in a special cosmetic bag, clean and dry. After each use, thoroughly sterilize each item.
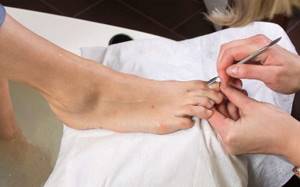
Pedicure: step by step
When creating a pedicure at home with your own hands, you should follow the instructions. So, let's consider all stages of the procedure.
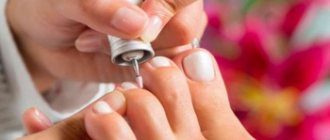
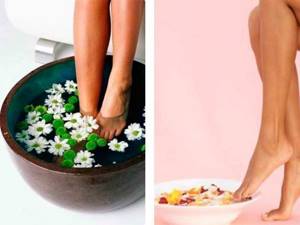
Step 1: Start with a foot bath. Before performing this procedure, you should remove all nail polish. For it, you can use sea salt, soda, calendula or chamomile tinctures. Or you can buy a ready-made softener with an antibacterial effect. As the water in the bath cools, it should be filled with hotter water so that your feet are well prepared for the pedicure process. You should steam your feet for about 20-30 minutes, then wipe dry with a towel.
Step 2: removing corns. Next, you need to take care of your feet, removing all corns and calluses. They can be removed using a pumice stone or a razor specifically designed for this purpose. Walk the pumice stone in a circular motion over the entire foot - this will help get rid of dry skin. To give your legs a more well-groomed appearance, use a scrub. Distribute and massage your feet, toes and between your toes. After this procedure, rub the cream into your feet.
If there are calluses and cracks, you can remove them using tweezers .
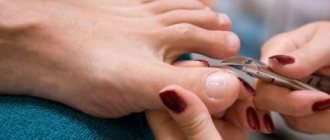
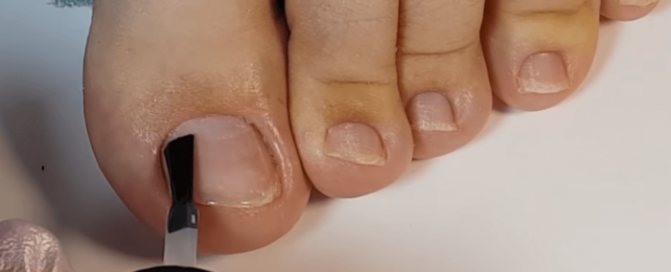
Step 3: prepare the nail and cuticle. Under no circumstances should you cut the cuticle, just push it back with a stick. You can apply an emollient cream or oil for this. Next, the nails should be trimmed and filed, but do not round their edges. This can lead to ingrown nails and you can’t do it without the help of a specialist.
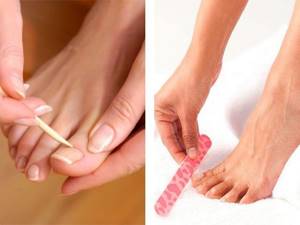
Don't forget about dirt under your nails! Clean it thoroughly!
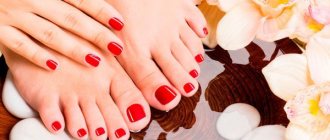
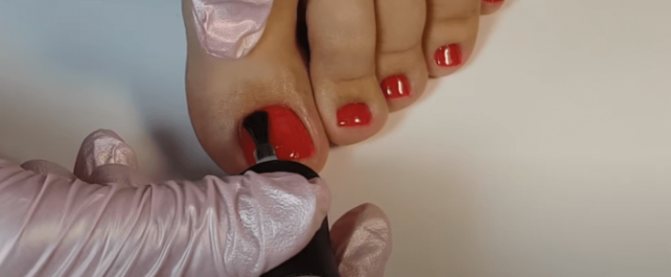
Step 4: Applying varnish. The first layer is a transparent nail base. It will protect the surface. Apply colored varnish in one or two layers, allowing each of them to dry thoroughly. Apply a fixing varnish on top to prevent the color from chipping.
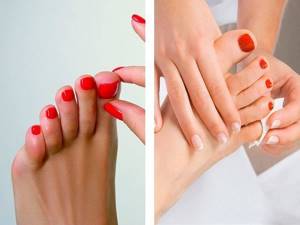
This completes the DIY pedicure at home! There is nothing complicated, the main thing is to learn how to do it correctly!
What can a master offer you?
Classics of the genre
Pedicure, based on cutting the nails with scissors and shaping their shape, after which comes the turn of skin treatment with the removal of calluses and keratinized areas. The procedure is carried out on previously steamed feet. Softening is achieved using baths based on herbal solutions or with the addition of oils. Remove dead skin with pumice or a special brush. Then the cuticle is processed. Finally, the feet are cleansed with water and softened with cream.
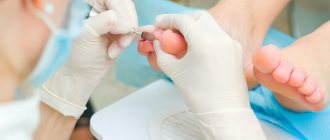
Using a router
A type of pedicure that is defined as hardware due to the use of a special machine (milling cutter) for the procedure. Perfect for those who have fairly serious foot problems. For example, corns, calluses, rough, dry and cracking skin. In this case, the legs are softened with cream, applying it for a while. Then, using various attachments, all problem areas are cleaned. Nails are also treated. At the end of the procedure, it is mandatory to use a nourishing cream.
Combination
Combined pedicure is quite popular. The procedure is more effective than the above, carried out separately. A combined pedicure involves the use of a milling cutter to process thinner areas of the skin or as a polishing after using the trimming method. In such a union, pedicure provides greater smoothness of the skin and longer lasting effect.
Treatment
A common reason that forces a person to go to a salon is the presence of foot diseases. For people with such problems, there is a medical pedicure. It is based on a combination of foot treatment with a milling cutter and the use of medicinal ointments and creams. Only a specialist can carry out such a procedure, since in the presence of diseases it is necessary to do a pedicure with extreme caution, and use special means only with knowledge of the nuances of the disease.
Spa
A feature of this type is the complete absence of mechanical effects on the skin. Only emollients are used; special scrubs are used to remove skin particles and, at the final stage, nourishing creams are used. A pleasant addition will most likely be relaxing music and soothing aromas floating in the air during the procedure.
Coating
In addition to the methods of performing a pedicure, there are various options for coating nails after treatment. The most popular are:
- Shellac coating. It involves a combination of strengthening varnish and gel, performed in various color combinations.
- French coating. A very popular way to care for nails. Elegant and simple at the same time.
- Lunar covering. The base of the nail plate (lunula) is coated with a contrasting varnish in relation to the rest of the nail surface.
- Medicinal drugs. Their use is aimed at strengthening the nail plate, eliminating fungal infections and giving smoothness.
Having knowledge about the types of this procedure, you can determine what will be optimal in a particular case. And going to the salon will not be a puzzle, but will be a pleasant pastime with the acquisition of well-groomed legs. For a clearer idea of pedicure, it would be good to know its main stages.
Features of pedicure for older people
A medical pedicure for the elderly at home is performed in exactly the same way as a regular do-it-yourself pedicure at home. The most important thing here is compliance with antiseptic rules at the highest level. Because for them it’s not just about getting their nails in order. This is an opportunity to move painlessly.
The duration of such a procedure will be from forty to eighty minutes.
A hardware pedicure is best for older people because it does not require steaming the feet. Many older people suffer from varicose veins and other diseases for which steaming is not recommended. This method can be done for you any day; the best specialists work in Moscow and St. Petersburg.
Advantages
You may have already noticed that it has a lot of advantages over similar procedures for the legs, namely:
- Hygienic and safe. All instruments are sterilized before use, some materials are disposable. This method of working with skin practically eliminates cuts, which often occur during a classic pedicure.
- Solves many problems of the legs and feet : corns, calluses, ingrown toenails, cracks, thickening of the nail plate, hyperkeratosis.
- There are no contraindications for those who suffer from diabetes.
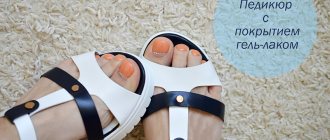
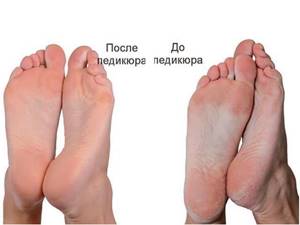
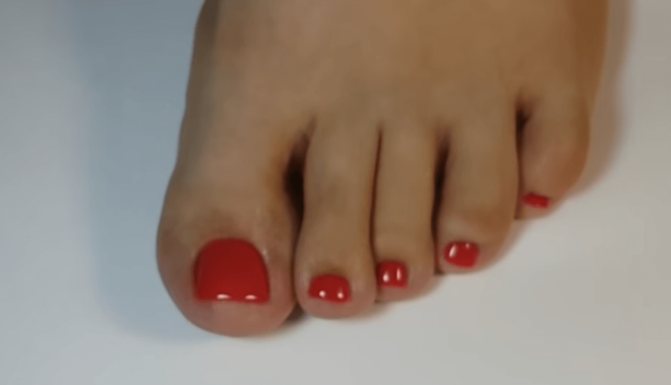
After the procedure, you can apply nail polish or gel polish. But that’s a completely different story :) In the photo below, my legs are after a hardware pedicure in the salon; I already did the gel polish coating myself:
How to do a hardware pedicure correctly?
Care should be taken to properly perform a hardware pedicure with your own hands at home. But this activity is quite easy to learn. The main thing is to choose the right device for this.
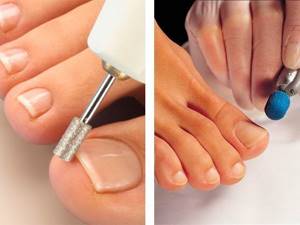
The main advantage of this type of pedicure is that your feet do not need to be steamed in advance; it is enough to treat them well with an antiseptic.
Hardware pedicure step by step:
- Cuticle. Here the operation of the apparatus must be very careful. With light movements, you need to lift the cuticle from the center to the edges. And then sand thoroughly;
- Sinuses of the lateral ridges. Move in the direction of nail growth, away from the cuticle. It is better to use a cutter edge;
- Nail folds. Light non-stop movements with soft grinding;
- Treating the skin around the nail. Similar movements, but using an attachment specifically for this operation;
- Polishing the nail plate. This is where grinding and polishing attachments come to the rescue. This will help remove all irregularities and polish the plate to a shine.
As you can see, do-it-yourself hardware pedicure is quite simple to perform. Hardware manicure is performed according to the same scheme.
Hardware medical pedicure is prescribed in cases where an ingrown toenail, foot fungus, calluses, corns have appeared, or to improve the blood supply to the foot or to treat and prevent cracks.
This procedure should be carried out by a person with medical education, because it requires special knowledge. Wound healing creams and gels and disposable attachments are used, which eliminate the risk of infection.
The most popular devices for hardware pedicure and manicure:
- Saturn 3565 from Planet Nails;
- RM-25000 from Runail;
- Combi from Planet Nails.
Professional equipment will allow you to reduce the procedure time and improve its quality.
What is a classic pedicure
The peculiarity of this technique is the use of a set of special tools for processing skin and nail plates. Typically these include:
- nippers or knipser;
- file, pumice;
- pusher and buff.
In addition, a trim pedicure includes a mandatory foot bath to soften dead skin.
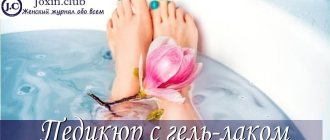
Pedicure with gel polish at home
Pedicure with gel polish at home is very easy to do with your own hands. It lasts for more than 3 weeks, and its color does not lose its saturation over time.
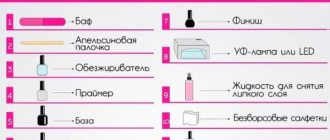
For this you will need:
- Gel-varnish,
- Base and coating
- Nail degreaser,
- Cotton pads,
- UV lamp.
Application steps:
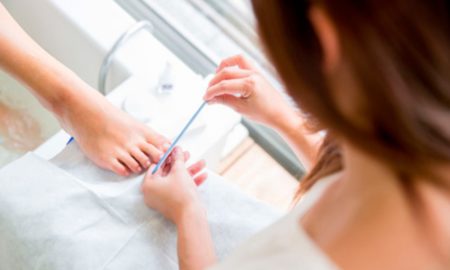
- First, let's remove the old polish, trim the cuticles and take care of the heels. After this, the nail is shaped, if it has not already been shaped.
- The base coat is applied immediately after degreasing the nail. This coating is kept under the lamp for about 2 minutes.
- The product is applied in 2 layers, each of which is also dried under a lamp.
- Top coat and its subsequent polymerization in a lamp.
- The sticky layer is removed and the oil is rubbed into the cuticle.
Preparation and application of coating
Once the cuticle and side ridges are prepared, you can begin coating. This requires nail preparation.
The surface of the nail plate must be sanded to remove all roughness. To do this, it is best to use a file with a medium abrasiveness of 240 grit. After this, the nails must be cleaned of dust and degreased.
If the client's fingers are straight, there is no need to use a special separator. If some fingers overlap each other, it is better to use a separator so that the coating does not rub off and dries thoroughly.
It is recommended to use a primer on your feet. It only treats the tip of the nail. It is not worth covering the entire surface, since a pedicure lasts longer than a manicure. And the primer dries out the nail plate with prolonged exposure.
The pedicure base can have a thick or medium-thick consistency. If you know how to quickly cover the nail and level it, you can also use the liquid option - a liquid base will help reduce the thickness of the layer.
Applying base coat
Having chosen a base that suits your needs, you can begin to coat your nails.
First, take a little material onto the brush and press one side of the brush against the neck of the bottle.
Place the drop of base obtained on the opposite side in the middle of the nail, not coming close to the cuticle.
Using light movements without pressure, distribute the base on the sides, moving the brush from top to bottom parallel to the side rollers. If you press the brush, the base will blur and “buns” will form on the surface.
At the cuticle, distribute the base with short, small movements. You can take an additional drop of material and, with light pressure, bring it to the cuticle, being careful not to go into the skin. There should be approximately 0.3 mm left to the cuticle.
After the gel is applied to the skin, you need to brush over the entire nail. To understand whether it is evenly distributed, you need to look at the end of the nail. In this position, it will be clearly visible where there is excess or deficiency of material.
You need to dry your thumbs immediately. The rest can be applied on 2 nails at a time. In this case, the leg should stand as straight as possible in the lamp. It is better to monitor the client for the first few seconds so that the coating has time to set and does not flow to one edge.
Drying time depends on the lamp - for LED models 30-60 seconds, for UV - 120 seconds.
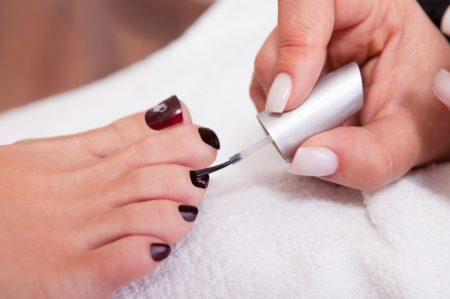
Color coating
When applying color to a nail, the same rules apply as when applying a base coat. You need to take a small drop onto the brush so that the varnish does not flow to the sides. To begin with, cover the middle part of the nail and its base. Then the varnish is applied as close as possible to the rollers, leaving a small distance in the area near the cuticle.
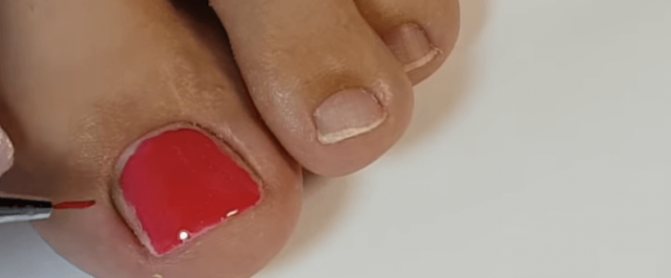
The first layer should be as thin as possible, but without bald spots. To achieve an even coating, you can use a thin brush - you need to saturate it with color and treat problem areas. You should not go deep under the rollers or cuticle. It is better to leave a small space of 0.2-0.3 mm.
If the polish is not highly pigmented, reapplication will be required. 2-3 layers of gel polish are enough for high-quality coverage. Each layer must be applied using the same technology as the first. After each layer, the nails must be dried thoroughly so that the rays of the lamp fall on its entire surface. Otherwise, the coating may shrink and peel off.
Top coating
For toenails, it is recommended to use a topcoat with a sticky layer. This coating is more elastic, which is what is required in a pedicure. A non-sticky top creates a dense reinforcing surface, which can cause chipping on your feet due to the constant pressure of shoes on your toes.
The top is applied according to the same scheme as the previous coating layers. Using a small brush, you can carefully distribute the fixing material near the cuticle and in the area of the side rollers.
Design
After the top coat has dried, you can make the design. Rubs, glitter, rhinestones and stickers are suitable for pedicure. The main thing is that the selected design elements do not disturb the shape of the nails, because on the feet they should be as square as possible.
When applying rub or glitter, you don’t have to cover the side areas - you’ll get an emphasis on the center of the nail. It is better to lay out rhinestones in straight lines or geometric shapes. Do not forget that each design element must be covered again with topcoat in conclusion. Otherwise, the decorations will come off the nail.
If in doubt, the rhinestones can be fixed with special glue or the design can be covered with a jewelry fixative - this way the jewelry will definitely last until the next correction.
Do your clients prefer a plain coating on their nails or do they like to decorate their fingers?
All about pedicure technologies and necessary products >>
Comment
Products for high-quality pedicure at home
A good pedicure involves not only processing the cuticle and carefully applying gel polish. It is also important to clean your heels, get rid of foot fungus and take steps to get rid of bunions. Here are some good remedies to use at home:
Pedicure socks Baby Foot
These socks have been popular in Japan for more than 15 years and have finally reached us. They are extremely simple to use: put them on, wear them for 15-20 minutes, remove and wash the product off your feet. Around day 2-3, the rough skin will begin to peel off.
Nomidol cream for foot fungus
Fungus is a popular problem of our time, which is most often caused by poor hygiene and poor-quality shoes. You can get rid of fungus. choosing a quality product. One of these is Nomidol. In just a couple of days, the itching goes away, sweating decreases, and after 30 days the feet take on an absolutely perfect appearance.
Gel gloves and socks
If there is no fungus and there is no need to exfoliate rough skin, pamper yourself with gel gloves and socks for spa care. Silky skin and a feeling of complete relaxation are guaranteed. Experts recommend!
Ointment "ValgusStop"
A protruding bone on the foot, calluses and corns are also common problems that can be dealt with by choosing a quality product for home use. ValgusStop ointment gives noticeable results in just 1 month of use.
Types of treatment for classic pedicure
Classic pedicure goes well with various methods of treating and caring for the skin of the feet and nail plates. At the request of the client, conventional trimming techniques can be supplemented with useful procedures. Today the following types are most in demand:
- SPA pedicure with chocolate wrapping of feet, application of exfoliating, nourishing and restorative masks. Socks soaked in natural oils, fruit acids, as well as paraffin therapy are used;
- exotic pedicure with Garra Rufa fish. The feet are lowered into a small aquarium container in which tiny fish swim. They effectively remove softened skin particles. The procedure itself causes a pleasant sensation with a slight tickling sensation;
- pedicure with ice cream. Ice cream balls made from vegetable oils are added to the bath. Gradually melting, they are absorbed into the skin and nail plates, nourishing and restoring them. Next, the softened skin is treated with a special scrub;
- A pedicure with a professional foot massage relieves chronic leg fatigue, improves blood circulation, and gives muscle tone. The skin becomes healthier, the legs are less sore and tired.
For each client, the nail master chooses an individual set of procedures. The condition of the skin and nail plates, the woman’s availability of sufficient free time, and contraindications are of great importance. So, if a person is allergic to chocolate or one of the components of the nourishing mask, it is better to refuse this procedure.
View this post on Instagram
Posted by Unreel (@extremeofficial)
Pedicure 2022: fashion trends (photos)
More ideas for stylish pedicures and big toe designs here.
Share with your friends!
Read us in the Zen channel