A beautiful manicure will attract the attention of others to your hands and make your image original. Butterflies on nails are one of the most popular options for summer. Its big plus: you can apply the design yourself, and do without going to a beauty salon.
Do you want to know all the secrets? To make it more convenient for you, at the end of the article there is a video describing in detail the entire process.
Decor features
This design has several features, which we will consider further to ensure that the image is perfect:
- The color should match the base.
- Choose harmonious color combinations, avoiding combining opposite shades.
- Keep the decoration light - don't add too much sparkle and rhinestone decoration.
- Do not repeat the directions on both hands, they should be different.
- In order not to lose the beauty of the pattern, do not draw large flowers on adjacent plates.
- Apply on one finger so as not to make the created image boring and overly colorful.
A few words about color
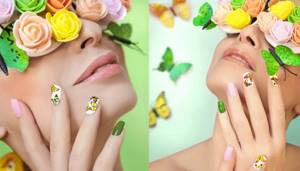
Let's talk about which color is better to choose. Butterflies are painted in summer or spring. To create an image, it is more appropriate to choose pastel or flesh tones. The main goal of the design is to stand out against the base background, so the color should be subtle.
Greens from mint or pistachio to dark green will help create a harmonious image.
Neutral colors are also appropriate, as is the classic combination of black and white. This tandem is considered universal and is suitable for clothing of different styles. N
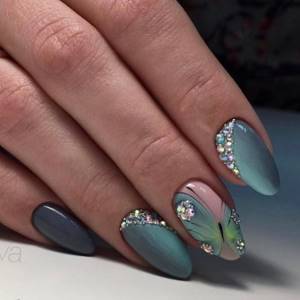
Neutral ones go harmoniously with accessories. A spectacular option is a silver and white butterfly on a black base.
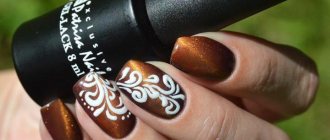
The duet of beige and brown looks interesting. If you want to use a mother-of-pearl texture or rub-in in your design, a mix of purple and white will do.
Do you want to focus the picture on brightness? An excellent choice for the summer season. In this case, it will be lost against a dark background. Choose shades so that the base itself is bright, and the base is several tones lighter.

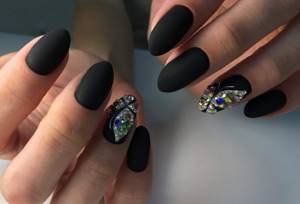
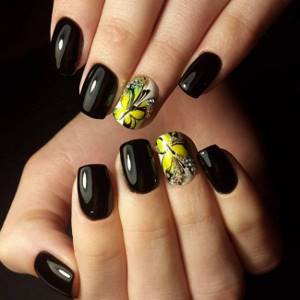
In black
This color attracts attention, combines restraint and expressiveness. Do you want a gothic, unusual butterfly?

Use matching gel polish or shellac to make it more voluminous. The image will “live” longer.
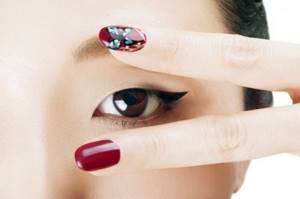
Red
An original, expressive decor will be created with a large red butterfly sitting on the nail of the ring finger. For the base, choose beige.

An interesting idea - a wing on one nail, mirrored on the next one.
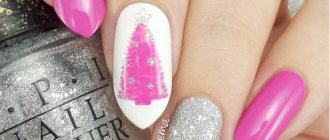
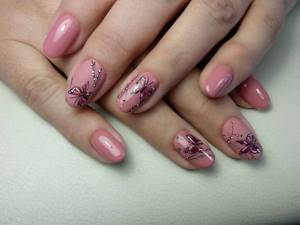
Pink
Pink decor will create a romantic look. A large picture is placed on the nail of the ring finger.
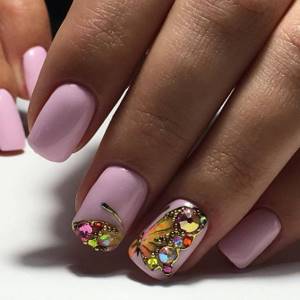
Thin contours are outlined. Rhinestones will add brightness and solemnity.
White
White never goes out of style and looks fresh and stylish. Decoration done in white is gentle and natural. To make the art beautiful, use rich colors. Do you like strict classics?
And there is a solution for you too, for example, a combination of black and white, or raspberry and white.
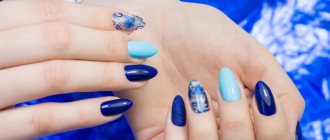
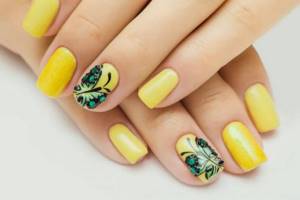
The youth trend of the season is blue, green, yellow tones.
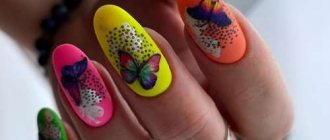
Options for manicure designs with butterflies
Today there are many options for manicure designs featuring butterflies. Manicures with butterfly designs, which are applied to one or two nails and are done using bright acrylic paints, are very popular among modern fashionistas. The design will look very attractive when the wings of a beautiful moth are located simultaneously on two nails. If the owner of this original manicure puts her fingers together, we will be able to see the full picture of the butterfly image. The design on the nails, imitating a butterfly wing, also looks beautiful and attractive. This original manicure is perfect for creating a summer look. A great idea is a manicure with different butterflies of different sizes, randomly located on all the nails. A butterfly on nails can be the main element, or it can complement a variety of design solutions.
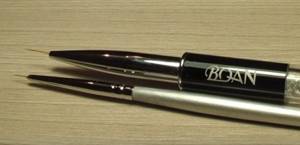
Tools
Manual drawing is done with a set of brushes or dots with different types of attachments. Prepare a rubber tool to remove the gel polish and wipe off the wet paint to even out the contour. You can replace dots with toothpicks.
To make the design professional, use ready-made templates with a pattern engraved or stamped on them. This method reduces drawing time by creating the base in the right place.
If you choose stamping, in addition to the plate, prepare a scraper with which you will remove excess and a roller to transfer the image from the plate.
They also use a flat brush with slightly beveled edges and a thin hair brush.

And now a method for the advanced
There are other, more complex, ways of drawing butterflies for true aesthetes. Let's get acquainted with one more of them.
This method is somewhat more complicated than the previous one, but nevertheless it is quite possible to master it even without special skills, but a drawing made in this way looks much more impressive.

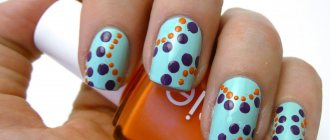
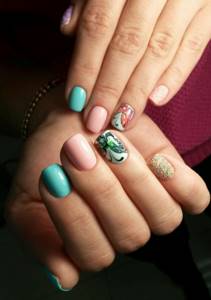
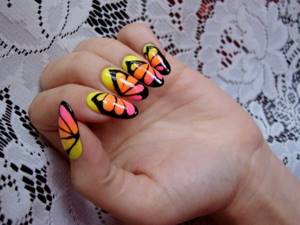
Bright butterflies on a turquoise background
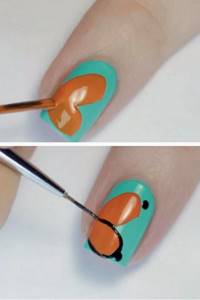
Step-by-step instruction. Step 1-2
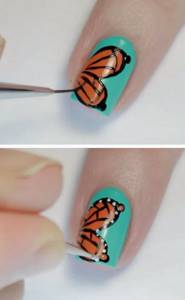
Step-by-step instruction. Step 3-4
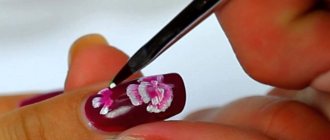
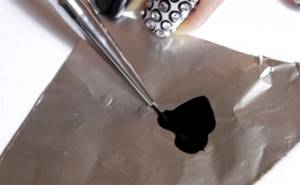
- On a small surface that will serve as a palette, we will apply two colors - white and the second one that you chose for the manicure.
- Dip a flat brush into the varnish on the palette so that there is white color on one tip and a companion color on the other.
- Place the brush on the nail so that when you make a circular motion, the outline of a wing with a white core and a colored frame appears.
- Repeat and draw the second wing.
- Now use black varnish and use a thin brush to outline the painted wings, drawing an outline. Then draw the veins.
- Using dots between the wings, place dots with black varnish, drawing a line that will imitate the body of a butterfly. Use a thin brush to draw the mustache.
- If you wish, you can decorate the butterfly with rhinestones or glitter.
- After the design has completely dried, carefully secure it with clear varnish.
Advice! Remember that anatomically, the upper wings of a butterfly are larger in size than the lower ones. Take this into account when drawing.

Just as there are no two identical butterflies in nature, there can be no repeating patterns.
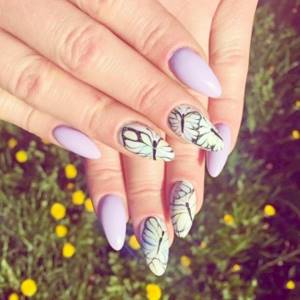
Each design is special and individual
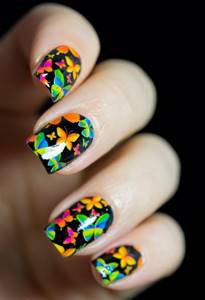
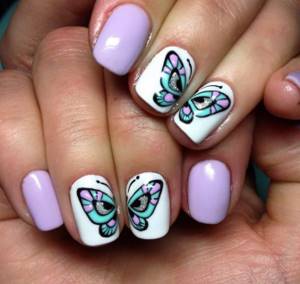
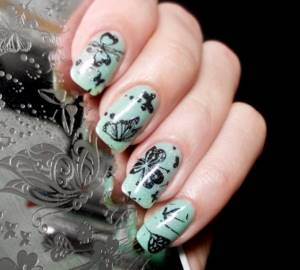
A whole flock of butterflies on each nail
Always remember to have a sense of proportion when doing nail art, especially when it comes to such a broad topic as butterfly wings. You may be tempted by the opportunity to go into detail, but this will not always give you exactly the effect you are hoping for.
We do not encourage you to limit yourself to a minimalist design, but excessive attention to each vein can spoil the light and “airy” design. Try to look at your nails like a canvas and constantly see the whole picture. This way you can avoid unnecessary expenditure of time and effort - one way or another, it will not be possible to depict a butterfly in exact accordance with its real appearance due to the physical properties of paint and varnish.
Always remember to have a sense of proportion when doing nail art, especially when it comes to such a broad topic as butterfly wings

You may be tempted by the opportunity to go into detail, but this will not always give you exactly the effect you are hoping for.
Excessive attention to each vein can ruin a light and “airy” pattern

Try to look at your nails like a canvas and constantly see the whole picture
Always leave room for your artistic vision
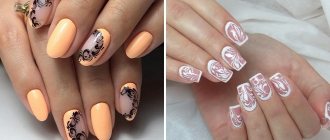
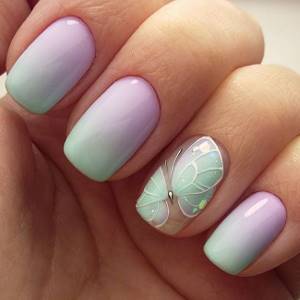
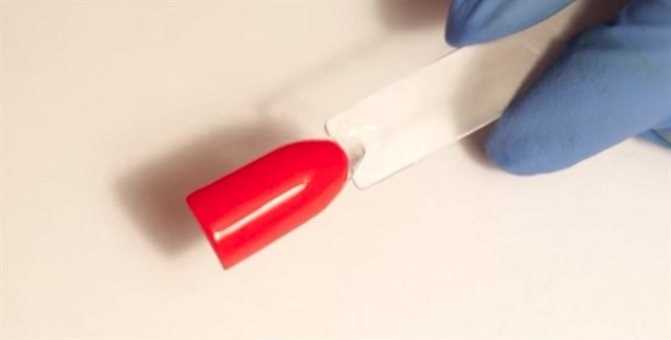
Trend 2022 - patterned wings
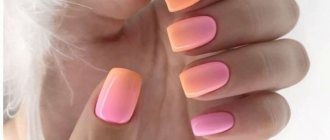
One option is patterned wings. It is not suitable for beginners, as it requires certain skills. The pattern looks advantageous when the base is a monochromatic, unusual shade. An interesting and sophisticated coating with a gradient effect.
Can't create a beautiful transition of tones?

Don't despair, use magnetic varnish. A spatula equipped with a diagonal stripe will create a beautiful pattern without applying titanic efforts.
Step-by-step instruction
Nail art requires patience and perseverance, but after a few repetitions, you can easily master it.

We'll tell you how to draw a figure in a few simple steps:
- First, clean the nail plate and treat the cuticle.
- Apply a neutral, muted tone base. Beige and pink look good.
- Wait a while for it to dry and start applying the pattern. Take a small piece of cardboard and drop two colors on it (for example, blue and white). After mixing the shades, draw the wings.
- Ready? It's time to apply the contour. Take a thin brush, dip it in a brown or darker tone, and outline the design. To make it more realistic, add small veins on the wings.
- Using a dots or toothpick, draw black dots - the body. Draw white peas in the center. Draw in the antennae with a thin brush.
- To add brightness, decorate with rhinestones or sparkles. Cover with a fixing varnish - this will make the art last longer.
And a video for clarity:
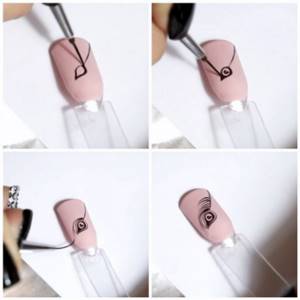
How to learn to draw monograms on nails step by step
Before you start drawing monograms on your nails, you will need to choose a comfortable brush. It is important to consider the width and length of the brush bristles. The bristles on the brush should not bristle and the hairs should be collected.
- Dip the brush into varnish or gel and pick up a small amount of material. Over time, you will learn to control the amount of varnish for a specific task.
- First of all, learn to draw lines in different directions. To do this, place a dot on the nail plate, then draw a line in the desired direction, slowly lifting the brush.
- With each subsequent monogram, add a new portion of varnish to the brush. Continue composing the drawing by placing dots and drawing back the brush.

Design nuances with gel polish
Gel polish is more durable and adheres well, but it requires drying with an ultraviolet lamp. To do it at home, you need to have the right tools on hand.
Let's describe the process step by step:
- First, prepare your nails by trimming the tips and treating the cuticles. The plate needs to be lightly sanded and wiped with a disinfectant. Apply the base and dry under the lamp.
- Next is gel polish for the base. The shade can be any, but it is better to stick to pastels to get a bright, voluminous element. Dry.
- Drop two colors onto a palette or cardboard, and dip the edges of the brush (each on its own side).
- After mixing, paint the wings using gel polish. Dry and repeat again for emphasis. Sprinkle with glitter or decorate with rhinestones.
- Apply the outline with a thin brush, draw the body and antennae with black or brown.
- Now it’s time for the fixative and drying. After this the work is completed.
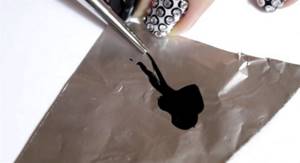
How to learn to draw thin lines on your nails
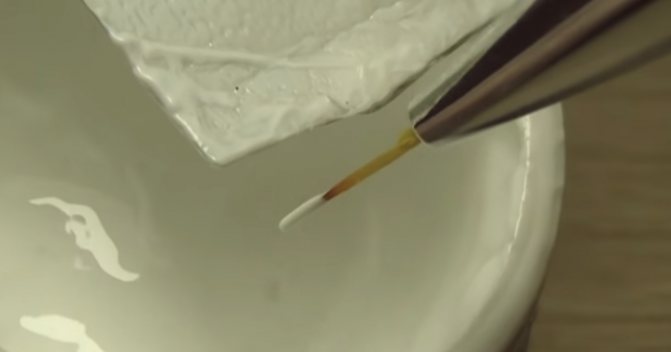
To draw thin lines on your own, first of all, you need to learn how to correctly apply the material to the brush. You can use any flat surface, such as foil, as a palette for work.
- Saturate the working brush completely with varnish.
- Drag the brush across the palette. This will remove excess varnish from the brush and create a thin tip.
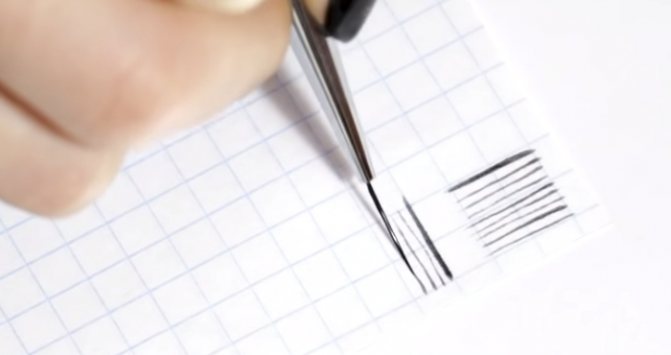
- On a piece of paper, practice drawing thin lines in different directions. Try to paint only with the tip of the brush. If you need a thicker line, then press the brush a little onto the surface and then draw it out.
- Practice drawing different shapes and waves.
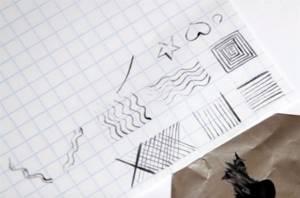
- After practicing on a sheet, try to consolidate your skills on a tip with a sanded surface by making some simple drawing, and only then start drawing on your nails.
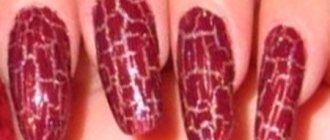
Broken glass technique
Original, attractive design, trendy this season. No stones or diamond dust needed. Buy a special film; if you don’t have it, regular foil will do.
Let's look at the process step by step:
- Cut the foil into small pieces.
- Choose a color scheme and a fixer.
- Apply base and dry.
- Apply base gel polish.
- While the base is still wet, glue the foil with tweezers, forming wings.
- Using a dark outline, form the antennae and body.
- Dry and secure.
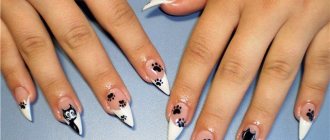
French style
When talking about manicure, we cannot ignore the French manicure. A discreet French jacket looks impressive and is liked not only by fashionistas, but also by those around them.
- Take a base, a wide brush, varnishes, glitter, fixative.
- Apply base. Paint the tip of the nail with white, pink or beige. Dry, add an additional layer.
- Draw the image. Using several tones, draw the wings, outline with black, attach rhinestones or sparkles.
- Secure.
French can be done not only on a single-color base. One of the trends of the season is a mint shade with a golden edging. If there is no gold, replace it with silver. Cover with white or pink.
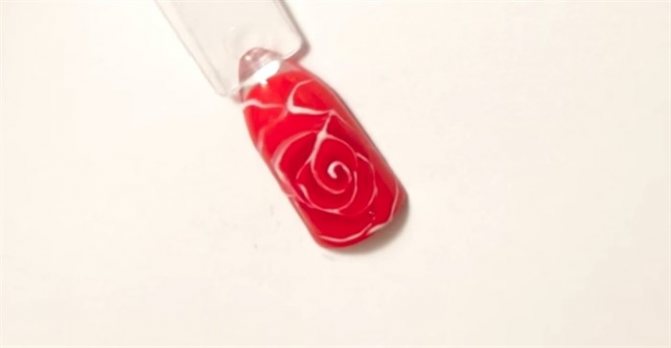
How to learn to draw roses on your nails
- Apply the base shade of varnish in two layers. Dry.
- Draw a swirl that resembles the shape of a rosebud.
- Then draw the petals. The further the petals are from the bud, the larger they should be.
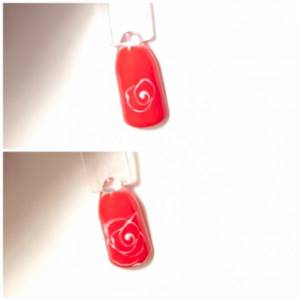
- Use a shade darker than the base to paint only half the middle of the petals. Cover with top coat.