One of the elements of a fashionable image is manicure. Professional nail design looks neat and attractive. However, at home you can learn how to do a manicure that is in no way inferior to a salon one. There are quite a lot of techniques, having mastered which, you can easily decorate your nails.
Simple Drawings for Beginners
Every girl can make an original design on her nails, even if she does not have artistic talent. All that is required for this is imagination and simple items that are found in every home: varnishes of different shades, nail polish remover, a cotton swab, a brush, a toothpick, a needle, etc.
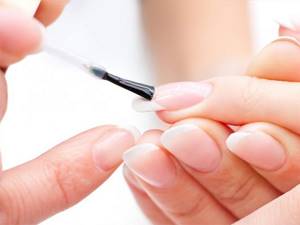
Before you begin the process, you should prepare your hands for this. To do this, give them a bath with warm water and sea salt. By holding your fingertips in it for 15-20 minutes, you can easily tidy up your nail plate and cuticle. At the next stage, you need to lubricate your hands with any nourishing cream, waiting until completely absorbed.
Avoid getting the cream on the nail, otherwise the future design may be ruined.
The easiest way is to make dots, lines and other geometric shapes on your nails. They can be applied in an orderly or chaotic manner. At the very beginning, the nail is covered with a base color. After the varnish layer has dried, lines are drawn with a brush, and neat dots can be applied with a needle.
If you are not sure that the lines are perfect, you can use special stencils. As soon as the design dries, the nail is covered with a layer of fixative, which will help preserve the manicure longer.
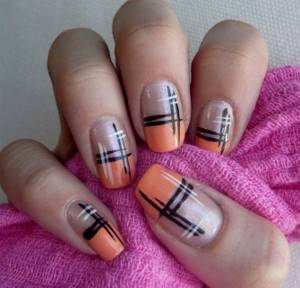
There are special tools for applying dots. However, if you don’t have these at home, you can easily replace them with a needle, toothpick, hairpin or the refill of an old ballpoint pen.
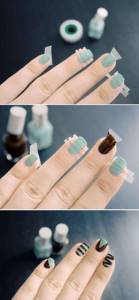
Step by step diagrams
The following tools are needed:
- acrylic nail paints;
- varnish (applied with a brush);
- tweezers;
- toothpick or thin needle.
Step-by-step implementation does not require special knowledge and skills; the average time it takes to paint is 20 minutes.
Rhinestones, crystal chips, sparkles or dried flowers are used as an additional decoration element. For beginners, it is recommended to use ready-made stencils.
Step-by-step diagrams. Photo:
Before you start drawing patterns, you need to complete the basic part of the manicure: process the cuticles, give the nails the desired or fashionable shape for the season, apply a transparent coating to the nails.
6 patterns for beginners. Video:
Manicure with tape at home
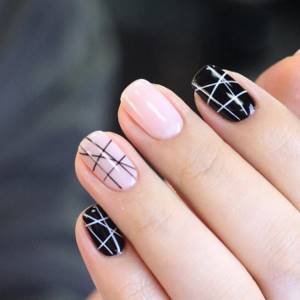
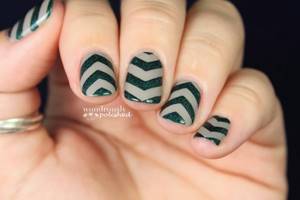
A geometric pattern on your nails can be easily created using adhesive tapes. They can be easily replaced with regular stationery tape. The easiest manicure done using this method is all kinds of stripes and blocks on the nails. To begin with, the nail plate is coated with base varnish. After it dries, pieces of tape are glued on top, and the unsealed part is painted with another varnish. This way you can make a two-color manicure.
Similarly, stripes and other geometric shapes are drawn on the nails. One of the most popular manicures today is chessboard, which can also be done using tape, which is cut into small strips in the form of a stencil.
Scotch tape will become indispensable for performing French or moonlight manicures at home.
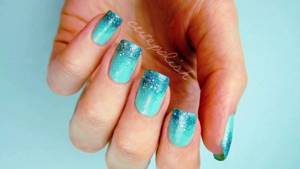
Gradient manicure at home
Today, a very popular gradient manicure or as it is also called ombre. At first glance, it is quite complicated and it is impossible to repeat it at home. However, there is one secret that will help achieve a smooth transition between shades.
To do this, in addition to nail polish, you will need eye shadow and a sponge. At the very beginning, the nail plate is covered with base varnish. Without waiting until it is completely dry, using a sponge, dry shadows of a suitable shade are applied to the nail. Finally, a clear varnish is applied.
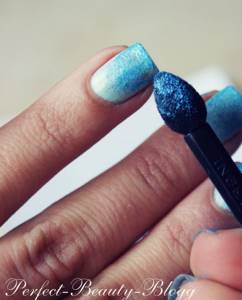
Regular sparkles will help diversify your manicure by making it original. You can also use special varnishes with glitter.
What tools and materials should be on hand
Before the drawing procedure, prepare materials and tools for work; their list and varieties will depend on what you plan to work with, what material you know how to use best, decide on the theme and color parameters.
Nail polishes
You will need the following in your work:
- clear nail polish;
- fortified;
- medicinal;
- varnish fixative;
- glitter;
- glitters;
- decorative powder;
- several different shades of varnish.
You can paint different patterns with nail polish
Tools
It is impossible to imagine drawing without tools, so everything will be listed below that may be useful in one case or another:
- stickers;
- ready-made stickers;
- template plates;
- brushes;
- needles;
- toothpicks;
- ordinary or decorative tape;
- foil;
- dots;
- acrylic paints.
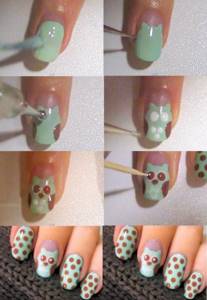
Drawings with a needle at home
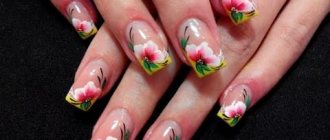
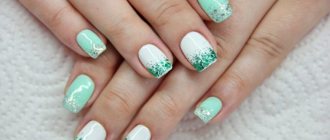
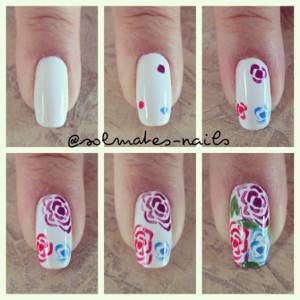
Floral patterns on nails are always relevant. By choosing the right shades, a floral manicure can be combined with any outfit. It’s not difficult to make such a pattern yourself if you have perseverance and patience.
To create it you will need: a base varnish, varnishes of different shades and a needle, which can be replaced with a toothpick or other object with a sharp end. To begin with, the nails are coated with base varnish. After it dries, flower-shaped dots are applied to the surface of the nail using a needle. Finally, a topcoat of varnish is applied.
If you have already mastered this technique, you can try something more complex. For example, draw leaves near a flower. To do this, place a point near the flower with a needle and, without lifting the needle, draw lines to the petals, forming a leaf.
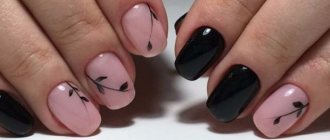
Using a needle or toothpick, you can apply various abstract designs to your nails. To do this, without waiting until the varnish is completely dry, use a toothpick to apply dots, lines or other shapes. Then, with light movements, connect them together, forming a pattern.
Design for the more experienced
Complex patterns are suitable for those who have experience in creating nail art.
Before starting the main work, you will need to prepare the nail plates. For this purpose, you can apply a stencil with the desired image option on them or cover them with a base color and let it dry completely.
Depending on what you have in mind, you can apply up to 2-3 different colors and shades, but each of them must be dried until completely hardened. Then, if stencils were used, you need to carefully peel them off, then paint over the empty spaces with varnish of a different shade; if not, apply the desired pattern with a toothpick.
In any case, the final stage will be the application of a fixing layer. It is recommended to use regular clear varnish for this purpose.
Drawing monograms. Master class on video:
Gel polish
The technique of working with gel polish requires attention and accuracy. This coating option will allow you to create designs of any complexity, suitable for summer or winter manicure.
If you don’t have enough experience or you have chosen a complex pattern, you can use glitter - they will correct mistakes and make your nails attractive.
It is important to apply them no less carefully than the main coating, since a mistake at this stage can ruin everything.
Techniques for working with gel polish for beginners. Video:
Some manicure options with a pattern can be done simply and easily.
For painting you will need:
- gel of desired shades;
- glitter (optional);
- lamp (UV);
- base coat;
- protective covering.
You will also need a toothpick or a thin needle for application, a tool that allows you to remove the sticky layer. At the initial stage, you need to prepare the nail plates - the work involves removing the cuticle and polishing.
Then a base coat is applied to the prepared plates (it must dry completely before further work; there is a special UV lamp for this purpose). Then a colored gel is applied - the shade is selected as desired or to match clothes and accessories.
It is important to remember that it does not need to be dried. Using a needle or toothpick, collect the required amount of glitter. They need to be carefully distributed over the surface, but not pressed against it. Excess glitter must be carefully removed so as not to visually spoil the manicure.
The next step is to dry your nails under a UV lamp. To complete the work, you will need to apply a final protective coating, which also needs to be completely dry. You can then use a stick remover.
This option is suitable for any season. It can be used for both daily and holiday use.
Acrylic paints
An excellent design and manicure option is delicate pink and white.
Stages of work:
- Cover the plate with a colorless coating (you can use a beige base, which is used for French manicure).
- You need to drop a little varnish onto the sponge and then press it onto the nail for 5-7 seconds.
- Using a thin brush, you need to apply white acrylic paint and draw any designs along the edges (this could be waves, curls).
Then you need to apply the finishing coat. Additionally, you can use a small amount of glitter.
Painting with acrylic paints. Video:
Brush drawings
Even a beginner can make a beautiful design on his nails with a brush. To do this, stock up on tools with natural bristles of different thicknesses. To start, try drawing simple lines. When you are already good at thick and thin lines, you can start drawing all kinds of curls. Over time, you will learn to draw even complex compositions.
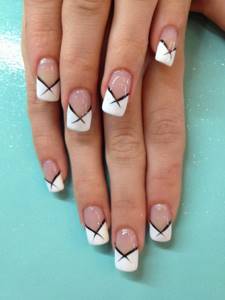
Original French
This design is suitable for both everyday manicure and special events (wedding or graduation). White polish with a thin brush, dots of small diameter - and an elegant pattern appears on your nails in a matter of minutes.
You can also use this technique when painting from the base of the nail and experimenting with colors. Then the manicure turns out bright and summery.
Video published by TUTORIALS (@naildecorvideos) Jan 9, 2016 at 9:05 PST
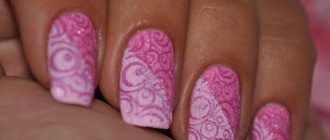
Dots drawings
Do you want to have a beautiful and unusual manicure, but are you afraid to work with a brush? Then use special dots. The drawings that can be made with their help are very different: floral arrangements, images of animals and other figures, abstract patterns, etc.
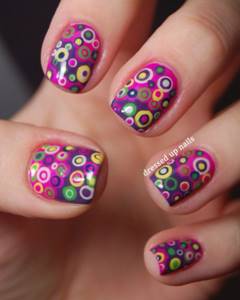
It’s even easier to make a drawing using stencils.
Drawing with acrylic paints
Using ordinary acrylic paints, you can decorate your nails with real masterpieces. First, practice with simple patterns. Later, having mastered the technique, proceed to more complex paintings.
First, the outline of the future design is drawn with a thin brush, after which its entire surface is filled with paint. To ensure that the manicure lasts as long as possible, the top of the design is covered with a fixative.
Simple gel polish designs
Of course, we always want the manicure to last on our nails for as long as possible. Especially if we made it ourselves. There is a gel polish specifically for this purpose that can last at least 2 weeks. With its help you can create absolutely any manicure, after which the varnish must be dried under an ultraviolet lamp.
As you can see, even with a minimal set of tools, you can make a spectacular manicure yourself. If you didn't manage to do what you planned the first time, don't despair. Over time, you will be able to create real masterpieces.