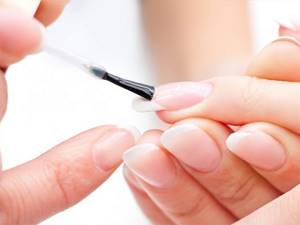
The use of gel polish for manicure has gained great popularity. Girls not only turn to masters, but also gain skills at home. I am pleasantly pleased that there are no chips, the nail does not break, and even with wet cleaning, the appearance of the nails remains unchanged. If all the nuances of application have already been mastered, then it’s time to move to the level of creativity and choose a creative “outfit” for your nails.
Simple patterns for beginners
Simple designs on nails that even a beginner can do at home should not have complex designs.
To get started, you should try options such as:
- heart (at the tip of the nail plate or in the middle);
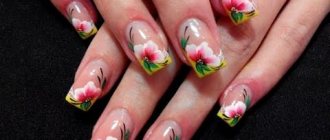
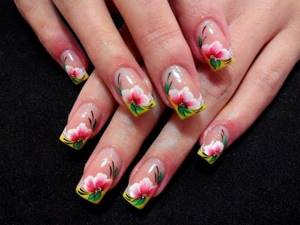
- flower;
- water drop;
- snowflake.
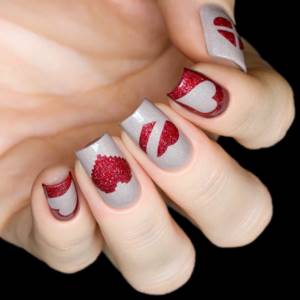
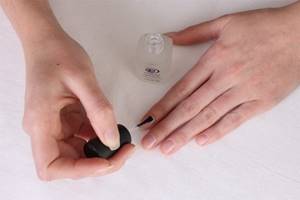
The simplest option is a heart. To apply the design, you will first need to completely cover the nail plate with white varnish. To continue working, the base must be completely dry. Then, using red, pink or another bright shade, you can begin to apply the pattern.
Using a toothpick, apply 2 dots, which are then carefully connected, giving the shape of a heart. If desired, it can be completely painted over or left as an outline.
Options for drawing a heart. Photo:
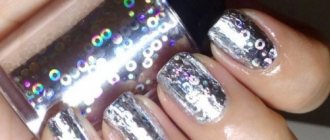
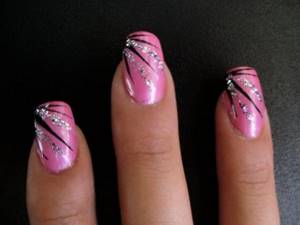
Glitter stretch
The most impressive design is made using shiny gel polish.
What you will need:
- gel polish with glitter;
- fan-shaped manicure brush.
First, choose where the shiny stretch will come from: from the base or edge of the nail. In this place the concentration of sparkles will be greater, and then will disappear. A strip of shiny gel polish 1-2 mm wide is applied to the selected beginning of the design. Then, using a fan brush, stretch this strip to the other side of the nail and dry the layer. Repeat these steps about 3 times. Each time, apply the strip thinner and stretch it less and less.
Video "Glitter Stretch"
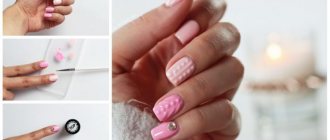
Step by step diagrams
The following tools are needed:
- acrylic nail paints;
- varnish (applied with a brush);
- tweezers;
- toothpick or thin needle.
Step-by-step implementation does not require special knowledge and skills; the average time it takes to paint is 20 minutes.
Rhinestones, crystal chips, sparkles or dried flowers are used as an additional decoration element. For beginners, it is recommended to use ready-made stencils.
Step-by-step diagrams. Photo:
Before you start drawing patterns, you need to complete the basic part of the manicure: process the cuticles, give the nails the desired or fashionable shape for the season, apply a transparent coating to the nails.
6 patterns for beginners. Video:
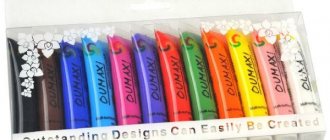
How to make simple designs on nails with acrylic paints?
You can feel like a real artist when painting with acrylic paints on a “canvas” like your own nail. A wide range of colors and ease of use will allow you to create a wide variety of designs that will inspire your imagination and creativity.
But working with acrylic has its own characteristics that you need to know in order for the drawing to be aesthetic and preserved for a long time.
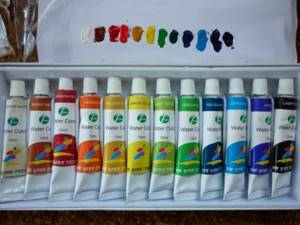
Acrylic paints
Before you begin the artistic process, you should prepare all the tools necessary for this:
- acrylic paints (they can be purchased at any craft store, stationery store, or even at the market)
- thin brush
- fixative varnish
- dots
Brushes
Having prepared your nails for manicure (removing cuticles and giving the desired shape), they need to be covered with a base coat. After it has completely dried, you can start painting with a brush.
You can draw on your nails both various dots and wavy lines, and by arranging these elements you can create entire inflorescences and enchanting designs.
If your imagination doesn’t suggest anything, then you can be inspired by the works of novice masters:

Drawing created by wave-like movements of the brush
Point Rays
Flame of fire
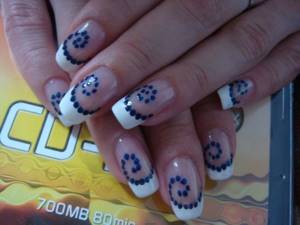
French manicure and dot patterns
Rays and sparkles
Show your imagination and the result will please you
After completing the drawing and drying the acrylic paint, it is necessary to cover the nails with a protective coating - fixative varnish. Otherwise, at the first contact with water, the pattern will blur.
Design for the more experienced
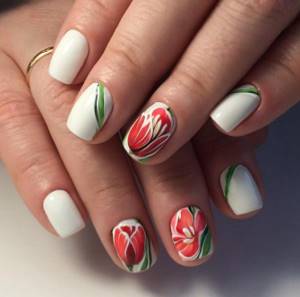
Complex patterns are suitable for those who have experience in creating nail art.
Before starting the main work, you will need to prepare the nail plates. For this purpose, you can apply a stencil with the desired image option on them or cover them with a base color and let it dry completely.
Depending on what you have in mind, you can apply up to 2-3 different colors and shades, but each of them must be dried until completely hardened. Then, if stencils were used, you need to carefully peel them off, then paint over the empty spaces with varnish of a different shade; if not, apply the desired pattern with a toothpick.
In any case, the final stage will be the application of a fixing layer. It is recommended to use regular clear varnish for this purpose.
Drawing monograms. Master class on video:
Gel polish
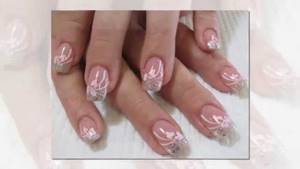
The technique of working with gel polish requires attention and accuracy. This coating option will allow you to create designs of any complexity, suitable for summer or winter manicure.
If you don’t have enough experience or you have chosen a complex pattern, you can use glitter - they will correct mistakes and make your nails attractive.
It is important to apply them no less carefully than the main coating, since a mistake at this stage can ruin everything.
Techniques for working with gel polish for beginners. Video:
Some manicure options with a pattern can be done simply and easily.
For painting you will need:
- gel of desired shades;
- glitter (optional);
- lamp (UV);
- base coat;
- protective covering.
You will also need a toothpick or a thin needle for application, a tool that allows you to remove the sticky layer. At the initial stage, you need to prepare the nail plates - the work involves removing the cuticle and polishing.
Then a base coat is applied to the prepared plates (it must dry completely before further work; there is a special UV lamp for this purpose). Then a colored gel is applied - the shade is selected as desired or to match clothes and accessories.
It is important to remember that it does not need to be dried. Using a needle or toothpick, collect the required amount of glitter. They need to be carefully distributed over the surface, but not pressed against it. Excess glitter must be carefully removed so as not to visually spoil the manicure.
The next step is to dry your nails under a UV lamp. To complete the work, you will need to apply a final protective coating, which also needs to be completely dry. You can then use a stick remover.
This option is suitable for any season. It can be used for both daily and holiday use.
Acrylic paints
An excellent design and manicure option is delicate pink and white.
Stages of work:
- Cover the plate with a colorless coating (you can use a beige base, which is used for French manicure).
- You need to drop a little varnish onto the sponge and then press it onto the nail for 5-7 seconds.
- Using a thin brush, you need to apply white acrylic paint and draw any designs along the edges (this could be waves, curls).
Then you need to apply the finishing coat. Additionally, you can use a small amount of glitter.
Painting with acrylic paints. Video:
Painting with gel polish
Gel painting on nails is an art that will not leave any woman unnoticed. In any nail design, there is a touch of charm that attracts the eye. The choice of gels on the cosmetics market is simply huge. Variegated, transparent, thick varnishes ─ each of them has its own mission. Gels of bright colors are rich and perfectly complement each other on nail painting.
Base and top coats are often used to create a background surface, as well as to perform additional paintings:
- If you are new to this creativity, then first you need to master the technique of circular color mixing. Having only a few bright colors, such as blue, red and yellow, can create a mass of shades. And if, in addition, you have white and black gels in your arsenal, then the base for creativity is endlessly large.
- When using gels, translucency is achieved by applying strong pressure to the brush. It is important to remember that when working with different varnishes, it is necessary that they all be from the same manufacturer, this will help to avoid shortcomings in creating a beautiful design.
- As long as the coating has not been under the lamp, you can apply corrections to the drawing without limit. Thanks to the thickness of the gels, the execution of drawings is greatly simplified; they do not smudge or flow.
Flowers with a needle
Any variations of images on nails can be made with a needle - floral motifs are simple for beginners.
For this option you will need:
- light varnish as a base;
- any shades suitable for creating petals;
- a contrasting shade to create the center of the flower;
- thin needle;
- nail polish remover;
- cotton pad or cotton swab.
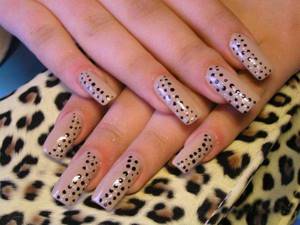
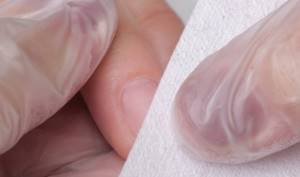
The work will require simple steps. First you need to paint your nails with a light color and let it dry completely. Then you need to dip a thin needle into the varnish (used to create the center of the flower) and place a dot in the place where the flower will be located.
The needle will need to be cleaned using a cotton swab dipped in nail polish remover. Then it needs to be dipped in the varnish that will be used to outline the petals in order to apply the contour points. You can decorate the entire nail with these flowers or paint several pieces just along one edge.

Simple drawings with a needle. Video:
A toothpick is also an option.
Using varnishes of various shades and a regular toothpick, you can create an elegant option.
For work you will need the following materials and components:
- varnishes (shades can be chosen independently);
- toothpicks (2-3 pcs);
- paper napkin;
- fixative;
- base for the main shade.
The sequence of creating the selected pattern assumes that the base will first be applied and allowed to dry. Then you need to apply the main shade.
There is no need to wait for complete drying. Using other colors, apply the desired pattern using a toothpick. The fixing composition is applied at the end, when everything is dry.
Master class on video:
Preparation stages
- With the help of a buff remove glossy shine from nails. Use nail files to give the desired shape.
- Degreasing marigolds and apply primer.
- We cover the marigolds thin base layer and dry it in a lamp.
- We apply the varnish , which will be our main one, in two layers, making sure to seal the end. We dry each layer separately in a lamp.
- Add the desired drawing . Let it dry in the lamp.
- We cover the nails with the finish and dry them in a lamp.
- Using special means remove the sticky layer.
If you have a single-phase gel polish, then you need to apply it without topcoat and finish in three layers.
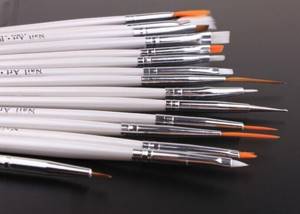
What brushes can I use?
Using brushes, you can create different decoration solutions based on a combination of lines. These can be marine themes, multi-colored compositions of varying degrees of complexity.
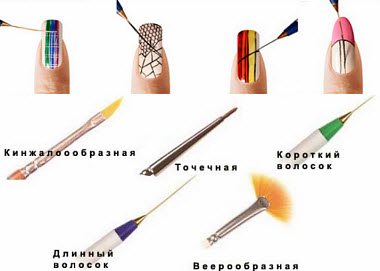
There are several types of manicure brushes, the main ones are:
- thin (liner);
- fan (straight or beveled).
Also, brushes can be of different sizes in height.
They should be selected based on what pattern should be obtained at the end of the work.
Video tutorial on drawing thin lines:
Shellac
Shellac is a new product, a new generation product. It successfully combines the usual varnish and gel used for extensions.
This combination allows the product to last for a long time, without chips or abrasions. The technique of working with it is similar to creating drawings using the usual method, but to speed up drying it is recommended to use a lamp.
Tips for saving a drawing
To ensure that the beauty of your nail patterns lasts longer, you need to adhere to the following recommendations:
- Use high-quality tools and objects in your work.
- When applying and choosing a design, focus on the size of the nail plate.
- Don't use multiple solutions at once to avoid awkward manicures.
- Geometric designs are the best option, suitable for any event.
- Be sure to apply the base at the beginning of work and the fixer at the end.
Thus, there are many options for creating an unusual and stylish manicure. For beginners and experienced people, it’s easy to choose designs for any event.
Matte manicure with gel polish
This year, matte manicure is on the list of the most fashionable trends. The secret of popularity lies in the ease of application and the achievement of an incredibly effective combination with other textures. Matte manicure looks very unusual and impressive.
A manicure with a matte finish will suit every girl and will go with any image. The coating can be done in a single color or try to complement it with glossy varnishes. Make various patterns, geometric shapes, decorate with sparkles and rhinestones ─ just use a little imagination. In any case, the tone of the coating should depend on the event for which it is being performed.
Whatever pattern or application method is chosen, it is important to remember that the matte finish is very easily soiled. Due to the rough surface, dirt gets on it, which looks like worn suede leather. Therefore, you need to take into account that on a light manicure, the stained areas will be very noticeable. To avoid this effect, choose dark shades of coating.
If you really want to do a matte French manicure using a pale pink shade, then buy more liquid to remove the matte gel coating; you should always have it on hand. If your nail is dirty, you just need to wipe it a little with the product and everything will be perfect again.