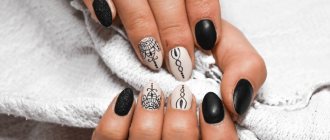
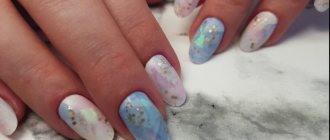
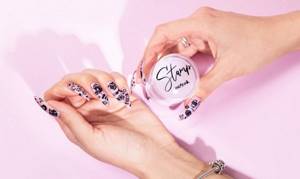
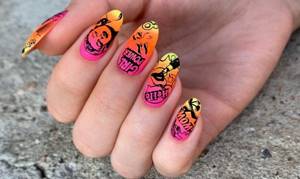
What is nail stamping and how to use it
Stamping is an opportunity to make a complex, effective design in just a few minutes!
One wave of the hand - and drawings appear on the nails, which would take much more time and effort to draw with a brush! This is why stamping is one of the most popular designs today. What are the advantages of stamping, how to create a design correctly, what secrets does the technique conceal? Let's find out in this article.
Scotch
We also include adhesive tape in the list of accessories for home nail art. Using adhesive tape we draw straight lines and shapes. We cut out the desired shape, glue it onto the nail, painted with varnish, and apply a contrasting shade on top. All that remains is to carefully remove the tape, our version of a professional manicure tool.
What is stamping?
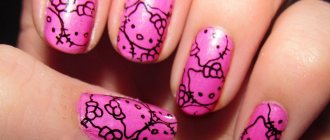
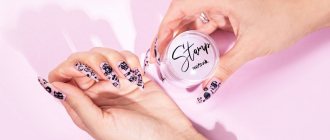
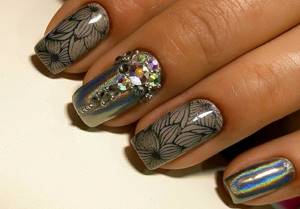
Stamping is a nail decoration technique in which a design is imprinted from a special plate onto the nails using a stamp. Comes from the English word stamp - stamp. Craftsmen value technology for the simplicity and speed of design creation. And clients love stamping because it can help bring the most creative ideas to life. Because of its simplicity, stamping is also appreciated by lovers of home manicures.
This technique has many undeniable advantages:
- Using stamping, you can reproduce the smallest details and lines of an image. Sometimes it is impossible to make such lines with a brush;
- if the image is applied to several nails, then on each of them it looks the same;
- the market offers plates with the widest range of images;
- You can choose any colors to apply the image. For example, this cannot be done when using sliders;
- saves time - the procedure takes only a few minutes;
- The technique is used not only in manicure; you can apply designs to other surfaces, for example, on the back wall of a mobile phone.
In order to stamp, you need to follow 3 simple steps:
- apply special paint or varnish to the design located on the plate;
- print the drawing on a stamp;
- transfer the design from the stamp to the nail plate.
Recommendations
The main recommendation is to use a high-quality color coating for applying both the base layer and image elements.
There are other important features that must be observed:
- It is necessary to remove the protective film from the surface of the metal disk (otherwise the design will spread).
- Use nail polish remover that does not contain oil elements.
- Quickly apply the varnish to the surface of the disk and stamp so that the composition does not have time to dry.
- Dry each subsequent layer thoroughly.
What is stamping?
It's not always possible to go to a salon to get your hands in order. And at home, it’s somehow safer - and there’s no risk of catching a fungus, and you’ll save money. And you can always learn the most necessary procedures for maintaining pens in decent condition.
For those who want to stand out from the crowd and want to be creative, there are different methods for decorating nails - from simple varnish to creating real nail art. Difficult? Certainly. But there is an easy way to get beautiful designs on your nails. And it's called stamping.
What is stamping
This is a method of applying a design to nails when the design is literally transferred from a stencil using a stamp and varnish to the nail in just a couple of movements. The technique is so simple that it can easily be used at home.
To do this, you need to acquire several tools, select discs or plates with the decor you like, and purchase several shades of special stamping varnishes. By the way, for home use of the technique, some things can be replaced with more affordable options. Below we will consider the issue of possible replacements in more detail.
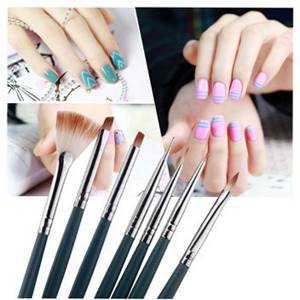
Brushes
A set of brushes should always be on hand. Professionals also use the finest brushes for lines and contours, thin long brushes, flat and beveled flat brushes, fan brushes for gradients and simultaneous application of several shades of varnish. The home version is a regular set of brushes for school. This is quite enough at first
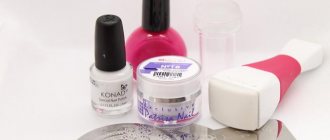
Stamping tools. What it is
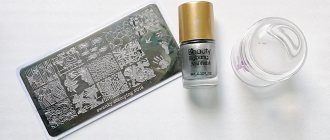
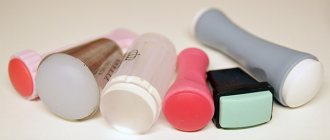
1. The most important tool is a stamp. It is not as simple as it might seem at first glance. Consists of a handle and a polymer elastic pad. She is the one responsible for high-quality copying of the drawing. The handle can be more or less large - choose according to your hand. There are also double-sided stamps: on one side there is a small pad for small elements, on the other there is a large area (for drawings on the entire nail).
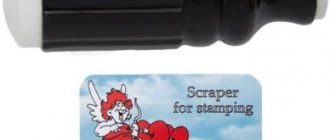
2. Another important tool is a scraper. He's a scraper. Designed to remove excess varnish from the plate. It must have a perfectly flat and smooth working surface - otherwise defects are possible. And the reverse side should be comfortable to grab with your fingers.
3. Where do the drawings come from? From stencils. They come in different shapes, with round discs and rectangular plates being the most common. They contain a different number of drawings (from 5-6 to almost a hundred). Accordingly, the greater the number of motifs presented, the larger the stencil area, the more expensive it will cost you.
4. It’s good to have an orange stick to correct mistakes if necessary. But a bamboo toothpick will also work, and in some cases a cotton swab.
Nail stamp
Stamping has recently become increasingly popular among the fair sex. However, for many, this method of applying patterns to nails remains a mystery. And many people don’t even know what the method of transferring patterns on nails using a stamp is called. So, stamping patterns on nails is called stamping.
When using the stamp for the first time, the design may not turn out very well. But with practice comes perfection. Therefore, it will take practice and stamping to achieve amazing patterns.
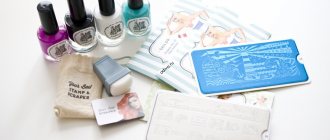
First you need to prepare the tools, namely: a primer, paint for stamps, a couple of contrasting varnishes, a special scraper or an unnecessary discount card, cotton swabs, nail polish remover, a set of stamps.
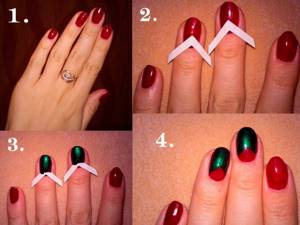
Stage 1. Stamping varnish must be darker or lighter than the base one. It doesn’t matter in what shades the base will be made, the main thing is that the pattern is contrasting.
Stage 2. So, first you need to cover your nails with base varnish. Then let it dry completely before applying the next layer. Wait until it dries completely again.
Stage 3. Take a stamping (most often it comes in the form of a metal disk or rectangular plate). Then apply varnish to the engraved pattern - you need to use a lot of varnish, since the pattern must be completely covered with varnish.
Stage 4. After using a discount card, you need to remove excess varnish.
Step 5. Then you can apply the stamp to the nail. In this case, you should lean the stamp against the edge of the nail and roll it along the nail plate, trying to leave an imprint on the surface.
Stage 6. Then duplicate all stages of the process on other nails. If the polish is imprinted on the surface of your finger, then you can remove it using a cotton swab dipped in nail polish remover.
Stage 7. After decorating the nails with a stamp, you need to cover them with a fixative.
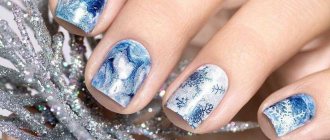
In this way you can decorate any manicure option, be it a French manicure or lunar nail art.
In the video below you can learn the secret of simply applying a pattern with a stamp.
Transparent nail stamp
The positive features of a transparent stamp for stamping are a wide variety of patterns, a minimal set of tools and products used for manicure, as well as the ease of removing and replacing the design on the nails.
The described type of stamp has a hollow handle, which makes it possible to control the process of applying the design and correct it in time, which is quite convenient. At the beginning of the process of working with the stamp, you should slightly correct it using a manicure file.
It is also important to note the fact that the pad of this stamp has a harder surface than the silicone one. The advantage of such a tool is that, thanks to its transparency, you can control the entire process of applying the pattern. This is quite convenient, especially when applying patterns at the location of the jacket.
Silicone stamp
It is necessary to consider in detail the key forms of silicone stamps used for stamping, their characteristic features and advantages. In general terms, we can say that nozzles made of this material are quite soft and flexible, but their various modifications are endowed with varying degrees of elasticity.
A large number of specialists in the field of manicure consider a rectangular stamping stamp to be the most convenient in the process of performing work. This working surface facilitates the application of a pattern on the entire surface of the nail plate, with the exception of the thumb. The base can be separated from the handle, but it is presented in a single copy in the set.
There are also non-original rectangular stamps of more impressive sizes. They are endowed with a more rounded surface, and their length can be up to 70 mm. In this case, they are most suitable for applying a more integral pattern to the surface of the nail plate. They can also be used for reverse stamping in conjunction with stencils with a three-dimensional pattern.
A large silicone stamp will help in the process of applying a solid pattern to any nail plate. Due to the suitable material, it is quite soft and elastic to work with.
The ball-shaped working head can be easily removed, and the silicone pads are ideal for thin and brittle nails and for very convex and long nails.
What can replace the tool for stamping patterns on nails?
In the case when it is not possible to purchase tools for stamping, but there is a desire to create your own exquisite design, then you can make a stamp with your own hands, and it is quite simple.
To do this, you will need several appropriate plastic materials for the pad. For example, dense foamed polymer or silicone. The most important thing is that the chosen base does not change its shape much when pressed, but at the same time has good plasticity.
You also need to take into account that the pad should not absorb much varnish, so a material such as foam rubber is not suitable for creating a base. The handle should be such that it is comfortable to place in your hands. And the pad should be of such a size that it is enough to cover the entire surface of the nail.
Reviews about stamping
Marina, 27 years old:
“I really like giving myself an elegant manicure using stamps. I also experimented with a large number of thick varnishes and concluded that the best option for me is El Corazon varnishes.”
Juliana, 24 years old:
“Finally I could afford to fulfill my old dream and bought a transparent stamp for stamping. The shape is very comfortable, the pad is, however, a little harsh (silicone gel), but it does not need to be treated with a buffer, it can be easily cleaned with tape. At first, of course, I couldn’t find a “common language” with him. But then I got better at it and now everything is wonderful. So, overall, I’m happy with the stamp!”
Katya, 33 years old:
“For some reason I’m not particularly good at working with stamps. I can’t find any varnishes with the required thickness. It’s probably better to buy a special varnish and try again, I hope everything works out.”
Video on the topic of the article
webdiana.ru
What errors are possible and why stamping fails?
It happens that shortly before the design, you applied cream to your hands or were fiddling around in the kitchen, and your nails were not degreased before stamping. In this case, the drawing may not be printed or will not adhere well.
Perhaps you chose the wrong varnish. And it either dries right on the stencil, or flows from it, or does not completely fill the grooves of the ornament.
The most common mistake is working too slowly. All movements must be fast and jerky. Before blaming your supplier for faulty plates or bad varnish, practice your speed and make sure you're doing it right.
The design can smear if you cover it with a top coat of varnish and do it unprofessionally: apply too much pressure to the brush, brush repeatedly over the same place, etc.
How to replace a stamping stamp and other tools
Sometimes you don’t have enough time or money to buy professional stamping tools. But I want to experiment. Is it possible to replace them with something?
· Strain
difficult to replace. But probably. The main thing in it is a pad of suitable elasticity. At the same time, it should not absorb liquid and not have pores - therefore foam rubber is not suitable. You can take a piece of pliable plastic or silicone. You can experiment with children's “jumping” balls; they are made from a material that has suitable properties. Anything can be used as a handle – metal, ceramics, wood, plastic. You can attach an improvised pad to it using quick-drying universal glue or a glue gun.
· scrapper
easier to replace. For example, any plastic card can play its role. The main thing is that its edges do not have grooves, cracks, or chips. Otherwise, defects in the design are guaranteed.
· Stencils
Unfortunately, nothing can replace it. They are made using high-precision engraving. It will not be possible to imitate it at home.
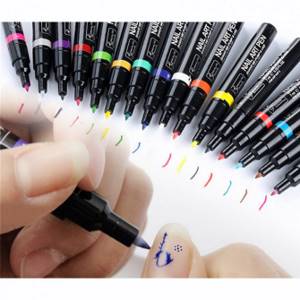
Pens
Nail pens are the same professional tools for manicure. They resemble markers. With the help of a nail pen, we get an accurate design that is neat and does not spread. But if there is nowhere to buy such similar markers, then we can easily replace them with a familiar gel pen. We can draw our own masterpieces just as well as she can.
What material should I use to replace special stamping varnish?
There are craftsmen who take the risk of stamping with acrylic paints. We don't recommend it. Acrylic materials harden quickly in air and are extremely difficult to wash out of the stencil grooves. There is a possibility that such a disk or plate will have to be thrown away.
It is better to experiment with ordinary varnishes - choose dense, saturated shades of medium thickness. Or pay attention to varnishes marked “for drawing”; they are most often sold in small bottles with thin brushes. By default, such materials dry quickly enough, have a dense, rich color and suitable thickness. Moreover, they are inexpensive.
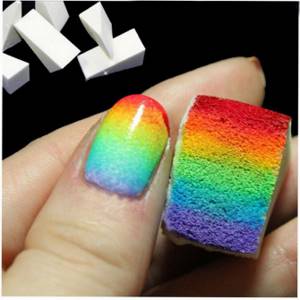
Sponge
For a smooth transition of colors and blur effect, use a sponge. Buying it won’t be difficult, but a regular sponge or powder sponge can replace it. Apply several shades of varnish one by one and lower the sponge onto the nail, turning it horizontally, vertically, diagonally - as you wish. There is no doubt: it will turn out very well!
Requirements for the room where stamping is done
Always remember that you are working with nitro soluble organics. Accordingly, it has a strong chemical odor and is highly flammable. It is from these considerations that you need to choose a place for stamping.
If you decide to settle in the kitchen, the gas stove should be turned off during the manicure. Yes, and electric too. Open the window or sash slightly. Turn on the hood if you have one. Place all products in the refrigerator and cabinets or seal them in bags - acetone fumes are perfectly absorbed by bread, pastries, and sweets. Do not allow paint or solvent to come into contact with products - these are toxic substances. Cover the table where you decide to decorate your nails with paper or film. Drops of varnish, of course, can be removed with nail polish remover. But it can damage the varnish coating of the wood, the oilcloth pattern, and the plastic. After finishing work, provide the kitchen with strong cross-ventilation until the smell of varnish and solvent disappears completely.
All this is also true if you decide to work in the room. There should be no burning candles nearby (romance comes later). Provide fresh air. Remove allergy sufferers, asthmatics and (ideally) children from the room. Count all the tampons or wipes you've used so you can throw them all away and not lose a single one. The toxic properties of the liquids remaining on them remain for a long time, and someone may get hurt.
Stamping for nails. How to choose and where to buy
It is better to choose tools and materials for stamping in a specialized store. Starter kits are often found on sale - a stamp, scraper, 1-3 varnishes, a plate or disk. You can start with this. And then, after practicing, you will understand what you are missing and buy what is missing.
Pay attention to the assortment of the Nails Plus online store. Here, at quite affordable prices, you can put together a whole collection of necessary materials and tools. At the same time, you will be confident in the quality of the goods.
This store is very convenient to choose everything you need and make purchases. There is a customer support service where you can answer any questions. Fast delivery to any point in Ukraine is organized.
Source of the article: https://nailsplus.com.ua/polezno-znat/stemping
Preparing nail plates before applying the pattern
Before starting the manicure procedure, it is advisable to saturate your hands with nutrients. A hand bath is perfect. Prepare:
- sea salt
- essential oil
- warm water
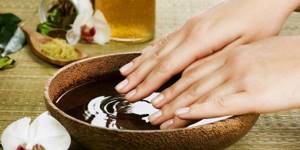
How to make a nourishing hand bath:
- dissolve sea salt in warm water
- add a couple drops of essential oil
- dip your fingers in the water and hold for 15 minutes
- wipe your hands dry and start doing your manicure
For the background, choose bright, rich coatings.
Also note that stamping tiles have replaced discs. On them you will find a wide variety of original drawings.
Stamping - a list of my tools for it and other bells and whistles down to the smallest detail (part 1)
I was inspired to write this article by this phrase from my search -
Thanks to this phrase from the search, I realized that this is an excellent reason to photograph everything I use in stamping, from basic tools to additional, not entirely necessary little things.