On special occasions, and in everyday life, every girl always wants to look as stylish and attractive as possible, in which the condition of her hands and nails plays a significant role. Not every handywoman can draw an ideal manicure, and even with a beautiful ornament or pattern, but everyone wants to make their nails completely original and unusual. It is for such cases that stamping will be the best solution, allowing you to get perfect designs on your nails even for those who do not know how to draw at all. Today we will figure out how to do stamping for nails, but not with simple and familiar varnishes, but with a durable gel polish coating.
What is nail stamping
Translated from English, “stamping” means “stamping”.
- In the case of manicure, the design is applied to the nails with a special stamp.
- This design doesn't take much time and looks amazing.
- Thanks to stamping, you can apply even small elements on your nails that are difficult to do with a brush.
- The stamp allows you to create patterns not only on nails, but also on the body of a mobile phone and other flat surfaces.
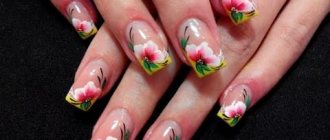
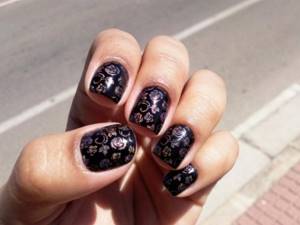
Gradient manicure with stamping
To change or not to change? Studying the properties of acrylic paint
Of course, the first and main reason for the question of the possibility of replacing branded stamping paint with another that is close to the analogue is the cost. Acrylic paints are much cheaper, in addition, the cosmetics market is saturated with sets of a wide variety of colors and shades of such varnishes and paints.
Thus, there are already two “pros” in the “to change or not to change” dilemma. Let's now consider "no". Why is it undesirable to abandon branded paint? The main argument is that the most valuable properties of this product, which allow you to easily transfer a clear image from a cliche to a nail, are the thickness and viscosity of the paint, as well as its drying time. There is no doubt that these parameters have been verified to the smallest detail, and during development the products have undergone more than one examination and testing until they have acquired exactly these qualities.
The viscosity of the paint ensures that it adheres to the rubber surface of the stamp and “pulls it out” from the labyrinths of the cliches, as well as preserving the contours of the design, even in its thinnest openwork weaves. And at this stage of the procedure, the most crucial moment is to have time to transfer the design imprinted on the stamp onto the nail before the paint dries. Otherwise, the pattern will smear and lose its outline. Branded paint for stamping design dries in up to 8 seconds. Acrylic paint-varnish dries much faster, this period is 4-5 seconds, and if you do not have experience, you may simply not have time to transfer your chosen ornament from the cliche through the stamp to the nail in such a limited time. That's two no's for you.
Advantages and disadvantages
Like any other technique, stamping has its positive and negative sides.
| Advantages | Flaws |
| Design with stamps can be done even with minimal artistic skills. Creating a beautiful and clear pattern depends on the ability to use a stamp, and not on the ability to draw | Without a quality tool you will not get a beautiful and clear pattern. |
| Allows you to create even multi-colored patterns | Drawing requires skills that are achieved through training. |
| The design appears thanks to one movement of the stamp, which takes a minimum of time | For drawing you need high-quality varnishes or paints, dense and not too thick |
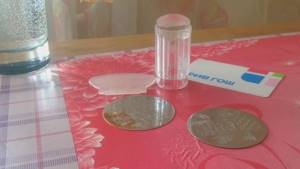
How to clean a stamping plate
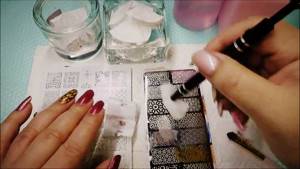
All tools – scraper, stencil and stamp – must be cleaned of paint residues. To do this, you can use nail polish thinner or remover. Acetone can be an alternative to these products. Cleaning instruments requires a large amount of liquid. Acetone is inexpensive and perfectly dissolves paint and varnish.
The algorithm of actions is simple: you need to moisten a cotton pad with it and remove the remaining paint, paying special attention to the engraving. Upon completion of the procedure, wipe all instruments dry. You can use wide tape to remove paint from the stencil.
Length and shape of nails for manicure with stamping
- The length of the nails does not matter for the stamp design.
- Stamping can be used on short nails, but the manicure looks more beautiful on a long plate.
- A geometric pattern is more suitable for square shaped nails.
- Smooth lines will look harmonious on almond-shaped nails.
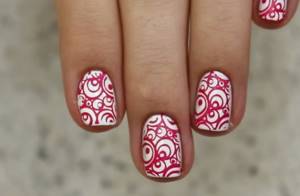
Red and white manicure with a stamping pattern on medium-length square nails
Nail coatings in manicure with stamping
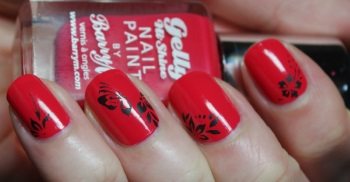
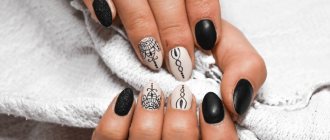
Red manicure with simple black patterns
Stamping designs can be applied to both regular polish and gel polish.
If you are working with gel, the stamp can be used in two ways:
- apply a pattern and cover it with a layer of fixative;
- Apply the design over the sealer.
When working with gel polish, create a pattern with regular varnish or special paints. Then the print can be removed with a liquid without acetone and a new one can be created.
Color combinations in stamping
The main rule when choosing color shades is contrast. So, if you plan to apply a light base, then it is recommended to choose dark tones to create a picture. Conversely, if the main color is dark, then an image made with a light varnish will look more neat and attractive.
Another feature: it is recommended to choose varnishes that have a matte finish as a base. In this case, the drawing will be brighter, clearer and more expressive.
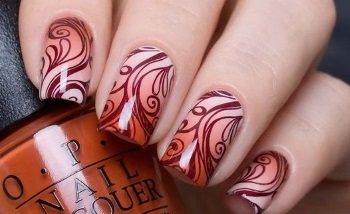
The most commonly used option is when a dark pattern is applied to a light base layer. For example, black, blue, and red patterns are most harmoniously combined with a white base. The beige base looks more restrained and casual. To create a picture in this case, it is best to choose black, blue, and emerald colors.
Silver varnish as a base harmonizes with the pattern of purple, hot pink, and blue colors. For a red or pink base, images made in black, white, blue, brown, gold or silver colors work well.
For a dark base (such as blue or black), it is recommended to choose designs in white, pink, silver or gold.
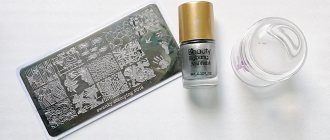
Stamping kits
Tools for traditional typing
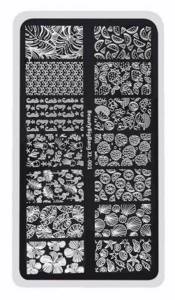
- metal plates , one or more, on which designs are engraved. Such plates have the shape of a circle or rectangle. One disk usually contains several patterns. Plates can also be purchased separately;
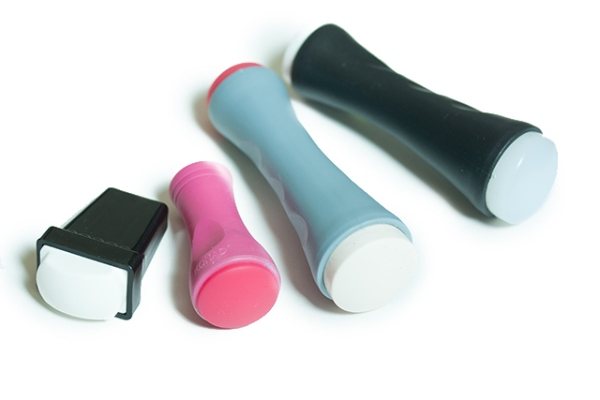
- stamp , with which the pattern is transferred from the plate to the nail;
- scraper - a scraper that is used to remove excess varnish from a plate. This is necessary to create a clear drawing.
Some manufacturers include paints for creating images in kits. If they are not included in the set, you will need to purchase them in addition.
For an overview of the stamping kit from the popular AliExpress site, watch the video.
Aids
- top coating;
- colored varnish for the background;
- fixative;
- nail polish remover.
Before you begin your manicure, you need to choose the right combination of colors so that the pattern stands out against the background of the base coat.
One of the popular companies that produce stamping kits is Konad.
Their kits contain 5-7 discs with interesting patterns, a scraper and a handy stamp.
The box also contains three polishes - white, black and a glitter fixer.
Learn more about Konad stamping in the video tutorial.
Classic stamping: review of companies
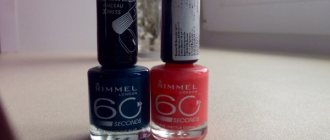
El Corazon brand stamping varnishes are very opaque: they contain five times more pigment than regular varnishes! It's no wonder their fans love them so much.
Gold and silver varnishes of the Rio Pro brand harden slowly, so you need to adapt to them.
The following also give good prints: “Bourne Petty Top” and “Bluesky”.
You might be interested in: Why does gel crack?
– a recognized leader in quality stamping materials. They are more expensive than others, but they amaze with the number of drawings. The print made from the Konad plate turns out smooth, even the thinnest lines are clearly printed. The pattern is elegant and delicate.
The manufacturer recommends using a special varnish for printing. It has a quick-drying formula and transfers beautifully onto the nail. Konad warns against using non-professional varnishes, explaining that it will not be able to create a print. Is it so? Many practicing nail design masters are sure of the opposite. You should consider their advice on which varnishes are suitable for stamping.
Step-by-step instructions for creating a manicure using DIY stamps
Stages of creating nail designs using stamping technique
- Degrease the nail plate. Apply a base coat to it and dry. Apply a background coat. It should dry well.
- Select the disk with the desired stencil. Remove the protective film from it if you are using it for the first time.
- Choose the polish you want to create the pattern with. Distribute it with quick movements over the entire surface of the stencil.
- Remove the unnecessary part of the varnish with a scraper.
When working, hold the scraper at a 45 degree angle. It must be pressed down with such force to remove all excess, but at the same time preserve the paint in the stencil engraving. Only practice will help you understand how to use a scraper. - Press the stamp onto the stencil using a rolling motion.
Check to see if the design is completely printed. If not, you should delete it and repeat all the steps again. After all, the quality of the manicure depends on this. If you do not have time to transfer the paint, it dries quickly on the stencil, treat the disc with acetone. Its droplets will slow down the drying process of the pigment. - Press the stamp onto your nail using a rolling motion.
If the image is partially printed, it means the varnish has dried out or the nail has a greasy surface. If part of the image gets on your skin, remove it with a cotton swab. - Remove any remaining paint from tools.
- Apply sealer after the design has dried.
This should be done with one stroke so that the pattern does not smear. Do not press the brush onto the nail, but spread a drop of fixative over the surface of the nail.
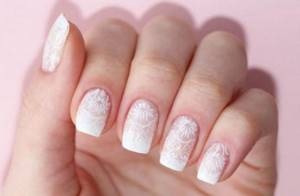
Example of French manicure with stamping
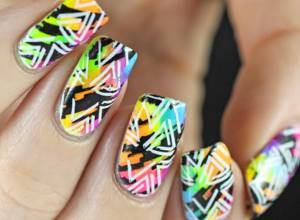
Multi-colored stamping on long nails
A video for beginners will tell you more about how to stamp your nails at home.
Required Tools
To get a beautiful stamping nail design, you don’t have to use lamps, much less brushes of varying thicknesses and densities. However, there is a need to purchase special plates and the dies themselves. In addition, not all varnishes are suitable for creating a pattern, but first things first.
Stamping plates
As already mentioned, a lot depends on the disks (or platters), and therefore you should understand what their differences are. These are metal plates on which there are all kinds of patterns and designs in the form of engraving. The quality of the metal is also important, which is usually higher for more expensive slabs. The result depends on the engraving, namely on its depth and size of the design.
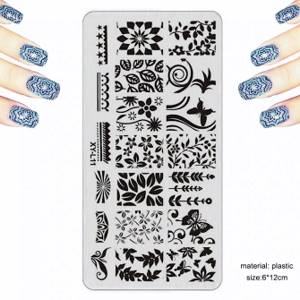
According to reviews from girls who are manicurists or do it themselves at home, it is easier to work with plates where the patterns have an average depth.
If it is a specific design, it should be proportionate to the nails. Large abstractions and patterns are perfect for transferring parts of them onto nails.
Types of stamps
Not only the plates with the finished images differ, but also the stamps onto which they are transferred in color. They are divided among themselves according to several characteristics, therefore, for clarity, the types are presented in the table.
| Sign | View | Description |
| Origin | Original | Stamps produced by well-known brands are usually marked accordingly |
| Unoriginal | Most often labeled under the name no name | |
| Number of working areas | Unilateral | There is only one pad for transferring the pattern |
| Double sided | 2 pads that differ in size and density | |
| Material | Rubber | Such stamps are denser, so it is a little more difficult to transfer the design onto them. |
| Silicone | Softer and more pliable than rubber, but require a special approach | |
| Color and transparency | Multicolored | Such stamps have several replaceable pads of different colors, which helps in cases where the varnish is hard to see on one of them |
| Transparent | Both the pad and the holder itself can be completely transparent, thereby allowing you to see the future result while applying the pattern. The varnish on them is also better visible. |
When choosing, it is important to remember that branded nail stamps are not always of the appropriate quality. Often non-original ones are much easier and more pleasant to use.
Other tools
Additionally, for stamping you will need some more items and tools:
- Scraper. It will be needed to pull the varnish across the plate; it may have a metal or plastic edge. The latter will last less, but do not harm the surface of the plate. If the scraper was not purchased as a set, you don’t have to buy it separately. An excellent analogue is any plastic card.
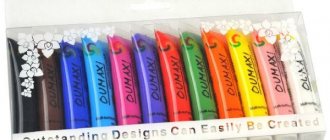
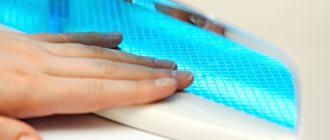
- Decorative varnishes. These can be either special stamping varnishes or the most common ones. At the same time, it is desirable that they are thick enough and do not have the property of drying out very quickly. It is impossible to stamp nails with gel polish, but its use is acceptable as a base coat. In this case, you will still need an ultraviolet lamp.
- Nail polish remover. Necessary for wiping the plate, scraper and die.
- Lint-free cloth. Best suited when wiping, because... leaves no additional traces.
Nail Design Ideas
Fun design with lambs
- Paint your nails mint.
- Fill in the stencils and apply paint to all nails or several nails.
- Apply sealer.
Voila! A funny design with white sheep and lambs is ready!
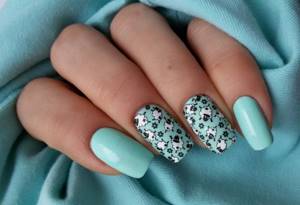
Original and fun design using stamping technique
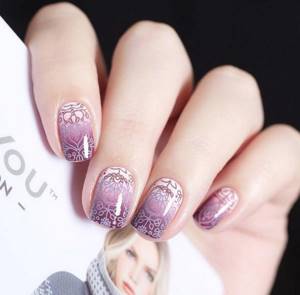
Gradient stamping
- Paint all your nails white. Dry.
- Choose an abstract stamping pattern that will cover the entire surface of the nail. Apply pink polish to half the pattern and yellow polish to the other half. Run the scraper over the plate several times until the colors are well blended at the border. Transfer the drawing.
- Cover the dried drawing with a fixative.
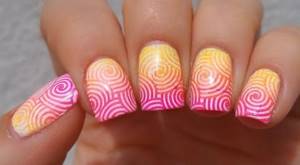
Gradient stamping
Leading manufacturers of stamping varnishes
Today, there are several leading brands producing such varnishes. The most popular products are rightfully considered to be from the Korean brand Konad, which are known for their unsurpassed quality. Lesly stamping varnish and paint, a product of a Russian manufacturer, has also proven itself to be excellent.
Original products have a lot of advantages, which we will discuss below. It is no secret that special acrylic varnishes can be replaced with ordinary decorative ones, but this requires a lot of experimentation. Even if you seem to have found that treasured bottle of thick and highly pigmented nail polish, in the process it may not live up to your expectations.