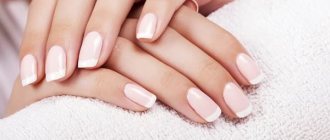
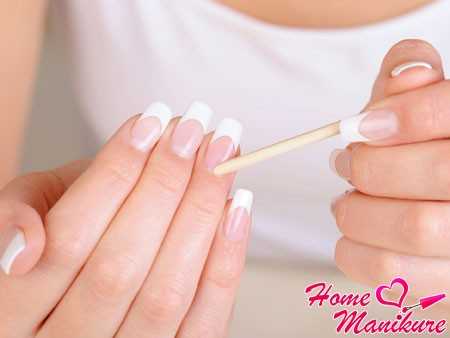
For a modern girl, it is important to be able to do a manicure quickly. This is dictated by the conditions in which we live. There's nothing you can do, you have to save time. Stamping was invented for those who are actively trying to do this. With this method, a beautiful and original nail design can be created in a short time. We will tell you how this is all done in this article.
What is stamping
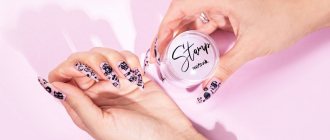
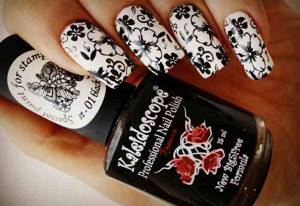
The “stamping” technique allows you to create amazingly beautiful designs on your nails, even for those who cannot draw and are not familiar with the intricacies of nail art. The process is otherwise called “stamping”. The image is applied to the nail plate using a stencil and stamp. The design is chosen based on personal preference. These can be various pictures, ornaments, abstractions, geometric and other shapes, fancy patterns.
To do stamping, in addition to paint, you will need a special set consisting of three main elements:
- A stencil is a metal plate on which a specific pattern is engraved.
- A stamp is a pad with a handle made of soft material (silicone, rubber). The purpose of the stamp is to imprint a pattern from a stencil and transfer it to the nail.
- A scraper (scraper) whose blade is made of metal or plastic. It is needed to remove excess paint from the stencil.
It remains to add that the technique of applying patterns using a stamp was invented in South Korea. The Konad company began mass production of stamping kits. But now other companies also produce accessories for stamping manicure. Products have different quality, as much depends on the brand.
Dots nail designs are a lifesaver
In order to do a good job, you need good tools. And the art of nail painting is no exception. It is impossible to do without dots.
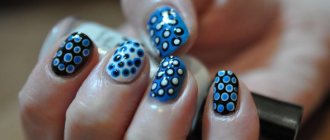
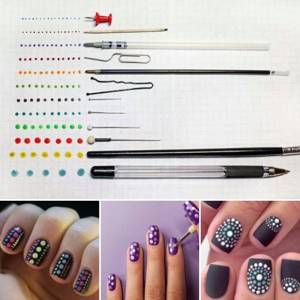
What is dots
Dots are a small and very practical tool for applying patterns and designs. With this tool you can perform any manicure of your choice. Everything is possible! For example, a classic manicure involves applying numerous dotted lines of the same size along the entire length of the nail. You can also make straight lines.
A dot is a small metal stick with two ends, each of which is equipped with a large or small ball, with which you can draw polka dots. Some dots are equipped with tips in the shape of a heart, cloud, flowers, butterflies, mustaches... This is a very practical and indispensable accessory for bringing to life a fantastic and fashionable manicure. Dots can be replaced with a regular toothpick, ballpoint pen, hairpin, etc.
How to use dots
Dots is very easy to use. Dip the tip of the stick into nail polish and then apply it to your nail to create a dot. Apply as many dots as you like and let the polish dry. You can use varnish of various colors. For example, black and white dots.
Try experimenting with shiny and matte polishes of the same shade. For convenience, you can pour a little varnish onto a piece of paper or a glass plate. This way you can control the amount of varnish on the dosage. There shouldn't be too much of it.
If possible, it is best to dip the dots in varnish whenever you are about to apply a design, otherwise the varnish may run. Remember to thoroughly clean the dots with solvent each time you use them before the varnish dries. Dried varnish on the dots can lead to a change in the shape of the design. Before drawing on your nails, we recommend practicing on a surface that resembles the surface of a nail.
Several options for applying dots patterns
- Single or double lines
First, coat your nails with base polish and let it dry thoroughly. Then choose one or two polishes of different colors, depending on the number of lines. There are several ways to complete lines. In the first case, you draw dotted lines, with each line becoming smaller and smaller in size than the previous one. And in the second case, you dip the dots into the varnish when applying each dot, while all dots are the same size. You can do the two options together.
Choose two colors that go well together (for example, pale pink and hot pink). Then coat your nails with base polish and let it dry. Once the polish is dry, apply dots all over the nail. You will get an interesting and at the same time simple drawing. For a summer manicure, you can choose 4-8 colors of bright polish. For the autumn-winter season, cherry red, brown and golden are more suitable. You can apply polish with two dot tips. In this case, you will get a pattern of small and large peas.
A combination of matte and glossy varnish or dark and light colors. Elegant and original!
Flowers are a fairly popular nail design. They look good on both short and long nails, even false ones. Paint your nails with your base color. Then make five small dots in a circle. Again, if you want the dots to be the same size and shape, dip the dots in varnish to make each dot. The middle of the flower can be made either with dots or with rhinestones.
For those who are not afraid to experiment, you can create designs over the entire surface of the nail. These can be circles, spirals or figures of other shapes and colors. Don't forget about the varnish fixer.
Video tutorial
teammy.com
Advantages and disadvantages
The technique of applying patterns with stamps is in demand not only in the nail industry. Because the image you like can be transferred to any smooth surface. For example, on glass in a closet or the body of your own smartphone. Wide scope of application is not the main advantage. Stamping has a whole list of other advantages:
- Allows you to save on the services of a professional manicurist. This is true, because you can decorate your nails in the most original way yourself.
- You can choose the color of the picture. By the way, lovers of nail stickers are deprived of this opportunity, since they have to rely on the manufacturer’s proposals.
- A stamping manicure requires a limited amount of time.
- Each nail is decorated with the same pattern - perfectly smooth and clear (subject to following basic rules).
The disadvantages of stamping are associated with tools and materials, as well as a lack of experience. For example, if the paint (varnish) is too thick or dries quickly, then you will not be able to transfer the image. If you start working with a stamp on a non-dried coating, the design will be blurry or not work at all. That is why before starting work it is worth familiarizing yourself with the basic rules.
General recommendations
- Training allows beginners to acquire the necessary skills. It is impossible to get a perfect stamping manicure the first time. During the training process, you need to independently determine with what force it is best to apply pressure on the stamp and scraper.
- The silicone pad should be treated with a buff before work. Because silicone imprints patterns worse than rubber. It is noteworthy that the use of transparent silicone is a “production necessity”, since the master sometimes needs to see the area of the nail to be decorated.
- The coating on which the design is applied with a stamp must be completely dry. If the nail polish is not completely dry, the contours of the pattern will be blurred. It is worth noting that the contours will be unclear even if a top coat is applied immediately after stamping.
- Transferring an image from a stamp can only be done once. The procedure is repeated for each nail.
- The drawing can be supplemented and diversified. This is done using a thin needle or dots.
- Varnish (paint) remaining on the skin is removed using a cotton swab dipped in nail polish remover. But it is better to use a special skin protection product that is used to treat the corresponding areas on the fingers. The product turns into a film that is very easy to remove.
- For a bright and clear pattern, you must use a well-pigmented, dense varnish.
How to replace a tool at home
You can choose an alternative to dotter from household items. This can be any object with a small rounded tip: a toothpick, a cotton swab, a needle, a pin eye, a match, a knitting needle or crochet hook, a hairpin, a ballpoint pen that has run out of ink.
An effective and inexpensive tool is the dots, which is convenient to use at home to create an original nail design. Although it can be replaced with improvised means, with dotter the patterns are more accurate.
It is better to start painting on your nails with a simple dotted manicure, gradually moving on to more complex compositions - geometric patterns, flowers or lace.
Article design: Svetlana Ovsyanikova
Tools and materials
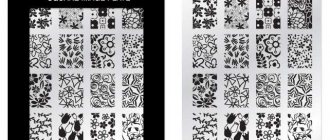
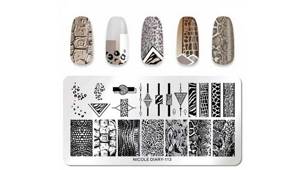
Stencils
Stencils are plates of various shapes and sizes on which patterns are engraved. They can be plastic and metal. The first option is more suitable for working with thick paints, since the embossing of plastic stencils is deep and wide. Their service life is short.
Metal stencils are more versatile because they are suitable for working with paints of any consistency. But over time, scratches appear on their surface from the scraper. This negatively affects the result.
All stencils differ from each other in the material used for production, the depth of embossing, patterns and shape. It can be: rectangular, round, shaped. Up to 30 drawings can be presented on one plate. If you only liked one of them, then you shouldn’t buy an expensive plate just because of one image.
The most common option is a disc-shaped stencil. It can contain from 4 to 8 pictures. It is better to buy several disks than one rectangular plate. Laser engraved stencils are of high quality, especially branded ones - Konad. Chinese replicas can please or disappoint.
Stencils are always protected by a thin film that may not be noticed. When using for the first time, you must carefully move a sharp object along the part of the plate where the pattern is missing. This will allow the film to peel off and be easily removed.
Stamps
All stamps have approximately the same appearance, but their pad can be square or round, made of rubber or silicone. Rubber pads are harder and will not work the first time. Their silicone analogues are softer, but in order for them to tolerate the pattern well, they require preliminary surface treatment with a buff. Silicone and rubber have approximately the same number of fans.
The surface of a good pad has a semicircular shape, which is necessary to obtain a clear image. The presence of a crack on the stamp indicates that this tool will soon become unsuitable for work. Replacement pads are freely available, and “consumables” can easily be matched to any stamp. For precise application of small designs, it is recommended to use a stamp with a transparent body and a silicone pad.
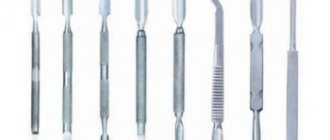
Scraper
A plastic tool is much preferable because it does not scratch the plate and does its job well. If you don’t have a scraper, you can use improvised means, for example, a plastic card. Over time, nicks appear on the end of the plastic scraper. This results in poor image quality.
A scraper with a metal blade more thoroughly cleans the surface of the stencil from excess paint, but it tends to leave scratches on it. From this we can conclude that an ideal scraper does not exist in nature.
Paints and varnishes
This technique of decorating nails involves the use of special varnishes and paints, the bottles of which are marked “for stamping.” Theoretically, regular nail polish can be used to create stamped designs, but it must have a high concentration of coloring pigments. To check the degree of pigmentation, the print should be applied to a black background. It is necessary to take into account that there are quick-drying varnishes and paints, the use of which requires efficiency from the master. If you miss the moment, the varnish may dry out while still in the stencil.
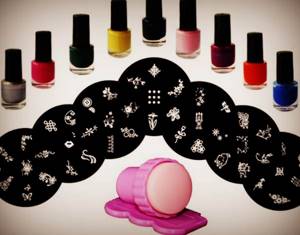
Popular brands:
- MoYou London;
- TNL;
- Born Pretty;
- El Corazon;
- Konad;
- Dance Legend.
For wide patterns, a thicker varnish is required, for thin and elegant ones (lace) - a medium consistency.
How to choose a good palette
There are different plastic molds for applying varnish samples. Some have a completely transparent structure, others are milky, and others are white.
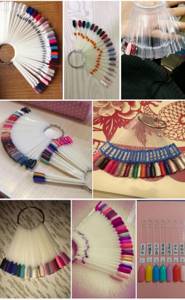
To apply the sample, it is better to use milk palettes. Or natural, slightly yellowish in color. The applied sample on them will be closest in color to the painted nail.
Some palettes cannot withstand the action of solvents - acetone or alcohol. These are not worth purchasing. Good professional palettes are made from durable plastic and are easy to work with.
Step-by-step instruction
- Prepare the nail plates: remove the cuticle, adjust the length and shape of the nails, remove the coating.
- Degrease your nails, apply a base coat, and let dry. Apply any polish to your nails, preferably in two layers. Each layer must dry well.
- Prepare all the tools and materials that will be required for the job. Paint and varnish should contrast.
- Select a design on the stencil and completely paint over it with a pigmented stamping agent.
- Remove excess paint from the stencil. It is required to quickly, with light pressure, run a scraper along it, located at an angle of 45-650.
- Transfer the drawing to the stamp, and from it to the nail. To do this, you need to lean the pad against the drawing for a few seconds, applying slight pressure. The design is transferred to the nail with a “rolling” motion - from left to right.
- Perform the procedure on all nail plates. The paint should be removed from the plate and stamp each time.
- Wait until the paint dries and apply the top coat.
- Remove excess paint with a cotton swab (provided that no special products were used).
see also
How to lengthen your nails- How to cut a kitten's nails at home
- How to do gel nails
- How to cut a kitten's nails
- How to paint your nails with two colors
- What do uneven fingernails mean?
- How to remove biogel from nails
- How to cure nails
- What is acrylic for nails
- How to remove iodine from nails
- How to extend nails at home with gel
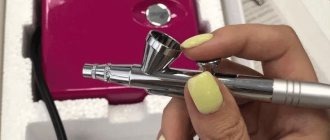
Stamping with gel polish
The procedure is performed by analogy, but it has its own nuances. To begin with, you need to choose the right gel polish intended for applying the pattern. It must contain a large number of pigments. This is necessary for the print to be clear.
A well-pigmented gel polish adheres better to the base and does not smudge. If you use gel paint, this simplifies the task because it does not require drying. In this case, the top coat can be applied 5 minutes after decorating the last nail. To ensure that the pattern does not blur, the sticky layer from the base coating must be removed.
Applying rhinestones and bouillons using dots
Dots can be used not only to apply interesting designs, but also to create a “caviar” manicure and decorate nails with rhinestones.
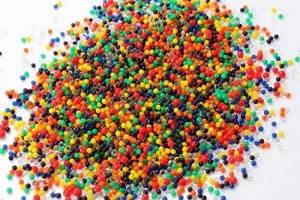
Using dots you can apply rhinestones and bouillons to your nails
- Get a manicure and cover your nails with a decorative coating.
- Apply transparent glue to the surface of regular or gel polish in those areas where you will attach rhinestones or bouillons .
- Using dots, attach decorative details to the surface of the nail.
- Let the rhinestones and broths dry or dry them in a lamp.
- Apply a coat of sealer .
If you want to cover the entire surface of the nail with broths, it is easier to lower your finger, nail plate down, into a container with them - and they will be evenly distributed.
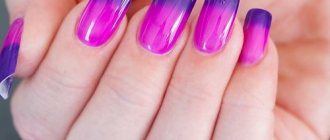
Reverse stamping with gel polish
This technique is not as complicated as it seems, but the effect it produces is amazing. First you need to prepare your nails and apply a base coat, which should dry well. After this, gel polish is applied in two layers, and each of them is thoroughly dried. Gel paint of the desired shade is applied to the plate pattern you like and, after processing the stencil, it is transferred to the stamp with a scraper.
The details of the drawing are additionally painted with bright colors, which is done using a brush for Chinese painting. Cover the design with topcoat and place the stamp in a UV lamp for a few seconds. Then you need to carefully remove the design from the pad with tweezers and transfer it to the nail. Next, treat with a top coat and dry in a lamp.
Practice sheets for Chinese
Author: Tanusha
Rate this article: (1 votes, average: 5.00 out of 5) Loading…
The Chinese nail painting technique allows you to paint incredible masterpieces on your nails. The main element in Chinese painting is always flowers, created by smooth transitions of colors using a special painting technique - the technique of double strokes with a flat brush. Mastering this technique can take months, so training is very important. First you need to master the basic strokes in one direction and in the opposite direction, then you can use them to compose the elements and compositions themselves.
Here I offer you a training card for the basic strokes that need to be drawn in a row, as well as several training cards with which you can practice performing various compositions. Some sheets are marked with the order in which the elements are performed, so it will be easy for you to understand their basics after mastering the main elements.
It is difficult to describe in words how to draw each element of this training card in Chinese, so below I offer several videos in which you can watch the first elements of the double stroke technique.
I would like to add a few tips of my own:
- It is best to perform training on these elements on special black paper for Chinese painting. It is thick and does not absorb paint like regular paper. Otherwise, it will be difficult to learn anything.
- Drawing of all elements is done with ordinary acrylic paints, but a straight flat brush is used, preferably thicker, for example No. 4.
- It is important to properly apply paint to the brush and shade it. To do this, when typing, you need to try so that the colors do not touch each other, so it’s good if you have a palette with dividers - it’s most convenient to do this on it.
- Training, training and more training. Don't expect everything to work out the first time. Despite the fact that everything seems simple in the video, in practice many difficulties can arise from positioning the brush to turning it with your fingers. Chinese painting requires perseverance and practice. But if you are determined to master it, then good luck!
Video lessons on training cards for Chinese painting
Lesson 1
Lesson 2
Lesson 3
Training cards for Chinese or Chinese nail painting
Using this link you can download an archive with other training cards.
If you found this page useful, please recommend it to your friends:
moi-manikur.ru
How to clean a stamping plate

All tools – scraper, stencil and stamp – must be cleaned of paint residues. To do this, you can use nail polish thinner or remover. Acetone can be an alternative to these products. Cleaning instruments requires a large amount of liquid. Acetone is inexpensive and perfectly dissolves paint and varnish.
The algorithm of actions is simple: you need to moisten a cotton pad with it and remove the remaining paint, paying special attention to the engraving. Upon completion of the procedure, wipe all instruments dry. You can use wide tape to remove paint from the stencil.