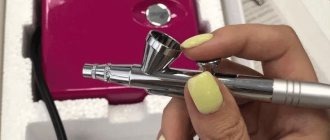
Hello, dear readers! Probably, every girl sometimes wants to do something new and unusual with her nails, for example, draw beautiful patterns on them. However, not all of us have the necessary artistic skills for this. You can, of course, paint with an airbrush, but this technique is quite complex and will take a lot of time to master. But there is a way out! Aeropuffing for nails will help us decorate our fingers with beautiful patterns without much effort and additional training. What is it and how to use it? We will try to answer these questions in this article.
What it is?
Aeropuffing is a unique technique of applying a design to nails using a special soft sponge and gel paste.
Its use requires practically no special training and at the same time allows even beginners to create an effective and stylish design using accessible and inexpensive materials. With the help of aeropuffing, you can create both a regular gradient or French pattern, as well as stunning three-dimensional designs. This coating technique is similar to airbrushing, but is much cheaper and much easier to master.
Graphic arts

The combination of different graphic stickers in one design gives an original three-dimensional effect. Combine two or three colors to highlight the play of lines. Before performing, try to make a design on tips to get symmetrical designs on all nails.
Geometry on nails - the best ideas for improvisation
Let's compare airpuffing and airbrushing on nails
Although the airbrush is considered a tool for true masters, allowing you to apply smooth, diffused gradients, air puffing is becoming increasingly popular, and not just among beginners.
This technique differs from airbrushing not only in its ease of use - it has a number of other equally attractive advantages:
- When creating a manicure, you can mix many colors to get exactly the shade you envision on your nails. It is not difficult to obtain both bright and saturated, unusual colors and delicate tints of halftones.
- The gel paste has a dense consistency, so it is convenient to create complex voluminous designs without worrying that it will dry out prematurely. In addition, it is inexpensive, sold in large tubes and is consumed slowly.
- Air puffing tools are much easier to clean after use than an airbrush.
- You will work more comfortably, without the fear of inhaling something not very useful during the spraying process.
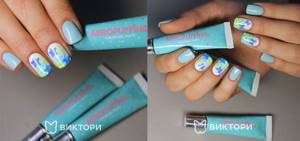
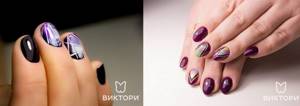
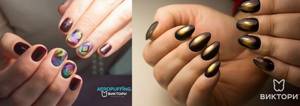
Examples of designs using the aeropuffing technique: photos and videos.
Even the most demanding client cannot resist the beauty of an air puffing manicure.
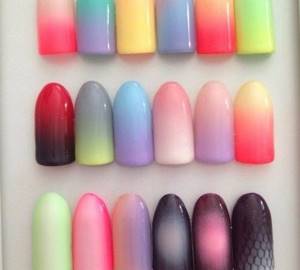
It will captivate with the play of color and light, smooth transitions, rich, realistic and natural patterns. In the training videos you will be able to see firsthand the quality of drawing details and the effectiveness of gradient transitions. As for the images that can be created with this technique, they are almost limitless. The most popular are, of course:
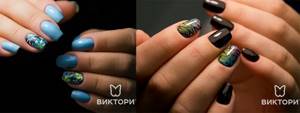
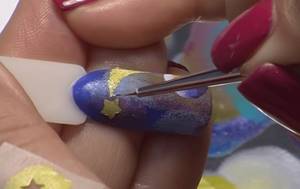
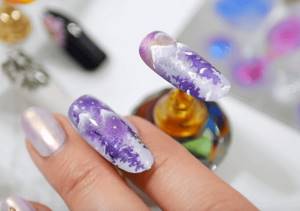
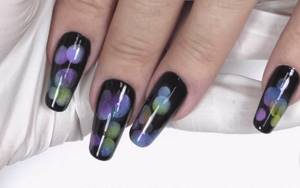
- three-dimensional 3D paintings (stars, planets, volumetric glare effect in precious stones);
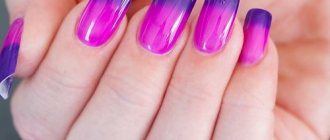
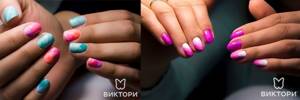
- a variety of ombre gradients (both soft pastel and brightly saturated);
- bright and attractive images for the holiday, evening images. For example, painting or spectacular stained glass;
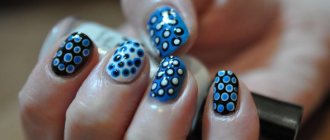
- original and mesmerizingly beautiful abstractions and geometric designs;
- manicure based on the seasons;
- and many many others.
By choosing an air puffing set as your assistant for decorating nails (both natural and extended) of any length and shape, you can be sure:
- the ideas embodied will be deep and voluminous, clear and impeccable;
- smooth halftones and airy transitions will give any design a special appeal and appeal;
- With air puffing, you don't have to worry about common imperfections like too much paint, brush marks in the design, or uneven coloring.
You can buy Aeropuffing using this link and bring your manicure fantasies to life in bright colors!
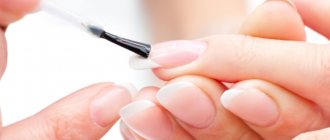
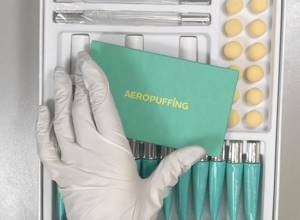
Materials for air puffing
Aside from the usual tools, aeropuffing requires little extra. In addition, girls who often do their own manicures probably already have some of the following. So, you will need:
- pouf with replaceable sponges;
- gel paste of various colors;
- art gel (optional);
- palette;
- stencils;
- cuticle protection liquid;
- matte and glossy top;
- brushes
You can purchase everything you need separately or buy a ready-made set - each option has its advantages.
Just don’t save too much by buying the cheapest Chinese goods. A high-quality tool will last much longer, and if you care for it properly and use materials rationally, the costs will be fully justified. Further details about each attribute:
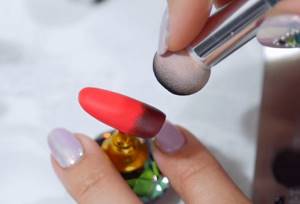
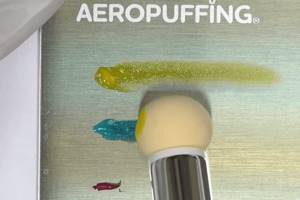
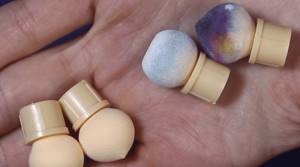
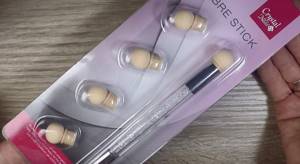
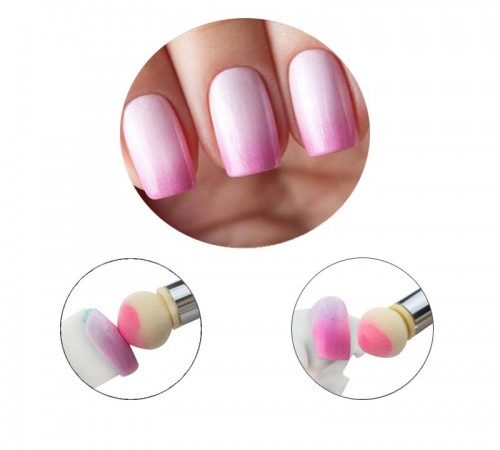
Poof
The main tool of aeropuffing is the poof.
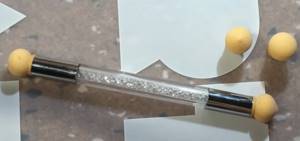
This is a stylus with two sponges on each side - round and drop-shaped; the standard set usually contains several pairs of additional pads. It is convenient to create a gradient with a round sponge, and with the sharp tip of a drop-shaped sponge you can do more delicate work.
To create a smooth ombre effect, you need to use only quality tools. Chinese poufs have uneven edges, which disrupts the smoothness and clarity of the gradient. Their rough surface can leave crumbs on the nail. This will definitely ruin your manicure. In addition, such sponges quickly become clogged with gel paste and lose their texture when cleaning, and also have poor attachment, so they can come off right during use.
Tip: the stylus itself is inexpensive, but the sponges will have to be changed quite often. For economy and convenience, it is advisable to assign each sponge to a specific color.
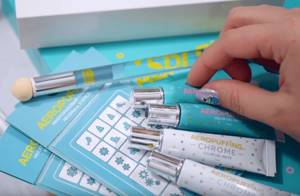
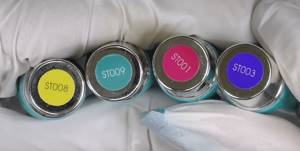
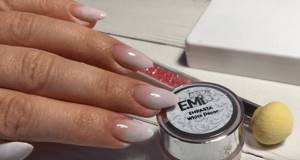
Gel paste
The set includes tubes of gel paste in a variety of colors.
Why is this particular product used for aeropuffing, and not paint or varnish? The fact is that the gel paste has a denser texture, which allows it to remain on the surface of the sponge, while varnish and paint are strongly absorbed into the spongy surface, and the layer comes out translucent and uneven. In addition, they heavily pollute the pad. If desired, you can use them to make a gradient pouf, but you will need to apply at least 4 layers with sequential drying of each.
Gel paste has a wide range of shades (including glitter). It does not smell, is easy to apply, does not flow, does not form bubbles and provides long-lasting, high-quality coverage for more than one week. With its help you can also create three-dimensional drawings. And when mixed with a top, it becomes more viscous and suitable for working with a wide variety of design elements. When used sparingly on the palette, the tube lasts a long time. To fix the gel paste, it is better to use a high power UV lamp.
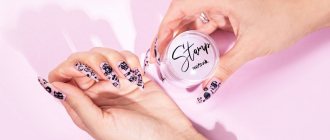
Note: the gel paste used in air puffing is also ideal for stamping: just apply the required amount of paste to the disc with the pattern and use a stamp to transfer it to the nail. The drawing turns out smooth and clear. If desired, you can use manicure tape as a basis for deep design.
Tip: if you unexpectedly run out of gel paste of the desired color, you can alternatively use a one-time use of varnish or gel paint. To achieve the result, you need to apply the desired color to the palette and wait a while: then the varnish will dry and acquire a denser consistency. The main thing is not to tighten it so that it does not dry out completely.
Art gel
Art gel helps to create spectacular 3D designs on your nails, as well as relief designs in a retro style using copper, gold and silver colors.

You can also use it to paint your nails with both straight and curved lines.
Palette
The metal palette in the airpoofing kit is a very necessary and useful tool. It provides convenient work with different colors, thanks to it materials are consumed more economically.
I would recommend attaching a piece of not too sticky masking tape to the back of the palette. With its help, you can easily remove dust particles and unnecessary paste from the sponge while working.
Stencils
Any stencils are suitable for the aeropuffing technique.
The standard set contains a set of the most popular options. They will be quite enough to create a wide variety of drawings - here everything depends only on your imagination.
Cuticle protector
The aeropuffing kit usually contains a product that allows you to avoid staining the cuticle and skin of the finger during operation - liquid tape.
Apply it to the skin around the nail and once the process is complete, you can easily remove any remaining gel paste.
Top coatings
Modern nail design simply cannot do without them. The set includes glossy and matte finishes.

A glossy top coat is usually applied as the last layer to add shine and brightness to the manicure. They can also be used to dilute gel paste. Matte is also used to increase the density of the varnish.
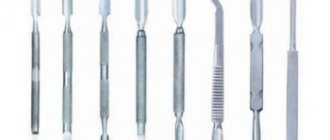
Brushes
They are not used directly in aeropuffing, but are absolutely necessary when creating a whole range of design options - not a single nail artist can do without them.
That's why we included them in this list.
Working with a brush requires some experience, but beginners are quite capable of using them for simple drawings. Below are the most popular brushes that will not be superfluous in your home manicure set.
- Monogram. This tool is useful for making thin, curved and wavy lines, as well as complex bends and weaves. Allows you to carefully draw small decorative details.
- Linear (hair) - slightly longer than the previous one and is also suitable for fine work. Craftsmen often use this brush for straight lines, but with its help you can also get good curves. It is best suited for working with the outer perimeter, creating geometric patterns, and other direct drawings.
- Petal - it’s convenient for applying strokes. Often used for abstract designs and floristry.
- Beveled. Allows you to make both thin strokes and wide ones. Ideal for realizing ideas in the fantasy style, as well as for floristry and Chinese painting.
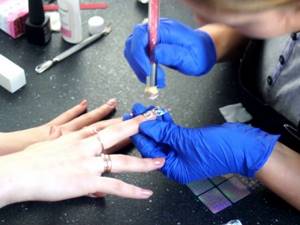
How to perform an airpuffing manicure
The technology is quite simple and familiar to those who already have experience working with stencils of any type. When designing with one color, you follow the following procedure:
- You perform a manicure with gel polish, and after covering the design with a matte top coat, polymerize it. There is no need to remove the sticky layer from the glossy top, it does not have one.
- Design using the “Aeropuffing” technique should be done specifically on a matte top. This is very important, since the ottoman is made of medical latex and when working on a glossy surface it loses its porosity.
- Apply the liquid protective tape around the nail, lightly gripping the cuticle. Let it dry and start drawing.
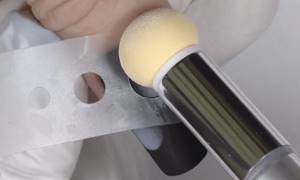
- Attach the selected stencil to the nail. If necessary, you can combine them without fear that particles of adhesive from the stencil base will remain on the design and ruin it.
- Apply the gel paste of the desired shade to the palette, blot the sponge with it and remove the excess with a sponge on the palette. This is necessary for uniform distribution of the product (you will avoid the effect of dirt).
- Use a sponge to apply paint onto the stencil using springy and patting movements. At the same time, move from the edge of the nail to the cuticle. At the edge, movements should be softer and easier to achieve greater coverage and color saturation (which is especially important for a gradient) and more confident and strong when approaching the base of the nail.
- Having completed the design, cover it with topcoat and polymerize it (30 seconds in an LED lamp). The finishing coat included in the kit holds rhinestones perfectly, so the artist can save money on buying glue.
- At the end of the work, the sponge must be cleaned with any cleanser (soak a napkin and blot the sponge with springy movements, removing any remaining paint).
A manicure that is not inferior in beauty to salon art painting or complex airbrushing is ready! If the image is planned from several colors, then each must be covered with a top (also applied with a sponge) and cured in a lamp.
How to care for your instruments
How to clean airpuffing materials so they last longer?
Try to follow these simple rules:
- Adhesive stencils must be cleaned immediately after finishing work. To clean them, it is better to first attach them to the palette and then wipe them with a napkin with a cleanser - this way the alcohol will not get on the sticky side. Be especially careful with patterned stencils - the napkin may catch on the edges and you risk tearing the base. It's better to just blot it.
- Also clean the sponge using a cloth with a cleanser. First, squeeze it in a napkin, then remove any remaining paste by lightly tapping it. Do this until the sponge stops giving off color. Then leave it to dry. Don't be alarmed that the sponge will remain colored - this will not affect the quality of the manicure. It is advisable just not to touch the dirty areas of the napkin with the sides of the pad, since they are used to create smooth color transitions (gradients).
- In order not to spoil the pillow, during the cleaning process it is important not to rub the pouf on a napkin, but rather to tap it. And with a damaged sponge, you risk ruining your manicure with foam crumbs. For the same purpose, it is recommended to store the stylus in a separate, clean bag.
Important: When working with a pouf, you must use lint-free wipes - lint on the sponge will ruin the entire manicure.
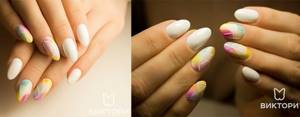
Flowers
Flowers and artistic paintings receive special attention from fashionistas in the spring-summer season. You can make this design with an airbrush in half an hour. Abstract lines are made using one stencil, secured, and then a second layer is created with butterflies. The base is a colored French coat using green, pink and orange varnish.
Painting on nails: materials, step-by-step instructions, design ideas
How to replace a pouf
If you have run out of all the stylus pads, and you want to do a manicure quickly and at home, then you can arm yourself with a regular sponge. It’s just important not to forget about some points:
- the sponge should be elastic and not too porous, otherwise the varnish will simply smudge;
- for the same purposes, do not use liquid varnish - the gel paste familiar for aeropuffing is best suited;
- during the process, use only a dry sponge so as not to dissolve the paste or varnish.
If the stylus suddenly breaks, you can take the tube from the pen and attach a sponge to it. Of course, this is only as a last resort, only before purchasing a new tool.
Play of textures: velvet sand design
For short nails, an original solution would be not only a combination of shades, but also working with different textures. It can be acrylic powder, velvet sand, sprinkle beads, melange, flock. Spraying a second color additionally emphasizes the volume of the texture used, attracts attention and allows you to create bright, original designs. Take the idea and try it in the next image.
For a practicing craftsman, having an airbrush becomes simply a necessity among demanding and creative clients.
If you need to save time and get new, enthusiastic recommendations, add it to your arsenal of tools. It will take several days to master the technique, and then working with it will turn into a complete pleasure. Which ideas will you try first? Share with us in the comments. Comment
Design options
With the help of aeropuffing you can create many express designs of varying complexity, you just need to give free rein to your imagination.
Below are three examples of the most popular and simple design options that you can use to decorate your nails. So, photos and sequence of actions - how to do aeropuffing:
Standard Gradient
- Apply a layer of gel polish of the main color and a matte finish to the nail - it will cause the sponge to clog less. If you don't have a matte topcoat, you can use a glossy one and lightly sand it with a buff.
- Start driving in the paste from the darkest area, gradually moving towards the border of the gradient. At this point you need to use the side of the sponge to create a smooth transition.
- To avoid ruining your manicure with the paint tip, turn the sponge towards the beginning of the gradient. The first layer may have an uneven color transition - that’s okay, the perfect ombre will come from the second layer. Dry the nail in the lamp, then repeat the application of the gradient. Then dry again and apply a glossy top coat.
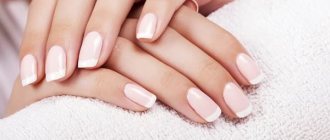
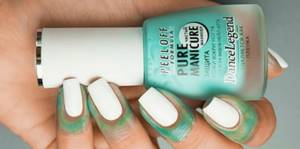
French
- Apply a light base coat, just like a regular French manicure.
- Prepare the required color on the palette and apply it onto the nail with gentle movements, forming an arc. Once you get used to doing a French sponge, you can make a very beautiful bend with a soft transition.
- If you wish, you can experiment by making the transition to a smile even smoother, like a gradient. This manicure will look very delicate, especially when using light shades.
rainbow gradient
This option is performed without drying individual layers.
- Apply gel paste to the palette in the colors of the rainbow.
- First, take the lightest shade and using a tapping motion, draw a vertical line down the center of the nail plate.
- Using the same method, apply other colors sequentially - like a rainbow.
It is not necessary to blend thoroughly - when applying subsequent layers, the borders of the colors will blend, forming a beautiful and smooth rainbow gradient.
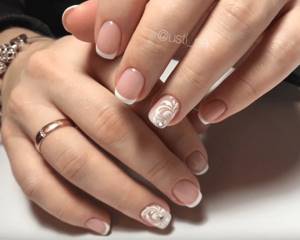
French
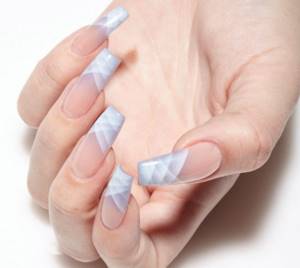
French airbrush
The same clear lines of French, only made with the help of sticky flats and gradient spraying, give new life to classic French design. It is better to perform on long nails in order to cross the strips several times. A half-tone of gray has been added to the white color, which creates an unusual play of shades at the junction of lines.
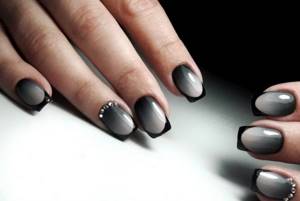
Another popular version of the French style, when a gradient is used for the background, and the tips themselves are painted over the fixed ombre effect. Use rich contrasting shades instead of black to experiment with this design with different outfits. Add rhinestones to your ring fingers to create a festive mood.
Design options for a French jacket - a selection of ideas
What to remember
Let's summarize:
- Aeropuffing for nails is not scary or difficult at all. This technique is ideal for beginners. Having barely become acquainted with the basic techniques, you can already make a beautiful and stylish manicure on your own.
- Gel paste is more suitable for air puffing than varnish or paint. In order not to be disappointed with the result, you need to use high-quality materials and tools specially designed for this technique.
Don't forget to share your experience with aeropuffing in the comments! See you again in the next articles!
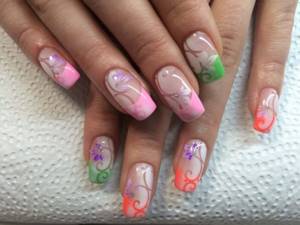
Combination of stencil designs
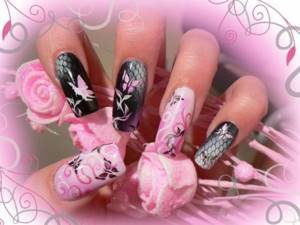
In one composition you can combine several stencil options: mesh, butterflies, flowers and ornate lines. When you have the time and desire to create, experiment with existing templates. Combining designs involves working on long nails to accommodate several different elements.
Execution technique
First you need to prepare the nail plate.
The usual manicure is done: the old polish is removed, the plate is leveled, the cuticles are trimmed, the nails are shaped, and then they are degreased.
After this, the varnish chosen for the background is applied.
The main point to consider is the mandatory use of the matte topcoat from the kit after the varnish coating is completed.
This is due to the fact that aeropuffing is performed only on a matte base. On a smooth surface, the gel paste will not look so impressive due to the specific structure of the sponge (its porosity).
Using stencils
Once the base is prepared, you can start manicure using stencils.
For this you will need a palette. The selected colors are applied to it.
If desired, you can mix different shades of varnish on the palette to obtain a new interesting color.
The required stencil or a combination of them is placed on the nail. A sponge (rounded or elongated, depending on the purpose of the design) is dipped into the material, and the paint is applied to the nail over the stencil. This is done with light, slightly elastic movements.
After this, the nail is placed in a special lamp to fix the design.
Then the stencil is removed and the artist can move on to the next nail or continue working on the current one. After completing the work on the nail, you need to cover it with the glossy material from the kit.
Gradient
What it is
A soft transition from one color to another in a manicure is called a gradient. Masters call it ombre.
This way of painting your nails never goes out of style. Soft colors, graceful and smooth transitions always look very beautiful and attract attention.
The ombre technique can be very different. The implementation of the conceived design is carried out taking into account the wishes of the client.
You can offer the following popular gradient options:
- horizontal;
- vertical;
- diagonal;
- smooth transition from one nail to another.
The most complex methods are those that use more than 4 colors.
How to do
To make a gradient using the aeropuffing technique, you need to prepare your nails. First, the old coating is removed, the manicure is done directly, and only then the base is applied to the nails.
After this, the nails are painted with the first layer of varnish (it is better that the color is darker - this will make it easier to start the gradient).
Next: gel paste of the desired colors is applied to the palette, a sponge is dipped into it and transferred to the nail with springy movements.
Each layer must be dried in a special lamp.
If a more saturated color is needed, the procedure can be repeated several times. After fixing, you need to cover the gradient with a glossy or matte top coat from the set.
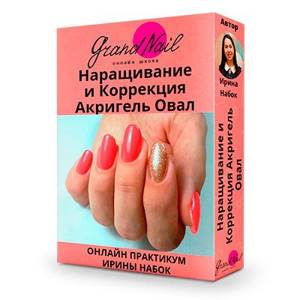
NAIL EXTENSION, STRENGTHENING AND CORRECTION ACRIGEL POLYGEL SQUARE
- We will teach you how to quickly and efficiently work with acrygel, polygel, acrylic gel
- Learn the differences between working with hard and soft materials
- Learn the technology of nail extension without peeling
- Your nails won't break
- Learn to understand which design is correct and which is not, why it is needed and what is the benefit of it
- Let's understand the terms so we can speak the same language
- Find out where the apex is and why it is needed (that it is not just a pile of superimposed material)
- Learn how to prepare your nails for applying artificial material.
- Learn to work with thin, wet nails
- Learn how to use the device (except for removing and lifting the cuticle) in other stages
- Forget about polishing your nails with a file - use only the machine
- Forget about filing the structure with a file - learn how to do it with a machine
- Do you make a shape with a file? And we will teach you with a machine !
- Do you cut the cuticle with nippers or scissors? Let's do it with a device !
Are clients leaving because you don’t know how to strengthen with hard gel, and the base doesn’t stick to them?
During the course we will learn in practice:
- We will teach you how quickly and efficiently work with acrygel, polygel , acrylic gel
- Learn the differences between working with hard and soft materials
- Learn the technology of nail extension without peeling
- Your nails won't break
- Learn to understand which design is correct and which is not, why it is needed and what is the benefit of it
- Let's understand the terms so we can speak the same language
- Find out where the apex is and why it is needed (that it is not just a pile of superimposed material)
- Learn how to prepare your nails for applying artificial material.
- Learn to work with thin, wet nails
- Learn how to use the device (except for removing and lifting the cuticle) in other stages
- Forget about polishing your nails with a file - use only the machine
- Forget about filing the structure with a file - learn how to do it with a machine
- Are you making a shape with a file? And we will teach you how to use a machine!
- Do you cut the cuticle with nippers or scissors? Let's do it with a device !
Are clients leaving because you don’t know how to strengthen with hard gel , and the base doesn’t stick to them? Sign up https://vip. grandnail.com/praktkum-akrigel-oval
You can watch the full version of this broadcast: