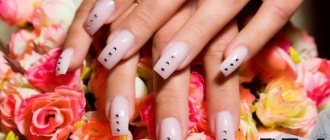
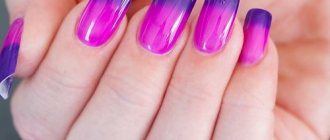
Hello, dear readers! Are you tired of monochromatic manicure? Do you want your nails to look like a work of art? An innovative device - an airbrush - will help you with this.
From this article you will learn what this device is, how to use an airbrush for nails, and what various decorative options you can create with it. We will also focus on materials for airbrushing and look step by step at creating one of the design options.
Advantages of airbrushing
The art of airbrushing is more than a century old, but it began to be used for applying designs to the surface of nails relatively recently. This technique is becoming increasingly popular because it has a number of undoubted advantages:
- Airbrush gives the artist more freedom in creativity - it can be used to create three-dimensional images, which is impossible with conventional painting.
- It significantly speeds up the drawing process.
- Paints dry quickly, so even painting complex images will not take much time.
- It is inexpensive - the necessary paints are cheaper than most analogues, and the necessary equipment, if used correctly, will last a long time and will pay for itself many times over.
- With the help of an airbrush, it is much easier for beginners to create many of the most popular designs, for example, French, gradient, ombre, openwork patterns.
What is an airbrush for nails
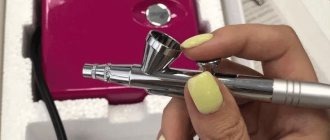
This is a tool with which paint is applied to the nail surface without contact - it is sprayed under compressed air pressure.
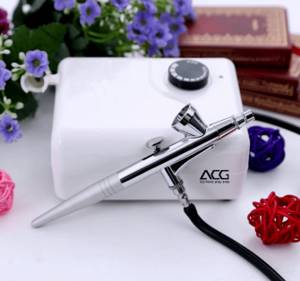
The airbrush (more precisely, the airbrush kit) consists of three main modules:
- The airbrush itself is a tool that is a cross between a pistol and a fountain pen. A compact paint tank is attached to it on top or on the side.
- A compressor unit that supplies compressed air (the tool can be sold without a compressor, in which case the latter will have to be purchased separately);
- Hose for connecting the compressor to the sprayer.
The nail airbrush is sold unassembled, but it is not difficult to assemble, and instructions are included with each one. The assembly procedure is simple: you just need to connect the spray gun to the compressor using a hose and replace the paint tank (if it is detached).
There are two main types of airbrushes: simple or single action and the most “advanced” and more often used - double action.
Single action
In such an airbrush, the “trigger” only turns on the paint supply, but does not affect the air pressure. It is adjusted elsewhere, usually with a screw. If you use this type of sprayer, then when replacing paint you need to completely unscrew and then tighten the screw again.
With proper adjustment, it is not difficult to achieve the optimal dye to air ratio. As a result, immediately after applying the design, the coating becomes dry. This airbrush is ideal in cases where the design is drawn using stencils or a smooth transition of colors (gradient) is made.
Double action
In airbrushes of this type, working with the trigger (lever) is a little more difficult - it has two functions.
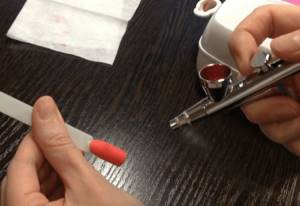
First, you pull the trigger and air begins to flow into the nozzle. In the second movement, you do not press, but pull the trigger back, as a result, paint begins to flow into the sprayer. The further you pull the lever, the larger quantities it flows. In order to change the paint, you need to pull the trigger all the way and the unnecessary residue will pour out.
Such airbrushes are used more often and not only in beauty salons. True, without sufficient experience, working with them is not so easy. But the result will certainly be worth the time spent on training and training. Once you get the hang of it, you will get clear images with precise rendering of all the details.
Typically, the device comes with cleaning brushes and pipettes. More expensive kits add solvents and device care products.
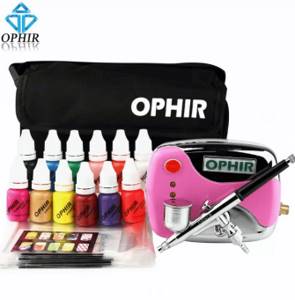
The price range for airbrushes is very wide. So, there are devices whose cost starts from 600 rubles. (they come without a compressor), and there are those that cost about $500. Inexpensive tools nowadays are often ordered from Aliexpress (they are ideal for beginner craftswomen), while professional ones are usually purchased for beauty salons.
Suitable paints
In order to use a spray gun, you need to purchase special paints.
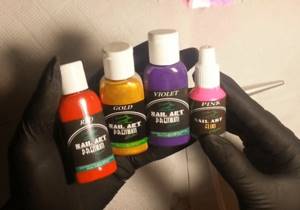
Regular varnish (even diluted) is not suitable for working with an airbrush. You should also not use acrylic masses that are stored in tubes.
The device only works with water-based compositions. They already contain acrylic, diluted to the required consistency. Airbrush paints look something like cream. They should not be too thick, or, conversely, too liquid.
To work with an airbrush, two types of paints are used:
Water based
They have a high water content, and acrylic is added to them as a pigment.
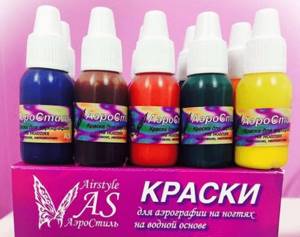
They are usually matte, less often - mother-of-pearl or metallic. Easily dissolves in water. Have two advantages:
- spray well;
- They do not dry immediately, so they can be easily wiped off from the skin around the nail.
These paints are good for beginners. The result with them is worse than with acrylic analogues, so professional craftsmen rarely use them.
Acrylic based
They also contain water, but the concentration of acrylic dyes in them is much higher. They do not dissolve in water (and are not washed off after drying), so the color scheme of the design is always brighter and more saturated than when using water-based paints.
Acrylic-based paints are sold for every taste and color: powdery, nude, shiny, matte, translucent, fluorescent, chameleon, neon, metallic, pearlescent, etc.
The many benefits of acrylic paints can only be fully exploited if you are skilled enough to prevent the mixture from hardening in the spray gun.
The disadvantage is that they are not so easy to remove from the skin on your fingers or clothing.
Tip: There is no need to mix water-based and acrylic paints - they have a heterogeneous composition, different densities and therefore usually do not combine with each other.
What do you need for nail art?
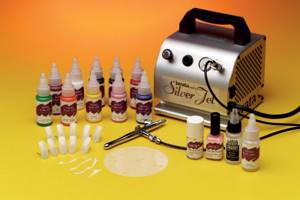
An airbrush is a “gun” or “pen” with a small container for paint. The kit includes a compressor as a pump and hoses that connect these devices. The principle of operation is to supply compressed air to the “gun”, which sprays paint onto the area of the nail plate.
A typical airbrush kit includes:
- hose, compressor, airbrush;
- tips for training;
- acrylic paints diluted with water;
- tweezers with sharp tips;
- stencils for painting;
- mask and gloves;
- paper towel;
- mat for cutting stencils.
Stencils are available in an assortment - with designs of lace, animals, floral motifs, geometric and abstract figures. Ordinary paper tape can turn into the embodiment of the master’s own artistic ideas.
Airbrush materials
In addition to the airbrush itself, you will need (or may need) the following materials and tools for work:
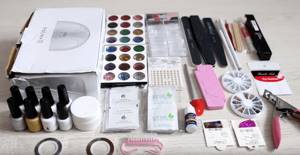
- airbrush paints;
- pipette for collecting dye;
- stencils;
- stickers;
- rhinestones;
- tweezers;
- buff;
- acid-free primer;
- sticky layer remover;
- top;
- device cleaner;
- tips for training.
Features of airbrush on nails
Like any pneumatic device for spraying paint, a manicure airbrush consists of the following main parts:
- air supply compressor;
- a paint-spraying tool in the form of a pistol with a small reservoir;
- connecting hose.
The operating algorithm of the device is as follows. The compressor creates high air pressure, which enters the spray mechanism through the valve. Under the influence of air, the coloring matter is blown out in uniform doses from the nozzle.
Important! The device in question differs from analogues for other areas of airbrush application in its compact size, light weight and small nozzle diameter, which allows you to draw the finest lines on nails and tips.
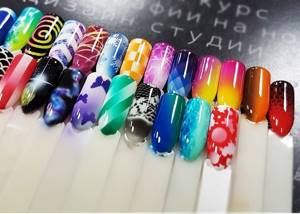
Manicure with an airbrush is performed much faster than applying varnishes and compounds using traditional brushes or brushes of different thicknesses. At the same time, the paint lays down in a perfectly even layer, thickened stripes and strokes, or missing areas are not observed on the nails. The device gives scope for the use of such artistic techniques as ombre and gradient, allows you to perform the finest strokes and draw small details of the picture.
Working with an airbrush
It should be noted right away that the art of airbrushing in general (and on nails in particular) cannot be mastered in a week or two. You can paint portraits with an airbrush, but people who have achieved such perfection in this technique have needed years of constant practice. You cannot create masterpieces without learning how to paint: first you need to master the technique of applying paint.
How to work correctly
In order to reach a professional level in airbrushing, you first need to work out the technique of producing an air-droplet mixture of the required concentration using a trigger.
It is necessary to ensure that the mixture always dries almost immediately after application. Achieving such a result is not so easy - you will have to practice a lot.
So, let's get acquainted with the basic rules and techniques:
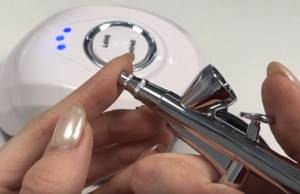
- While working, hold the airbrush in a way that is comfortable for you. It is only important to maintain an inclination of approximately 45 degrees. The accuracy of the image on the nail plate depends on this.
- When working, the wrist should remain motionless. Spraying is carried out with brush movements - up and down. As a result, the coating will be more uniform.
- First press the trigger (lever) to introduce air, and then smoothly move it back so that paint begins to flow into the system. Once the mixture begins to spray, gently press the lever forward and the spraying will stop. Repeat the entire cycle several times until you feel that you can control the process with the trigger.
- To ensure that the paint and air are mixing correctly, first apply a sample to absorbent paper.
- The less you press the trigger of the device, the less intense the color.
- Move the tool smoothly - this way you will evenly spray the pigment over the nail.
- Always watch your hand and don't stop it. Otherwise, an unattractive stain will appear on the nail plate.
- If you want to get thinner lines, then keep the airbrush at a close distance from the nail; if you want to make more transparent and blurry outlines, then move it further away.
- Only slow down the spray gun if you want to achieve a more intense color.
Important! Do not forget to rinse the airbrush by passing the cleaner through it before filling the tank with paint.
How to clean
The sprayer will last a long time if you properly care for it.
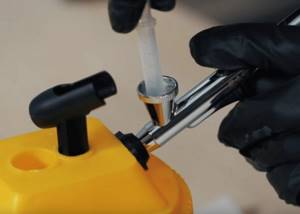
Do not forget that it must be cleaned after each use. This is done using an alcohol solution or a special product:
- Use a paper towel to remove any remaining ink from the tank.
- Pour alcohol or a special cleaner into the hole.
- Turn on the airbrush and force the liquid through the needle.
Now you can refill the paint and get to work. The same is done when changing colors!
How to choose
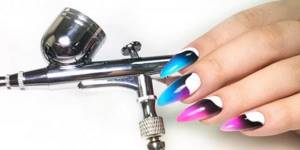
Airbrushing on nails as a manicure technique appeared several years ago. The demand for devices has led to the emergence of several dozen models adapted to the needs of the nail industry. The most popular manufacturers that beginners and experienced craftsmen should take a closer look at:
- Iwata;
- Sparmax;
- Evolution;
- Jas;
- Hansa;
- AirNails;
- Tagore;
- Fengda;
- Harder and Steenback.
The list includes European, Russian and Chinese manufacturers. For beginners, taking into account the combination of price and quality, you can try applying designs with models from Jas (China) and AirNails (Russia-China).
For salons, manicure salons and professional use with a large flow of clients, more expensive models from the manufacturers on the list are also suitable. The cost of a complete airbrush set starts from 3,000 rubles. You can also buy the handle, hose, compressor, nozzle and needle separately.
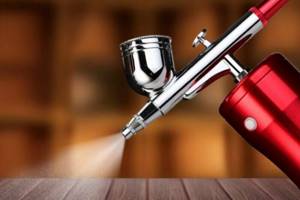
To perform professional nail designs, you will need the following device parameters:
- Bottle 2 ml;
- Air flow from 10 l/min;
- Pressure from 1.5 - 3 atmospheres;
- Productivity from 1.75 to 3 kg/cm2;
- The hose is fabric braided, not silicone. Length from 1.5 m;
- Nozzle diameter 0.2 mm - better than 0.3 mm;
- Compressor with a power of 12 W.
These same parameters are minimally sufficient when choosing a device for home use.
When working, the paint should spray evenly, into a fine dust, or gather in an even line as the nozzle approaches the work area. The trigger should have a smooth and soft stroke. There should be no drops or lumps left on the needle after applying the material to one nail. If possible, it is better to test these functions before purchasing the device.
New models of airbrushes are characterized by automatic start. The compressor starts working when the material supply trigger is pressed. Older models do not have such an automatic device, and therefore they are noisier and create vibration when the compressor itself is turned on. The airbrush will make noise and vibrate continuously throughout the entire process of applying the design to the nails, even during breaks in the supply of material, with the trigger turned off.
Expert advice
- If during spraying you do not see a stream of paint coming out of the airbrush nozzle, then everything is in order - the proportions of paint and air are correct! And if a stream is visible, the mixture is too wet.
- It is best to start by practicing on tips, a white sheet of paper - gradually working out the application technique, only then move directly to nail design.
- When painting, try to use the lightest colors first. This way you can add the next darker color faster with less cleaner.
- Before use, paint bottles must be shaken to avoid sediment. This especially applies to compositions such as “metallic”, “gold”, “silver”, etc.
If one color smoothly transitions into another and there is no visible border between them (that is, you already have a gradient!),
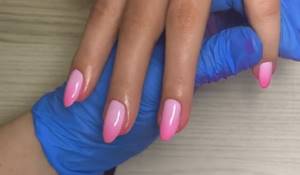
then it’s time for you to move on to the next, more complex stage - creating drawings using overlays and stencils.
Airbrush with stencil step by step
To create a beautiful design on the nail plate, you need to follow the standard procedure: remove the previous coating, file your nails, and then apply polish (you can use regular polish, but professionals advise using gel polish).
For example, let’s look step by step at how to make a simple design with an airbrush using a stencil:
- After standard hygiene procedures on the nails, we apply a base of gel polish in two layers. If it is well pigmented, then one layer is enough.
- After drying, cover the nail with a glossy topcoat, dry it again and polish it with a buff or a soft file.
- Pour 2-3 drops of the desired coloring pigment into the airbrush tank and close it tightly.
- Choose the stencil you like and apply it to the nail plate. It is more convenient to do this with tweezers. There are a variety of stencils and you can use them even on one nail many times - it all depends on the design you come up with.
- First, we point the airbrush at a piece of paper or a glove. This is necessary to control the mixture. (To avoid making a blot, such checks must be done periodically until the entire manicure is completed.)
- After this, spray the paint over the nail plate with smooth movements, creating a light air gradient.
- After a few seconds, carefully remove the stencil with tweezers. If the stencil is applied more than once during the process (and this most often happens), do not forget to dry the nail with air before each fixation.
- Apply the top coat, dry it in a UV lamp and remove the sticky layer of the topcoat.
- After a manicure, do not forget to moisturize your skin with a special cream.
Ready!
Anyone can make this design at home. You just need to practice a little. For clarity, I suggest you watch a video in which an experienced nail artist shows how to do airbrushing using stencils:
Features of nail care at home and in a beauty salon
It would seem that every woman should be able to take care of her hands and nails using a standard household manicure set. But for most, competent care is limited only to the ability to cut their nails, somehow file the corners and simply apply one color of polish. And for some, this doesn’t work out quite correctly and beautifully.
It is clear that for more complex things, which are at the peak of fashion, you need skills, skill, and special devices with materials. For example, almost no one can apply gel exactly the first time; this only comes with experience, which is reinforced by everyday work with this material. And only a master with a special airbrush with a compressor for nails can make a gradient design.
Important! To get a high-quality manicure that will last a long time and look decent, it is still better to trust its implementation to professionals working in a salon.
Design options
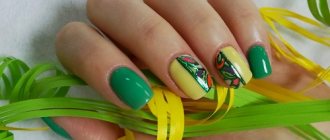
Using an airbrush, you can create a unique nail design that will fit into any look. The following options are considered the most popular:
French manicure or Baby Boomer
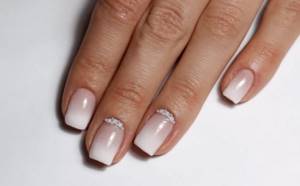
- done using sticky strips and (or) a gradient, best done on medium or long nails.
Ombre
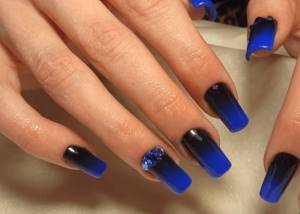
- looks ideal on short nails, goes well with rhinestones, bouillons and other decorative elements.
Lunar with gradient
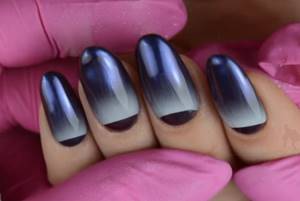
- suitable for any length, creates a feminine look, combined with glitter and sequins.
With stencil
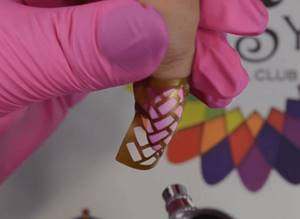
- the easiest to implement, saves time, creates a neat and attractive design.
Small thematic images
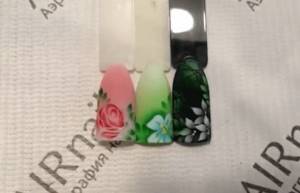
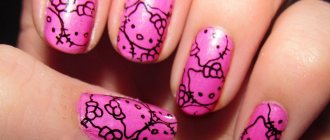
- usually painted on one or two nails, the drawing technique is simple, suitable for any holiday or celebration.
Geometry plus gradient
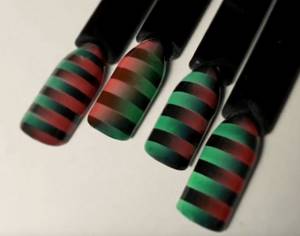
— suitable for any nail length, creating clear lines and shapes.
Any, even the simplest nail design can be made unique by creating additional details using acrylic powder, rubbing, beads, broths, etc. Don’t be afraid to experiment!
Design ideas using airbrush technique - photos, videos
From the photographs and videos presented, you can get ideas for using them in manicure or pedicure.
What to remember
Let's summarize:
- Airbrushing is a relatively new and very popular trend in nail design. It helps to create a perfect and original nail design in a short period of time.
- There are two types of airbrushes - single and double action. The first is ideal for beginners, the second is intended for more experienced craftswomen.
- The technique of applying a picture using an airbrush is quite complex and to achieve perfection in it, you need a lot of practice. Don't try to create a complex design with drawings right away - start with the very basics. First, master the basic technique and learn how to work with stencils.
- In order for the airbrush to last a long time, you need to choose high-quality paints and do not forget to clean the tool in a timely manner.
Did you enjoy working with the airbrush? How long did you have to train to learn how to use it? Share your experience with us in the comments!
