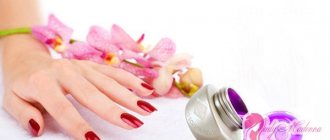
Colored nail gels are an innovative material that allows you to significantly expand the scope of nail service capabilities. A huge palette of gel polish colors allows you to create incredible compositions, which makes it possible to implement the most daring design ideas.
Colored gels are used to create a general background on the nails, but recent developments have allowed it to be compatible with other manicure products.
What is gel nail paint
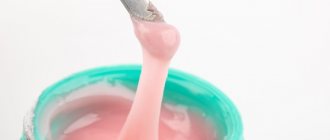
Gel paint for nail design is a gel-like substance with a thick consistency and bright pigmentation. This product does not spread or bubble when applied, maintaining a clear contour. To harden it, use an ultraviolet lamp for several minutes.
The consistency is very dense, viscous and thick, reminiscent of drying ordinary varnish. The wide range of colors is surprising: manufacturers offer various tones that can be mixed and used in unique shades if desired.
Bright and rich products are widely used by masters to create entire masterpieces of nail painting. There are two types: with and without a sticky layer.
Gel paint with a sticky layer
When creating a manicure using the casting and “velvet sand” techniques, colored gel nail paint with a sticky layer is used. After application, it does not lose its stickiness, so you can print foil or acrylic powder on it, which creates the desired effects.
These techniques are most often performed on artificial surfaces, but some masters are able to create casting on a natural nail plate.
Gel paints without sticky layer
These gel paints are used to paint artistic paintings on nails or a smile in a French manicure. They can also be used in one color over the entire surface as the main color.
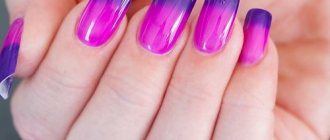
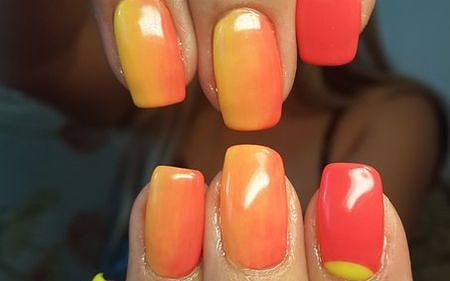
Classic gradient option
Initially, the gradient was performed in the horizontal direction. First, the coating is applied to the edge of the nail, then slowly moved to the back of the nail plate.
It was made with contrasting colors, close to each other in a circle of colors, and with the same color of different shades.
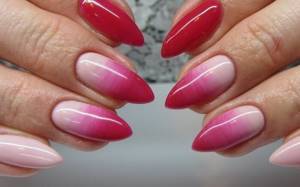
In one case, the manicurist achieves a bright, contrasting design, in another, a romantic, delicate design.
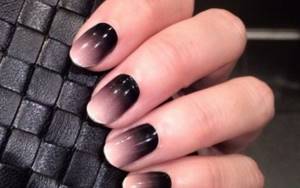
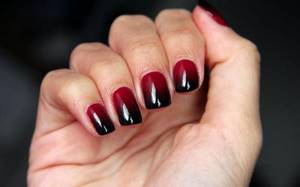
The combination of white with any other color, as in other things, and black also refers to the classic or horizontal version.
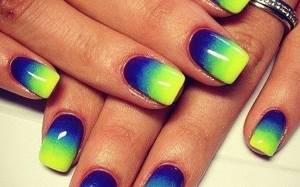
In classics, it is allowed to use two or several different colors. The greater their number involved in coating, the sharper the transition between them.
By using two colors of similar shades, the transitions are smooth and the manicure looks calmer.
Which is better: gel polish or gel paint?
In fact, these funds have similarities only in the name, but there are many differences:
- Paints are more dense and pigmented in structure than gel polishes. The pigments in the latter constantly settle to the bottom of the jar, so they need to be stirred daily, while their competitors do not need this procedure.
- Due to its dense consistency, the paint is economical in consumption.
- To obtain a rich color, 4–5 layers of shellac are used, when it is enough to apply the paint once.
- Creating a pattern with gel polish is difficult.
- The paints come in a wide range of colors and can be mixed.
Difference between ombre and gradient
If you look at it, these two techniques have little difference from one another. In both one and the other, the base layer is applied with colorless varnish, then one color gradually flows into the next one.
Each master has his own secrets in applying different manicure options. But no matter what technique they use, everything is aimed at a smooth transition between different shades of one color or several colors into each other.
Translated from French, ombre means shadow. Essentially, ombre is the same gradient, only made in the same color scheme with different tones. There is no sharp change in colors, their boundaries are not marked, one might say they are blurred. In the gradient, shading is also present, but not as smooth as in ombre.
View this post on Instagram
Posted by Unreel (@extremeofficial)
There is also the concept of Dip Dye, which also refers to a gradient made in bright contrasting colors.

The gradient itself can be performed in different directions: horizontal, vertical, with the transition of one color to another from the little finger to the thumb.
The technology is constantly changing and improving, but it is not particularly difficult. It can be done at home with a little practice. The main thing when performing is to have time and persistence.
Is it possible to paint your nails with gel paint?
Initially, the product was applied only to create decorative painting in manicure. Nowadays paint is used to paint the entire surface instead of shellac.
Important! Covering your nails completely with gel paint is a serious procedure that is performed with a certain sequence. Otherwise, you may harm your hands.
Proper preparation is necessary. In addition to the basic gash, you will need:
- erasing gloss from the surface with a buffer;
- degreasing the plate with a fresher;
- primer with acid-free primer.
The painting itself takes place in several layers, just like with shellac.
There are two options for the arrangement of these layers:
- Gel polish base, color layer, topcoat.
- Basic product, acrylic powder, base, two layers of paint, top.
Each product will need polymerization using a UV or LED lamp. Without the layers drying completely, the tint may pool, crack, or chip, and the durability of the finish will be very low.
Attention! To paint the entire surface, use a flat brush. Apply the paint in a small amount, stretching it.
Usage
So, you purchased colored nail gel. How to use it? The answer to this question will please every girl with its simplicity. Covering nails with colored gel is carried out like painting with regular varnish.
Please note that the gel should be spread evenly over the entire nail plate. It is better to apply it in a thin layer to avoid unevenness, gaps, swelling and the appearance of air bubbles. Therefore, the question of how to apply colored gel to your nails should no longer be scary.
Some girls compare the use of gel with extensions. In fact, what they have in common can be traced only in the result, and the application technique is completely different.
How to use gel paint
For work use:
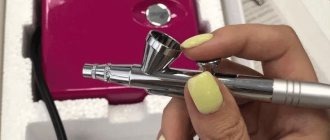
- brushes (thin, flat or fan, depending on what design is intended);
- dots - another tool for drawing dots and patterns with gel paint on nails;
- a palette for mixing colors, it can be easily replaced with a piece of foil or thick polyethylene;
- ultraviolet lamp for polymerization;
- buffer or polisher for removing gloss from the nail plate.
- degreasing agent;
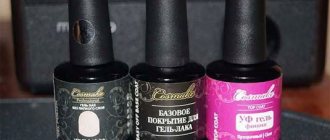
- base for gel polish;
- finishing coat (top).
The principle of operation is similar to the technique of applying shellac. Only with paint it is easy to draw patterns, taking your time and drawing every detail. Use gel paint on the natural nail and on the extended one. After the manicure, be sure to dry it under the rays of a special lamp.
How to dilute gel paint
If the product has dried out, even around the edges, then you should not try to revive it, it is better to throw it away. Such material is no longer suitable for work; it has lost its properties.
You can only dilute the paint if you want to get a less saturated color. To do this, use a transparent gel or 1-2 drops of acrylic monomer.
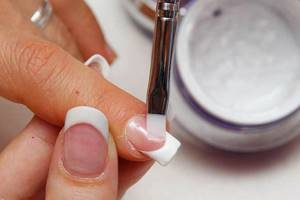
How to apply gel paint on nails
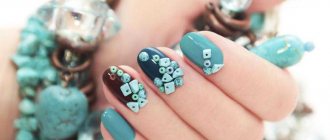
When working with paint, you can experiment with the design in every possible way. This can be patterns and lines, as well as painting a large area of the nail plate, for example, a French manicure.
Use the product as follows:
- First, use a base product, which must be polymerized using a UV lamp.
- Next, a colored layer is laid down (it can be one or several), they also need to be dried each.
- Now the design itself: apply a little product to a thin brush and carry out the intended design. You can correct the pattern with an orange stick or another clean brush.
- Polymerize.
- If the product forms a sticky layer, remove it with a cotton pad and an alcohol solution.
- Next, the entire pattern is secured with a top coat.
How to dry gel paint on nails
Dry paint designs on nails using a UV or LED lamp.
Each layer is held under the rays of the lamp, with the hand positioned horizontally. In a UV lamp, the polymerization time is 1–2 minutes, in an LED lamp – 1 minute.
It is worth paying attention to the manufacturers' recommendations; drying time may vary for each product.
Important! The master needs to find out the power of his lamp. If the coating does not last long when worn and becomes deformed, it means that it has not dried out, so it is time for the existing device to change the heating elements.
Do I need to coat the gel paint with a top coat?
Securing with a topcoat depends on the nail design made with gel paints:
- Convex lines and patterns are usually not covered with a top coat; it is used before making a three-dimensional design.
- With the “velvet sand” technique, the paint is sprinkled with acrylic powder and only then sent for polymerization. No topcoat is used.
- After hardening, flat designs and French manicures are best secured with a top coat to extend the life of the manicure.
How to remove gel paint from nails
Paint, unlike gel polish, is not susceptible to solvents. But this does not mean that it is not removable, because it is used together with shellac products.
First, the finishing coating is cut off. Afterwards you should use a remover - this is a special solvent for shellac. With its help, they wrap the nail plate, which is kept for 5 minutes, and if the top was not filed off, for 15 minutes. The surface must be degreased after removal.
But most often craftsmen remove paint by filing:
- file with abrasiveness 100/180 grit;
- using a machine, use ceramic or hard-fused cylindrical cutters.
Pros and cons of bright nails
Nail design (even a novice master can create multi-colored nails using gel polishes) has a number of advantages when combined with clothing style. The presence of several shades in manicure makes it easier to select a wardrobe by color.
Advantages of bright designs:
- lift your spirits;
- modern varnishes do not lose their shine;
- suitable for any style of clothing;
- attract the attention of others.
The disadvantages of multi-colored designs include excessive brightness. Not everyone can afford a provocative manicure due to their own character and temperament.
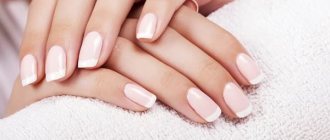
How to make French gel paint: step-by-step master class
Before doing a French manicure with gel paint, you should take into account that it will last a maximum of 7-10 days on natural nail plates, after which cracks and chips will begin. Therefore, this method is more suitable for artificial surfaces.
How to make French step by step:
- Steam your hands in the bath.
- Moisturize the skin with cream.
- Remove cuticle.
- Give the desired shape to the edge.
- Use a buffer to file off the glossy layer of the nail plate. Don't be too zealous.
- Apply base gel polish.
- Dry under an ultraviolet or LED lamp
- Apply the base shade of shellac. In a classic jacket, beige is used.
- Dry this layer.
- Gently dip the brush into the white gel paint, then start drawing a smile from the central axis, moving towards the rollers. The brush is applied with the flat part to the nail surface, the color is applied abruptly, constantly changing the angle, covering the previous stroke. With long-term training, the smile turns out beautiful and natural. You can always correct the line using an orange stick.
- Dry the resulting jacket.
- Cover with top.
- Carefully polish the manicure under the lamp. French is ready.
The advantage of paint over white shellac in French manicure is that it does not need to be applied in several layers. As a result, there is no step transition between tones that would have to be covered with several layers of top.
If desired, you can perform not only the classic French jacket, but also its other types shown in the photo:
Removing colored gels
In order to remove nail gels, you do not need to file, since the chemical composition of the product allows you to do this with the help of special preparations. As a rule, they contain acetone. To do this, take a small cotton wool and soak it in the preparation, then gently rub it into the nail. When it is sufficiently soaked, it should be wrapped in foil and wait ten minutes. After removing the foil, you can see that the entire coating has split and can be carefully removed in sections.
This procedure is used in cases where it is necessary to change the color or style of the nail, or apply a new varnish. If you do not need to change the color scheme, then there is no need for the removal procedure. A design with colored gels can be created very simply, since a large number of colors allows you to create compositions that previously seemed almost impossible. It is very important that this coating, even without applying additional varnishes, has a beautiful and natural appearance. This allows you to give your nails an aesthetic frame without much effort.
If you want to do something new, you can add special fillers. They will allow you to create an incredible design on your nails and surprise everyone around you.
Which gel paint is best for casting?
The casting technique uses self-leveling colored paint with a sticky base. To make the decor voluminous, it is necessary to apply several layers, drying each one. When applied correctly, you get a perfect manicure that does not require additional polishing.
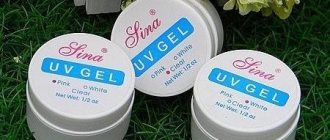
The most famous manufacturers of casting paints are:
- Cody. Not the most expensive gel nail paint, the best for casting techniques. This product has the right consistency, so the pattern does not spread.
- Masura. The manufacturer presents a whole collection with which you can imitate precious stones in manicure. The cost is high, but economical consumption.
- Toffee. The most budget option, however, is not inferior to competitors. True, the shades are all pastel and delicate, which is suitable for creating a business design or a classic jacket.
- AMY. German expensive gel paint in nail tubes, which is presented in the richest color palette. The quality of the products is excellent.
Important! Any casting paint can be used in other techniques.
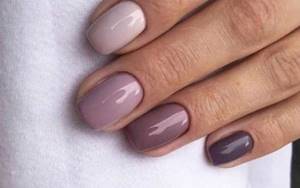
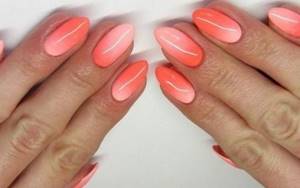
Gradient option with transition
This is perhaps the easiest option to implement. One color of varnish is selected, but with five different shades. They are applied as the color intensity decreases or increases, alternately on each nail of both hands, starting with the little finger and ending with the thumb.
Fact about manicure
The art of manicure has been known to people for more than 5,000 years. Painting nails with natural henna or charcoal was practiced in Ancient Egypt and Babylon. And the first fashionistas were Chinese women.
You can prepare varnish of different color intensity yourself by mixing the color you like with white in different proportions. Having obtained five different shades by mixing the main color with an additional one, you can begin to apply a gradient with a transition.
The nails of both hands can be covered, changing lighter shades to darker ones from younger fingers to older ones or in their mirror image.
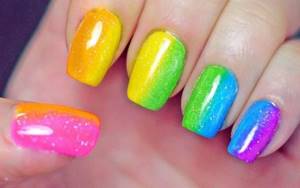
The transition option can also be performed using another technique, when for the transition not one specific nail is performed, but all the fingers of the hand.
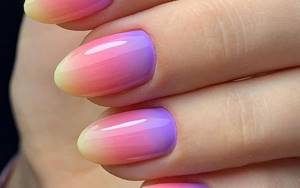
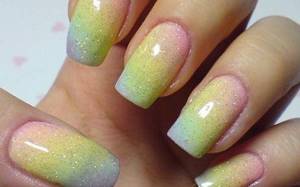
In this technique, the colors of the rainbow look beautiful, smoothly flowing from one finger of the nail plate to the other.
How long does gel paint last on nails?
The service life of the coating depends on the correct execution of the gel manicure. If the master did not make mistakes, then the artistic painting will last 2-3 weeks.
If the coating was deformed earlier, there may be several reasons for this:
- Poor quality material used in the work. If the product has expired, it will not last.
- Poor polymerization when performing manicure. Each layer requires complete curing. Otherwise, the pattern will begin to crack and deform.
- Incorrect plate preparation. If the master treated the nail poorly, did not remove the gloss from it or did not degrease it, then the coating will not last long for its owner.
Do not forget that manicure requires certain rules when worn:
- Gel nail painting should not be picked, chewed or subjected to other mechanical stress.
- On the first day after application, you should not take a hot bath or visit a bathhouse, sauna, do laundry or have long contact with water.
If you follow these rules, a beautiful manicure with gel paints will last up to three weeks.
Choosing a nail coating
Today, the nail art industry offers several options for color coating of nails. Each method differs in the complexity of application, which determines the cost of the procedure in the salon. Durability of use in everyday life depends on the quality of materials and proper work of the craftsman.
Color options:
| Type of coverage | Materials and application method | Advantages and disadvantages |
| acetone based varnish | dries in air, applied to the base layer and covered with a top coat. | speed of application, budgetary cost of materials, fragility in use (tendency to chipping and abrasion). |
| gel polish (shellac) | polymer liquid, used in combination with base and finishing gel, dries only in UV rays. | requires a careful application process, expensive materials, manicure duration up to 4 weeks. |
| DIP system | Powder is applied to the layer of gel glue to strengthen and color it, each layer dries in air without a lamp. | helps strengthen nails, saturates with minerals, the method is easy to use, provides a manicure for 4 weeks. |
Craftsmen often use combinations of varnishes and paints to create complex designs. For example, acetone-based varnishes can be used in stamping.
How to make gel paint yourself
Many girls buy gel paints for nail design at home. It is not profitable to buy all the desired shades. When working at home, it is impossible to use all the colors, so most jars will have to be thrown away when they expire.
But there is a way out of this situation. You can buy transparent and white paints, as well as dry pigments in the required shades. They are significantly lower in price and have a very long shelf life.
To obtain a rich, bright color, white is used as a base; for calmer shades, transparent is used. Place a little product on the palette. The pigment is added in the same way as when working with regular paint: the more pigment, the brighter the resulting shade.
In addition, paints can always be mixed with each other to create unique shades. This is a great tool for experimentation!
Stylish and harmonious color combination
Recommended color combinations are developed for each season. For example, for the 2022 season, a fashionable adventurous combination is an interweaving design of purple and coral shades.
Recommended color compositions for 2019:
| Main color | Warm colors | Cool colors |
| violet | gold, yellow, orange, coral | green, pastel blue |
| fuchsia | light purple, pink | grey, light brown, green |
| Bordeaux | pink, nude | green, blue, gray |
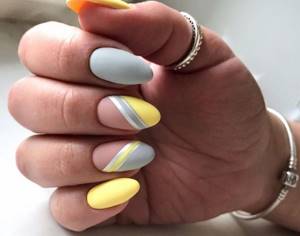
| grey | Red Yellow | green, blue, black |
With their help, abstract designs and geometry are created, and they can also be used in reverse stamping and rainbow french.