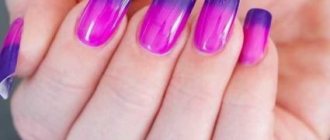
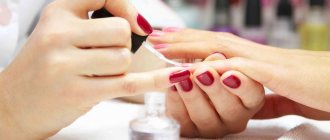
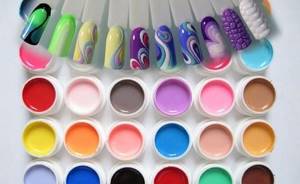
There can be many options for a spectacular manicure: nail decorations on any background, patterns, photo nail designs, etc. After all, most often they take gel polishes as a basis and improvise with the appearance of the nail through combinations of color, rubbing, and painting. Now it has become much easier to make elegant patterns and drawings, since a product has appeared that resembles acrylic paint in pigmentation, but has the structure of a liquid gel. A new convenient material for manicure design is gel nail paint.
Varieties
Gel nail paint (a design master will tell you how to use it correctly) comes in two varieties:
- with a sticky layer;
- no sticky layer.
The first type is used to create a casting effect. The second one is used for various types of artistic painting and as the main coating.
Advantages and disadvantages
| Advantages | Flaws |
| One of the main disadvantages is damage to the nail plate when removing the coating, so after this procedure the nails should be given some time to recover |
How to dilute
It is proposed to dilute the composition with several compositions that will mix evenly with the gel thanks to a complex chemical formula. Do not dilute thickened varnish with acetone or any other liquid that contains this component. It's better to do this with:
- A special liquid for diluting thick varnish, for example, Severina, Domix Green or THINNER. It is enough to use 2-3 drops of the composition per one full bottle; it can also revive the base and top coat for nails. The thinner does not affect the quality of the gel polish and its future shade; it is absolutely safe and is the most progressive solution for nail salons and home use.
- An alcohol solution will be an alternative to a special diluent. Ethanol in alcohol negatively affects the quality of the future color (it becomes duller) and shine.
- Top coat or clear gel polish can also be used if your favorite color has thickened. It is necessary to mix the products together to obtain the desired consistency in a bottle with gel. The disadvantage of this method is the loss of color intensity, but the quality of the coating does not suffer at all. It is necessary to use the top; the base is not suitable for such a case.
The most acceptable option for diluting thickened gel polish is to use a special solution: it does not affect the further quality of the product and copes with its task perfectly, and also has minimal consumption.
The method is suitable for professional craftsmen and specialized salons, since there are many jars of gel polishes and they tend to harden. At home, it is not always appropriate to purchase a whole bottle of thinner for a couple of bottles of gel, so home craftsmen often dilute thickened varnish with acetone.
To properly dilute the gel, add 2-3 drops of a special liquid, alcohol, top or transparent analogue, then mix the components together using rolling movements of the bottle. There is no need to shake the package - the gel will not mix in this way. Evaluate the new consistency - it should not be too liquid, as it will become more difficult to apply due to the composition spreading and flowing onto the cuticle. If the diluent did not work enough, add another 1-2 drops of the composition and mix the components together again. In this case, it is good to know when to stop and not make the gel polish too liquid. Firstly, this will make the pigment watery, you will have to apply more layers of gel, and secondly, the brightness of the shades will disappear.
Colored gel and gel paint: which is better?
Gel nail paint (you can learn how to use it from special video tutorials for those involved in nail art) appeared in the nail design industry relatively recently, but quickly gained popularity. Comparing the product with gel polish, it can be noted that they have a similar composition, only the paint is more liquid in consistency.
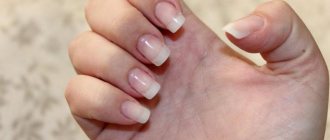
The first product is ideal for creating a small pattern, and the second is suitable for backing and laid-out jackets.
For a bright shade, it is enough to apply the paint in one layer, unlike gel , which requires multiple applications. Another big disadvantage of the gel is that it needs to be constantly stirred to obtain a uniform color. Creating a painting using shellac requires quick application, because it tends to harden in the air, which is a big disadvantage for beginners.
The use of gel paint is more suitable for manicure beginners, since it dries completely only under the influence of ultraviolet light.
Reviews
Alexandra, 24 years old: I am a beginner manicurist. I tried several gel paint manufacturers for my work, but most of all I liked working with E.Mi. Everything is thought out in the finished set. The tones already differ in color saturation, but I prefer mixing. The results are unusual and interesting shades. When drawing contours, the lines do not spread, and under the lamp the nails dry in 1-2 minutes. I recommend trying it!
Ksenia, 19 years old: I was given a Cody set for my birthday. I couldn’t even imagine that I would create such masterpieces myself, because I didn’t really know how to draw. The miracle is accomplished through the use of casting techniques and high-quality coatings from Cody.
Victoria, 37 years old: I decided to save money on manicure paint and purchased Canni Nail Art Output for the first time. Apparently bright colors, when placed on a plate, do not give a rich color. The contours are difficult to draw. To obtain a dense coating, I had to apply 4 layers. This manicure only lasted 5 days. So far, Cody hasn't tried anything better.
How to choose?
Professional craftsmen recommend following some rules when choosing high-quality gel paint.
Gel nail paint: how to use and choose a color coating can be suggested by your own observation of the work of a master in a salon or on YouTube
- First of all, you need to pay attention to the composition of the coating; it must be hypoallergenic and have an acceptable odor.
- It’s worth choosing trusted manufacturers with good reviews.
- Don't forget about the high-quality base coat, because it is the one that comes into direct contact with the nail plate.
- An important factor is the durability of the coating; it should not peel off, become cloudy or form chips and cracks. The manicure should be worn unchanged for 2-3 weeks.
Review of popular products
Which single-phase gel for nail extension is better? There is no definite answer to this question; each master has his own favorites. But we can highlight several products, the reviews of which are the most numerous.
- RuNail can be called one of the most popular. Available in several shades, it files and presses well, and is well suited for beginners. Course teachers often choose this material: nail extensions with RuNail single-phase gel are discussed step by step during training. It is suitable for professionals with a lot of traffic, and for those who only do their own nails. Low cost is one of the advantages of the product. A jar of 15 grams will cost on average 250-300 rubles.
- Formula Profi is a brand loved by many craftsmen. For a jar of single-phase gel “A-Profi” you will have to pay about 450 rubles. Once polymerized, the gel turns into a very durable monolith. It is easy to file and does not create a large amount of flying dust.
- UV Lina is a product that many craftsmen who are passionate about shopping on Chinese sites have become familiar with. The cost of one jar weighing 15 g is only about 100 rubles. Reviews about this product are extremely contradictory. Some claim that the single-phase gel for nail extension “Lina” copes with the tasks perfectly. But there are also those who warn potential buyers against the terrible smell, poor packaging, and allergic reactions.
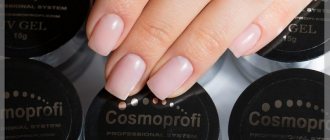
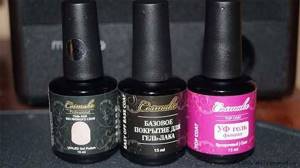
- Cosmoprofi gel is available in several shades. It is loved by manicurists due to its comfortable consistency of medium viscosity, average price (350 rubles / 15 g), and good wearability.
- Irisk single-phase gels are praised by many for their lack of odor and large palette of shades. But in reviews, some note a runny texture, due to which the material tends to flow. Not everyone is happy that the time stated by the manufacturer is not enough for polymerization.
Manufacturers
| Name | Peculiarities | average cost |
| 1. Kodi Professional (Kodi) | The brand has existed since 2005 and is in great demand among craftsmen throughout Europe. Products of the Ukrainian brand comply with all International quality certificates. The product is produced in 4 ml jars. It does not create stickiness and covers the nail evenly, used for voluminous and flat designs. | 250 rub. |
| 2. E.Mi (Amy) | The paint from a German manufacturer is available in 5 ml tubes. The composition does not cause allergic reactions and fits tightly onto the nail. The color range is quite varied. Gel nail paint is available in both gold and silver tones. It is very convenient to use the products, because they can be purchased in the form of ready-made sets or individually. | Price for 1 piece. — 500 – 700 rub. The price of the finished set is 1500 – 2000 rubles. |
| 3. RuNail (Runail) | The product has a liquid composition that is easy to apply without leaving any unevenness behind. Suitable for various types of design: Chinese painting, French, flat pattern. The palette contains 15 shades, 8 ml each. Made in China. | 250 rub. |
Peculiarities
Gel paint is available in a different color palette, ideal for extended and natural nails. If there is no suitable tone, the compositions can be mixed together. Masters like to use this technique to create an exclusive manicure. The applied pattern can be adjusted before drying and during polymerization under a lamp.
The main advantage is the ease of application to the nail. The liquid structure does not spread at all. And one layer is enough to achieve rich color.
A finishing coat should be applied over the patterned layer. This way the manicure will last longer and will resist mechanical stress.
Preparing for work
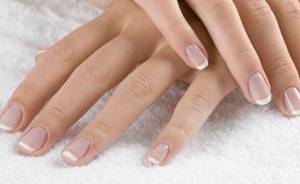
Before applying gel paint, you should do a classic manicure.
If the procedure is carried out at home, then you need to purchase the following tools:
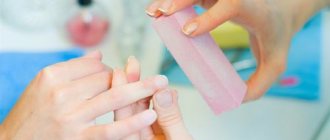
- a special sponge that will remove excess gloss from the nail;
- degreaser;
- acid-free primer (to improve the durability of manicure);
- basic and top product;
- a set of thin brushes for painting.
A classic manicure will include several stages:
- steaming nails in water;
- treatment of overgrown cuticle;
- filing the nail plate;
- cleaning the natural plate;
- use of a degreaser and a leveling layer;
- application of modeling gel;
- drying in a special lamp (each layer separately).
How to apply?
After preparing the nail plate, you can proceed to the design:
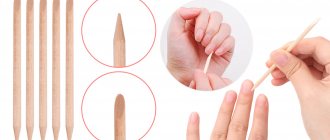
- A design is applied to the treated surface with a fine-bristled brush. If there are any imperfections, they are corrected with an orange stick before drying.
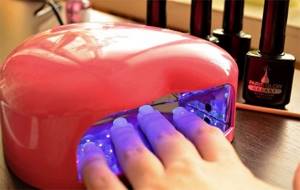
- Then the paint is polymerized in an LED lamp for 30 seconds, in a UV lamp for 2 minutes.
- If there is stickiness on the surface, it must be removed with a cleaner.
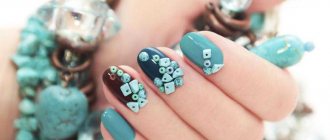
- Depending on the desired design, you can add other decor to it: stones, rhinestones or glitter.
At the end of the work, the surface of the manicure is secured with a finishing agent.
Removing gel paint
You can remove the product in several ways:
- remover with foil;
- using a nail file with an abrasiveness of 100-180;
- machine cutters.
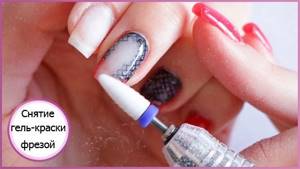
If you remove paint using a remover, it is important to know that the coating is poorly exposed to solvents, and you need to choose a product specifically designed for the gel composition. At the end of the procedure, the plate is treated with a buffer and degreased.
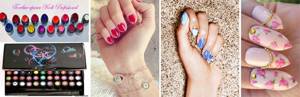
Manicure options with gel paint
Gel paint is used to create original manicure options.
With glitter
Step-by-step instruction:
- a base is applied to the prepared plate and dried under ultraviolet light;
- then apply colored gel polish in 2 layers and dry according to the instructions indicated on the coating packaging;
- the remaining nails are covered with paint with glitter in 2 layers and dried separately in a lamp;
- then a thin brush is used to apply a shiny coating and apply a pattern;
- After applying the design, it is polymerized.

At the end of the procedure, the manicure is secured with a special product.
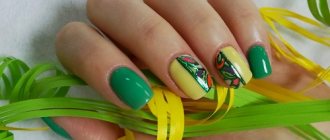
Easy manicure with white tulips
Execution steps:
- the treated nail is coated with primer and dried in an LED lamp;
- then any dark-colored shellac is applied in 2-3 layers and also exposed to ultraviolet radiation;
- Flowers are drawn with a thin brush and white gel paint and dried for a few minutes.
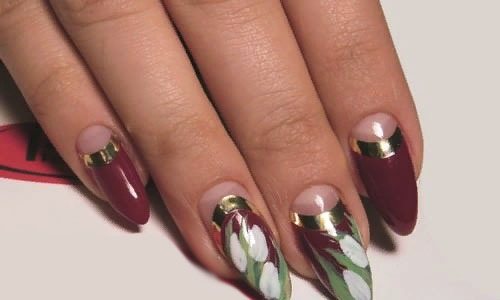
The finished design is covered with a top coat and the end is sealed.
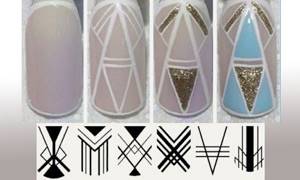
With monograms
Gel nail paint (how to use it in design and how to draw monograms correctly is shown in detail in the photo) will help you create beautiful patterns.
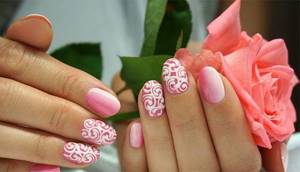
Stages of work:
- after standard preparation of the nail and covering it with a base layer, colored shellac is applied and dried;
- monograms or any other pattern are drawn using stretching movements with black paint;
- the pattern is polymerized and a fixative is applied;
- If desired, you can add decorative elements (stones, rhinestones).
With white roses in the wet
- after applying the primer, the plate is covered with gel polish in 3 layers;
- in this embodiment, the “hole” at the base of the nail remains open, but it can also be filled with colored gel paint, for example, white;
- The 3rd layer of color coating does not need to be dried;
- After that, the rose petals are drawn with a thin brush; you need to start from the middle, giving the shape of a crescent or comma to each petal. The result should be a twisted spiral, which will gradually turn into a rose.
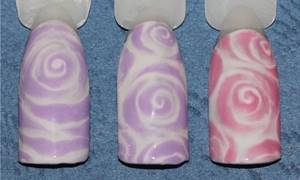
At the end of the procedure, the resulting manicure is secured with a finish.
Geometry on nails
- shellac is applied to the cleaned plate in 2 layers and dried in a lamp;
- to create a geometric pattern you will need a brush with long bristles or a regular toothpick;
- before creating such a drawing, you need to practice, it is quite complex and requires a “steady” hand;
- the drawing is created according to the scheme shown in the photo.
At the end, the nail is covered with a fixative and cuticle oil is rubbed in.
With casting
Before you start using this technique for the first time, it is important to remember that:
- the drawing will directly depend on the quality of the material;
- to perform the effect, it is necessary that the paint used for the drawing matches the color of the foil;
- You don’t need to press too hard on the foil;
- the foil should not be imprinted on the end of the nail.
Step-by-step instruction:
- It is necessary to prepare the surface for applying gel polish. If you do a manicure yourself, then before starting work you should degrease your fingertips and the skin around the cuticle.
- Then the base and shellac of the desired shade are applied and polymerized until completely dry.
- The pattern is applied to the matte coating using gel paints with a sticky layer and dried.
- The foil is applied to the wrong side for a few seconds and torn off with a quick movement.
- The pattern is dried in the lamp for about 20 seconds.
- Excess paint is removed with a buff, and then the nail is sealed with a finish.
Gel nail paint is a high-quality and highly durable coating for creating various nail design effects. This tool is convenient to use for both professionals and beginners. All that is required is a great desire and an unlimited flight of imagination.
Article design: E. Chaikina
Step-by-step extension technology
- We cut the nails with clippers as short as possible and push back the cuticle with a spatula. There is no need to cut it off immediately, since during the extension process acid will get onto the damaged skin, which will cause very unpleasant sensations. And not just acid. The skin will become very vulnerable and the slightest snag with a nail file when filing acrylic will lead to redness of the fingers. As a result, instead of beautiful hands, you will end up with an unsightly picture and sore fingertips.
- Remove the shiny layer with a soft nail file. There is no need to be very zealous and try to cut it down too much. It must be cut down carefully, without leaving a single shiny piece, but not too deep. Deep cutting leads to deformation of the natural plate and it then grows not smooth, but in “waves” and scars. After filing, carefully brush off the dust with a brush.
- We put forms on the nails or glue tips. If you use tips, then immediately cut the length.
- Apply primer and wait for it to dry
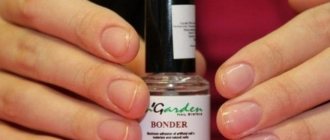
- We apply bonder - it dries instantly, literally before our eyes. After this, you cannot touch the nails, since there is dirt and grease on the fingertips, and we have already completely prepared the plate for extensions.
- We put two glasses on the table, pour monomer into one, about half a glass, and pour acrylic powder into the second. Ideally, the nail should be formed with three balls, and with the fourth layer it should be finally smoothed and the risk zone should be formed (the middle of the nail, closer to the end)
- Rinse the brush in monomer, remove excess liquid by wiping the brush on the edge of the glass. Then dip the tip into acrylic powder. A round ball should form on the brush, approximately 0.7 centimeters in diameter. Neither more nor less is recommended, since applying the material will be inconvenient.
- Place the ball in the middle of the nail (where the cut is) and pressing down with a brush, distribute the material, leveling and smoothing it as best as possible.
- We take the second ball and use it to form a free edge.
- We take the third ball and put the material on the part closer to the cuticle. Here you need to act carefully and pick up the ball thinner than the previous ones, that is, the brush should be wetter. If the material gets on your skin and hardens, filing it away can help you lift the material. In general, you need to immediately lay the material so that there is practically no filing in this area, but only a slight “grinding”. That is, near the cuticle this layer should be as thin as possible.
- We take the 4th ball and place it just below the risk point, that is, between the free edge and it. Using stroking movements, we distribute the material so that the nail begins to look natural, and for this you need to form a small hump in this place, and reduce it to nothing at the end of the free edge. We finally smooth the nail with a brush, removing any unevenness.
- We wait for the nails to harden and remove the forms.
- We file the finished acrylic nails and give them their final shape, constantly brushing away the resulting dust with a brush. If you don’t do this, it will be difficult to see whether you have smoothed the nail enough or not.
- Cover them with sealer, dry them in a lamp for 2 minutes, and then remove the sticky layer.
OK it's all over Now
Now we need to talk about the correction procedure, since being able to do this is no less important than being able to increase