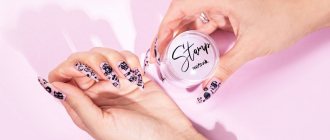
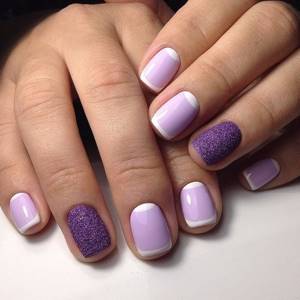
Modern trends offer many interesting solutions for nail design. Let's see how our members use stencils for design.
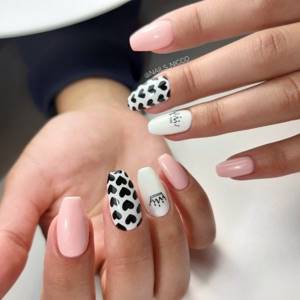
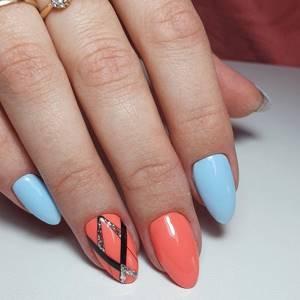
In modern nail art, not only colors and their combinations are important, but also how they are applied to the nails. Nowadays they practically don’t wear a single-color coating: modern manicure almost always contains one or another decor. These can be geometric shapes, floral elements, ornaments in different styles and even interesting subjects.
The designs and inlays on the nails look impressive, but not every person is able to apply a beautiful design on their own nails, especially on their working hand. To draw clear and even lines, you cannot do without training, which takes time, but you want a beautiful and trendy manicure not someday, but right now. If the task is to draw absolutely identical or symmetrical elements on several nails, it becomes completely impossible: it is almost impossible to do it manually.
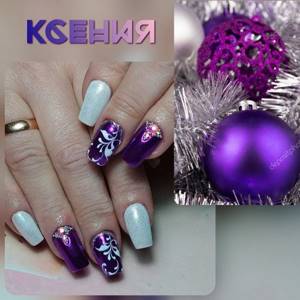
In this situation, special nail stencils will come to the rescue. They help you draw absolutely straight lines, perfectly identical elements and scenes, and by choosing the right and fashionable color combinations, you can use them to create real masterpieces on your fingers. The use of stencils, although a “template” solution, allows you to show imagination and individuality: by skillfully complementing stencil designs with inlays, sparkles, and hand-made designs, you can get a non-standard and fresh solution that will look professional.
Interesting!
In general, a stencil is a necessary item in the arsenal of a graphic designer. This can be a paper or plastic flat piece with lines or cut-out shapes, or a stamp. In any case, such a device is used to apply paint strictly within the required boundaries, evenly, neatly, without drips. However, you shouldn’t think that the template will do everything on its own: a certain skill is required to apply the paint neatly and evenly.
Personally, I think that stencils are simply irreplaceable for home nail art: they allow even a non-specialist to create a design that will look like you just came from the salon. I think it's a good decision.
What are stencils for nail design, and what are they?
Nail art stencils come in two main types: reusable and disposable. Let's figure out what the features of each type are, how they differ from each other, and which ones are better.
Reusable stencils or stamping
Stamping stencils are flat plates made of metal. They can have the shape of a circle, square, rectangle or any other shape according to the manufacturer's taste. The surface of the metal template is covered with a chrome layer. There are also templates made of thick plastic.
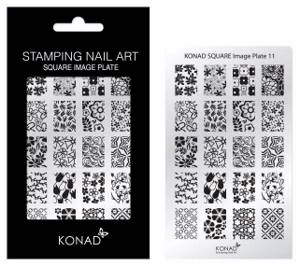
Various patterns are applied to the surface of the plate: they seem to be scratched into the material; Essentially, these are indentations. One stencil can contain several scenes and ornaments, as well as individual figures.
Interesting!
The principle of stamping is taken from printing; it also uses forms from which an impression is made onto paper. The ink is applied to the printing plate so that it falls into the recesses and is then transferred to the sheet using a printing press. We do roughly the same thing with stamping forms, only our nails act as a blank sheet.
In the case of reusable stencils, in fact, plates alone are not enough. It is necessary to purchase additional accessories: a special scraper for removing excess paint and a stamp with a silicone or rubber surface.
Important!
With reusable templates, it is usually not ordinary varnishes that are used, but special paints. The bottom line is that they are much thicker in consistency, and therefore do not spread and allow you to create clear lines and boundaries of elements. If you are seriously interested in stamping, you may want to purchase a thousand convenient little things for this art: cases for stencils, special holders, stamping mats.
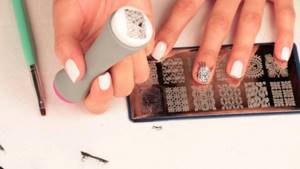
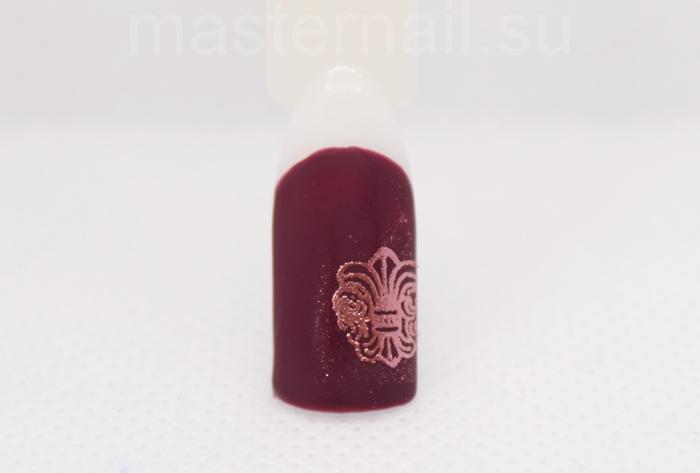
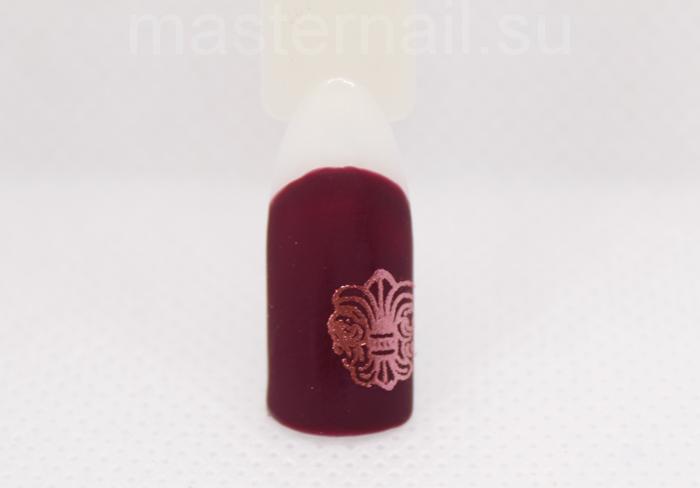
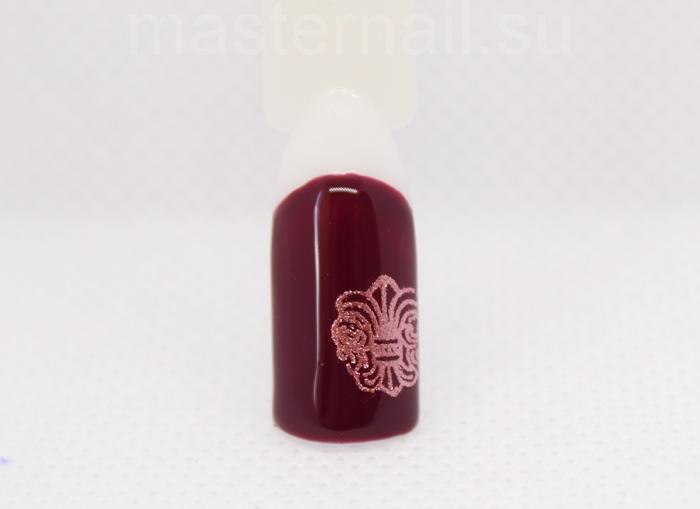
In order to transfer the selected ornament to the surface of the nail, the recesses in the stencil are filled with varnish, the imprint is transferred to a special stamp, and only then - to the nail.
Disposable stencils
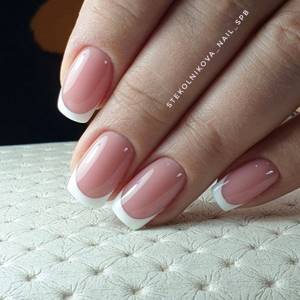
If you've ever done a French manicure yourself, you probably know how difficult it is to draw an even, clear-cut “smile.” One wrong micro-movement - and the drawing is smeared, or the “smile” turns out to be crooked. You have to wash it and start again. For example, I have painted French with a brush more than once, and although my hand is “full,” I’ll tell you, this activity is not for the faint of heart.
However, thanks to the fact that there are stencils for the French coat on sale, few people now think of drawing it “by hand.” I glued a template, drew what I needed: even a French jacket, a “lunar” French jacket, some kind of geometry or simple heart-flowers, and voila - the beauty is ready! Everything is smooth and symmetrical. All you need is a little bit of precision.
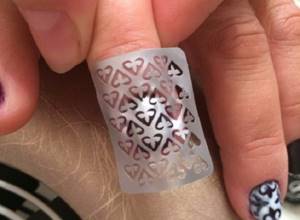
Disposable stencils are made of paper or film and have a sticky layer on one side, so you can glue the template to the surface of the nail plate and not worry that it will move or paint will leak under it. The film is placed on a base from which the selected element can be easily removed.
Advice!
To separate the element from the base, use tweezers. This way you can carefully remove the element and glue it to the desired area of the nail without deforming it.
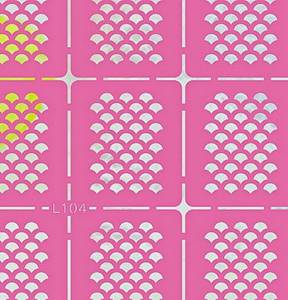
In addition to paper, there are vinyl stencils. They are a little more expensive, but higher quality and denser, so they are more convenient to work with.
The essence of painting with a disposable paper or vinyl template is that we isolate areas of the nail of a certain configuration from paint. After the free areas are filled with color and dried, the stencils are peeled off, and a pattern or element is obtained (for example, the same “smiles” or holes). Due to the fact that the templates are tightly glued, they not only do not move, but the varnish will not flow under them, which means that the boundaries of the colored areas will be clear.
Disposable stencils are suitable not only for painting with a brush, but also for airbrushing, although, of course, not everyone has the necessary equipment for this at home.
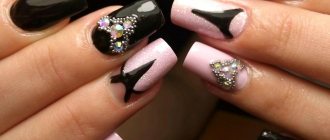
As for the shape, as I already mentioned, now it is not limited to crescents for “smiles”. There are a lot of stencils in the shape of flowers, hearts, geometric shapes, animals, fruits, and ornaments.
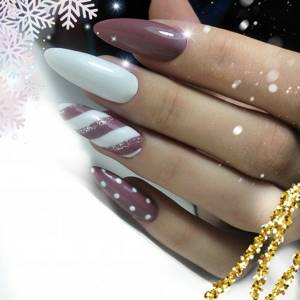
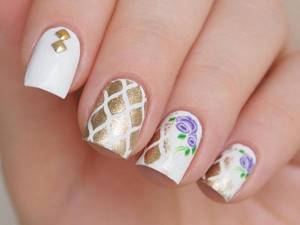
Roses in Shabby Chic style
To create these adorable roses you will need shades of pink/red polish, green polish and a thin brush.
- Paint your nails and let them dry
- Apply a few spots with your original varnish brush and let them dry a little
- Now, with a lighter varnish (you can make it yourself if you mix, for example, pink and white) paint the petals
- Add color accents with the darkest polish to make the roses look three-dimensional
- Draw triangular shaped leaves
- After the drawing is dry, cover it with a top coat.
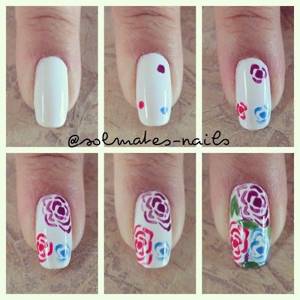
As you can see, roses can also be created in one color. They certainly don't look like works of art, but anyone can draw them.
Video on how to create cute roses 
See what a wonderful vintage manicure you can create without leaving home, using the simplest means:
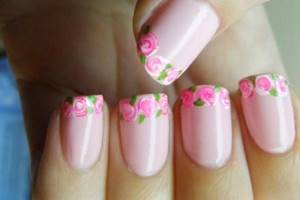
You can decorate everyone's favorite French manicure with roses.
Price issue
The question arises: how ruinous are all these pleasures for the budget, and are manicure delights worth it?
Disposable stencils are thrown away immediately after use; they can be considered consumables, which is why their price is low.
I took a stroll through online stores and discovered that a sheet containing 2-3 dozen stencils can be purchased for 150 rubles. But they often have discounts, and then such a sheet is sold for 30-50 rubles, which, of course, is not at all not expensive, because the cost of a stencil for one finger can be only 1 ruble.
Advice!
Monitor stores with manicure accessories, wait for discounts and buy “in reserve” for pennies. Disposable stencils do not take up much space, and you will always have a good selection of creative materials at hand.
Stamping will, of course, cost more. The cost of the plates themselves is around 500 rubles, although, of course, you can find cheaper or more expensive ones.
But you are unlikely to limit yourself to just one plate: although usually each stencil contains several scenes and individual elements, there are too few of them to create different designs. Usually, stamping lovers accumulate entire collections of templates, scenes from which can be combined to obtain a unique design. However, there is no need to purchase a whole set at once: at first you can get by with a couple of stencils.
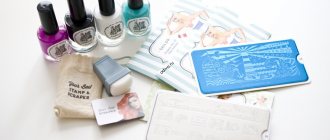
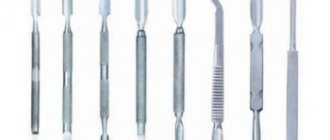
You can’t do it with plates alone; you will also need other devices:
- scrapers (scrapers) for removing excess paint from the surface of the plate - from 40 rubles apiece;
- silicone stamp to transfer paint from the template to the surface of the nail - 200–300 rubles;
- replacement stamp pads - 120 rubles per pair;
- roller for cleaning the stamp - 100 rubles;
- cuticle protection (liquid tape) to protect the skin around the nail from paint and avoid subsequent tedious cleansing with aggressive compounds - 200–250 rubles.
Optional but pleasant expenses include a protective mat, a holder, and nice cases for plates. In addition, you will need special varnishes:
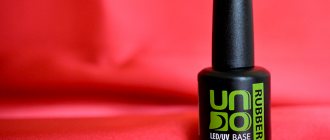
- base varnish for stamping - from 200 rubles per bottle;
- thick gel paint or stamping gel - 200–350 rubles;
- varnish thinner - 100 rubles;
- removing liquid - 100 rubles.
In general, expenses accrue well at the initial stage. But most of these investments are for a long time.
Advice!
Savings on stamping materials can be quite significant, because the discounts on them can be quite large, and considering how much you need to purchase, the amount saved may not be trivial. Why buy a stencil twice as expensive if you can buy two different templates for the same money during the discount period? You will also need several shades of gels and varnishes; The more there are, the more free you will be in your creative expression, so saving on them can also be noticeable.
Therefore, I advise you not to rush. At the initial stage, purchase only the essentials, and then keep an eye out for discounts and gradually buy more stencils and consumables at competitive prices. Over time, you will collect your collection of stencils and shades of gels and varnishes, while spending several times less money than if you had purchased everything without discounts.
We do it ourselves
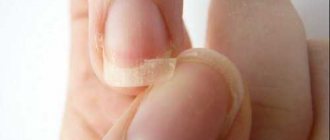
In principle, you can make stencils for nails yourself if you wish. There are no particular difficulties in this, although, of course, you will have to limit yourself to simple forms. To work, you will need adhesive tape, adhesive tape or masking tape. Any of these three materials are suitable for making nail stickers. By working independently, you can choose the form that seems most attractive to you.
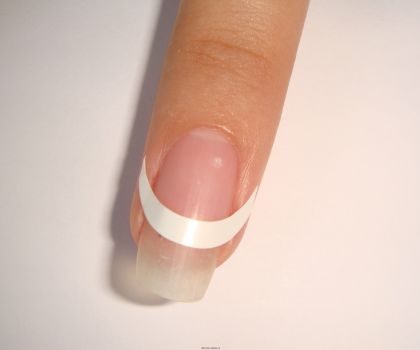
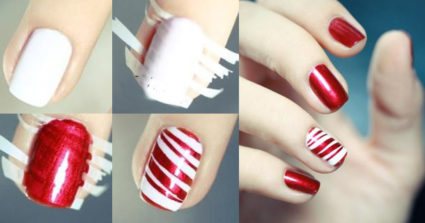
If you want to get classic nail strips to perform a regular French manicure, then you don’t even need to do any cutting. All you need is to separate the free edge from the main part of the nail and paint over it. After the coating has dried, simply remove the stencil. A beautiful, straight line should remain in its place.
Of course, stickers are used not only for jackets. Now the nail industry has such designs that the use of stencils can take manicure to a completely different level. At the same time, working with nail strips yourself allows you to show your imagination and choose the picture that you would like to see on your fingers.
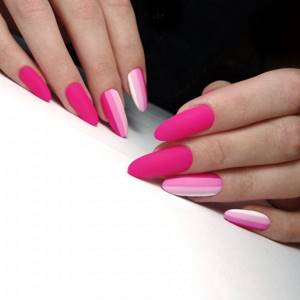
For almost any geometric manicure, it is enough to simply use thin strips, crossing them in such a way as to obtain the desired pattern. As an option, you can arrange three longitudinal strips and cover them with different colors of varnish. At the same time, the nail itself will look good in a single-color matte design. Once the polish is completely dry, the stripes will be easy to remove from your nails. Secure the result with a sufficient top coat.
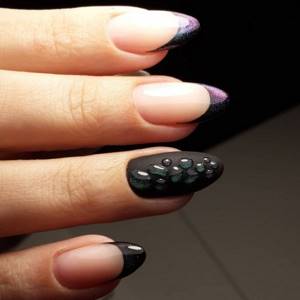
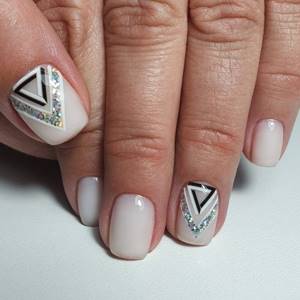
Stickers can also help you create a 3D manicure. For this job, you will need to choose a base color for the entire nail and leave it until completely dry. First, stencils in the form of triangles are cut out of a material convenient for work; their corners should be sharp. The stickers are laid out on a dry surface in such a way that the free edge is separated as if by half a star. In this case, the rays should look towards the nail base.
The part highlighted with the stencil is coated with varnish of a contrasting color, and after drying the stencils are removed. In principle, the manicure can be considered ready-made, but if you want to make it even more unusual, just stick the triangles on the rays overlapping with the pattern that has already been created and cover the nail with a varnish that has a darker shade. So, with the help of simple homemade stickers you can get a three-dimensional design.
Another option is stencils in the form of waves.
To create, you can take special scissors with teeth. This design will look very beautiful on your nails. Simply cut a strip of tape using serrated scissors and stick it to the free edge. In this case, the entire nail is first coated with dark varnish.
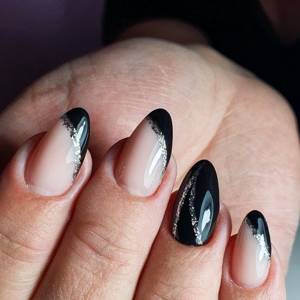
Ordinary stencils for French manicure can help create a lunar version that is relevant today. If you don’t have such stencils at hand, don’t despair. All you need is to cut a semicircular strip from the tape. When creating a manicure, you must adhere to a certain sequence.
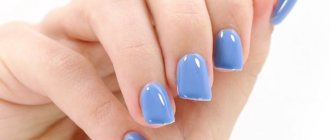
First, the entire surface of the nail is covered with varnish, you can choose silver, which is left until completely dry. After a slight retreat from the nail hole, the stencil is glued. Do not forget that the line should have clear semicircular shapes.
The remaining part is varnished and the stencil is left to dry. With a silver coating, black will look very advantageous. To consolidate the result, you can also go over the finishing top.
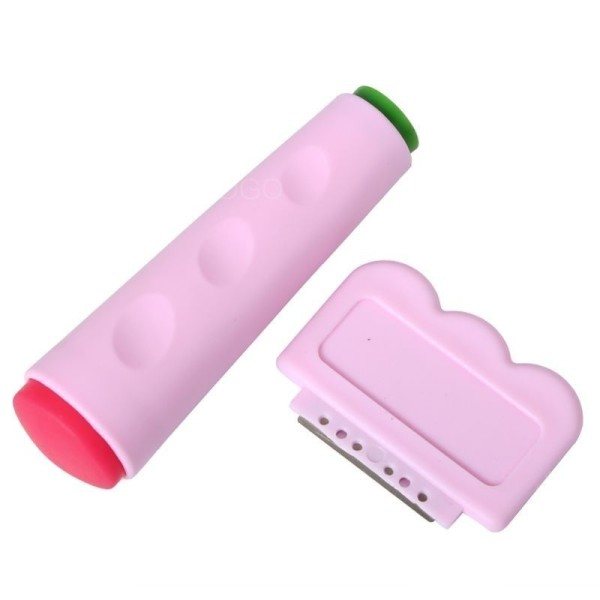
Another great option, which you really can’t do at home, is stamping. The set for home use includes a special metal palette on which three-dimensional designs are cut out, a stamp made of rubber that transfers the selected design to the nail, as well as a varnish special for this design. The designs can be very varied, which allows you to choose a manicure for a specific occasion.
How often do beginning artists encounter difficulties when applying even basic drawings! Sometimes a simple French manicure causes a lot of problems due to the need to create an even and beautiful hole. Nail stencils are a surefire way to achieve an optimal design in just 5 minutes, but they also need to be used wisely. All the nuances of using stencils and the features of making them yourself will be discussed below.
How to use nail stencils
Let's now figure out how to use all this wealth to create indescribable beauty on our precious nails. The process of using stencils is simple, but there are certain subtleties that you need to familiarize yourself with in advance.
First of all, do not forget that we begin to decorate our beautiful hands only after the nails are put in order: the cuticle is removed, the nails are given the necessary shape, in accordance with the plan. There is nothing more unpleasant than uneven nails with overgrown cuticles, painted with “patterns”. I think you will agree with me that this “design” looks vulgar and repulsive. Therefore, cleanliness, grooming and neatness come first!
Stamping technique
Above, I have already given a list of supplies and material support necessary for work. I also advise you to take care of good, uniform lighting, which will not produce glare on the shiny surface of freshly painted nails.
Advice!
The ideal lighting option, of course, is natural daylight, which does not distort the shades of colors, does not give bright glare and does not blind the eyes. A good lamp will also work, but make sure that its light does not have an extraneous tint (yellow, green, bluish). Otherwise, having carefully selected the shades, you will discover in daylight that you have painted something wrong. Also make sure that your hand is placed on a flat, preferably gray background, so that you can adequately evaluate color combinations.
Now that everything you need is prepared, let's get started.
Important!
Stamping requires a certain amount of dexterity, so don’t worry if everything doesn’t work out as planned the first time. A little practice and you can handle it! Soon the initial difficulties will only make you smile.
Stages of work:
- Think over the design in advance and prepare all the materials necessary to realize your plan. Place them on your desk next to you so that they are easy to take. There is nothing worse than looking for some little thing you need in the midst of the creative process.
- Degrease your nails as usual and apply base.
- Apply and dry the varnish that was chosen as the background.
- Choose a stencil design that you will transfer to the nail plate, then apply gel or stamping paint to it. There is no need to try to get only into the recesses, apply to the entire motif, because we will clean off the excess later.
- In one confident motion, remove the paint from the surface of the stencil using a special scraper. The paint will only remain in the recesses. How cleanly you remove the excess paint directly determines how clear and clean the picture will be, so take this step responsibly.
- Since the stencil itself is flat and hard, it will not be possible to transfer paint directly from it to the nail. We need an intermediary - a soft stamp. We press it to the stencil, “roll” it a little to transfer the paint to its pad, but not to smudge the pattern. Now the design is transferred to the surface of the die in a mirror image. All that remains is to transfer it to the nail.
- Using the same rolling movements, we transfer the design from the stamp to the nail. Of course, you won't be able to do this without getting paint on the skin around the nail, so applying liquid tape around it in advance will come in handy. It will protect the skin from paint. If you haven’t taken care of this, you will have to clean the skin with a special liquid using a brush. There is nothing wrong with this, but it is extra work and time wasted, in addition, nail polish remover is not useful for leather: it dries and damages its natural barrier. If you frequently expose your skin to such aggressive solutions, you can seriously damage it.
- Apply top coat to smooth and gloss the nail surface. This final touch gives the design a finished look and, importantly, protects the newly created beauty from damage.
Interesting!
By the way, craftswomen know how to do stamping not only with special varnishes and paints, but also with regular gel polish. Of course, you need to have some practice, because stamping paint is specially produced thick so that it does not spread and holds the pattern. Gel polish does not have such properties and tends to spread. In addition, it must be dried in a lamp at each stage, but in general, with a certain skill, everything is quite doable.
How to use sticky nail stencils
Disposable sticky stencils are easier to use than reusable ones. This may be why beginners often prefer them. You can use both regular polishes and gel polishes with them. The only difference is that each layer of gel polish must be dried in a lamp, while regular polish must be dried in air.
Stencils for creating French and reverse French are usually stripes and crescents, but there are stencils with ornaments or individual decorative elements. They are usually glued to the base and can be easily separated from it using tweezers. After this, a sticky film with cut out elements remains on the base, so this is also used as a stencil.
Manicure with sticky stencils step by step:
- Prepare your nails and apply base coat as usual.
- Apply the background polish and let it dry.
- Separate the stencils from the base and stick them on using tweezers. Using the tips of the tweezers, press the template firmly onto the surface of the nail to ensure a seal over its entire area, especially along the edges. If this is not done, paint may seep under the stencil and spoil the clarity of the borders.
- Apply varnish of the chosen color using a thin brush.
- Let it dry, remove the templates and coat your nails with topcoat to give them a finished look.
As you can see, with disposable stencils the procedure is more concise and simpler, and does not require special filigree, but everything turns out very clearly and neatly. In addition, no additional devices are needed.
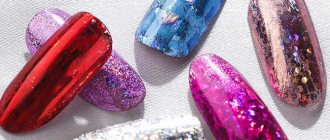
Rubbing
Another technique that allows you to quickly create shiny designs on your nails. You can use any rub.
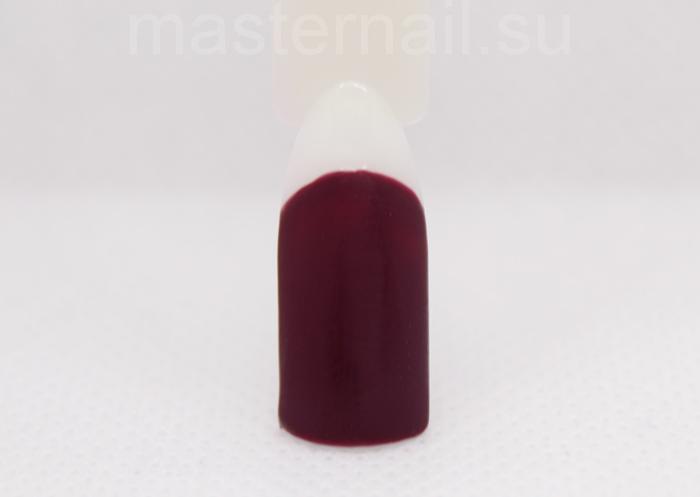
- Step 1 - Apply a brown shade to the ends and cover with a thin layer of top coat.
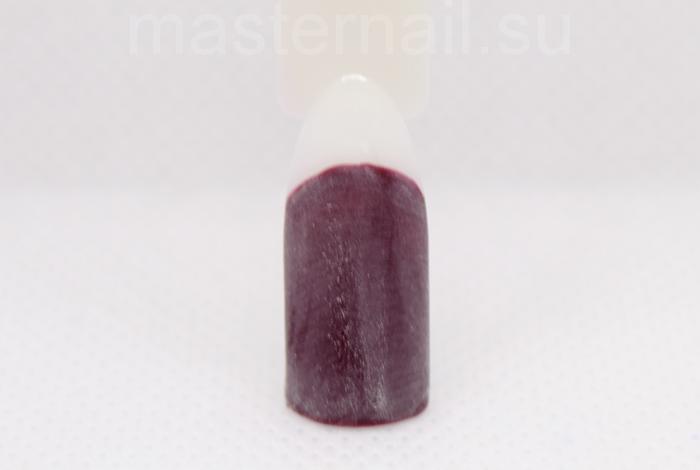
- Step 2 - To print just the wear on the design, lightly buff the entire surface.
- Step 3: Remove dust after sawing.
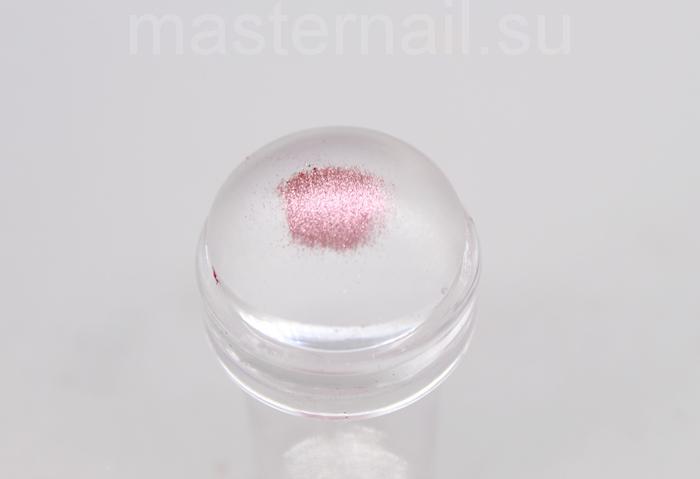
- Step 4: Apply a small amount of rubbing compound to the clear stamp.
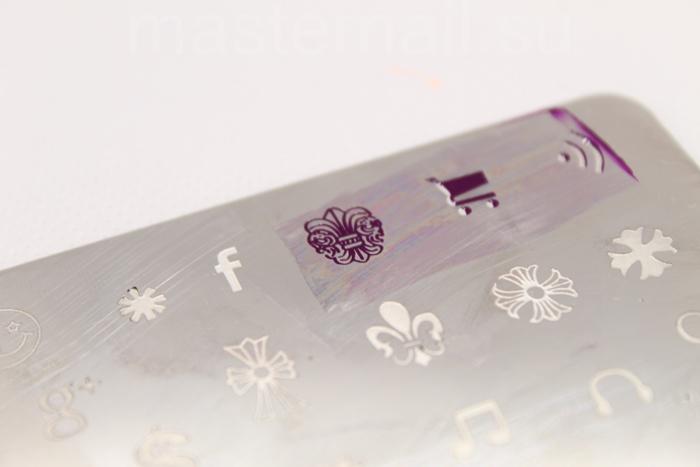
- Step 5: Select a design and fill it with gel polish.
- Step 6: Apply gel polish to the stamp over the rub.
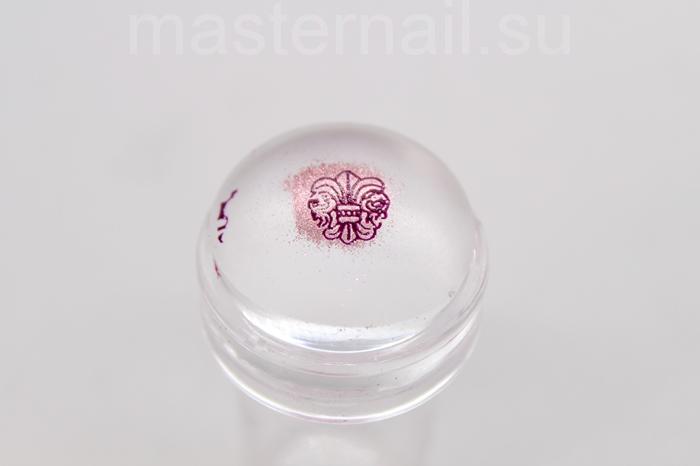
- Step 7: Make an imprint on your nail.
- Step 8 - Lightly shake off the excess rub with a brush.
- Step 9: Cover the entire nail with topcoat.
Now you know how to use stamping, correctly and quickly create beautiful designs on your nails with any print and design.
Is it possible to make templates yourself?
We are such craftsmen here, we do everything ourselves, and, of course, a reasonable question could not help but arise: shouldn’t we make paper stencils ourselves?
Personally, this question is very clear to me, and it’s not about saving pennies. No matter how wide the selection of ready-made stencils is, you can always come up with a crazy idea that no one has yet implemented.
Well, there is nothing complicated about making templates yourself. The material used is masking tape. It is easy to cut out figures from it that can be used as a stencil.
For stamping
Nail stencils created on flat metal plates with images applied are called stamping. The drawing is performed a little deeper into the plate material. During the application of varnish, this recess is easily filled, which allows you to create the desired pattern. Excess varnish is removed using a special scraper.
Then the pattern is imprinted with a rubber roller and transferred to the nail. Thanks to this experience, you will be able to create unusual masterpieces. But to apply images you will need a whole set of varnishes and tools. And you still need preliminary training in application.
Advantages and disadvantages of template application of drawings
The use of stencils is just one of the many techniques that are used in nail art. She has many advantages:
- Templates are inexpensive, they are available in online stores in a wide variety, and purchasing them is not a problem.
- There is a wide range of different patterns that can be combined with each other to create a unique solution.
- Sometimes a template can give you a nail design idea.
- By using the same stencil in different colors, it is possible to obtain completely new design options.
- You don’t need to have a steady hand or be able to draw out the finest elements and even shapes with a brush in order to beautifully draw a design using a template or print it with a stamp.
- You can make the perfect geometry.
And, of course, a “template” design can only be the basis, which you can complement with rhinestones, sparkles, inlays and anything else. The main thing is not to lose your sense of proportion.
Templates also have disadvantages:
- It is necessary to buy templates, additional materials, devices and store them somewhere.
- Stamping requires a certain skill.
- Template application is a “template” solution. There is always a risk of meeting someone with the same nail patterns as yours. However, it is not so great, because each craftswoman chooses her own combinations of colors and combinations of elements.
But in general, in my opinion, stencils are an excellent help, and if you are doing a French or “lunar” manicure, you don’t even need to think about it: with templates you will do it in no time and much better than by hand!
Tell us about your experience using these devices. Do you use it? What did you like and what didn’t? Do you have any secret developments and technologies? Let's discuss this burning topic and share some tricks and wisdom.
What you need for home nail art
If a person is not going to become a professional and do manicure as a core activity, then it is absolutely not necessary to buy everything. It is enough to acquire a basic set of things that will be useful for drawing and developing designs.
To do your own manicure at home, you will need the following things:
- Scotch. It will help you create geometric shapes and do a French manicure;
- Dots. This element is a small plastic or wooden stick with a ball at the end for making dot patterns. Using this device, if necessary, you can also draw;
- A set of brushes of different diameters. The choice should be made in favor of products with natural bristles;
- Gel polishes of different colors;
- Glitters, sequins, rhinestones.
- Toothpicks, cotton swabs for pattern correction;
- Manicure corrector or gel polish remover;
- Fixative. This is a means to extend the life of the coating.
Attention! You can’t start your business with professional and expensive materials. At the first stage, you can try to apply drawings using ordinary watercolor paints, which are easily washed off
The main rule is to avoid overdoing the design.
History of origin
Despite the name, French film appeared in 1976 in the United States, when the director complained to a friend about the lack of time during a shooting day.
The problem was that the actresses changed not only their outfits, but also the color of their nail polish. And this greatly affected the budget, because we had to pay manicurists for processing. Jeff Pink, after listening to a friend's problem, created a collection of varnishes that was innovative for that time, allowing you to create a universal manicure with stencils.
The collection was so successful that it soon appeared on the catwalks of France. Thanks to the models who had to change outfits dozens of times. This is where the name “French” came from.
The creator of the innovation patented the created feature. After all, as you know, everything that is called French is associated with sophistication.
Manufacturing
If you urgently need to do a manicure, but there are no stencils, you can do the preparation yourself. For these purposes, paper tape is used, from which it is easy to make oblong and arched stripes, circles and zigzags. To make cutting easier, it is advisable to use applique scissors.
You can make stencils yourself like this:
- First you need to decide on the design and calculate the proportions of the lining.
- For a French manicure, you need arched strips with a sharp bend, which will visually increase the length of your fingers. You can make original preparations for the holiday. Wedge and lace shapes work well.
- To perform a lunar manicure, you need blanks similar to the shape of a circle. They are applied to the base of the nail. This allows you to make excavations of varying depths.
- When cutting stencils, it is necessary to make more than 10 copies.
Stencils made by yourself will be the most budget-friendly. In addition, with them the manicure also turns out to be exquisite. But getting an original design requires skill, which comes with experience.
Thus, nail stencils are excellent helpers in creating a beautiful manicure. You just need to carry out the work carefully and slowly.
With your own hands
When purchasing ready-made stencils for nails, you cannot be sure that the pattern you apply to the plates will be unique. To create your own unique manicure at home, you can make templates for drawings with your own hands.
All you need are scissors, a utility knife, double-sided or regular tape, or sticky paper. The creation process can be represented as follows:
Use scissors to cut the paper or tape into small squares.
Choose a suitable design, transfer it to the base, or print it on a printer.
Using a utility knife, carefully cut out the pattern.
If you decide to use ordinary tape, then before transferring the design, stick it on clean glass - this will make it easier to work. Ready-made nail stencils are transferred to plates and painted over. There are two ways to use DIY templates:
- You can use a directly cut part, which is applied to the surface, and then varnish is applied. The result is an even layer with a void in place of the pattern. It must be painted with a thin brush.
- By applying the stencil itself, it is possible to create an original and accurate design on the surface of the nail, but a steady hand is required to complete the manicure.
Both methods require a steady hand that can draw on the nail and apply varnish without “climbing” onto the transferred pattern. It is much easier to use strips, with which you get an equally expressive manicure.