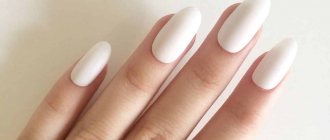
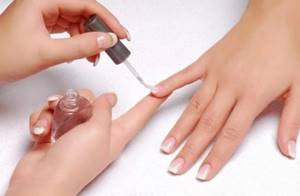
A flawless manicure is the key to the beauty of your hands. Some girls prefer not to experiment with nail coating themselves, but turn to an experienced nail technician, but many fashionistas are not afraid of difficulties and do their own manicure. There is nothing difficult about painting your nails with gel polish yourself. To do this, you will need a base, top and color coating and a lamp for drying gel polish. And our recommendations will help you do a smooth and beautiful manicure with gel polish at home.

Impeccable DIY manicure
Varnish selection
The second secret to a successful manicure is choosing the right coating. Today, stores offer gel polishes for every taste and budget, so you should choose carefully. A good gel polish should be of medium thickness and flow from the brush in a uniform, viscous stream. A varnish that is too thin creates streaks, while a varnish that is too thick creates lumps.
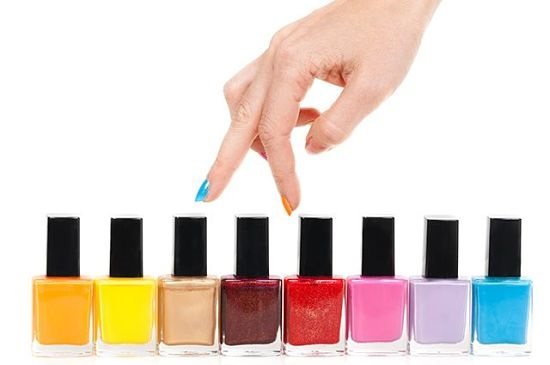
Choosing a varnish
When purchasing, it is better to give preference to gel polishes from trusted manufacturers specializing in products for professional nail design: CND, Gelish Harmony, Kodi Professional, OPI. These gel polishes are of high quality: they apply perfectly, are worn for a long time and do not spoil the nails. Their only drawback is the cost. So, shellac CND or gel polish Gelish or OPI will cost you about 1000 rubles. Kodi gel polishes are a little cheaper - a small bottle of this polish costs, on average, 600 rubles.
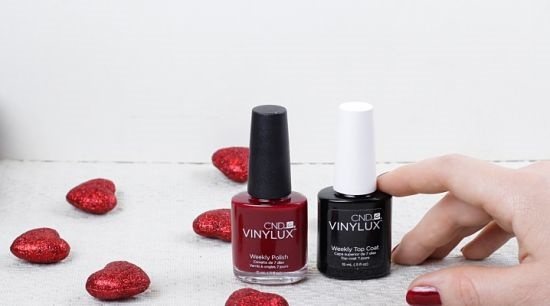
CND varnish
Chinese and Russian gel polishes are inferior in quality to their European and overseas counterparts, but due to their affordable price, they are also in demand. Among the gel polishes in the middle price segment, we can highlight the products Bluesky, Cristina, RuNail, Lianail. They are less convenient to use, but when used skillfully, they look and wear no worse than gel polishes from professional brands.
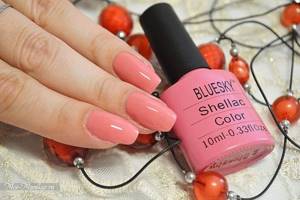
Bluesky varnish
When choosing gel polish, pay attention to the brush: it should be elastic, with even hairs of the same length. As for the width of the brush, this is a matter of individual preference: for some it is more convenient to use a brush, which paints the nail in two strokes, while others choose a thin brush, which can be used to carefully paint delicate areas near the cuticle and side ridges.
Don’t forget about the auxiliary coatings – base and top.
Manicure with gel polish is done in stages:
- base coat;
- one or two layers of colored varnish;
- finishing coating.
Final varnish coating
By purchasing a high-quality base and top coat, you can adjust the surface of the nail and the uniformity of the color coating. Some gel polishes have the ability to self-level, so if your nails have texture, a layer of base will help level the plate, preparing it for the application of colored polish.
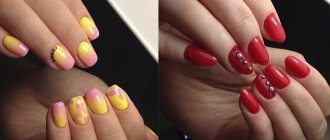
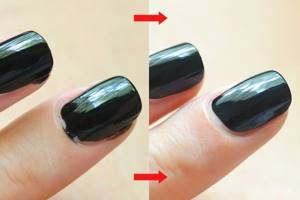
How to make a neat coating, explained on two fingers
The promised post is about how to get rid of varnish runs on the cuticle and around the nail, if your hands are shaking and you can’t apply the coating immediately carefully.
There are, of course, many ways to correct such mistakes. Some apply a thick cream or oil to the cuticle before polish, others use a corrective felt-tip pen, toothpicks or a match after. A method that I learned about a few months ago from a foreign paint blog (lost the link((), made me throw away the markers and opened my eyes to how to make the coating neat without unnecessary nerves.
We will need:
- a thin synthetic brush with a pointed tip (I use Sigma - E05 for eyeliner) - a napkin - your favorite nail polish remover
It is better to correct the varnish in this way when the varnish is completely dry, not earlier than about an hour after applying the last layer.
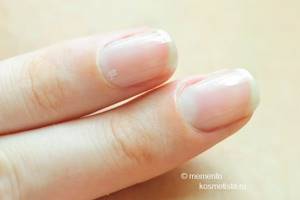
1. Take a nail with a base coat.
2. Cover with varnish. Despite the fact that the Illamasca brush is ideal for me, and I can apply nail polish with it quite accurately the first time, for this post I’m simulating typical runs on the cuticle.
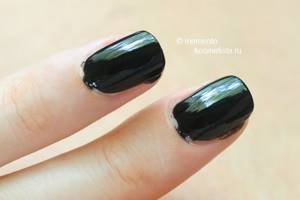
And we wait for the appointed hour.
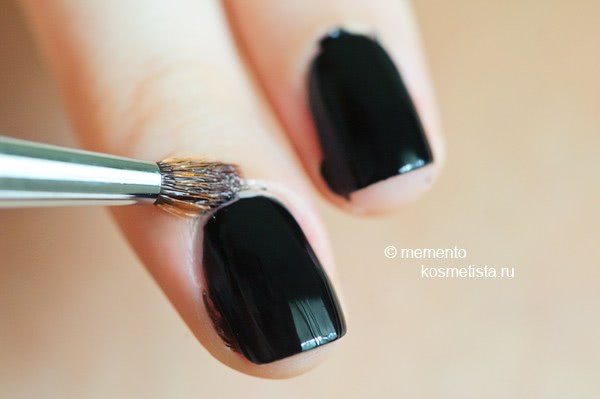
3. After the varnish has dried, we proceed to the actual correction. Dip the brush into nail polish remover and run it along the cuticle, where you need to remove streaks. First, lightly press so that the liquid is absorbed, and then a few more times on top, removing excess varnish. When the brush gets dirty and starts to spread dirt, wipe it off on a napkin.
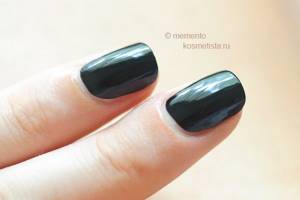
4. That's it) All that remains is to dry the varnish for another 10-15 minutes.
When I read about this method myself, I didn’t think that everything would work out, much less that it would turn out so
easily. The whole trick is in the brush. Mine, as you can see, is fluffy - this is because the neck in the Mavala liquid is too narrow, and I have to push it in there)) But the fluffiness, in fact, practically does not interfere. The fact is that the synthetic hairs of the brush are quite elastic and the erasing line in any case turns out to be very smooth. In addition, the varnish does not begin to wear off instantly, and even if you miss at first, it’s okay, you still need to go over the same place several times to remove the varnish completely.
Not a single felt-tip pen has ever given me such a carved, smooth and clear cuticle line. I had to rub the skin, but here I pressed it, rubbed it several times and that was it. It takes no more than 15 minutes to adjust both hands. And my photo, of course, is not an ideal example; if you spend a little more time, you can achieve a superb result. I do an unedged manicure and sometimes it happens that the polish gets under the cuticle, this is the worst option and you have to tinker with it longer, but again, due to the fact that this is a brush and its thin hairs, wetted nail polish remover can penetrate under the cuticle , such mistakes can also be erased.
In general, if anyone has this problem, try it! Often synthetic brushes from sets lie idle, but here it has become a panacea for me.
How do you achieve a neat manicure?
Increase
Gel polish application techniques
Every professional manicurist develops a technique that allows him to apply gel polish evenly and beautifully to his clients’ nails. Let's look at the most popular of these techniques. Following the advice of professionals, you can paint your nails at home no worse than in a beauty salon.
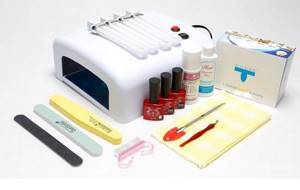
Necessary tools for manicure
Six rules for applying nail polish
To get a neat and beautiful manicure, you don’t have to spend money on visiting a salon, just learn some tricks.
- Petrolatum. If, when applying varnish, it spreads beyond the nail plate, Vaseline will come to the rescue. It is necessary to lubricate the skin around the nail. The varnish will not dry quickly on an oily surface, and you can easily remove it with a napkin.
- White base. To achieve even coverage, apply a white base coat first. Thanks to the contrast, unpainted areas will be clearly visible.
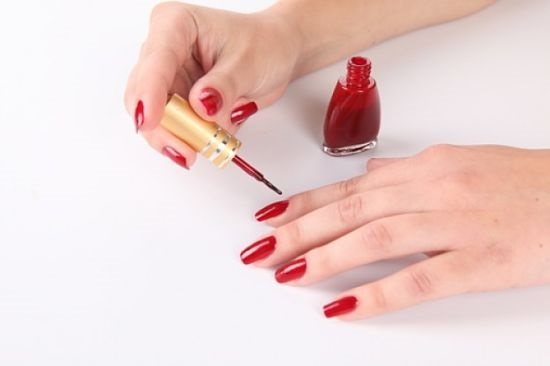
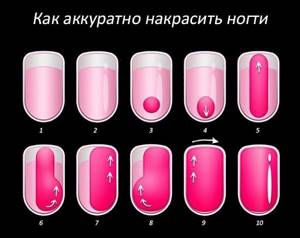
- Apply polish from the middle of the nail. First, place a dot in the center of the nail and begin to stretch it towards the cuticle, moving from the base to the tips. If you start applying cuticle polish, excess polish will get on it and leave marks.
- Warm up the varnish. Shaking the polish vigorously causes air bubbles to appear in it, and they appear on painted nails after coating. To avoid this, rub it thoroughly between your palms before applying.
- Stencil. It’s not so easy for a beginner to do a French manicure on their own. Use special stencils that are designed for this type of manicure.
- Stick for nail polish correction. This product will help remove excess varnish. The wide tip of the stick will make the edge smooth and help save your nerves.
Repeat nail shape
This is a simple and convenient way to carefully paint your nails without getting your fingers dirty:
- Place the brush as close to the cuticle as possible and use two even strokes to fill the sides of the nail with color, following their contour. Then paint over the central part and dry the gel polish in a lamp.
- Paint your nails with another layer and dry.
- Apply topcoat.
This technique allows you to paint your nails quickly and accurately.
How to carefully paint your nails
Stages of the procedure step by step
Gel polish for beginners is a rather complex procedure, since it contains many stages, each of which must be paid attention to and followed.
The technology for applying gel polish includes four main stages:
- Preparing the nail plate for decoration.
- Applying the base.
- Performing a color design or a single-color coating.
- Fixing the work with a top.
To ensure that the manicure looks well-groomed and remains in the same condition for up to 2-3 weeks, be careful when carrying out each stage, make sure that the work surface is clean while performing them.
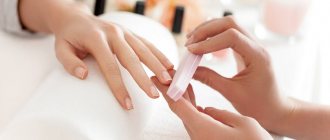
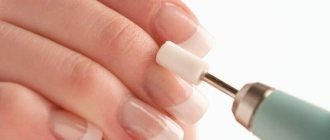
Preparation
To ensure that the gel polish lays evenly on the nail bed and does not form bumps and detachments ahead of time, you should perform a rough manicure, which involves completely cleaning the nail.
You need to start working by washing your hands and then drying them completely. This step can be replaced by using an antiseptic, as it ensures that moisture quickly drains from the skin.
The preparatory stage most often takes about forty minutes:
- Adjust the shape of the free edge with a file.
- Apply the remover to the cuticle.
- After a minute, push back the cuticle with a pusher or an orange stick and lift it.
- Use nail scissors or clippers to cut off the keratinized epidermis.
- Polish the nail bed with buff.
- Remove excess sawdust with a stiff brush.
- Apply dehydrator to degrease the surface.
Keep in mind that all manipulations should be performed carefully, slowly, otherwise there is a risk of accidental damage to the periungual area, and a manicure with bruises will look sloppy.
Also, before applying the pigment, it is recommended to use a primer - a special product that increases the adhesion of the decorative coating to the nail. There are acidic and acid-free compositions that differ in the direction of action - the former remove the fatty film from the surface, tightly fixing the gel polish, and the latter strengthen the weakened surface, which also increases the long-term preservation of the work.
As a standard, the primer does not need to be dried in a lamp, but some acidic products need to be dried, so before using them you need to pay attention to the instructions prescribed by the manufacturer.
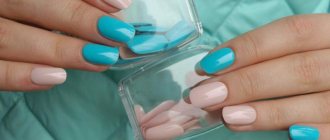
Applying base coat
The base is an important stage when applying dye, since when the pigment is distributed over a clean plate, there is a high probability that it will quickly begin to chip and come off. The base layer is the ideal medium for fixing the dye.
Apply the base evenly over the entire nail plate. The layer should not be very thick so that it can be dried in an ultraviolet or LED lamp for 1-1.5 minutes. Only after this can you apply the main gel polish, which will create the design of the manicure.
Keep in mind that sometimes you can use not ordinary bases, but self-leveling solutions. They not only create high adhesion to the pigment, but also smooth out the nails, eliminating minor cosmetic defects in the form of bumps and depressions that can interfere with the technology.
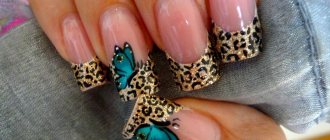
After distributing the base, you can apply colored shades of pigment in two middle layers to completely cover the natural manicure. Each stage is dried in a lamp for one minute. After drying two layers, you can create a unique design using simple nail design options:
- Stamping;
- Stickers;
- Rubbing;
- Foil;
- Stencils.
The applied design also needs to be thoroughly dried in a lamp.
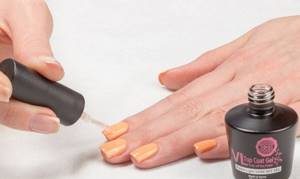
Application of topcoat
To prevent the work from coming off prematurely, it must be fixed with a finishing coat - top. It is recommended to use all formulations of the same brand so that their active ingredients do not conflict with each other.
Pay attention to the technology of uniform distribution of the top:
- Apply the mixture to the center of the nail.
- Spread the solution on one side, moving the brush from the base to the free edge.
- Repeat the manipulation on the other side.
- Align the remaining product in the center.
- Seal the end (to do this, run along the free edge of the nail) to prevent premature convergence of the work.
- If the coating turns out uneven, turn the nail face down for a few seconds so that the topcoat flows to the center and spontaneously distributes over the nail.
It takes a little longer to dry the finish coat in the lamp - one and a half minutes.
Final stage
Most topcoats have a sticky layer after drying, so the final stage of the manicure is removing it. The standard way to do this is to use a lint-free cloth moistened with a cleaner, which should be passed over the surface 1-2 times.
If you don’t have a cleaner, you can use available materials (medicinal alcohol, acetone, liquid for removing regular varnish dye), but you need to be as careful as possible with them, because there is always a risk of accidental damage to the gel polish and deterioration of its visual condition.
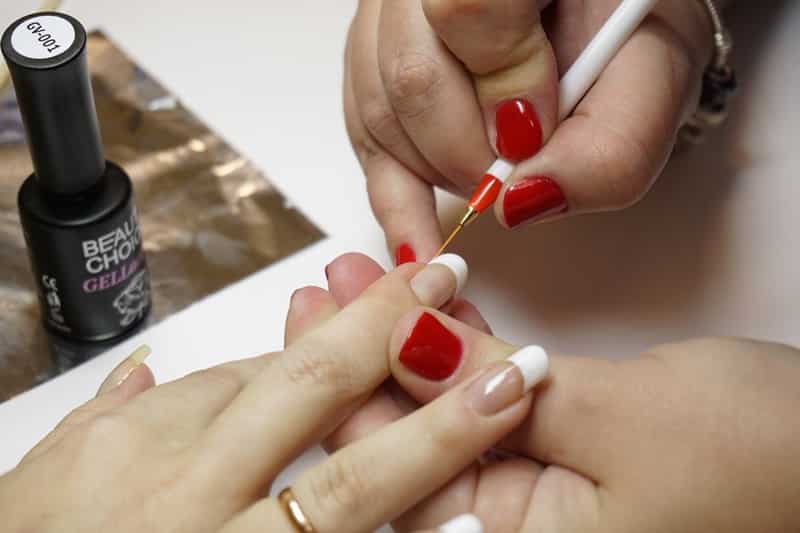
Using a fine brush
This technique is preferred by those for whom jewelry painting of nails in the most inaccessible areas is important.
- Apply a drop of gel polish to the palette (you can use any smooth surface).
- Use a thin brush to pick up some varnish.
- Carefully paint the area near the cuticle and side ridges.
- Paint the rest of the nail surface with a regular brush and dry under a lamp.
- Gradually apply another layer of colored varnish and top coat, drying each layer under a lamp.
Using a thin manicure brush
Method two: using a thin brush
Another method, the benefits and convenience of which are divided between two camps. For some, it is universal, simple and reliable. Others can't cope and find it incredibly difficult. This is a great puzzle that you can solve and join one or the other.
- To begin with, you need to apply a drop of varnish to absolutely any convenient surface.
- Use the thinnest manicure brush to grab a little varnish.
- Slowly and carefully cover the area of the nail that is next to the cuticle. After painting there will be something similar to a translucent hole.
- Now, armed with a regular brush, you need to paint the entire nail.
- As expected, dry in a UV or LED lamp.
- Next, apply the second layer. It is worth paying special attention to the cuticle area. If it is neat and even, well painted, then we can assume that everything was a success.
These methods are most suitable for those who are not professionals, but amateurs in nail decoration. They are quite simple and convenient, but their versatility creates the effect of going to a professional nail technician.
Application under the cuticle
This is a complex method of applying gel polish that requires skill.
- Treat your nails thoroughly.
- Use an orange stick or pusher to push back and lift the cuticle as much as possible.
- Using a thin brush, paint over the vacated space and paint over the rest of the nail.
The method of applying varnish under the cuticle will prolong the freshness of the manicure, since as the nail grows, the boundary between the coating and the natural surface will become noticeable later.
Important little things
The main nuances that it is advisable for everyone who is going to apply gel polish to become familiar with.
- It is necessary that the nail plate be carefully prepared. In order for the coating to be perfectly smooth and even without having to redo it, you need to treat the nail plate by polishing it. There should be no roughness or irregularities; if any are detected, the procedure must be repeated. The cuticle and side ridges need to be treated most thoroughly. A sign of a good manicure is smooth sides, smooth skin, and the absence of cracks and burrs.
- Before painting your nails, it is extremely important to fulfill one more important condition. Use an orange stick or pusher to push back the cuticle, do it carefully and slowly. This will ensure that the polish is applied closest to the base of the nail. This simple action can make your manicure look fresh and tidy. Once the painting is completed, the cuticle will return to its original place. The border of the polish will be covered, which means the new part will be less noticeable as the nail grows.
- You should not stop at just one chosen application method. Girls who were unable to create the perfect manicure at home on the first try quite often decide not to do it anymore and turn only to specialists. However, painting your nails is a task that absolutely any representative of the fair sex, who has neither talent nor artistic abilities, can cope with. It is important to choose exactly the method that is convenient and acceptable. Yes, you will have to experiment a lot and have a lot of patience. However, this activity – decorating your own fingers – is quite exciting and interesting. If ideas don’t appear on their own, you can look them up on the Internet or ask your friends.
These simple tips will help you avoid many problems. By honing your skills over time, you can achieve incredible success. Then you will not only be able to save on going to a beauty salon for a manicure, but also enjoy and enjoy your own skills.
other methods
There are a number of other tricks with which you can carefully paint your nails with gel polish. Among them is the use of manicure or masking tape. Prepare thin strips of tape in advance, stick them on your fingers as close to your nails as possible (pictured) and apply the coating. When the polish is dry, remove the tape.
You can also use regular PVA glue. Before applying the polish, take the glue and spread it around the area around the nail. After the glue has dried, paint your nails and remove the adhesive film.
With these simple techniques, you can paint your nails correctly and beautifully, and your manicure will be as good as a salon one. And to get a visual idea of the intricacies of applying gel polish, watch this interesting training video.
How to apply polish evenly on short/long nails?
When it comes to short nails, covering them with polish is not so easy. It is very important that it is not thickened, because this will stain the skin around the nail plate. Too saturated shades on short nails look untidy; it is better to use translucent, pastel colors.
To accurately and evenly paint short nail plates, you need to apply a little varnish, creating a decorative layer, starting from the central part, smoothly moving to the sides. By the way, if you leave the edges a little unpainted, your fingers will appear longer. It is very important not to touch the cuticle while dyeing, because eliminating this effect will be problematic.
Are you thinking about how to beautifully paint your nails yourself? If they are long, then this will be much easier to do, and the varnish coating on them looks excellent. Before you begin, you need to warm the bottle of varnish with your hands. Painting your nails starts with your little finger; it is better to position yourself so that the light source is in the upper left corner of the room (this is if you do everything with your right hand). You need to completely dip the brush into the bottle, and then wipe it on the edge of the tube (the polish should remain on one side). The principle of applying paint does not differ from that indicated above; excess is removed with a brush.
If you want to learn how to carefully paint your nails with gel polish, remember that each applied layer is “dried” under a UV lamp; a maximum of 2 minutes is enough for the coating to completely undergo the polymerization process and bond to the surface.