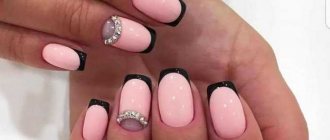
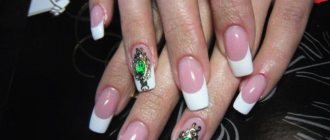
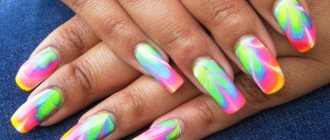
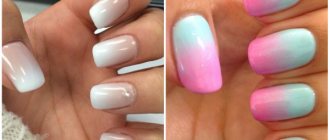
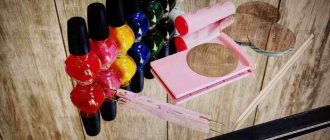
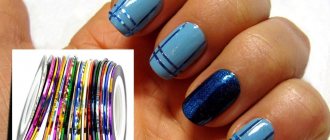
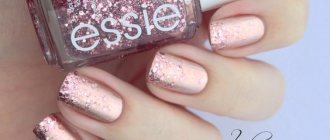
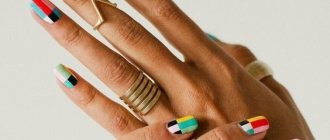
Using stencils you can decorate your nails with patterns and even pictures. You can create entire compositions consisting of flowers, butterflies and other ornate images. A large selection of different templates allows you to bring to life any, even the most original ideas.
Types of stencils for nail design
Water based
Water stickers
They are a thin and elastic film with an image , which is applied to paper for convenience. They are used after wetting in warm water.
Adhesive based
Thanks to the adhesive layer, the stickers adhere well to the nail plate and help create clear designs.
French stripes
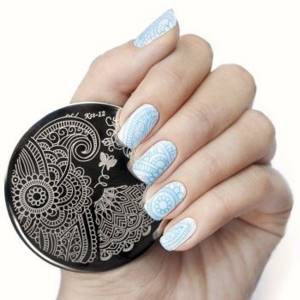
Stamping disc
One of the most popular stencils, because not everyone can boast of the ability to draw a perfectly straight line. And with the help of special strips you can make a French jacket even at home.
Stamping disc
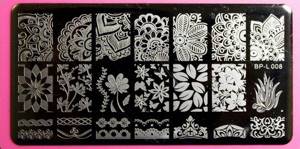
The main tools of this technique are a stamp for transferring the finished drawing and plates with drawings . The stamp has a rubber or silicone tip, which allows you to transfer the finished image through the print.
Airbrush stencils
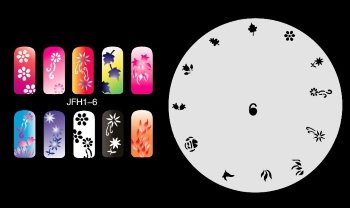
Airbrush stencil
They are rarely used at home, since this technique requires a special tool - an airbrush , which is quite expensive. The template is firmly fixed with the help of an adhesive base, and after spraying the paint it is removed, leaving a beautiful design.
Vinyl stencils
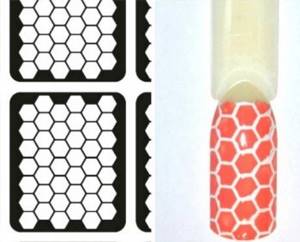
Vinyl stencil
They are very similar to paper ones, but have a number of advantages. So, they have a more varied design. With their help, you can create absolutely any decor without fear of smearing the design.
And thanks to the specifics of the material from which they are made, such templates fit more tightly to the surface of the nail plate, which allows you to make patterns with clear and even lines and draw the most intricate shapes.
Technique for performing classic edged manicure
At home, manicure is carried out according to the following instructions:
- Wash your hands with detergent.
- Completely remove the previous coating.
- Give the nail plates the required shape.
- Make a softening bath. To do this, lay out a towel, place a container of warm water on it and place your left hand there if you are right-handed, and your right hand if you are left-handed.
- Wait a few minutes, then take out your little finger and pat it dry with a towel.
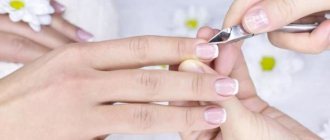
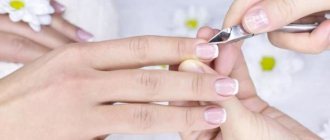
- Gently work the cuticle with the side of the pusher that resembles a “spatula”.
- Remove the pterygium from the plate with the side of the pusher where the blade is located.
- Using clippers, cut off the dead skin from the skin folds and nail bed.
- Consistently repeat the described procedure with the remaining fingers and the other hand.
- Polish your nails.
- Cover the plates with your chosen varnish, transparent base or medicinal composition.
- Massage your fingers and hands with special oil.
DIY nail stencils
Nail tape stencils
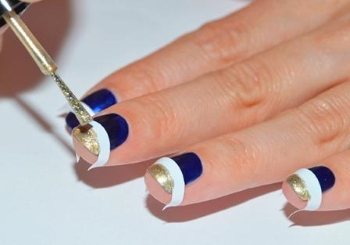
Stencil for French
Beautiful and convenient stencils can be obtained from nail tape.
You can use even strips, and you can also cut out various geometric shapes, waves, arcs, etc. from them.
Original pictures can be obtained by combining several strips located on the nail at different angles.
Stencils made of paper, window tape or cash register tape
Plain paper, window tape or cash register tape will help you create large motifs and simple designs. Sketch a sketch on paper, then apply film and cut out the resulting design. When applying the design, make sure that the varnish does not flow under the film. Paper will also make wonderful strips for a French manicure or moon manicure .
Make a stencil design in just a few minutes under the guidance of an expert:
Stencils made from adhesive tape, tape
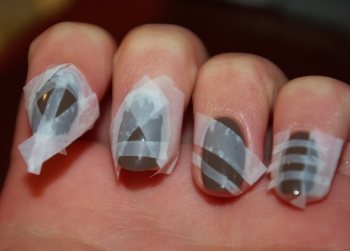
Geometric fantasies using tape
To make a stencil from tape or adhesive tape, you will need scissors, a utility knife and a glass surface .
- First come up with a suitable design.
- Cut off the required amount of tape or adhesive tape.
- Next, carefully stick it on the glass surface.
- Using a utility knife, shape the tape into the desired shape.
Please note that there are no folds or irregularities anywhere, otherwise the stencil may turn out to be of poor quality.
To get a truly original and unique drawing, it is better to draw it yourself. You can draw directly on paper or in a graphics editor, such as Photoshop. If you can’t draw it yourself, you can download ready-made pictures from the Internet and print them.
Another simple way to make a stencil:
How to make a template for a French manicure
Original French
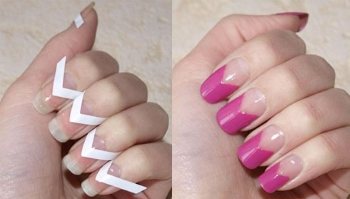
A stencil for a French manicure can easily be made from tape, adhesive tape or window tape . At the same time, you can not be limited to the standard form, but show your imagination and create your own unique pattern for a jacket, for example in the form of a wave.
How to make a stencil for a moon manicure
Original lunar
Moon manicure is very similar to French manicure, only the hole at the base of the nail is highlighted with varnish, and not its very tip.
A template for such a manicure can also be made from tape or adhesive tape by simply cutting out the desired shape: round, triangular, wavy, or even with a pattern.
Homemade strips for French jacket
If necessary, purchased strips for French manicure can be replaced with homemade strips cut at home. To do this, you will need tape, adhesive tape or window insulation tape - the strips can be made from any of these materials. At the same time, you can not be limited to any one form, but get creative and create a unique stencil, for example, a wave or something similar.
If you decided not to experiment with the shape, but settled on the usual crescent moon, then you can use these homemade stencils for a French manicure without additional manipulations with scissors, that is, without cutting. In this case, you need to paste over the nail with the selected material (their types are listed above), leaving only the tip free. After the coating has been applied and dried, your homemade French stencil is removed, leaving a beautiful, even white line.
However, French stickers are not the only thing that the nail industry offers us. To create a design, nail stencils of various shapes can also be used. Thanks to this, the process of drawing at home turns into an exciting undertaking, simple in its execution.
How to do a manicure using a stencil
Using adhesive-based stencils
- Securely attach the template to the surface of the nail. If it moves during the drawing process, the picture may turn out blurry.
- Apply varnish or special paint.
- Let the paint dry thoroughly.
- Once the varnish or paint has dried well, you can carefully remove the stencil.
It is more convenient to apply the pattern using a sponge. The varnish layer will be thin, it will dry faster and provide a more accurate drawing.
See how you can use stencils in gel polish manicure:
Using a stamping disc
- Apply varnish or paint to the desired template picture.
- Remove excess varnish with a special scraper spatula.
- Press the stamp onto the design until it is completely imprinted.
- Use a stamp to transfer the design onto your nail.
For clarity, watch the video:
What is stamping and how to use the kits
The most modern and easiest way to create designs and patterns for nails is the stamping technique. Translated from English, the word “stemp” means stamp. This method of creating drawings is based on an analogy with the name.
The stamping kit usually includes:
- a special stamp with a wide and flat silicone tip for transferring the design;
- metal plates with recesses in the form of various designs and patterns;
- scraper for removing excess varnish from the plate;
- acrylic paints for creating three-dimensional and clear drawings, gel paints are also suitable
Stencils
Also, to create a manicure using stamping you will need:
- degreaser, nail polish remover;
- cotton pads, cotton swabs;
- plastic card (it is often used to replace metal scrapers for removing polish residues, since plastic is less damaging to the nail plate).
Dark manicure
Original nail design ideas using stencils
Geometric Mess
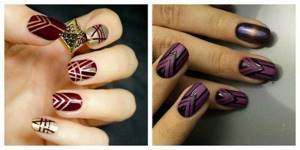
Take varnishes of different shades and apply them in longitudinal stripes to the nail plate. Cut several narrow strips of tape and stick them randomly onto your nail. Then cover it with a plain, preferably matte, varnish.
Manicure with triangles
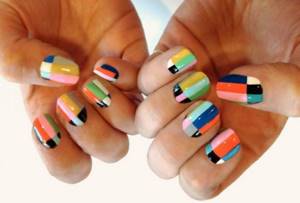
Cover the nail with a plain base polish. Cut out several small triangles from tape and stick them on the nail, creating a design. Then apply a contrasting color of polish and let it dry.
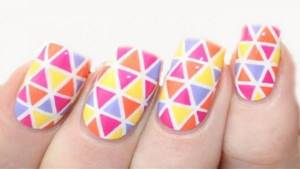
Instead of triangles, you can use any other figures for decoration: hearts, diamonds, stars, etc.
Wavy French
The template for such a manicure is most conveniently cut using special serrated scissors for needlework. Cut a strip with wavy edges, glue it to the tip of the nail and cover it with polish.
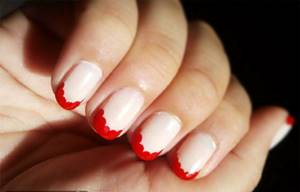
Instead of waves, you can use paper lace.
To create an original manicure, you simply need nail stencils. You can buy them in a specialized store or make them yourself. These stencils are very easy to use, and the results are incredibly beautiful.
More interesting articles:
Drawing techniques
First you need to decide on the character and style of the drawing. After all, different designs suit every woman’s look. It is images and patterns that can make you stand out from the crowd and complement your image. Let's look at the basic techniques for creating patterns on nails. Now we will explain how to learn to paint on nails.
Brushes
Which brushes to choose for manicure from all the variety? Let's get a look:
| Brush | Characteristic |
| dots (dot) | Instead of lint, the dots have a ball on its tip. There are a huge number of dosage attachments available, ranging from the smallest to the larger ones. They can easily place peas and dots of different sizes, as well as draw rounded flower petals. |
| fan | A fan-shaped brush helps to draw various patterns and waves. With it you can mix several drops of varnishes together, creating an unusual composition. |
| hair | Typically, the tip of the brush is 2-3 cm long and about 2 mm wide. This allows you to display various curved lines, monograms and curls. |
| flat | A flat brush 4 mm wide is suitable for creating patterns, brush strokes or decorative painted designs. |
| petal | The brush is somewhat reminiscent of a flat brush, but the petal brush has a cut corner. Thanks to this structure, it is convenient to display various petals. |
| fluffy | With a brush with increased fluffiness, it is easy to sprinkle glitter onto the nail plate. |
| thin | The medium thin brush has a length of 5-8 mm and is suitable for drawing dots, stripes, lines and other patterns. The short one has a length of no more than 4 mm, and it can be used to draw the smallest details in the composition. |
| Chinese | A popular brush used for Chinese nail painting. Most often it can be found in special sets. |
Painting with brushes is quite simple. The exact same principle is used here as when drawing on paper.
It is only important to correctly calculate the parameters, because the nail bed is much smaller than a landscape sheet
Needle
If you cannot find brushes at hand, then a needle will come to the rescue. How to learn to draw on nails with a needle? Here are the step-by-step instructions:
- Apply any polish to your nails as a base.
- After complete drying, use a needle to scoop out the desired shade of varnish.
- Place several dots parallel to each other on the nail.
- While the varnish is still wet, carefully connect the dots with a needle, creating unusual patterns.
- Cover the nail design with top sealer.
Step-by-step diagrams can be seen below:
Using varnishes
Don't write off the most common varnishes. You can even use them to create unusual designs on your nails.
Here it is important to choose a comfortable native varnish brush. It should not be too thick and not very long, otherwise it will be impossible to work with it
Make sure that the background matches perfectly with the shade of the design being applied.
Tape drawings
Who would have thought, but you can also draw with tape! This is a universal tool that almost every home definitely has. Fortunately, beauties from the nail industry have found a use for adhesive tape even in nail design.
How to do a manicure using tape:
- Apply a base coat to your nails and then 1-2 layers of color.
- Using nail scissors, cut out a stencil of the desired shape from tape.
- Apply a different shade of polish to your nails and let it dry.
- Carefully remove the tape.
- After everything, cover your nails with top coat.
Scotch tape is an ideal option for creating a geometric manicure, which is so popular in the new year. This could be a manicure with stripes, in which multi-colored horizontal and vertical lines alternate. Using such a handy tool, you can draw a Christmas tree, zig-zag, rhombuses, triangles and other geometric shapes.
Step-by-step instructions for creating designs using adhesive tape and manicure tape:
Acrylic paints
Painting with acrylic paints is a popular method for creating the simplest and most uncomplicated patterns. Of course, this method is much more difficult than painting with varnishes, but each of you can learn it, because there is nothing difficult about it.
How to draw twigs on nails:
Cover your nails with a base and 1-2 layers of delicate varnish. Using a thin brush with a contrasting paint color, paint thin and curved branches, starting from the cuticle and leading to the tip of the nail.
Carefully draw small leaves on the branches. Paint over the leaves
Apply a finishing topcoat to secure the design.
Drawings on nails with acrylic paints step by step for beginners:
Subtleties of work
In order for the manicure result to meet all your expectations, you need to competently approach the issue of applying designs using stencils on the nails
First of all, you need to pay attention to the templates themselves: the patterned strips should be strong enough, and the sticky layer should be an evenly distributed thin layer

To do this, tear off a small piece and press it to the plate. If after removal there are greasy marks or the glue itself, it is better to choose a product from another manufacturer.
To create an attractive, long-lasting manicure while working, you should use three types of coloring agents:
- The base varnish is chosen colorless or plain for expressiveness or contrast.
- Base coat to transfer designs.
- Fixative for creating durable protection for manicure.
High quality varnish must be used to apply all layers. Otherwise, you risk blurring the entire picture, or the result will not last and will fade in the sun.
Application of strips
Strips for French manicure are necessary in order to use them to draw a clear and even smile line on extended or natural nails. They have an adhesive base, thanks to which they are firmly attached to the nail, hence another name for them - stickers for French manicure. Correct use of these stencils guarantees a high-quality and neat manicure with a minimum amount of time. These stencils must be used as follows:
Thus, from the description of the process it is clear that there is nothing complicated in how to use stickers for a French manicure. The technology described above is suitable for creating a classic French jacket or a colored one when only the color of the free edge of the nail is replaced. If you plan to replace both shades in your manicure (both pink and white), then you will need to first apply a lighter or less dense tone to the entire nail, and only then stick on strips, separating the darker area.
