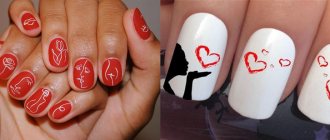
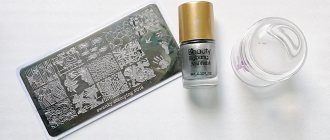
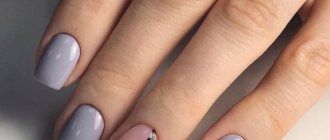
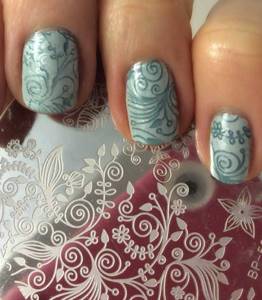
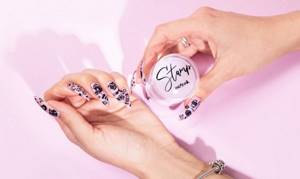
Drawings on nails are no longer a rarity. Now every girl can print any pattern on her nails using the stamping technique. Even the thinnest and most graceful lines. The principle of creating a design is very simple: special paint is applied to a plate with a fragment of the design, the excess is removed with a scraper and the imprint is put on a stamp, after which the imprint is placed on the nail, previously coated with varnish.
There are inexpensive stamping kits on sale. They can rather be called probes than serious tools. When trying to decorate their nails with a beautiful pattern, many experience difficulties: some part of the design is not printed, the print turns out rough, and its lines are thick. Maybe it's all about the paint? It dries poorly and unevenly. What if you try to replace it with varnish? And what varnishes are suitable for stamping?
You may be interested in:What is nail liquid?

Classic stamping: review of companies
El Corazon brand stamping varnishes are very opaque: they contain five times more pigment than regular varnishes! It's no wonder their fans love them so much.
Gold and silver varnishes of the Rio Pro brand harden slowly, so you need to adapt to them.
The following also give good prints: “Bourne Petty Top” and “Bluesky”.
You might be interested in: Why does gel crack?
– a recognized leader in quality stamping materials. They are more expensive than others, but they amaze with the number of drawings. The print made from the Konad plate turns out smooth, even the thinnest lines are clearly printed. The pattern is elegant and delicate.
The manufacturer recommends using a special varnish for printing. It has a quick-drying formula and transfers beautifully onto the nail. Konad warns against using non-professional varnishes, explaining that it will not be able to create a print. Is it so? Many practicing nail design masters are sure of the opposite. You should consider their advice on which varnishes are suitable for stamping.
Stamping for nails. How to choose and where to buy
It is better to choose tools and materials for stamping in a specialized store. Starter kits are often found on sale - a stamp, scraper, 1-3 varnishes, a plate or disk. You can start with this. And then, after practicing, you will understand what you are missing and buy what is missing.
Pay attention to the assortment of the Nails Plus online store. Here, at quite affordable prices, you can put together a whole collection of necessary materials and tools. At the same time, you will be confident in the quality of the goods.
This store is very convenient to choose everything you need and make purchases. There is a customer support service where you can answer any questions. Fast delivery to any point in Ukraine is organized.
Source of the article: https://nailsplus.com.ua/polezno-znat/stemping
How to replace professional stamping varnishes: acrylic paints
Nail design masters can safely be called pioneers of techniques. They love experiments, learning in practice the compatibility of materials and technologies and sometimes making useful discoveries.
A manicurist involved in design has acrylic paints in his arsenal. These are quick-drying paints with finely ground pigment. They are successfully used for painting. The advantage of using these paints for stamping is that there is no need to act quickly until the varnish has dried. You can easily draw a design onto a transfer pad, clean up the uneven lines with a brush moistened with water, dry the paint and slowly transfer it onto the nail. Such prints are covered with a varnish top coat.
You may be interested in: How to soften a toenail
If something is not printed as you would like, you can correct the design with a damp brush. Experience shows that acrylic paints are no worse than varnishes and are suitable for stamping. No matter what high-quality varnishes are, when applying a design with them, in the event of an unsuccessful print, you have to start all over again: remove the coating with liquid and acetone, repaint the substrate and print the design.
Requirements for the room where stamping is done
Always remember that you are working with nitro soluble organics. Accordingly, it has a strong chemical odor and is highly flammable. It is from these considerations that you need to choose a place for stamping.
If you decide to settle in the kitchen, the gas stove should be turned off during the manicure. Yes, and electric too. Open the window or sash slightly. Turn on the hood if you have one. Place all products in the refrigerator and cabinets or seal them in bags - acetone fumes are perfectly absorbed by bread, pastries, and sweets. Do not allow paint or solvent to come into contact with products - these are toxic substances. Cover the table where you decide to decorate your nails with paper or film. Drops of varnish, of course, can be removed with nail polish remover. But it can damage the varnish coating of the wood, the oilcloth pattern, and the plastic. After finishing work, provide the kitchen with strong cross-ventilation until the smell of varnish and solvent disappears completely.
All this is also true if you decide to work in the room. There should be no burning candles nearby (romance comes later). Provide fresh air. Remove allergy sufferers, asthmatics and (ideally) children from the room. Count all the tampons or wipes you've used so you can throw them all away and not lose a single one. The toxic properties of the liquids remaining on them remain for a long time, and someone may get hurt.
Stamping with gel polish (for professionals)
Many people are interested in which gel polish is suitable for stamping. The right transfer pads expand the possibilities of stamping and allow you to carefully transfer the gel to the nail. There are subtleties here. Without knowing the features of this technique, many consider imprinting gel polish impossible. Firstly, the stamping pad should be buffed for better adhesion. Secondly, it should not be hollow inside.
Before application, gel polish should be placed on a palette and held in the light. It will evaporate the transparent component a little and become more opaque. Only after this can it be used to print a pattern. Apply gel polish to the plate with a brush, remove excess with a scraper. Roll the stamp without any effort. The drawing should go clearly and without crushed lines. If some details do not look very nice on the stamp, you can correct them with a brush dipped in an alcohol-containing liquid (klinser).
Now it is important to dry the gel polish a little in the lamp so that its top layer polymerizes. This is approximately ten seconds of UV drying. The time will be slightly different for each lamp, and for each gel polish too. You can first make several test prints, establishing which varnishes are suitable for stamping in this technique, and determining the optimal time for their exposure in the lamp. Of course, the master will not experiment in front of the client; he will prepare the design in advance and will already know all the subtleties.
To apply a design to a nail, it is first coated with colored gel polish and, without removing the dispersion, the design is carefully transferred from the stamp. At this point, you can again correct the drawing with a brush moistened with a clinser. If everything is satisfactory, the nail is sent to the lamp. Dry a full cycle.
Before applying the top (it must have a sticky layer), you can add rhinestones.
Beautiful and well-groomed hands are the dream of a woman of any age. An excellent solution for DIY nail design is stamping. This manicure technique allows you to transfer any patterns to the nail plates using stamps.
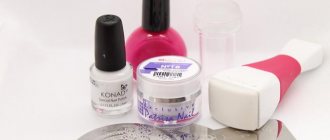
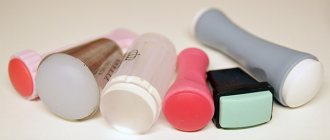
Stamping technology helps you create spectacular designs on your nails with your own hands at home. When stamping, a design is applied to the nail plate using special simple devices. The peculiarity of the technique is that you can create fine lines and the most complex elegant patterns without much difficulty. Thanks to stamping, absolutely identical designs are made on all nails. As a rule, all equipment for stamping is sold in specialized departments or cosmetic stores as a set. The kit includes varnishes, rubber stamps, a plastic or metal scraper and stamping plates. But if you wish, you can buy separate boards.
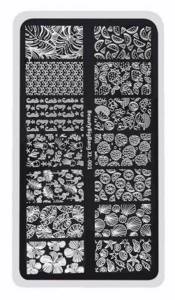
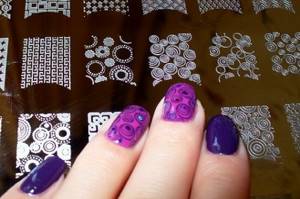
Stamping plates are thin metal plates with patterns or designs engraved on them, the number of which can vary. The algorithm for creating a manicure using the stamping technique is as follows: you should drop a little varnish onto the selected element, remove the excess with a scraper, go over the design with a stamp, and then quickly stamp it on the nail. It is clear that the beauty and quality of a manicure largely depends on the choice of plate, especially since there is a huge variety of plates and discs on sale.
When selecting boards for stamping, you need to consider two main points. Firstly, you should not chase cheapness. High-quality plates produced by well-established manufacturers on the market are not cheap. Now there are many counterfeits of popular brands, in which the quality of the patterns is quite low, individual fragments are poorly cut, which excludes the possibility of getting a good manicure. In addition, high-quality plates can be used for a very long time, so the high price is completely justified. Secondly, you should consider the size of the drawings. Some discs have quite small designs designed for miniature nails, or intended to cover part of the nail. For those with long nails who want to have a pattern over the entire surface of the nail plate, it is advisable to specify the size of the patterns.
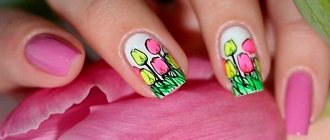
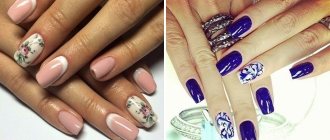
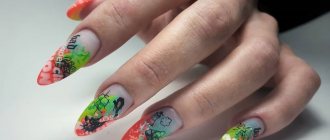
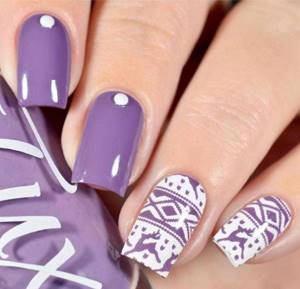
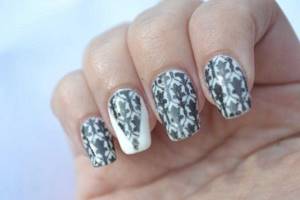
Of course, nail design should be purely individual. When choosing stencil designs, you should proceed from your own preferences and characteristics of the chosen image. Fancy floral patterns with lots of curls are great for special occasions. The design on the nail plates can echo the design of the fabric of the outfit or be combined with jewelry. You can complement the glamorous design on your nails with miniature rhinestones or sparkles. If stamping art is done for every day, then strict graphic lines and laconic design are preferable. The most daring and young ones can afford a separate abstract design on each nail plate. Of particular interest to fashionistas are plates completely covered with various patterns. For each nail, you can choose your own motif from a wide variety of patterns.
The quality of stamping boards, like any product, is largely determined by the packaging. A responsible manufacturer cares not only about the quality of the engraving on a disk or plate, but also about the safety of the product, because during transportation of goods, a smooth metal surface can acquire minor defects - scratches. To protect against damage, boards with stencils are packaged in protective film and placed on a plastic base. Each of the packaged plates has a cardboard case-box, on which the brand of the company producing the product and the basic data of the manufacturer are indicated. Poor packaging indicates that the product is defective.
Manufacturers of stamping devices have proven themselves to be the best: Konad, Bundle Monster, Afrodita, BornPrettyStore, Red Angel and others. Popular companies engaged in the production of disks and plates have a patent for this type of activity, which guarantees the high quality of the products they produce. Experts recommend purchasing a disk holder along with the templates. Fixing the stamping plate simplifies and speeds up the procedure for applying a pattern, and, by preventing varnish from getting onto the work surface, makes the result of the work better.
The unique stamping technology allows you to design your nails in a matter of minutes. Those who have mastered the creation of manicure using this technique have the opportunity to replenish the collection of boards with stencils for stamping in accordance with fashion trends.
Stamping with gel and gel paint (for professionals)
The experiments of masters (in particular, Yulia Biley, a leading figure in nail design) have proven the possibility of creating a gel polish imprint on gel polish. What other gels are suitable for stamping on gel polish? All that are sufficiently pigmented.
To apply gels, the dispersion layer of the background substrate is not removed. If it creates excess volume, it is dried again so that very little stickiness remains.
Similar to gel polish, you can use gel paint for design. It is usually used to draw a Frenchman's smile. If you use a sufficiently soft transfer pad, such material does not need to be pre-dried in a lamp. It transfers well to the nail. Polymerize for a standard time, cover with a top coat with a sticky layer.
The gel for laying out the white tip when modeling a French jacket can also be used in stamping. It is not pre-dried like gel polish. Roll the pad over the nail with a slight movement and polymerize for the required time.
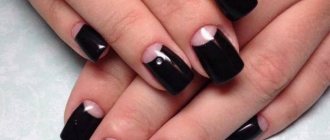
Gel paint for casting can also be applied using stamping. Some black gel polishes are suitable for the same purpose. After complete polymerization of the design, foil is printed onto its dispersion. If necessary, correct with a brush soaked in clinser and polymerize.
What is nail stamping and how to use it
Stamping is an opportunity to make a complex, effective design in just a few minutes!
One wave of the hand - and drawings appear on the nails, which would take much more time and effort to draw with a brush! This is why stamping is one of the most popular designs today. What are the advantages of stamping, how to create a design correctly, what secrets does the technique conceal? Let's find out in this article.
Reverse stamping
Imprinting technology is evolving and now there is a new use for a transfer pad - creating a homemade slider on it. The technology was called “reverse stamping”. An additional flat platform was produced especially for it, onto which the drawing is transferred.
Many people are interested in which varnishes are suitable for stamping using the reverse technique. It is easiest to make an impression with highly pigmented materials that have a homogeneous structure. Spangles, glitter, crumbs - all these inclusions are contraindications for creating a print. But they can be used in the next layer, even with large decorations - stones or kamifubuki.
Sets
Some manufacturers offer to purchase stamping kits, which include the required minimum of tools and tools. It is more profitable to purchase such kits than to order all the products separately, so take a closer look at such offers.
TNL has such a set, for example. The kit includes:
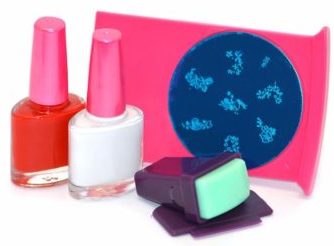
- Two bottles of stamping paint – red and white or white and black;
- Rectangular silicone stamp;
- scrapper;
- Disc stencil.
The cost of the set is 470 rubles.
Born Pretty offers a slightly more expensive set with similar components:
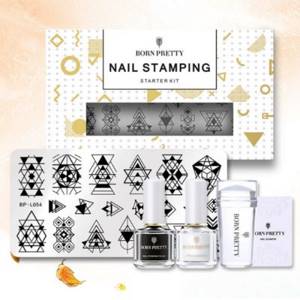
- White and black paint;
- Scraper and stamp;
- Rectangular stencil plate 12*6 cm.
Price – 560 rub.
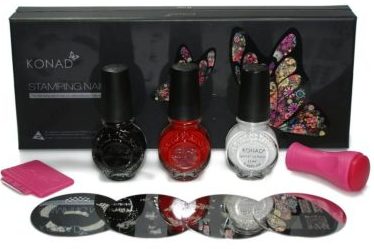
The stamping kit in a cosmetic bag from Konad is suitable for traveling or for artists who often visit clients’ homes. In the set:
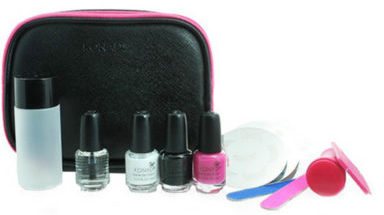
- Stencil disk – 3 pcs.;
- Varnish-paint – 3 pcs.;
- Stamp and scraper;
- Two nail files;
- Nail polish remover.
All products are packaged in a cosmetic bag made of thick material. The price of the set is 1,500 rubles. Konad has other sets of different configurations, their cost is from 600 to 10,000 rubles.
Technique for imprinting translucent varnishes
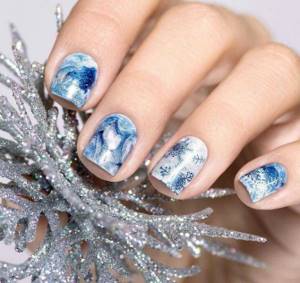
What about those varnish colors that have a translucent structure? Among them are very impressive neon, delicate pastel and berry colors of red and pink. Designs such as the Venetian lattice are not complete without stained glass paints. Surprisingly, the craftsmen claim that these varnishes are suitable for stamping. What's the secret to applying them?
Two conditions must be met: you will need a transparent transfer pad made of silicone. It allows you to control the penetration of colored varnish into an already printed design. The second condition is to apply a translucent varnish on a white substrate.
Painting with such varnishes is possible only with a silicone stamp. How the master does this is shown in the video.
Now the masters answer the question: “What varnishes are suitable for nail stamping?” confidently answer: “Any!”
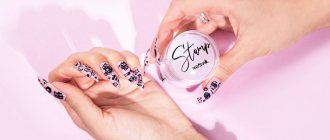
Stamping - a list of my tools for it and other bells and whistles down to the smallest detail (part 1)
I was inspired to write this article by this phrase from my search -
Thanks to this phrase from the search, I realized that this is an excellent reason to photograph everything I use in stamping, from basic tools to additional, not entirely necessary little things.