Home page » Beauty » Nails
Author of the article
Svetlana Pavlikhina
Reading time: 6 minutes
AA
Manicure at home is always simple, painless, and safe. Using a minimal set of tools and varnishes that match the color, you can get your hands in order no worse than in a salon. There are many nuances that can ruin the result.
If the nail polish bubbles or layers unevenly, this is a consequence of improper application. Below are answers to the question of what to do for a perfect nail coating without bubbles and roughness.
Why does my nail polish come out with bubbles?
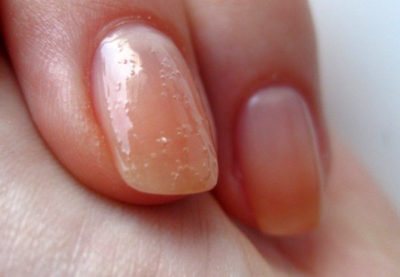
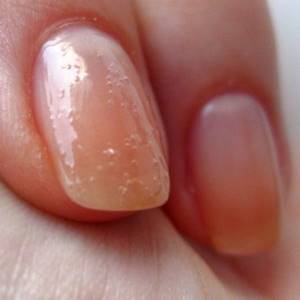
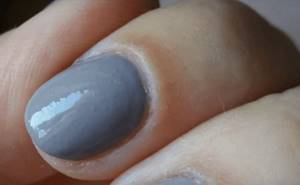
Often after applying varnish we find bubbles. This spoils the manicure, making it sloppy. It’s better to go with your nails unpainted than to appear in public with such disgrace. Most often, the woman herself is to blame for the appearance of bubbles.
Reasons for the appearance of bubbles:
- Poor quality varnish. This usually occurs with very inexpensive products. Manufacturers use substances as solvents that interact with air, forming bubbles
- Applying too thick a layer. It is necessary to put a little product on the brush and apply it in several layers. After drying, repeat painting again. So, there will be no bubbles
- Oily nail plate. Some solvents react with fat. As a result of the interaction, carbon dioxide is released, which appears in the form of bubbles
- Wet nails or water in the polish. Solvent and water do not mix well with each other. After the varnish dries, some of the water will evaporate, forming bubbles.
How to make a perfectly smooth manicure
Recommendations on how to achieve a perfectly even manicure are given by experienced nail specialists:
- Before painting your nails, pay attention to whether there are any greasy stains on the nail plates. Also, before painting, dry your nails and wipe with a dry cloth. The varnish lays flat only on a clean surface, without dust or other particles. Cuticle oil is applied after completing the manicure.
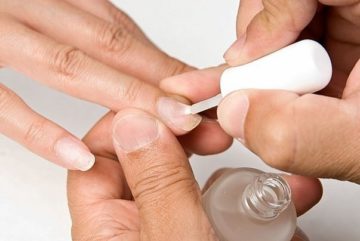
- Apply a degreaser before spreading the base. If this is not available, alcohol will do.
- Don’t be afraid to sand the surface, but you need to do this with a file, not with a coarse abrasive, but with a fine one. The lumpy surface looks untidy. If you also coat it with varnish, bubbles are 100% guaranteed. A special buff is sold for polishing.
- If the manicure is monochromatic, use 1 bottle of varnish. Moreover, you should not mix formulations from different manufacturers.
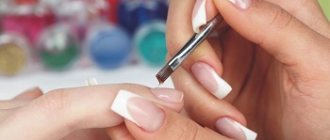
- Before use, brushes for applying designs are not washed with water, and it is also not recommended to leave them inside the bottle.
- The enamel will turn out smooth if the brush is placed in a bottle when painting, and then carefully wiped on the neck and, finally, applied to the nail plate.
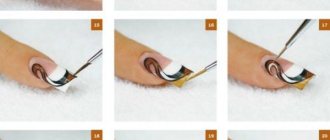
A step-by-step technique for carefully painting nails with varnish is described in the video instructions, which are presented to the attention of readers below:
If the varnish swells while creating a manicure, do not rush to get upset. You can always disguise defects, and next time, taking into account the recommendations of specialists, remove negatively influencing factors and achieve a perfectly smooth varnish coating.
Why does nail polish bubble when applied?
A manicure with bubbles can be considered ruined. You have to wipe everything down and spend time on beauty again.
Reasons for the appearance of bubbles when applying varnish:
- Lumpy nail plate. If you have uneven nails, use a thick base. In addition, you can polish your nails with a soft buff or file.
- Old varnish. During storage, some liquid appears on the surface of some varnishes. This is a solvent. If repeatedly mixed and applied, it may cause bubbles.
- Crooked and hard brush. If the brush is dry or has splayed bristles, use a different brush.
- Expired varnish
- Thick layer application
- Stir before application. Most often, we shake the bottle of product from top to bottom. This cannot be done. It’s better to rub the polish between your palms or soak it in hot water for a couple of minutes.
Why does the top coat swell after application and what to do about it
Bubble formation can accompany any stage of the nail coating procedure. The pros and cons of Max Factor lipsticks are revealed here.
Let's summarize the probable reasons why nail polish bubbles after application:
- Insufficient or insufficient nail preparation. Before coating with gel polish, the nail plate needs careful preparation: sanding with a buff or nail file, and treatment with a degreaser.
- Coating with a thick layer has a lot of negative consequences, including bubbles. To avoid their appearance, the varnish should be applied in a thin layer in 2-3 passes. When applying, the brush should be pressed tightly against the nail; after application, carefully hold the manicure with gel polish under the lamp for the required time.
- Improper storage of manicure materials. Store bottles of varnish away from sunlight and heat. After coating, screw the lids on tightly.
- Expired product expiration date.
- Hard brush.
- Incorrect mixing of varnish. Do not shake the bottle of product with vertical movements, as this promotes the accumulation of air inside. It is better to rub the bottle between your palms and warm it slightly in warm water.
- Moisture gets into the bottle.
A premium product at an affordable price – Pupa lipstick.
Poor quality treatment of the nail leads to its bumpiness and roughness, and violations in the treatment with dihydrate (degreaser) lead to subsequent deformation of the coating.
Why does nail polish bubble when it dries?
Often there are no varnish bubbles when applying, but after the coating dries they appear. This usually occurs due to improper drying.
Causes of varnish bubbling when drying:
- Using a hair dryer. With a strong air flow, it can penetrate deep layers of varnish and cause bubbles to form.
- Drying varnish in cold water. Often bubbles form after immersing your fingers under a stream of cold water.
- Washing dishes after the varnish has not completely dried. Don't rush with water procedures. It is necessary that the varnish remains on the nails for more than an hour and does not come into contact with moisture.
Reasons for the appearance of blisters after the coating dries
The formation of such deformation is influenced by 3 factors:
- layering the product multiple times;
- improper drying;
- use of oily nail and hand care products shortly before the procedure.
It is important to consider all these factors to create a neat manicure.
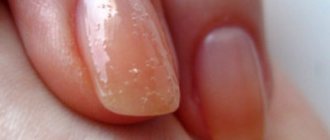
Reason 1: layering
If you layer the coating repeatedly, then after drying tubercles appear on the surface. It is not recommended to use more than 3 layers .
For the first application, use a base, then a color coating, then a fixer, glossy coating or top coat for gel varnishes.
If you apply more layers, their surface will become covered with bubbles, crack, or come off in layers the next day.
Reason 2: improper drying
You need to dry your nails under special lamps or in a calm state. Waving your arms is not recommended. When exposed to air, the varnish will form bubbles if the rules are not followed.
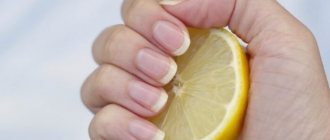
Reason 3: Using an oily hand product
It is not advisable to apply creams and oils before the manicure procedure.
This product and varnish products have a different structure. The cream always contains oils or fatty acids, petroleum jelly, glycerin, which are its basis. The reason for the appearance of roughness: these substances have poor contact with the varnish structure, covering the surface of the nail with a thin, greasy film, which does not allow the varnish to adhere to the upper stratum corneum, so irregularities appear.
Why does nail polish bubble on my nails after drying?
This often happens even after a salon manicure. If this gel polish and bubbles appear after drying in a lamp, then most likely this is the result of a low-quality product. Often, varnish, base and top coat from different manufacturers can react with each other, so use products from the same company.
If you use regular varnish, bubbles may appear due to using varnish that has dried pieces on the neck. In addition, it is recommended to blow into the bottle after applying the coating. This will displace the air and prevent bubbling.
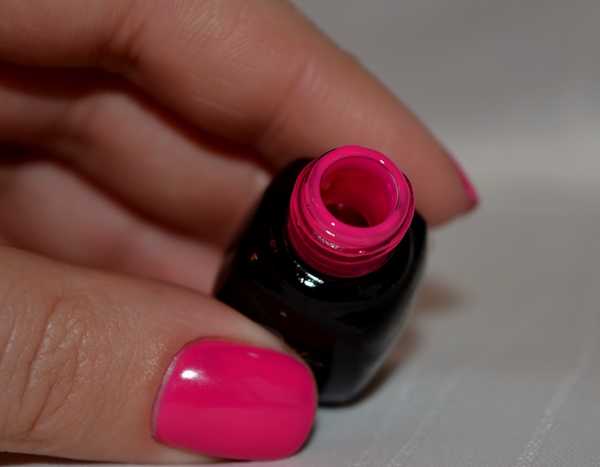
Shake the bottle before use
This mistake is very common both among ordinary women and not very experienced manicurists in salons. The bottle is shaken for two possible purposes:
- achieve a uniform consistency of the varnish;
- pick up enough substance on the brush if there is little left at the very bottom of the bottle.
Due to the shaking, the air and liquid in the bottle mix, and when applied, bubbles appear on the nail. If the varnish needs to be mixed due to its uneven consistency, then this must be done in advance and allowed to sit for at least a couple of hours before use. To make it easier to remove the remaining varnish from the bottom, it is better to tilt the bottle rather than shake it.
What to do if the varnish bubbles, how to avoid bubbles?
Of course, it is easier to prevent bubbles from appearing than to fight them. To do this, follow certain rules.
Ways to avoid blistering:
- Degrease the plate before coating. To do this, use regular nail polish remover or alcohol.
- During the hour before your manicure, try not to get your hands wet. The nail is saturated with water, which can then evaporate, forming bubbles on the coating
- Do not shake the polish before applying. Wipe the neck of the bottle with nail polish remover from time to time.
- Before application, immerse the bottle in warm water
- Do not rush to dry the polish with a hairdryer or cold water.
- Use base and varnish from the same manufacturer
"Bubble" manicure"
Every woman dreams of having beautiful and well-groomed hands. And the modern nail industry contributes to this. Now there are many technologies and products that will keep your manicure durable and unmatched for a long time.
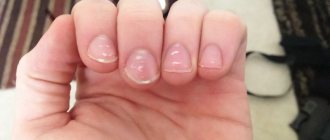
However, it happens that the coating does not adhere well, chips, cracks or bubbles appear. These defects will sadden anyone!
Do you want to avoid “bubble” manicure? Then, first, let’s look at the reasons for its appearance!
How to remove bubbles of nail polish?
There are special means for correcting uneven surfaces. The essence of the action of these products is to dissolve the top layer of varnish and dry it again. The following products can be considered the most popular:
- Pro Fix. This is a product from a well-known company. It is intended for leveling low-quality coatings
- Smudge Corrector. This is an Avon product. It also contains a strong solvent that removes bubbles and helps even out the coating.
How to smooth out raised bumps
You can get rid of blisters and even out a fresh layer using topcoats designed for this purpose. They can dissolve the top uneven coating and fill it with their own structure.
When dry, the treated surface becomes absolutely smooth and even. This fixative is a quick and easy way to remove bubbles from nail polish.
Which company is better to buy gel polish?
Nowadays there are a lot of products from different manufacturers on sale. They differ in quality and price. But nail service professionals prefer certain brands that have proven themselves well.
High-quality gel polishes:
- Kodi
- IBD
- CND
- Bluesky
- Canni
Of course, now there are a lot of more accessible products that can cost several times less. Only often low-cost gel polish has to be applied not in 2 layers, but in 4. In addition, cheap varnish can streak or even not dry at all in the lamp. Accordingly, do not skimp on health and beauty. There are known cases where cheap Chinese varnishes caused allergies.
We solve the problem on the spot
Completely redoing a bubbling manicure is not an attractive idea. Well, since the problem occurs often, the masters have several practical tips in store:
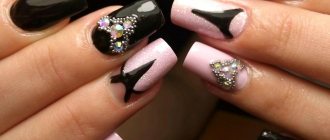
- layering accessories is the easiest way. Rhinestones, stickers, and beads will add chic and correct minor defects. 3-D flower applications help well;
- for serious problems, relief drawings will help. They are difficult to perform, but hide voluminous bubbles well;
- correction with special means. The top damaged layer is removed, the lower ones are leveled, and then the finishing coating is restored. Correctors can be purchased in specialized stores, but it is better to visit a salon.
One last piece of advice. If bubbles appear on your nails after polishing , you should start restoring the nail plates. At this time you will have to abandon complex treatments. But then the coating will fit perfectly and last a long time.
Which company is better to use shellac?
The pioneer in the production of shellac was the CND company. It is to her that millions of women are grateful, whose manicure can now last so long. But the cost of these varnishes is not the most affordable, so women prefer analogues. Bluesky and Canni products have proven themselves well.
They dry perfectly in Led, hybrid and UV lamps. In addition, the base and top of these companies allow you to achieve maximum adhesion of the varnish to the nail plate. This is what ensures long-lasting wear. In addition, these varnishes are inexpensive and are sold in fairly large bottles. If the varnish is applied correctly and the plate is prepared, there will be no bubbles.
Do not use three-phase gel polishes; they apply and dry well, but chip quickly. This occurs due to poor adhesion of the coating and the nail plate. For high-quality manicure, it is better to use three-phase systems. The top seals the varnish and gives the surface a glossy shine that lasts for a long time.
As you can see, in order to avoid the appearance of bubbles, you just need to carefully approach the process and carefully follow the rules. You also need to purchase high-quality coatings.
Drying errors
At the drying stage, no fewer mistakes are made than during coating application.
- Incorrect fixative. The product should be in the same line as other manicure materials.
- The lamp is faulty. It works, of course, otherwise you wouldn't be able to use the device. But the light source has exhausted its resource and no longer dries the surface as required by the technology. This is why gel polish bubbles after drying your nails .
- Use of available devices. What inventive and economical ladies can’t think of when doing home manicures. Dry your nails in front of a preheated oven, hold them under a hot hairdryer, and shake your fingers like the blades of a mill. The structure of the coating is damaged instantly. Delaminations and unevenness appear, and the gel begins to bubble during drying.
- Effect on nails that have just been dried with a lamp. Despite the spectacular shine after ultraviolet treatment, the surface was not completely fixed. The manicure needs about 1-2 more hours of rest for all layers to dry.
If immediately after the lamp you come into contact with water, household chemicals, touch the nail plates, and even hold hot objects, the coating can easily be damaged.
How to deal with a dried-on lid
Due to the contact of varnish or gel on the neck, the cap is firmly glued to the bottle. There are several ways to solve this problem.
Soaking in water
If the options for opening the bottle do not produce results, soaking the nail polish in a high-temperature liquid will help open the nail polish:
- Pour hot water into a shallow container.
- Place the bottle cap down in the water.
- Leave for 5 minutes and remove the bottle from the water. Now the bottle will quickly unscrew.
Only the plastic part is placed in water, because upon contact with heat, the structure of the product changes, becomes sticky, and delaminates.
Dried particles of a cosmetic product under the lid soften using a simple method:
- Place the top of the bottle under running hot water (the higher the temperature, the better).
- The bubble should be rotated slowly.
- The procedure takes from 30 seconds to 2 minutes depending on the water temperature.
- Dry the lid from moisture so that it does not slip.
- Under the influence of water, the material of the cap expands, the dried particles soften, try to unscrew the jar.
Important! Part of the bottle with dye must be protected from the stream so as not to spoil the contents
Available means
Increasing the grip force will help unscrew the bubble. To increase retention, an ordinary elastic band is used.
If you don’t have it on hand, use tape or a fabric bandage. Take adhesive materials with a minimum width of 1 cm.
A rubber band is placed on the cap of the bottle. It will take more than 3 coats to eliminate slippage. This will help grip the cap and make it easier to turn.
Application of tools
None of the methods helped to unscrew the bubble? Use physical strength
The most powerful life hack if the cap is dry is to use special tools, but with caution, because there is a risk of stripping the thread and damaging the bottle
Algorithm of actions:
Wrap the cap in cloth. Take pliers and grab the lid tightly. Turn the pliers carefully before the first movement so that the contents do not leak out. You can rotate the jar.. Instead of pliers, use any metal tool with a clamp - pliers, tongs, wire cutters
Instead of pliers, use any metal tool with a clamp - pliers, tongs, wire cutters.
You need to act carefully, without damaging the jar and preventing the contents from spilling.
Poor quality materials
This is the first thing the master thinks about when he notices that the gel polish is swollen. Why do manicure materials have different prices? Because they are of different quality. You should not expect that the budget series will not differ in application and wear from the luxury series.
Experts say that cheap gel polishes, especially from Asia, are the first step towards ruined nail health. They can cause allergies and even more serious conditions, such as onycholysis. Working with them is extremely inconvenient: the material “runs off the end”, streaks, and wrinkles when dried. Bubbles are common with low quality materials.
Here, experienced nail experts give their young colleagues only one piece of advice: it is better to purchase 2-3 high-quality products than 10 cheap ones. Don’t chase a low price, otherwise you won’t really learn anything and ruin your nails. Pay attention to reviews. And if you want to save money, monitor sales and catch promotions that are often offered by reputable stores with quality products.