Do you admire when women's manicures are made with different designs? What if we tell you how to create nail designs yourself, even if you are new to manicure. Simple designs on nails with gel polish for beginners to make money at home
Do you admire when women's manicures are made with different designs? What if we tell you how to design your own nails. Yes, first you will have to figure out the easy options. But remember that they look no less impressive than complex patterns. Today on Manicurchik.ru you will learn how to make simple drawings with gel polish that even beginners can easily do. Each of them will be supplemented with a list of necessary tools and materials, as well as instructions for implementation.
What you need for drawings
Before painting on your nails, you should acquire special equipment, tools, and materials.
List of necessary materials for any design:
- Everything for gel polish: primer, base, top.
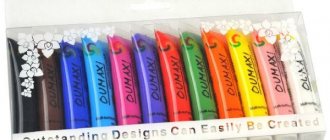
- Colored gel polish: You may need several colors.
- Lamp for drying the coating.
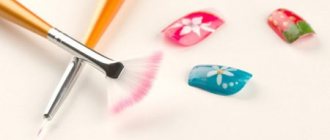
- Brushes, dots and other tools.
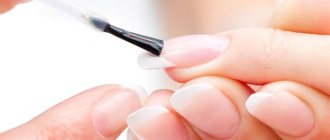
Before you draw a pattern, you should do a manicure. Then the nail is treated with a primer, a base and the main color gel polish are applied. Each stage, except for applying the primer, is dried in a lamp. Then you should choose the simple design you need. After applying it, the layer is dried and the top is applied. It should also be polymerized in a lamp.
on this topic:
How to apply gel polish at home: step by step (PHOTO)
What is the difference between gel and regular polish?
Nail gels vary in purpose. Among them are means for lengthening the nail plate, as well as strengthening biogels that help prevent delamination. The purpose of gel polish is similar to ordinary nail polish - it is used to decorate nails.
The main differences between gel and simple varnish can be seen in the table:
| Distinctive features | Gel polish | Regular varnish |
| Application | Preliminary preparation of the nail plate is required (filing, degreasing, applying a base). | Before you start, just degrease your nails. |
| Drying | Dries only under a special lamp for 2-3 minutes. | Air dries in 5-10 minutes. |
| Wearing period | The manicure remains beautiful for about 3 weeks. | Nails look untidy after 2-4 days. |
| Removal | Dissolves with a special liquid in 15 minutes. | Easily wiped off with a cotton pad soaked in nail polish remover. |
Another distinguishing feature between gel and regular varnish is cost. Gel polish is more expensive. And since the application procedure requires certain skills, they also pay separately for the services of the master.
Points
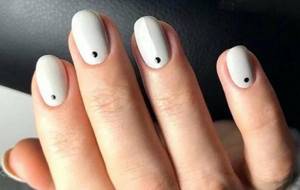
The simplest patterns are dots, peas and circles. They can cover the entire nail or create a simple pattern.
What additionally you will need:
- dots or needle;
- gel polishes.
A minimalist pattern with a dot looks great. For this design, it is enough to place 1 dot on the nail, preferably at the base. The most convenient way to do this is with a dots, or a needle. The technique of working with dots is very simple.
Manicure step by step with simple dot designs
- Drop a little gel polish onto a jar or surface.
- Dip the tool into the drop and transfer the dot to the nail.
- Another option is to make a pattern of dots.
- Using the same principle, dots are applied all over the nail or in the form of any pattern.
also interesting:
What is a rubber base? How to apply rubber base
Delicate manicure: fashionable design ideas (photos)
Manicure SUMMER 2021: fashionable nail design (PHOTO)
Red manicure: 50 fashionable ideas (PHOTO)
Video “Simple drawings for beginners: painting with dots”
Easy seasonal short nail designs
Manicures with seasonal motifs are no less popular than abstract designs, animal prints and art graphics.

Autumn winter
The autumn-winter period is the ideal time to experiment with simple patterns, textures and bright accents on transparent and dark surfaces. Asymmetrical and different hand designs, color blocking, silver “cat’s eye” with magnetic gel polish are types of nail designs that can always be presented in an interesting way.
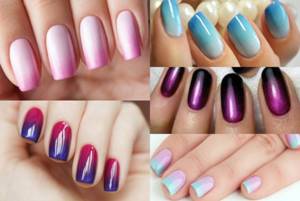
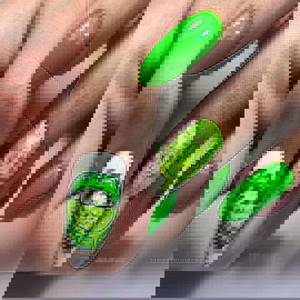
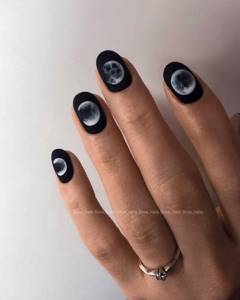
Spring Summer
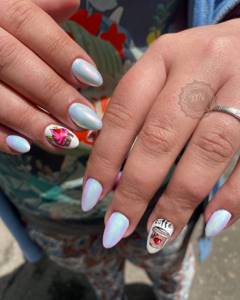
The simplest, but no less beautiful way to decorate short nails is a summer design with neon shades. Lunar manicure, neon strokes/blots on a transparent coating or a multi-colored rainbow of flexible ribbons - it's up to you. A spring version with pastel shades and single patterns of twigs/flowers and hearts will make the manicure aesthetic.
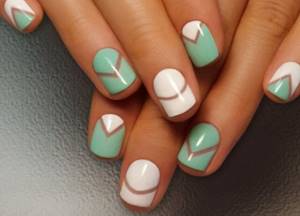
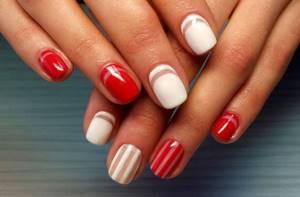
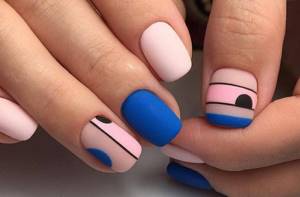
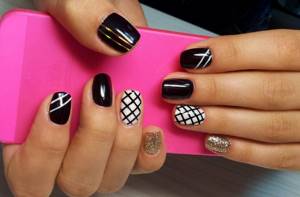
Stripes
If you are new to manicure, drawing from stripes can be done easily and simply. At the same time, there are many variations of designs with stripes that every girl will like. Using stripes you can create a checkered pattern.
What additionally you will need:
- fine brush: number 0, 00 or 000;
- gel polishes;
- adhesive tape: the required width (optional).
A pattern with parallel stripes can be drawn freehand with a brush. To make the drawing more colorful, alternate matching colors, and also make lines of different thicknesses. If you cannot accurately draw an even line, then resort to using adhesive tape.
To do this, after applying the main background color, remove the stickiness from the gel polish with alcohol or a degreaser. Apply the tape and apply gel polish over it. Then dry the drawing and remove the tape. This can be repeated step by step many times.
Simple designs on nails with gel polish for beginners
Simple designs on nails with gel polish for beginners
Simple designs on nails with gel polish for beginners
Video "Stripes"
The simplest options for beginners ─ step-by-step instructions
If the technique of applying such varnish is fully studied, it’s time to learn how to create masterpieces on your nails. Let's look at a few simple options:
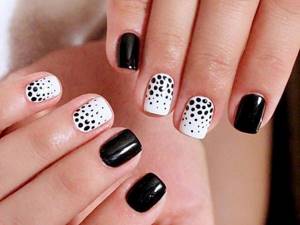
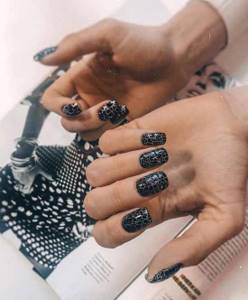
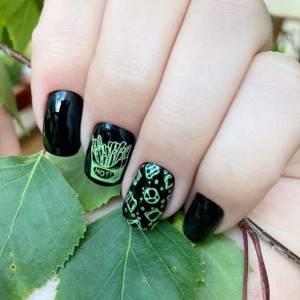
Option one
This method of application will not take much time and will not cause any particular difficulties in the process, but it will look impressive. You will need a dots with a small ball and gel polish in colorful and expressive shades; you can choose based on your own preferences or according to your clothing style:
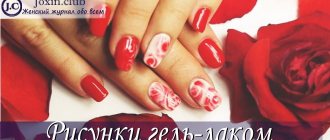
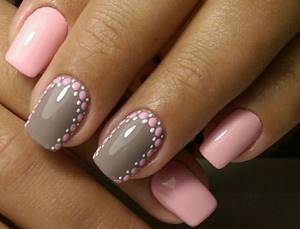
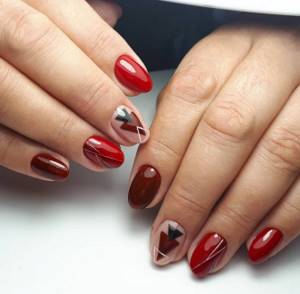
- Variegated nail design is offered on two fingers of your choice. The middle and ring fingers look impressive. Cover them with a layer of black varnish, and the rest in red. Dry with a lamp, and then use a special product to get rid of the sticky layer. This is done so that the varnish for the design does not smudge.
- On the main black color, make dotted patterns with white varnish. You can dilute the white spots with pink dots. The size of the circles is selected based on tastes. The main component of effectiveness will be the frequency of placing the dots; the denser they are placed, the prettier the manicure will be.
- Finally, you need to dry the resulting pattern and fix it with a top coat.
Simple, but tasteful!
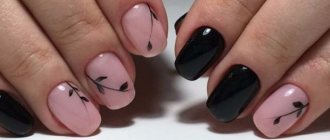
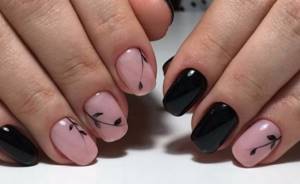
Option two
The idea of the nail design below can be easily implemented without any special skills:
- Cover your nails with a base coat.
- Next, apply a black coating and dry it.
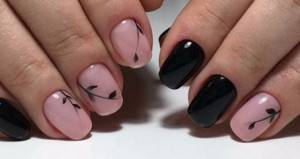
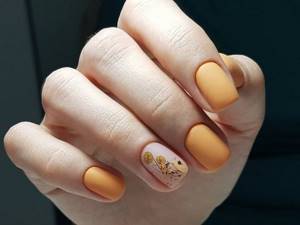
- Then cover your nails again with black, but with a thinner layer and paint on it in the form of daisies, using white and yellow coating colors. Dry the finished design under a lamp for 45 seconds.
Spectacular artwork is ready!

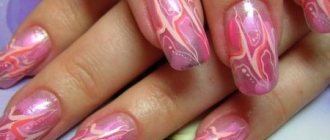
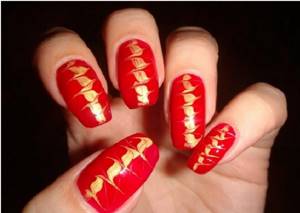
Option three
This manicure is an artistic painting on the wet surface of gel polish. Dots is again an indispensable assistant here:
- After applying the base coat, cover all nails with a layer of red gel polish. Let it dry and you can start painting.
- Using the gold color coating, apply three stripes on each edge of the nail.
- the middle of the nail plate with varnish of any color.
- On a wet surface , make zigzag movements with the dots so that the tones blend.
- Dry the resulting manicure thoroughly and secure with a topcoat.
As soon as you manage to complete your first drawing, you will want to create more! Enjoy!
Patterns
A pattern with simple patterns of elongated dots can be either an everyday option or an evening one.
Monograms on nails: beautiful patterns step by step
What additionally you will need:
- dots;
- needle;
- gel polishes.
Several dots are applied in a row onto the main color of the gel polish. This should be done using dots. You can put dots of different colors, and also add a small dot of a different shade to one large dot. Then draw a continuous line with a needle through all the points. This creates a beautiful elongated pattern.
Video “Simple Dots Patterns”
Using a sponge
There are two techniques for painting with a sponge. They differ from each other in the degree of complexity and the final result.
For this manicure you will need:
- Base coat. Better with strengthening function.
- Varnishes of different colors, but similar shades.
- A piece of foam rubber.
- Foil.
- Cotton swab to remove unevenness.
- Nail polish remover.
- Toothpick.
- Finish coating.
The first method is perfect for those who decide to do such a manicure for the first time. It is easy to implement.
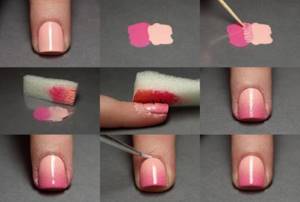
Technique:
- Any manicure begins with applying a base coat.
- Then the varnish of the color that will be the main one is applied. This should be the lightest shade. You must wait until it dries completely.
- You need to drip a different color of varnish onto the foil (darker or any opposite color, in which case the manicure will turn out brighter and more extravagant).
- Dip a sponge into the polish and apply to the base of the nail. Press down, but not too hard. Remove sponge.
- If several shades are planned, then the next color is applied overlapping slightly higher than the previous one.
- The third or fourth color, if desired, is applied to the tip of the nail.
- It is necessary to remove excess nail polish (on the cuticle and sides) with a cotton swab dipped in a special solution (nail polish remover, acetone).
- Secure the design with colorless varnish.
The second option at first glance seems easier than the previous one, but, in fact, requires more concentration:
- The nail is covered with a manicure base.
- 3-4 colors are applied to a piece of foil.
- Using a brush or cotton swab, transfer all the colors right next to each other to another piece. If there is free space between them, you can simply connect the layers with a toothpick.
- The sponge is dipped into the palette and pressed against the entire length of the nail.
- Remains of varnish are removed with a cotton swab dipped in liquid.
- After drying, the finishing coat is applied.
Advice! It is better to choose a sponge of small thickness and dense texture. A good option would be a regular eyeshadow applicator.
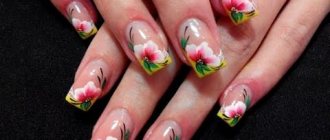
Flowers
Drawing beautiful flowers on your nails is quite easy. They can be built based on dots and patterns.
What you need:
- gel polishes;
- dots;
- needle.
You should start drawing flowers with the petals. To do this, rather large dots are placed in a circle. They will form the basis of future flowers. Afterwards, from each point you should draw a strip with a needle to the center. Do this for each point. Then, from each point, draw the needle outward from the flower to pull out the petals. Next, the drawing is dried in a lamp. After polymerization, do not forget to place a dot in the center to imitate the middle of the flower.
Video “Simple flowers for beginners”
How to choose a UV lamp for drying gel polish at home
Lamps for drying gel polish vary in power, as well as in the type of light emitters installed inside. Ultraviolet lamps dry not only gel polish, but also other extension products. Models with a power of 36 W are suitable for home use. Such devices have 2 disadvantages. Bulbs quickly burn out and require replacement with identical ones.
Other lamps will not work. UV radiation negatively affects the skin of the hands. After drying, it is necessary to use moisturizing oils and special creams. There are LED lamps that do not negatively affect the skin and dry the gel coating faster than ultraviolet lamps. The light bulbs in such devices last a very long time, and energy consumption is reduced by half.
For home use, devices with a power of 6 W are suitable. The disadvantage of such dryers is their high price.
There are hybrid lamps that contain both types of bulbs. They reduce the drying time of the coating from 2-3 minutes to 30 seconds. Their power is enough to dry any design, as well as gel for extensions.
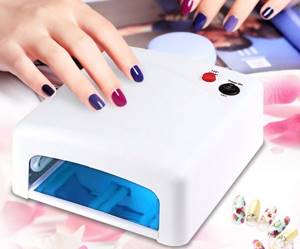
For home use, it is recommended to purchase small-sized devices with low power. Their cost is low and drying is carried out properly. Large and powerful lamps are needed for salons where there is a large flow of clients. In a large device you can dry both hands at the same time, thus saving time.
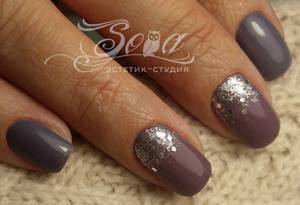
Glitter stretch
The most impressive design is made using shiny gel polish.
What you will need:
- gel polish with glitter;
- fan-shaped manicure brush.
First, choose where the shiny stretch will come from: from the base or edge of the nail. In this place the concentration of sparkles will be greater, and then will disappear. A strip of shiny gel polish 1-2 mm wide is applied to the selected beginning of the design. Then, using a fan brush, stretch this strip to the other side of the nail and dry the layer. Repeat these steps about 3 times. Each time, apply the strip thinner and stretch it less and less.
Video "Glitter Stretch"
Simple craquelure manicure for short nails
The artificially aged paint coating of nails looks beautiful and unusual when the bottom layer of the coating is visible through the cracks. Of course, gel polish or varnish with such an effect can easily be considered one of the easiest ways to design both long and short nails. This decor is simply covered with a top.
How can you make it easier to apply a design using stamping?
It’s easier to make any design using stamping. A large selection of patterns that can be made in a few minutes.
What additionally you will need:
- plate with a pattern;
- gel polishes;
- stamp;
- scraper.
Place a drop of gel polish near the pattern on the plate. It is stretched across the plate with a scraper. Then they lean the stamp against the pattern on the plate to transfer the gel polish. The design from the stamp is applied to the nail simply by applying it.
Simple and beautiful monograms with shellac, gel, acrylic
Creating designs in the form of monograms can be the main decor for a manicure or additional on some nails, using the main elements. The work process is carried out using acrylic, shellac, gel, and goes well with sparkles and rhinestones. Monograms are drawn using a needle or brush.
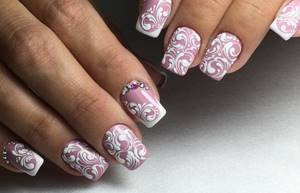
Volumetric
Volumetric monograms are patterns combined with volume that give a convex effect to the design and are quite easy to reproduce. To work, you will need gel paint that does not stick - the designs are applied over the topcoat.
Each component is drawn with a thick curl and immediately dried under a lamp for 10 seconds. It will be enough for the material to dry out and not mix with subsequent curls in the composition.
With French
First, a French design is made on the nails, decorating the top with patterns of simple weaves. The difference between this nail art is the spirals painted on the sides of the nail plate, usually on one side, complemented with rhinestones.
With rhinestones
Strokes with the addition of shiny stones look especially stylish and graceful on long nails. Professional craftsmen advise emphasizing the brilliance of the design by combining decorative elements and a plain background. You can use rhinestones to highlight the middle of the monogram, and also place it along the edge of the hole itself.
With acrylic powder or sand
To create monograms, you must also use acrylic powder and varnish with a sticky property:
- Cover the drawn pattern with a sticky layer of varnish.
- Using a wide brush, gently powder. The decor will be evenly distributed, the particles will be fixed without crumbling later.
- Dry the resulting manicure under a UV lamp.
This design is suitable as a DIY nail design. It should not be combined with other techniques.
With glitter
You should treat the nail surface in advance, painting it with a varnish base. Having decided on the choice of the desired sparkles, they should be applied with a hairpin or a toothpick dipped in water along the contour of the indicated pattern. The final stage of the procedure is drying and applying a bleached fixative.
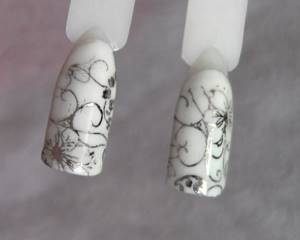
With openwork
The most complex and somewhat painstaking technology in manicure design. The finest mesh, similar to lace fabric, carefully drawn over the entire surface. To facilitate this method, there are special stencils. Working manually, with the simultaneous use of different tones, requires a clear image of the future picture.
Particular attention is paid to the correct combination of colors and color harmony. The openwork lines of the pattern should be clearly visible on the main covering.
You can diversify your nail design with drawings and decorative elements. A step-by-step brief description of the work processes for beginners and photos will help you acquire skills and learn how to combine various techniques for applying gel polish.
Great photo ideas
On a classic French jacket, it is not necessary to use two colors. You can diversify your manicure with the help of designs on extended nails, because this way the design becomes more complete and impressive.

@nail_idei1
When creating designs on extended nails, artists often resort to using matte varnishes, because this way the design looks more delicate and elegant, emphasizing every stroke of the design.
@narine_nails_studio
Ribbons are often used for geometric designs. But if you feel that such a simple solution is not for you, draw it yourself or ask a specialist to make drawings for you on your extended nails.
@simanogotki
For different times of the year, fashionistas choose thematic seasonal designs:
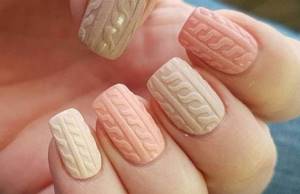
- Winter is characterized by snowy motifs, sweater nail designs, Christmas trees and other designs on extended nails.
- In spring, girls choose willow branches, tulips, lilies of the valley and other primroses.
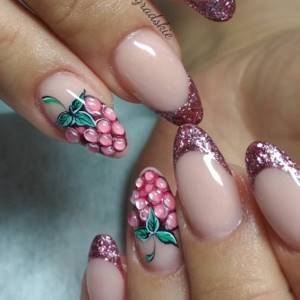
- In summer, designs on extended nails in marine and beach themes, with fruits and ethnic motifs are typical.
- In autumn, ladies prefer voluminous designs on extended nails in the form of raindrops, autumn falling leaves and other autumn motifs.
@beauty_bar_kol
@vi_vi.nails
@nogti.best @wow_studio_kh
Try creating designs on your extended nails yourself or contact a master to make your manicure truly unique!
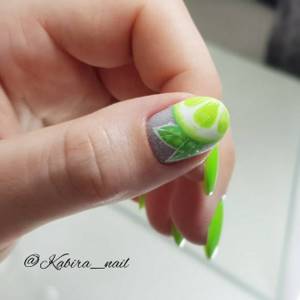
@kabira_nail
@sova_nails_obninsk
@nails_dudka_zp
Types of drawings used
A monochromatic manicure seems boring to many, and therefore girls turn their attention to the designs that can be made on extended nails.
Conventionally, all drawings are divided into 2 groups:
- Smooth - when the design turns out flat, it is not felt when running a finger over the nail and does not cling.
- Volumetric are drawings whose design has some volume and is felt through tactile contact.
@feeria_krasoti
@nogti_kaliningradskie
Based on the principle of decoration and theme, drawings are divided into many categories. For example:
- Landscapes;
- Animals;
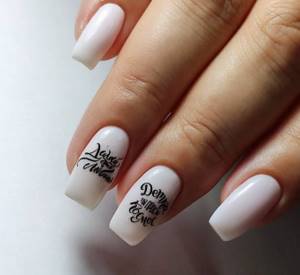
- Lettering;
- Smileys;
- Geometry;
- Flowers;
- Insects;
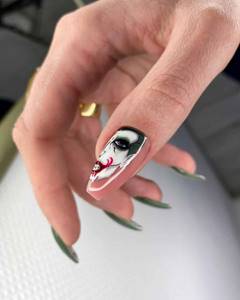
- Portraits;
- Fruits, berries and vegetables;
- Food;
- Etc.
@aynura_nails_master
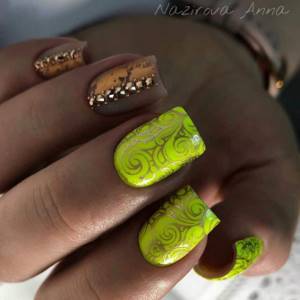
@nazirova_anna
@by_negolshova