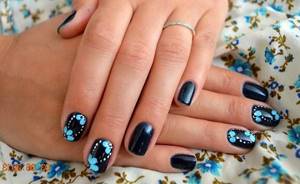
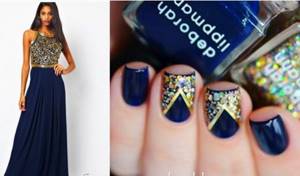
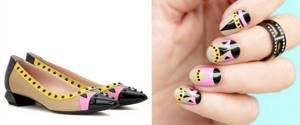
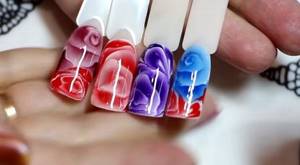
Rating: No rating

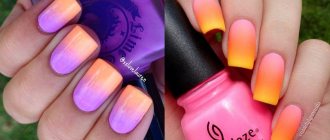
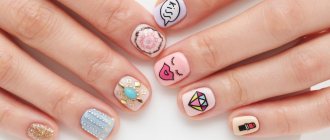
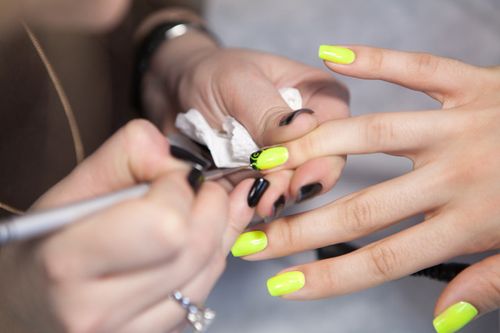
Well-groomed hands are a must-have for every modern girl. Gel polishes are a great help with this now. And to save time on trips to nail specialists, many people do their own manicures. And if there are no problems with a monochromatic coating, then the drawings frighten many with their far-fetched complexity . Now we will share several options for gel polish designs on nails for beginners. You will no longer look with envy at photos of beautiful nails with gel polish designs. Now your friends will beg you for the secret of such a beautiful manicure.
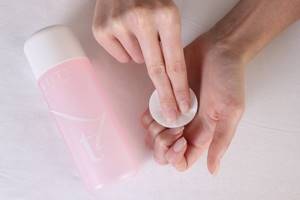
Before we move on to describing the various variations of gel polish designs on nails with step-by-step photos, let's look at the features of preparing nails.
Preparation stages
- With the help of a buff remove glossy shine from nails. Use nail files to give the desired shape.

- Degreasing marigolds and apply primer.
- We cover the marigolds thin base layer and dry it in a lamp.
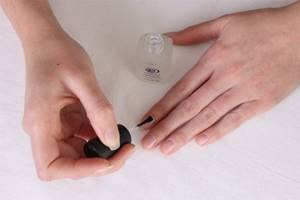
- We apply the varnish , which will be our main one, in two layers, making sure to seal the end. We dry each layer separately in a lamp.
- Add the desired drawing . Let it dry in the lamp.
- We cover the nails with the finish and dry them in a lamp.
- Using special means remove the sticky layer.
If you have a single-phase gel polish, then you need to apply it without topcoat and finish in three layers.
Volumetric designs on nails with gel polish
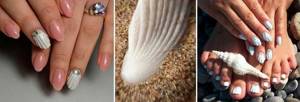
Sea shell
For this easy gel polish nail design, we will need just one color of polish and a medium-length manicure brush.
Execution steps:
- Sand the base color of the gel polish until it becomes matte.
- Using a brush and polish, draw lines from the edge of the nail towards the cuticle.
- It is imperative to change the pressure on the brush so that the line becomes thinner as it approaches the cuticle.
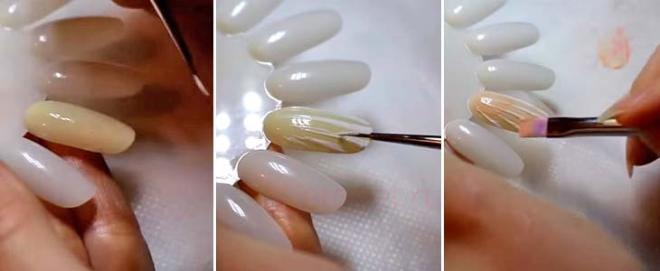
- You need to make several such lines throughout the nail to create a pattern that resembles a seashell.
- To make the drawing three-dimensional, you need to apply another layer of varnish along the lines.
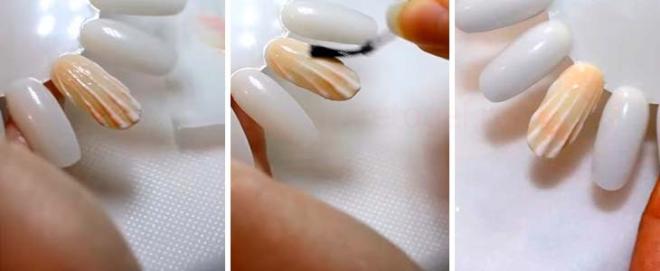
- We must dry each layer in a lamp.
For such a pattern, gel polishes of the same tone or different colors can be used.
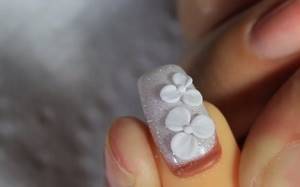
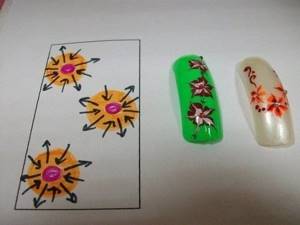
Modeling pattern
For such a beautiful design on nails with gel polish, we will need two polishes with contrasting colors, a brush and a buff.
Drawing technique:
- We cover the nails with the main color of gel polish.
- Using a brush and gel polish of a contrasting color, we make a few strokes on the nails to create a flower.
- To create volume, the contours of the flower must be applied in two layers. Be sure to dry each layer in a lamp.
- We cover the nail with a thin layer of base varnish so that the design is completely painted over. Dry it in a lamp.
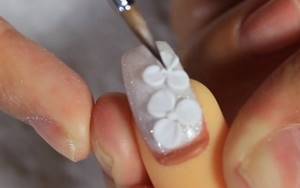
- To better highlight the drawing, you need to polish the contours with a corner of the buff.
- We cover the nails with the finish and dry them in a lamp.
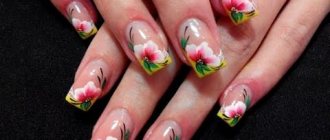
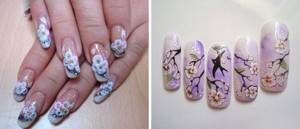
Japanese nail painting lesson for beginners
Japanese-style designs are very popular among young girls because they combine notes of tenderness and a certain severity. This painting can be done with any paints, but for beginners it is recommended to use acrylic, as it is very easy to use and apply. In the first stages of learning nail art, it is better to give preference to simple versions of sakura and light hieroglyphs.
Required materials and tools
- Acrylic paints purple, pink, white, black, green, yellow.
- Transparent varnish and light enamel.
- Brushes, napkins, water.
Execution steps
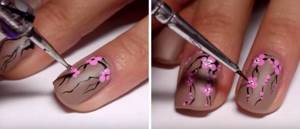
- We prepare the nails for coating, for this we do a cosmetic manicure, polish the plate with a soft nail file, and degrease the surface.
- Apply a transparent layer or any other fixative. After this, cover the nails with soft pink varnish.
- We dilute purple acrylic in water and apply it in uneven, sparse lines on the nail. In this case, the stripes can be short and long, wide and narrow.
- Dip the brush into water and shade the applied purple lines to create a beautiful background.
- Apply black paint with a thin brush, drawing out the sakura branches. For the drawing to look organic, the beginning of the lines should be thicker than the end. It’s worth imagining what a tree branch looks like in order to depict it correctly.
- On each edge of the branches we draw sakura inflorescences with soft pink acrylic, for this we put 6-7 dots representing petals. Some flowers may not be in bloom, in buds; it is better to depict them simply as a pink dot.
- Using white acrylic we draw the contours of sakura flowers, giving tenderness to the petals.
- Take a brighter pink shade and paint the middle of the flower with small strokes from the center to the edges. In this case, you do not need to add a lot of this color; it is better to use it in small quantities.
- We place a yellow center in the center of the sakura flowers. This should not be done in buds.
- On some branches we draw green leaves, and you can mix this shade with white acrylic.
- We outline the contours of some large flowers with a thin black line to express them.
- On an empty background, it is possible to add decoration in the form of white drops to make the design more impressive.
- We cover our nails with a transparent fixative varnish and admire them every day.
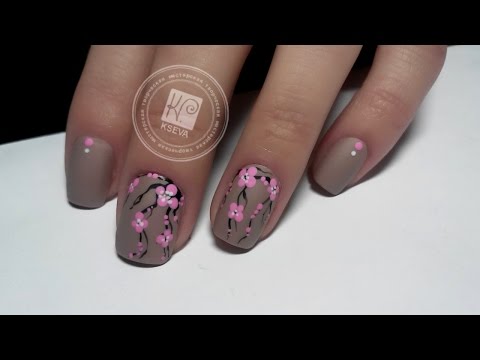
Sakura on nails | Cherry Blossom Nails Tutorial | KSEVA
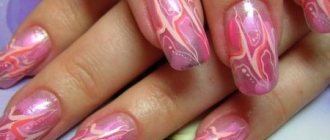
Nail designs using wet gel polish
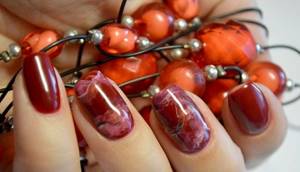
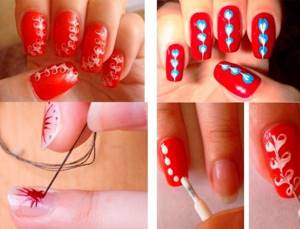
Imitation garnet stone
To make such a drawing, we will need red gel polish, a brush and several light-colored polishes.
Execution steps:
- Apply the base color varnish in two layers and dry each one.
- Using a brush, apply several dots of light varnish.
- Using a brush, blend the dots of the varnish in different directions. The stains should look like stains in stone.
- Dry it in a lamp. Apply the finish and dry in a lamp.
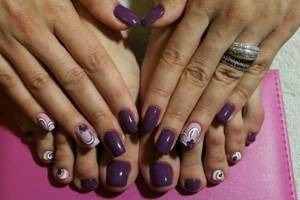
Spirals
To make such a drawing, you will need a dotter, several shades of gel polish and a toothpick.
Execution steps:
- Apply the main varnish in two layers and dry each one.
- Using dotter and gel polish of a different color, we randomly place dots or lines.
- Using a toothpick, we run along them so that we get spirals and streaks.
- Dry it in a lamp. We cover with the finish and send the nails to dry in the lamp again.
Now we will share with you a simple step-by-step nail design using wet gel polish.
Circles-dots
For this version of the drawing we will need a dotter and several shades of gel polish.
Execution steps:
- Dry the first layer of the main gel polish.
- Add another layer of the main color of gel polish.
- Using a dotter, we place dots of a different color.
- We wait a few seconds. Our dots should blur. After this we dry it in a lamp.
- Apply the finish and dry it in a lamp.
To add even more variety to this pattern, you can use different sized dotter tips .
A toothpick is also an option.
Using varnishes of various shades and a regular toothpick, you can create an elegant option.
For work you will need the following materials and components:
- varnishes (shades can be chosen independently);
- toothpicks (2-3 pcs);
- paper napkin;
- fixative;
- base for the main shade.
The sequence of creating the selected pattern assumes that the base will first be applied and allowed to dry. Then you need to apply the main shade.
Options for geometric patterns on nails with gel polish with photos
To make such a manicure, we will need gel polishes of two colors and a brush.
Technique:
- We apply the gel polish, which will be our main one, in two layers. Dry each layer thoroughly in a lamp.
- Using a brush, draw a triangle, the base of which will be near the cuticle.
- Dry it in a lamp. Cover with finish and dry again in a lamp.
The triangle can be drawn inside, or you can leave only the outline . You can make several triangles on the nail.
Another option for geometric manicure are lines that can be drawn arbitrarily on the nail.
How to paint with gel paint on nails?
Gel paints have high density and pigmentation. They are easy to draw various design elements, including fine lines and raised details. It won't spread. Usually one layer is enough for the image to be bright.
Step-by-step instructions on how to learn how to paint with gel paint on your nails:
- Apply gel paint to the finished manicure covered with top coat.
- Start drawing from the central element.
- Dry the final result in a lamp.
- Cover with top coat if desired.
Choose gel paints from trusted manufacturers. Cheap options often turn out to be fakes. They apply poorly and are of poor quality.
Experiment with gel paints from different manufacturers. Only through experience can you choose the best option for yourself. Keep in mind that the paint color should be rich. The consistency should not be liquid so that it does not spread during drying in the lamp.
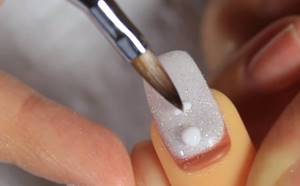
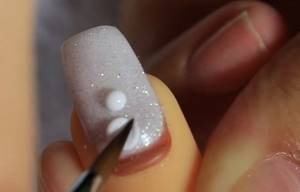
Dot designs on nails with gel polish
Flower
On the base varnish we place several dots of acrylic paint so that we get a flower. The points should touch tightly . The center of the flower can be made with acrylic paint of a different color.
Flower with elongated petals
Cover the nail with the main color of gel polish. a dot with dot, and then stretch it out so that we get petals.
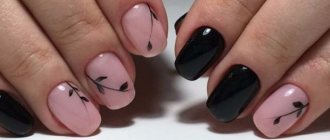
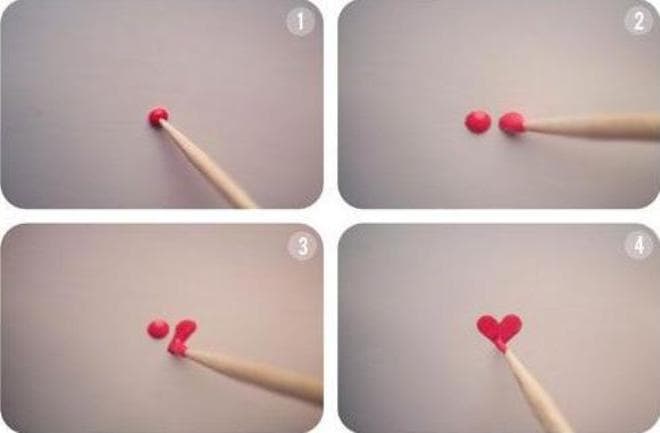
Heart
On the gel polish of the main color, put two dots with a dot and stretch it down diagonally.
Rows of dots
- using dotters with tips of different sizes, you can make a series of dots, in which each subsequent point will be less than the previous one.
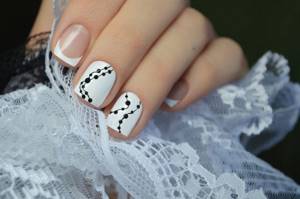
- using dotter you can make a variety of drawings, the outline of which will be points.
Beauty and subtle style
Many representatives of the fair sex wonder whether it is possible to paint roses with gel polish. Of course you can!
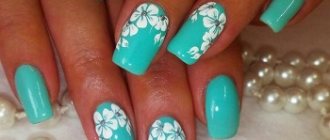
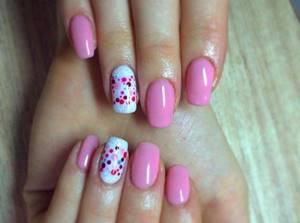
Do not think that this product can be used exclusively as a monochromatic coating. It opens up wide possibilities for the master in terms of inventing complex images and luxurious bows. You can play with color and texture, complement the design with stones or rhinestones, or make a jacket with a floral print. You can combine gel and acrylic nails by covering them with a gel polish design. But you can learn to create original drawings with your own hands.
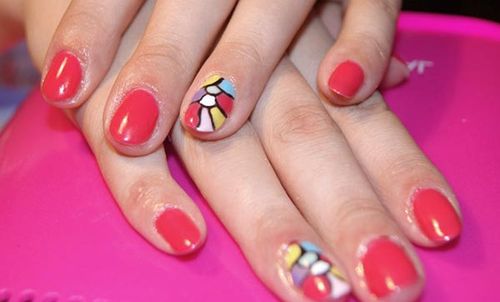
Nails like the one in the next photo look incredibly well-groomed and attractive. They successfully emphasize the beauty of an image of any style and color, which is why such a manicure can very often be seen at fashion shows of branded looks. And although creating flowers and patterns on gel polish with gel paint is not very easy, it can be learned.
How to make spectacular nail designs with gel polish at home
To begin with, you can find on the Internet photos of new designs on nails with gel polish, so that you have an example before your eyes. The simplest option would be a manicure using dotter .
It does not require any special skills . If you know how to draw, you can try applying a design to your nails with a brush.
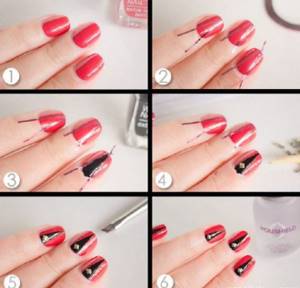
Geometric ornament
To make geometric prints and unique patterns, you will again need a brush. In this case, it is important to imagine in advance or find on the Internet a print in this style. Then it will be very easy to repeat it. The brush easily draws straight and winding lines, zigzags and squares. How to draw circles? Use the dots while the nail is wet. Is it possible to combine the ornament with a classic French jacket? Yes! Perform it as an addition on several fingers of both hands.
This manicure will highlight your individuality and sense of style.
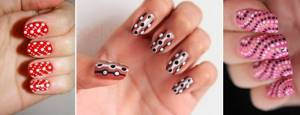
Charming peas
To create a polka dot design, you need to cover the nail plates with a base and dry them in a lamp. Next, the thumb and index fingers along with the little finger are covered with black gel, the middle and ring fingers with white.
After drying your nails in a UV lamp, cover them with a second layer of gel. This is necessary for a brighter color. After drying, carefully remove the sticky layer, and only then can you proceed to applying the polka dots using dots.
Choose contrasting colors: make white polka dots on a black nail, and black polka dots on a white nail. They must have the same diameter. To prevent the pea from spreading, you should not take too much dosage. Each nail must be dried separately so as not to damage the design. Painting on gel polish with paint is very easy, if you don’t rush, follow the step-by-step instructions and adhere to the recommendations we described. But if you don’t understand how we paint with gel polish from the video, you can determine the nuances of the process. Look at it carefully and follow it exactly as described.
Combination with other types of design solutions
- Manicure options in which the nails are covered with gel polish with a pattern (pictured above), Suitable for a variety of styles clothes.

- For evening wear It’s better not to choose geometric ones drawings.
- It is important that the color of your polish didn't create too much contrast with the color of your clothes.

- Drawings with dots can be combined with geometric patterns.
- Three-dimensional drawings and drawings on wet gel polish are self-sufficient. Therefore, it is better to combine them only with a manicure without a pattern.
- If you do a manicure with a pattern, then pedicure should be with a similar type of pattern.
Whatever patterned manicure you choose, the main thing to remember is that it should be neat. Because hands are an indicator of a girl’s well-groomed appearance. What nail design do you prefer? Share your opinion about manicure with drawings in the comments.
Five ideas for lovers
Tanya will share five easy-to-execute options that do not require special skills. The first design is formed from five black dots that are given a blurry effect. The second imitates marble - lines on a white background are drawn in gray and black. Golden stars on a purple background look bright and are easy to make; you just need to have glitter on hand. If the choice of varnishes is minimal, it is convenient to paint bright butterfly wings with lipstick. The last option is blue sparkles on the same background. Colors can be varied at your discretion, inventing new compositions.