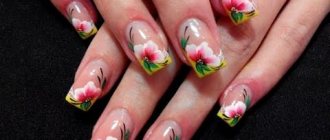
The image of a modern lady should be perfect: from the tips of her hair to the tips of her nails. That’s why it’s so important to follow fashion trends in hairstyles and manicure. The nails of a well-groomed girl should look neat and stylish. At the same time, you don’t have to do a discreet manicure; you can experiment with the design. Thanks to modern tools, you can create real masterpieces on your nails. A trendy way to draw attention to your hands is with a gradient manicure.
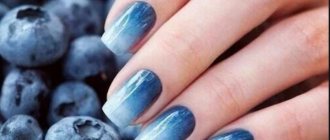
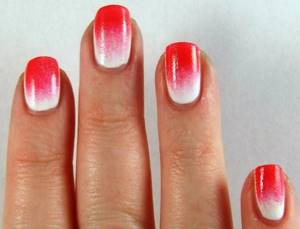
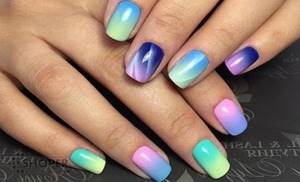
Gradient in light colors
Types of gradient manicure
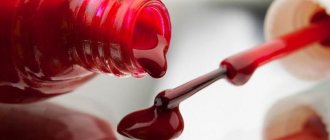
A gradient is a nail design that uses several shades of polish that smoothly flow from one to another. It looks impressive on paper, but even more impressive on nails.
Types of coating using gradient technique
There are several types of gradient manicure.
Their choice largely depends on the shape of the nails and their length:
- Vertical is a traditional gradient option. It can be called universal, as it suits all nails. With a vertical manicure, the transition of shades occurs from the root part of the nail to the tip. A video tutorial on gradient gel polish on short nails can be seen below.
- Horizontal. The color changes from the left side of the nail to the right. More suitable for medium-length nails. This manicure can visually lengthen your nails.
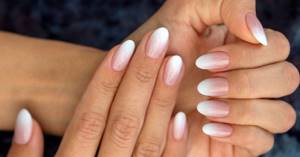
- French. White is applied to the edges of the nails and made more transparent closer to the roots. This type of manicure is suitable exclusively for girls with graceful fingers and long and thin nails.
- Gradient with transition. Fingernails are painted with different gel polishes, close to each other in tone. This creates an overall picture of the transition from dark colors to lighter ones. This option is the simplest and is suitable for short nails.
- Linear. Thin lines, straight or curved, are drawn on the nails. Each new line is made a tone darker than the previous one.
Vertical gradient
For a gradient, both tones of the same color and completely different colors are used. Usually they take from 2 to 4 colors.
A manicure with a color transition can be done with regular varnishes, but everything will have to be done very quickly, before the varnish has time to dry. It is much more convenient to create a gradient on your nails with gel polish. This material does not dry in the air, and besides, such a manicure will last much longer than a traditional one.
Horizontal Gradient
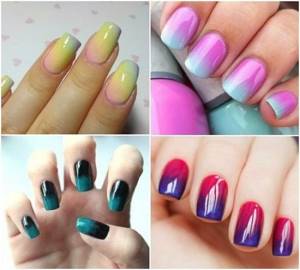
Ombre manicure – about smooth transitions
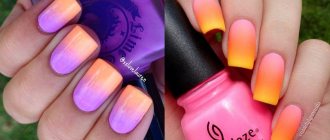
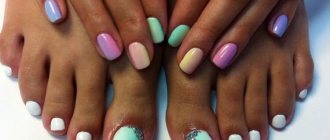
Ombre manicure, or as it is also called, gradient or degrade, is one of the popular types of manicure, since the technology for its implementation is very simple. Moreover, it is suitable for both short and long nails. This method visually lengthens the nail. Its peculiarity is the transition of colors with a blurred border both horizontally and vertically. The color palette can be varied, the most daring, fantasy combinations are possible. Ombre means “darkened” in French. There are a huge number of ombre options. These include bright acidic colors, restrained pastels, and contrasting ones. A transition manicure is universal.
Nowadays, it is not surprising for a girl to go to a beauty salon and “order” a certain nail design from the master. But previously, the field of manicure was so primitive that even banal nail cleaning could only be afforded by people of privileged status. It is believed that the first noble lady to have her own personal manicurist was the ancient Egyptian queen Nefertiti and, by the way, it was she who came up with the idea of gradient decor. True, there are a number of nuances here. In those days, nails were covered exclusively with natural and affordable dyes, often food products or ocher. According to archaeological excavations, even during burial, the Egyptian queen had an improvised manicure with a rich pigment at the base of the nail bed, which slowly lost its original intensity towards the end of the free edge.
Gradient manicure in a modern and familiar interpretation appeared much later - in the 80s of the last century. It was brought into fashion by the then famous Golden Hollywood actress, Rihanna Daymond. Appearing on the Red Carpet at the Oscars, the spectacular beauty literally made a splash with her sexy floor-length satin dress and unusual “vampire” style manicure. The public liked the original nail art so much that the very next day after the release of photos and video reports from such a significant cinematic event, lovely ladies attacked nearby beauty studios with a request to implement a similar decor on their fragile fingers. This caused a wave in the fashion industry, as more than 16 designers, including Gucci, Prada, Dolce and Stefano Gabanna, sent models wearing jackets and skirts with smooth color transitions onto the catwalk. And in the 2000s, hairdressers, inspired by the gradient technique, came up with the most textured, stylish coloring called “ombre”.
By the way, there are a thousand and one varieties of such a sensational gradient manicure; ProstoNail specialists have collected information about the most popular of them into a compact cheat sheet.
| A variety of gradient | Features and Specifications |
| Simple | This type differs from the others in that the gradient effect will not be created on each nail, but on the entire hand as a whole. It is perfect for manicure at home and is created using 5 shades of the same color. To do this, a darker varnish is applied to the thumb or little finger nail. Next, the nails are painted in increasingly lighter colors. Alternatively, 3 shades can be used. In this case, the middle nail will be either the darkest or the lightest. |
| Classic or horizontal | The gradient is made along the width of the nail plates, and the colors themselves are mixed horizontally |
| Vertical | Created as an alternative to the classic horizontal ombre. It is not difficult to guess that the gradient is placed vertically |
| Variations on the theme of French manicure | Essentially, you are doing the same discreet French in a calm, beige and white color scheme. True, instead of clearly drawing the smile line, you blur the border of the free edge onto a general nude background |
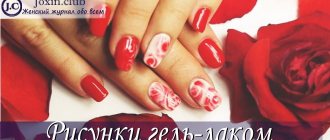
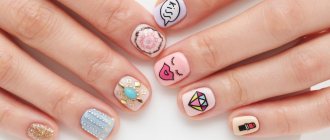
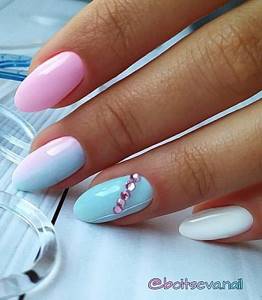
| With nail art | In this case, the vertical or horizontal gradient is only part of the overall pattern or an effective background for it |
| Brilliant | The transition on such nails is carried out not by playing with the degree of pigment saturation, but by playing with the degree of concentration of the sparkles themselves |
| Linear | The design on the nails is often represented by vertical lines, which are carefully drawn with thin brushes. This type of nail design does not imply blurring the boundaries between colors. A good example is the diamond geometric gradient. |
| Chaotic | There are no limits to human imagination. Only you decide how, where and on what part of the nail or marigolds there will be an area with the desired gradient |
As you can see, there are a lot of interesting, original and completely unusual ways to emphasize the elegance of your thin fingers. A large portion of inspiration awaits you in the selection below.
Nail preparation
Before creating a gradient, you need to prepare your nails:
- Sand the surface of the nails with a buff.
- Adjust the length.
- Apply primer to them and dry under a UV lamp. The primer makes the nails drier, improving their adhesion to the polish.
- Apply base coat and dry it. Usually the base is transparent, but sometimes it can have a pink color.
Nail preparation
After preparing your nails, you can proceed to their design.
Creating a gradient with a sponge
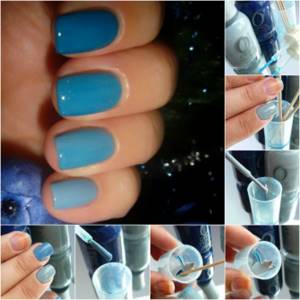
The most common way to create a gradient on your nails involves using a sponge or an ordinary kitchen sponge. This method is recommended for beginners.
Step-by-step design process:
- Take a sponge and cut off a small piece, slightly larger than a nail.
- Apply a couple of drops of varnish of different colors to the surface of the sponge. Mix drops of varnish with a brush to create a color stretch.
- Apply the sponge to the nail so that the gel polish imprints on it. The sponge is applied with light, patting movements. To fix the color, the procedure can be repeated, but only after the first layer has dried.
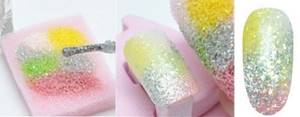
Gradient sponge
In addition to the above, there is another way to make a gradient of gel polish with a sponge. It involves using a tablet on which gel polish is applied and the transition is shaded. You can use any surface as a tablet - plastic, glass, silicone. To create a transition, take an orange stick or a regular toothpick.
In the future, the sponge must be slightly moistened, pressed onto the resulting range, and then onto the nail. You shouldn’t rub your nail with a sponge for a long time, otherwise the varnishes will mix and give a dirty tint.
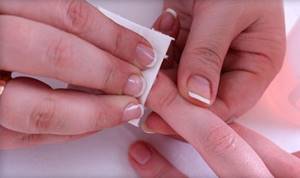
After the nails are completely dry, you need to remove any remaining polish from the skin. A cotton swab is suitable for this, which must be dipped in nail polish remover in advance. The process of creating a gradient using a sponge on short nails can be seen in the video.
Advice! To quickly clean the cuticle and side ridges of the skin, you can use a professional product - Defender. It is a quick-drying product that forms a film on the skin, which is easily removed from the skin after painting the nails.
How to make a gradient on nails with polish?
Choosing the right shades is not as simple a task as it might initially seem. They can be either the same color or contrasting. But if you still want a similar palette and have difficulty choosing, there is the opportunity to purchase a special set of varnishes containing up to 7 shades. Be that as it may, you need to have a pastel-colored polish or a rich white – they are excellent as a base.
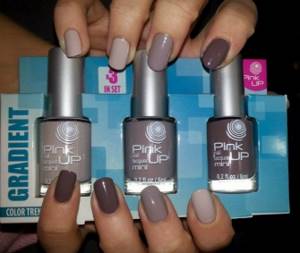
Ready-made set of gradient varnishes
IMPORTANT: Make sure that the varnishes have the same texture.
- Varnishes do not necessarily need to be applied to a sponge. As an alternative, you can smear them on the lid or plastic film. In this case, the strokes should be adjacent to each other, and the joints can be smeared with a toothpick or some kind of sponge. After this, you can transfer everything to the nail plate.
- There is one secret to applying varnish: for example, if the coloring involves a transition of colors from light at the base to dark at the tip, you need to make this dark color the base color. If, on the contrary, from dark to light, then light is initially applied to the entire plate. By the way, in this case, you can apply a non-base shade to a sponge and simply stamp it on the tip of the nail
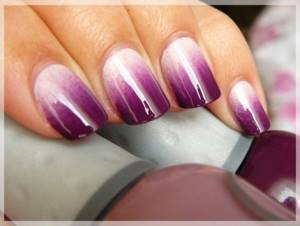
Transition from light to dark
Another option for transitioning from light to dark
Transition from dark to light
- The varnish can be evenly distributed over the plate thanks to the finishing coating. By the way, thanks to it, the boundaries of the shades become more blurred, and the surface of the nail itself is evened out.
- The latter is especially true if the varnish was applied using a sponge and pores from it are visible on the surface. Color stripes can be placed both horizontally and vertically - it all depends on the idea.
- There is a little trick: so, if you want to get as many shades as possible, try mixing different colors of varnishes on some surface. White and black are especially suitable for this - they allow you to successfully recreate dark and light shades
Horizontal stripes
vertical stripes
IMPORTANT: In order to create shades that are as close as possible in the palette, you should work hard, adding the same number of drops of varnish each time you mix. For example, try to increase the number of drops by two over and over again - this will help you achieve a smooth color change. If you like this method, apply the second layer immediately after the first has dried, and only then start experimenting with mixing again.
Mix colors yourself to achieve the desired shade
Using a fine brush
Creating a gradient with a brush is not difficult, but for everything to work out successfully, you should first practice not on your nails, but on third-party objects.
Graphic gradient with thin brush
Step by step creation of a gradient:
- Two (or more) colors are selected and applied in two stripes to the sanded nail. Varnishes should be applied in equal proportions.
- Take a brush (size zero), soak it in degreaser and squeeze it out.
- The brush is passed along the junction of colors, forming a smooth transition between them. The procedure can be repeated several times.
After each stroke, the brush must be thoroughly wiped with a napkin. There should be no lint left on it.
It is necessary to dry the coating thoroughly
Gradient using a fan brush
You can make a gradient with gel polish using a fan brush.
To do this you need:
- Choose two colors: dark and light.
- Apply gel polish of the background color to your nails. It will be visible at the roots. It is recommended to choose light colors as a base.
- Mix both colors on a tablet to obtain a medium tone. Cover the middle of the nail with this tone, marking the transition point.
- Apply a darker color to the tip of the nail plate.
- Take a fan brush and start shading with light hand movements.
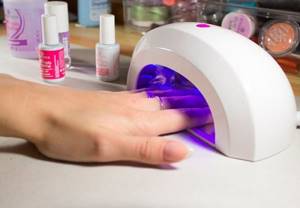
- Dry the nail under the lamp.
- Repeat the procedure to achieve brighter colors. In this case, the base color should be applied only to the root part of the nail.
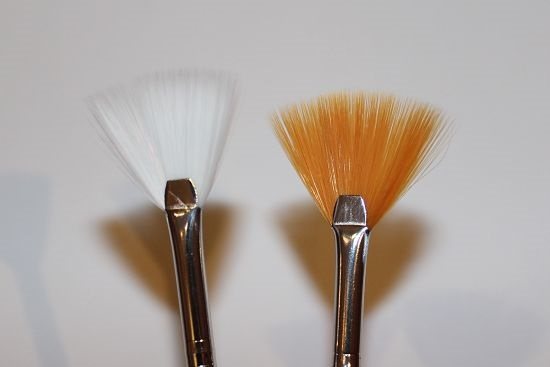
Fan brushes
The ombre effect on nails looks very attractive. It can be done in both pastel and bright colors. The process of creating a gradient on nails with a brush can be seen in the photo.
Ombre or gradient: features of the technique
"Ombre" is translated from French as "darkening." The technique means creating blurred boundaries between shades. More often they use the flow of a light tone into a darker one.
This effect is sometimes called "degradation" or "gradient". The difference between the concepts is minimal:
- Ombre implies different color saturation and smooth transitions.
- Having a visible boundary between tones or using different shades on each finger to create a consistent range is suitable for defining a gradient.
The application technique is almost the same. Only professionals in the field of nail art can discern the nuances.
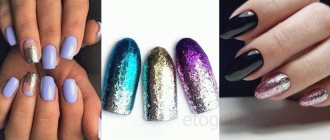
Gradient with glitter
An interesting option for nail design is creating a gradient with glitter. As a background, you can use a plain gel polish or a ready-made gradient. Sprinkle glitter onto the newly applied layer of varnish using a dry brush. More glitter is applied to one part, less glitter to the second. The glitter gradient can be made both vertical and horizontal. It will shimmer beautifully and look especially interesting on short nails.
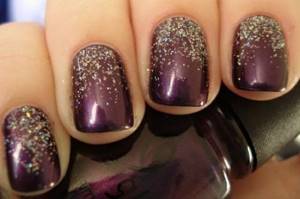
Glitter Gradient
Types of gradient in manicure
There are several types of gradient in nail art: horizontal, vertical and angular.
Horizontal is the most popular gradient technique. This manicure can be complemented with stickers, inscriptions or glitter.
A vertical gradient visually makes nails longer. It goes perfectly with both pastel shades and bright ones.
Angular gradient - a diagonal or angular transition of colors along the nail plate.
There are dozens of types and options for ombre manicure. Let's look at the most trendy ones for the 2021-2022 season.
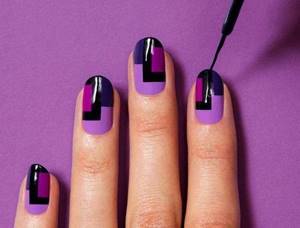
Graphic gradient
In 2022, the trend is gradients with geometric patterns. To create it, you need to prepare a thin brush and two gel polishes: colored and white. The geometric gradient is drawn step by step, gradually diluting the bright color with white. This type of manicure can be challenging for beginners.
The varnish is applied in a thin layer so that it does not spread over the entire surface of the nail plate. They begin to draw from white to dark. When creating this type of manicure, there is no need to dry your nails after each step. Only when the drawing is completely ready are the hands placed under a UV lamp.
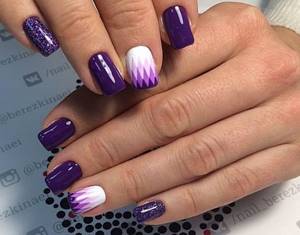
Graphic gradient
The most popular geometric manicure options are those with diamonds and circles. A spectacular gradient manicure design with geometric shapes can be seen in the photo.
The final stage of manicure
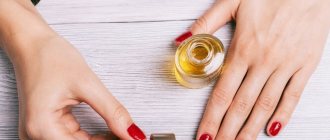
After creating the design, you need to dry your nails under the lamp for 4-5 minutes. After this, you should fix the gel polish with a top coat. After the nails are completely dry, the cuticle must be lubricated with a special oil.
Author's gradient
Gradient gel polish manicure is a fashionable and practical way to decorate your nails. Many options for performing multi-color manicure allow you to find a suitable design for every woman. The technique of creating a gradient manicure is not complicated, but it does require patience and time. Step-by-step implementation of the technology for creating a gradient will make your nails beautiful even at home.