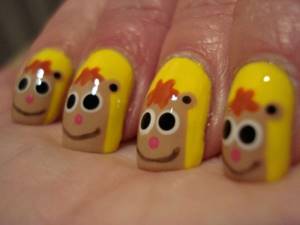
Childhood is a delightful time that you want to return to again and again. Spring is that time of year when girls can afford to be a little brighter. A manicure in the SpongeBob style is a good way to add brightness to gray everyday life and play a little into childhood.
To play a plot based on a famous cartoon on your nails you need: a basic base, several types of varnish: yellowish, blue, dark and snow-white, drying and fixative. SpongeBob or SpongeBob is a South American cartoon character. The rights to play belong to the Nickelodeon TV channel.
Children's manicure - what kind of procedure is it?
Many mothers believe that a young lady should be taught to take care of herself from an early age. And if a girl learns to do a beautiful manicure and take care of her hands, then this habit will remain with her for the rest of her life.
The best age to teach a child how to care for nails is 10-12 years old.
But this does not mean that children’s hands should be ignored at an early age.
You can give a baby a manicure as early as 5 years old, but this process must be approached with the utmost caution. After all, nails and skin at this age are very delicate.
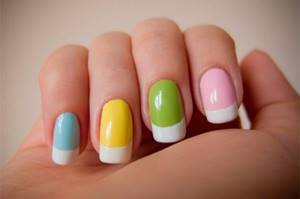
Unusual multi-colored jacket
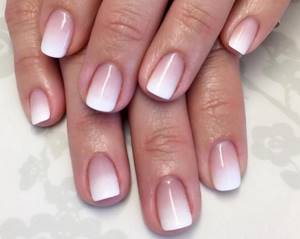
What is a gradient manicure?
A gradient or “ombre” is an effect in which one color smoothly transitions into another. Over the past few years, everything has been decorated with a gradient: hair, fur, clothes, shoes, so it is natural that one day ombre manicure appeared.
This manicure can embody the most original color combinations, as well as the changeable mood of its owner. But the most important thing: ombre manicure can be done at home, using a regular sponge and several nail polishes. If everything is so simple, what are we waiting for? We've found 7 step-by-step instructions for you, as well as lots of design ideas that we hope will inspire you to experiment.
Advantages and disadvantages
Children's manicure has its advantages
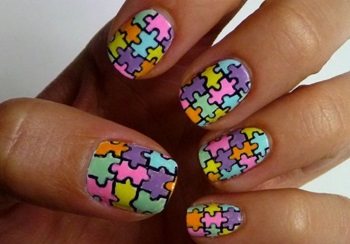
Multi-colored manicure puzzle for children
- Teaching girls how to take care of their appearance.
- The child's joy from the new procedure.
- Development of taste in a little fashionista.
- An opportunity to stop a child from biting his nails.
- The girl's nails will always be healthy and well-groomed.
Cons of children's manicure
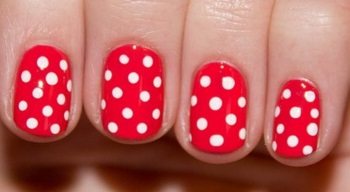
Children's manicure with polka dots
- A child's fussing can lead to unwanted cuts and wounds.
- Manicure products that are suitable for adults cannot always be used for children.
They can harm the health of a small child.
Basic rules of manicure for a child
- A must buy antiseptic and use it before the procedure.
With this, the mother should treat not only all manicure tools and the baby’s hands, but also her own hands, too, in order to avoid infection in possible micro-wounds and cracks.Without following this rule, the procedure will be dangerous to the child’s health.
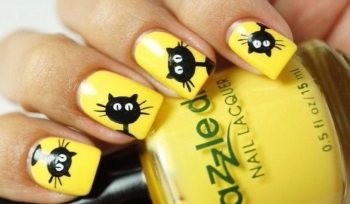
Funny yellow manicure with catsFrom the very beginning, teach your girl to take nail bath
This process will help steam your hands and take care of their health.
You can add a mixture of natural herbs to the bath. And don't make the water too hot. The optimal temperature is 37 degrees.
- shorten your nails using special manicure scissors. Leave about 2 mm free at the tip of the nail. You can give it the desired shape with a small nail file.
- Use a simple baby hand or nourishing oil . Thanks to this product, your hands will receive healthy vitamins and your skin will not become dry.
- push back the cuticle with a disposable orange stick.
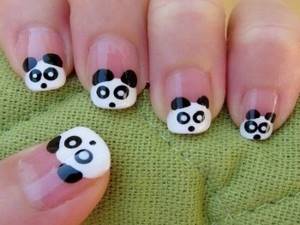
Children's nail design with pandas
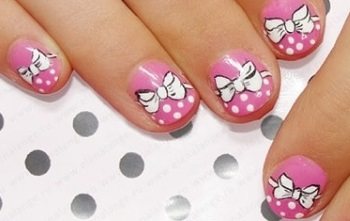
Pink manicure with bows
You cannot remove the cuticle with scissors; they can only be used to trim the hangnails near the nail.
Required tools and materials
To perform a manicure masterpiece with a sponge we will need:
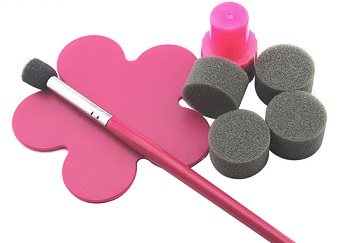
Palette and sponges for manicure
- usual tools for manicure: files, tongs, manicure scissors;
- colorless base;
- several thick colored varnishes;
- sponge with the smallest pores: melamine sponge or makeup sponge;
- needle or toothpick;
- the palette, its absence, is easily replaced by a piece of foil;
- fixative varnish;
- cotton buds.
If a manicure is performed using gel polishes, you will need the necessary tools to perform it: a primer, top and base products, and a liquid to remove the sticky layer. Also, for manicure with gel polishes, you must have a UV lamp.
If you are not very confident that you will apply varnish only to the nail plates, you can lubricate the skin around them with a cream or a special product. Afterwards it will be easier to remove the varnish that has gone beyond the contour.
Set of tools
The procedure will be successful if you purchase
- A small soft nail file.
- Children's scissors - preferably not very sharp.
- Nippers for removing burrs.
- Set of disposable cuticle sticks.
- Baby cream or oil.
- Herbal tincture for bath.
Original design with monkeys for children's nails
Step-by-step instructions for performing a manicure for a child at home
- First of all, you and your baby need to wash your hands with antibacterial soap. She must initially get used to this important step.
- Now treat your hands, as well as all tools, with an antiseptic .
- The next step is a bath . Let the baby hold her hands in it for at least 10-15 minutes. Then the skin will steam, and the procedure will be as painless as possible.
- Next, you need to dry your hands with a clean towel and start processing the nail. For very small children it is better to leave 1 mm of free edge. But for fashionistas over 10 years old, you can make your nails a little longer. A free edge of 3 mm is considered optimal at this age.
- After you have cut your nails with scissors, give them the desired shape using a nail file.
- Be sure to clean all dirt from under the nail plate.
- Afterwards , apply a special oil , which will quickly soften it. The cuticle needs to be pushed back with a disposable orange stick.
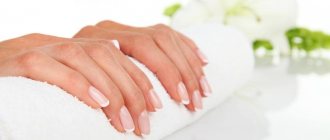
- Finally, we recommend applying a nourishing agent to your hands . Children are not recommended to wear nail polish. And for older girls, after 10 years, you can apply a light transparent varnish, do a French manicure or create a fashionable design.
This video tutorial will show you how to give your nails a beautiful shape.
The master will tell you more about how easy it is to do a children's manicure at home.
Manicure technique using a sponge
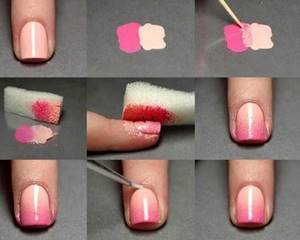
Simple gradient manicure technique
- First you need to do a regular manicure , treating the nail plates and cuticles.
- Next, apply the base varnish and dry it.
- Apply one of the selected varnishes to the nail plate ; usually the lightest shade of varnish is selected for this layer. The layer should not be thick, but dense enough. We wait until the varnish dries.
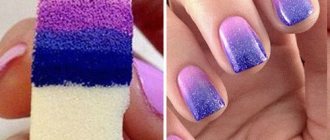
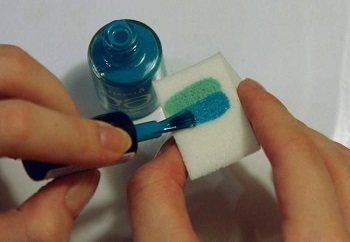
- Apply the second varnish to the sponge in two stripes. This is done in such a way that one part of the sponge is densely covered with color, and the second - not so intensely.
- Press the sponge quickly onto the nail from the middle of the nail plate to its tip. The closer to the free edge, the denser the coloring. To do this, apply the sponge to the nail several times, most often closer to the tip.
- We fix the manicure with a layer of top protective coating.

Gradient manicure technique
The second simple way to perform a manicure with a sponge
- The nails are covered with a base coat , which must dry.
- Varnishes of the selected colors are applied in strips directly to the sponge transferred to the nail with a few tapping movements .
- Excess varnish that gets onto the cuticle area and finger skin is carefully removed.
- A top coat is applied over the dried manicure .
Manicure with a sponge
This method is quite simple even for a beginner, and you can verify this by watching the video:
Smooth color stretching on nails
This manicure method is more complex than the previous ones, but the boundaries between colors are almost invisible, and the transition is very smooth. To do this , carefully apply drops of varnish to the palette . close to each other .
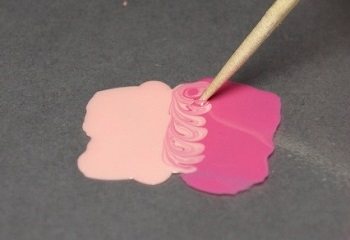
For a beautiful color transition, carefully blend the borders of the varnishes
Depending on the desired design, varnish blots can be arranged vertically or horizontally in order or randomly. Mix the varnishes very carefully along the border of the colors with a needle or toothpick. The colors should transition one into another smoothly.
We blot with a sponge apply it to the nail plate with a smooth and quick movement .
Don't forget to clean the skin around the nail with concealer or nail polish remover applied to a cotton swab.
In addition, it is better to cut the sponge into smaller pieces, and apply BF or PVA glue to the cuticles, which should be removed at the end of the manicure.
To prevent bubbles from appearing on the nail coating, blot the sponge on the foil a couple of times before processing the plate.
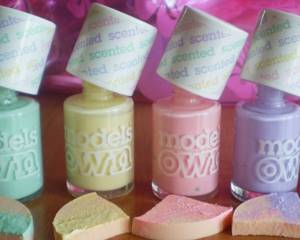
Choosing children's nail polish
- Under no circumstances should your baby use adult products. It will only harm the fragile nail plate.
- It is recommended to buy special children's varnishes. They will not contain acetone or other chemicals.
- It is best to take a product that contains nail strengthening additives, such as calcium.
- Many nail polishes for children are made with scents. Therefore, it is very important to check before purchasing whether the baby is allergic to this smell.
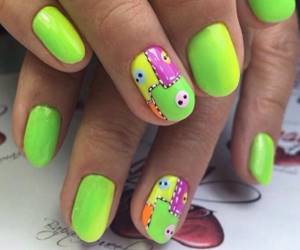
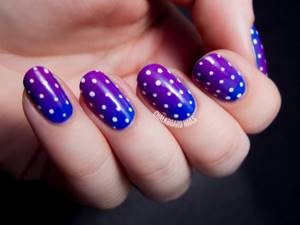
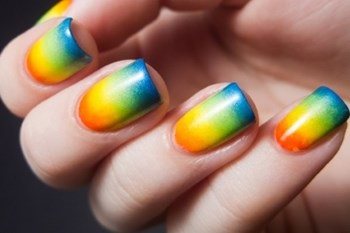
Bright gradient manicure with designs on ring fingers
Tools

A manicure that can be done at home using a sponge, presented in the video, is called Gradient or Ombre. There are several ways to do it. Whichever one you choose, the result should be a smooth transition from one color to another within the same nail plate. But depending on the chosen technology, you will need certain materials and tools.
- Manicure set for preparing plates for applying varnish;
- Transparent base for color coating;
- Two (or more, depending on the intended design) dense colored coatings;
- Toothpick or needle (for the second method);
- Palette (for the second method);
- Fine-pored sponge or cosmetic sponge;
- Top coating.
In order to perform a nail design with a sponge as high quality as in the video, it is important to carefully select the material and tools. The sponge should not absorb the varnish too much. For the same reason, the varnish should not be too liquid. But a slightly thickened varnish will also not work, as it will not give an even and smooth coating.
Choice of colors and accessories
- You should not choose a very bright nail polish color during the school year when your child goes to school. So the girl may have problems with some teachers. But during the summer holidays, bright colors will come in handy.
- For fashionable ideas, you can purchase special children's nail stickers. They are made in the shape of your favorite cartoon characters. Such decoration will bring maximum joy to the girl.
- You can also use glitter for manicure or small rhinestones. It is better to add one decoration of your choice so that the manicure is not tasteless.
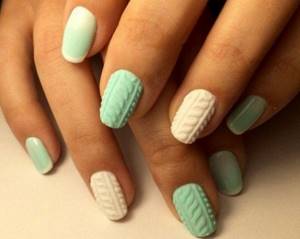
Discreet mint manicure with knitted design
Ideas
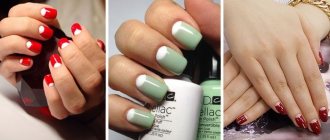
Knowing the basics of how to do a manicure with a sponge, you can create a fairly large number of different designs. For example, a horizontal transition from a light tone to a dark one looks great. The black and red combination can also be called classic. For those who always strive to stay on top of fashion, we can recommend the mint-salmon combination. The shades look very harmonious side by side and are trendy.
[yandex3] [google3]
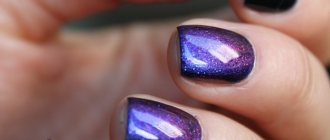
Although it was repeatedly mentioned above that both coatings should be sufficiently dense, this is not a prerequisite. It will be easier for beginners to work with such colors, however, if you have enough experience, you can also use translucent shades. So, on a dense base color you can make a slight nuanced transition using translucent varnish, which also looks very interesting and unusual.
Drawings on nails painted with a sponge also look good. A rather interesting combination of two small drawings was recently invented by nail technicians. With it, a small element is made on the light part of the nail in the same color that covers the second part of the plate, and on the dark part the same element is made in a light color. However, some people think this option is unnecessary.
Ideas for children's manicure
- Strawberry heaven. Apply red polish to your nail and wait until it dries completely. Now dip a thin needle into black varnish and leave small dots on the red background. Finally, paint small green leaves on top of the nail. These are the tails of our strawberries.
- Manicure in the style of "SpongeBob".
Paint all of the girl's nails yellow. But we will decorate the nail on the ring finger with a picture of SpongeBob.If you use your imagination, you can design each nail in the form of SpongeBob's favorite friends.
- Floral motifs .
Apply clear polish to your nail. On top of it, paint a couple of strokes with your favorite color. These will be the petals of our flower. This manicure is suitable for school time. You can sprinkle glitter on the polish to make your manicure look festive.
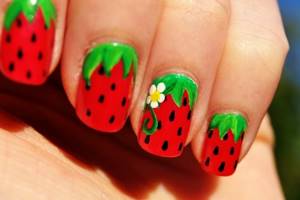
Juicy strawberry manicure
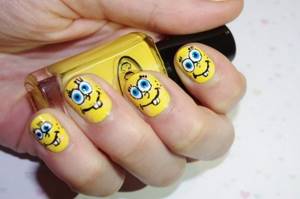
Option to design a children's manicure with a SpongeBob design
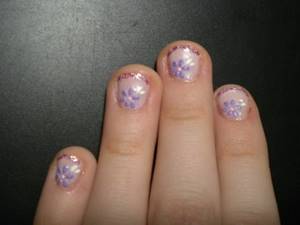
An example of a simple manicure with floral notes on children's nails
This video review will tell you which manicure to choose for short children’s nails.
Characteristics of manicure using a sponge
On nails, as in clothes, makeup or hair, a smooth transition between contrasting or similar shades is also possible. A manicure with a sponge always turns out spectacular and attracts attention. But such a manicure requires some skill.
Manicure with color transitions
The most skilled craftsmen are able to make transitions between shades and colors using a brush, but more often such a pattern is performed using a cosmetic sponge. If this is not available, a sponge with small pores will do.
You may also need a palette. In all other respects - all the necessary products and tools for a regular manicure, but only the varnishes should be the freshest possible.
Useful tips
- If you don’t have enough experience and knowledge about children’s manicure, you should go to a beauty salon and watch how a master will carry out this procedure. You need to choose a proven salon with good specialists.
- Choose one day a week to be your “manicure day.” The baby should know that it is on this day that the procedure must be done, and she will learn to regularly take care of herself.
- If the girl is very small and cannot sit still for a long time, try to entertain her during the manicure process. You can buy a nail file with bright designs or interesting nail stickers.
Follow the above tips, carry out the procedure regularly and with great responsibility. Then a manicure will bring positive emotions to both you and your child. .
More interesting articles:
Fashionable nail design ideas
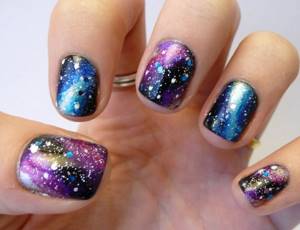
Manicure “Space”
To create it you need colors such as black, sapphire, blue and green, as well as any pastel-colored varnish, lemon, pearlescent white and glitter varnish. First, the nail is covered with black varnish, then, using a sponge, imprints are applied in the center of the nail with sapphire, blue and green varnish, and in the core of the design - lemon. The highlights are created using white mother-of-pearl and a toothpick. The manicure is completed with a varnish with glitter that imitates starlight.
How to make a beautiful “Space” manicure, watch the video tutorial:
Horizontal Gradient
Suitable for long and medium length nails. The color stretches from the cuticle to the free edge. As a rule, it is performed with two or three colored varnishes.
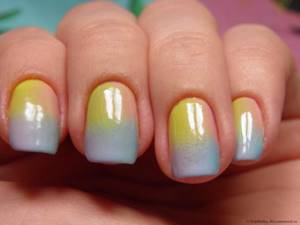
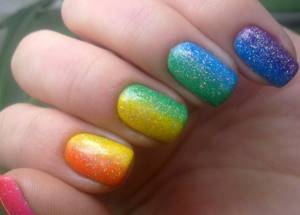
Vertical ombre
Suitable for nails of any length. The color transition runs from one edge of the nail to the other. Using the vertical ombre technique, you can create a rainbow design on your nails or use just two colors of polish.
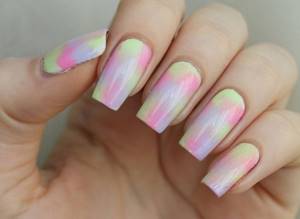
Chaotic gradient
The number of flowers and their arrangement on the nail is limited only by the imagination of the fashionista.
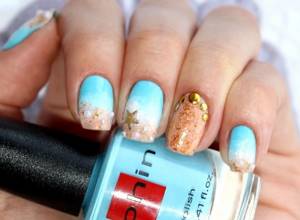
Marine manicure
A blue or turquoise varnish is applied to the nail. Using a large sponge (a dishwashing sponge is ideal), a varnish pattern is applied that imitates the seabed. Using a thin brush, the nail is decorated with designs in the form of corals, shells, and small fish.
Manicure with a sponge is a rather complex and labor-intensive nail design technique. However, with due skill, accuracy and diligence, it is quite possible to create a beautiful and intricate manicure at home using a sponge.
More interesting articles: