- Pros and cons of the procedure
- How to choose a cuticle remover?
- What tools and supplies will be needed?
- Orange stick for manicure
- Execution steps
- Polishing nails with buff or wax
- How often should you do an unedged manicure?
- Reviews
Types of unedged manicure
This technique can be performed in several ways:
- Using the dry method without pre-soaking. Used in cases where there is simply no time to steam your hands. But it is suitable only for those with healthy and flexible nails. Brittle nails will immediately begin to peel after dry treatment.
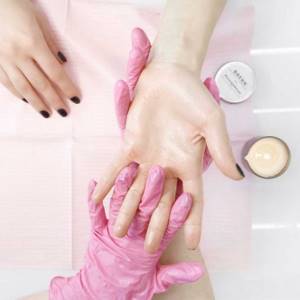
- Brazilian spa manicure. Similar to the previous one. The only difference is that before treatment, cream is applied to your hands for a while and gloves are put on. It is much easier to treat the skin after this, and the softened nails do not break when trimmed.
- Wet method. Moisturizing the skin in water. To soften it and care for your hands, lotions and oils are added to the bath.
- Hot manicure. Ideal for brittle nails. With this method, the skin is steamed not in water, but in a cream or special lotion heated to 50C. For the convenience of the procedure, you can purchase an electric bath. With this method, the cuticle softens even without gel, and it can easily be pushed back and cleaned with a stick.
- Hardware. To process cuticles and polish nails, a special grinder with attachments is used. You can also purchase it for home use.
Untrimmed manicure can be performed in several ways, but its peculiarity is that the cuticle is not trimmed with scissors
Advice! Do you know that after a wet or hot manicure you can’t immediately apply polish? Otherwise he won't last long. After all, moistened nails, absorbing moisture, change size and expand, and after completely drying, they take on their original shape. This is why the varnish begins to crack quickly.
What is European manicure and how does it differ from classic manicure?
European manicure is a relatively new, but quite popular type of nail care, which costs the fair sex “little blood.” But jokes aside, in fact, this method of caring for nails and cuticles is not in vain recognized as the safest in the world, and therefore it is widely used not only on the European continent, but also in the USA, as well as Asian countries.
Another name for European manicure is unedged, and all because the technology for its implementation does not involve the use of piercing or cutting tools. By the way, the history of the emergence and promotion of unedged manicure around the world begins in the times of Ancient Egypt, when it was customary to use an infusion of healing henna to care for the cuticle. Later, in 1830, the tradition was revived, thanks to a painful hangnail on the royal finger of the famous French monarch Louis Philippe. After an operation to remove part of the cuticle, the ruler decided to carefully care for the skin around the nails and the side ridges, regularly anointing them with overseas essences. This fashion quickly spread to nearby lands, making well-groomed hands the calling card of the aristocracy.
European manicure in the modern understanding of the process also appeared in France, but already at the end of the 20s of the 20th century. A native of France, Juliette Marlene, played a significant role in its spread. This extravagant lady was the personal stylist of the legendary star Marlene Dietrich, whose nails were especially problematic, fragile and brittle, and whose cuticles were painfully thin and bleeding. The enterprising Mrs. Juliet invented her own type of manicure, which eliminates the need to cut off the overgrown skin. Somewhat later, this stellar method spread around the world and acquired the name “European manicure.”
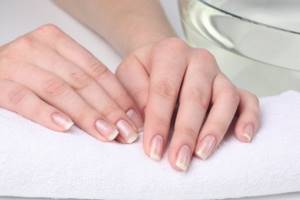
We have already talked about how to properly care for your nails, from which the conclusion follows - it’s easy to do a manicure, without even putting in much effort. But at the same time, many beginners are afraid of the fact of cutting or traumatizing the delicate epidermis, and for good reason, because even an experienced, practicing master in a salon can accidentally catch the skin. Therefore, an unedged manicure is the best way out of the situation, which does not require special skills and knowledge. European unedged manicure is recommended for those with fragile, brittle nails that are prone to splitting, as well as for those whose cuticles grow especially quickly. It is logical that the more often you cut it, the sooner it will grow back and will require you to go to the beauty salon again.
Pros and cons of the procedure
This type of manicure has a lot of advantages :
- the absence of even the slightest possibility of causing an infection - after all, no sharp manicure instruments are used during this procedure; therefore, it can be done even if you have poor immunity and your wounds do not heal well;
- it is a real salvation for girls with thin and very sensitive skin;
- over time, the buzz grows more and more slowly, so your hands will remain well-groomed for more than one week;
- Unedged manicure at home (see photo), unlike a regular manicure, does not require special skills and takes a minimum of time.
In addition to the advantages, like any procedure, European manicure also has disadvantages :
- it is better not to use it for women with rough skin, as completely removing the cuticle will be problematic;
- in the first few weeks, due to the fact that the skin is accustomed to frequent trimming, the hands will look sloppy, so it is better to switch to an untrimmed manicure during vacation or holidays;
- cuticle removers may cause irritation;
- at first you will have to trim the hangnails in the corners of the nails;
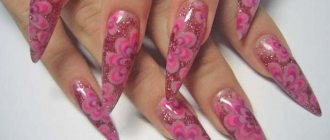
- This technique is absolutely not suitable for extended nails.
The main advantage of the procedure is the absence of even the slightest possibility of infection, because no sharp manicure instruments are used during its implementation.
Advice! To make your manicure last as long as possible, treat your nails with a protective base before applying the polish, and after it dries, with a glossy finish.
Step-by-step instruction
After careful preparation, you can start performing unedged manicure at home step by step. The algorithm is as follows:
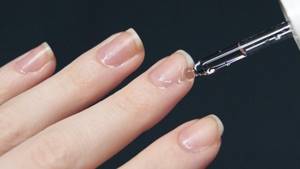
- To protect the cuticle from the harmful effects of the softening liquid, you need to use oil. It is available in pencils or bottles. Choose the option that is most convenient for you. Apply a thin layer of oil to the cuticles and leave for a while, allowing it to be absorbed. Rub the remaining product into the skin.
- Now you need to use a cuticle remover. If you look at a photo of an unedged manicure at home, you can understand that the gel is carefully applied to the cuticle. In this case, you need to try not to touch the rest of the skin.
- It takes a certain amount of time for the product to take effect. There is no universal advice. You must read the instructions carefully. All cuticle gels differ in composition and, accordingly, exposure time. Each manufacturer has its own recommendations.
- After waiting the required time in accordance with the instructions, you can begin processing the cuticle. First, the remaining gel must be wiped off with a napkin so that it does not interfere with processing.
- Using a wooden stick, you need to remove excess softened cuticle, simultaneously pushing back the skin and giving a neat shape to the nail hole.
- The final stage will be the application of a nourishing cream, since the nails and the skin around them have been exposed to an aggressive agent, as well as coating with varnish - decorative or medicinal.
After carrying out the procedures described above, every lady will be able to enjoy the magnificent result of an unedged manicure.
How to choose a cuticle remover?
Such products (removers) are available in the form of pencils, liquids or gels. They may contain alkaline potassium or sodium hydroxide, with the help of which dead cuticle skin is quickly destroyed. More gentle are products made from plants with alpha-hydroxy acids. They do not destroy the skin, but only remove the glue-like substances that hold it in place. According to reviews, it is better to do an unedged manicure at home with high-quality products such as El Corazon and Shillac.
After treatment, the keratinized skin around the nail is removed very easily and painlessly with a special wooden stick. In addition, the substance contained in them prevents cracks from forming on the skin, so over time you will no longer suffer and cut off hangnails. Since such products are potent and can affect the condition of the skin, they should be applied no more than once a week.
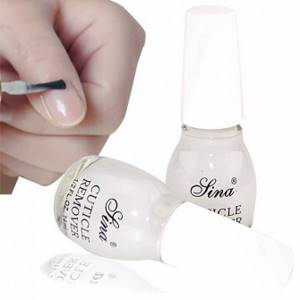
Unedged manicure products may contain alkaline potassium or sodium hydroxide, which quickly destroys dead cuticle skin
Important! Alkaline potassium and sodium hydroxides can cause dry skin, so you should not keep such compounds on the skin for a long time. Be sure to wash your hands thoroughly under running water after handling.
What tools and supplies will be needed?
Believe me, the technique of performing an unedged manicure at home is simple even for beginners. We need a minimum of tools:
- regular hand cream;
- nail scissors;
- scissors with rounded ends;
- nourishing oil to give skin elasticity;
- pusher (metal tool with blades at the ends) or orange
- cuticle stick;
- cuticle remover;
- a file with a coarser abrasive;
- a special soft file with fine abrasive or a buff for polishing nails;
- bio wax for polishing.
The technique of performing unedged manicure at home is simple even for beginners
Advice! If you don’t have a complete manicure set on hand, you can start by using a regular disposable set of sticks and files.
Flaws
You may be interested in:Nail shapes for manicure: regular, square, almond, oval, round, sharp
Delayed effect. To achieve a decent result, you will have to be patient. An unedged manicure at home is unlikely to give you immediate results. Especially if the cuticle is hard.
You need to be patient, carry out several procedures, and only after that will you be able to understand what effect an unedged manicure can give at home.
Orange stick for manicure
I would like to tell you separately about this wonderful instrument, invented in France. An outwardly unpretentious, modest stick made of orange wood is an ideal tool for processing cuticles. After all, wood of this type is very dense, but does not delaminate at all, so it does not injure even sensitive skin.
Outwardly, such a tool resembles a thickened toothpick and is also pointed, however, only at one end. It's inexpensive, so we definitely recommend taking it into account. After all, some procedures without it, especially unedged manicure, are difficult to imagine. Another important advantage of such a stick is the presence of antiseptic substances contained in its wood.
Advice! For the most sensitive skin, you can purchase orange sticks with rubber tips.
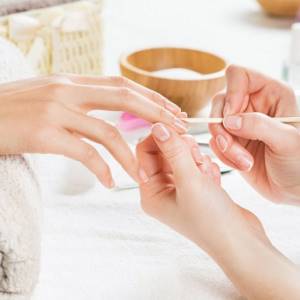
An outwardly unpretentious, modest stick made of orange wood is an ideal tool for processing cuticles.
Using this tool, you can:
- moving the cuticle: it is the main tool for processing nails without trimming;
- removal of softened cuticle treated with a special gel or cream;
- cleansing the inner surface of the nails;
- sticker of tips (plastic parts that imitate nails) during extensions;
- laying out acrylic material and biogel;
- removal of extended nails;
- decoration: artistic painting or application of small details, appliqués, sparkles and rhinestones.
Advice! After the procedure, it is better to immediately discard the orange sticks and not reuse them. After all, soft wood quickly absorbs dirt and remaining fatty deposits.
Execution steps
Let us describe in detail and step by step how to perform an unedged manicure at home:
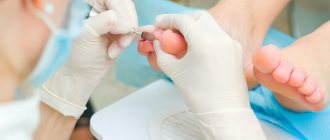
Depending on the technique chosen, the skin is steamed in water or cream or left dry
- Before the procedure, the old varnish must be removed.
- Depending on the technique chosen, the skin is steamed in water or cream or left dry.
- Cream or gel is distributed at the cuticle locations. A drop is enough for one nail.
- Now gently rub the product with an orange stick. It is more convenient to use the widest one (they are numbered by thickness).
- The time it needs to remain on the nails is always indicated on the packaging. As a rule, it is no more than 5 minutes.
- The gel or varnish is washed off with running water.
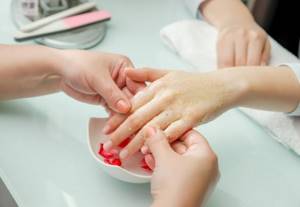
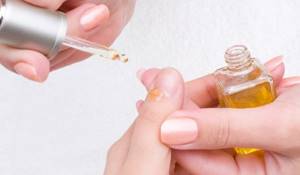
- Any nourishing oil is applied to the cuticle.
- With gentle movements of the orange stick, the cuticle moves to the very edge of the nail.
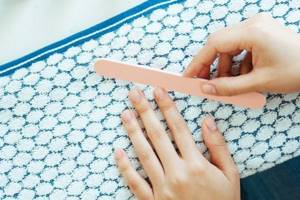
- The skin around the nails is cut or filed with a diamond file.
- All that remains is to file your nails and then polish them.
Any nourishing oil is applied to the cuticle. With gentle movements of an orange stick, the cuticle moves to the very edge of the nail
Advice! Do not apply nail polish immediately after treatment. First, lubricate them with any nourishing cream or essential oil and leave for a while. Let your nails be supported by useful substances.
Preparation
Even before you start performing an unedged manicure step by step, it is recommended to treat your nails a few hours in advance to give them a little time to “rest” and recover.
It is necessary to remove the old coating using vitamin nail polish remover, which does not contain acetone.
Particular attention here should be paid to nails that have been painted with gel polish. You will need:
- cotton pads;
- special liquid;
- some foil;
- wooden sticks or pusher.
You may be interested in: Geometry on nails: step-by-step application instructions, fashionable manicure, using a template and giving your nails a beautiful shape
You should also be patient. The procedure is not quick.
First you need to file down the top so that the liquid penetrates better. Cotton pads soaked in it are applied to the nails, then wrapped in foil. Exposure time – 10–15 minutes. After this, the remaining shellac is scraped off with a pusher or stick.
If you have to do an unedged manicure, it is important to know that the skin of your hands should remain dry.
If you choose the wet method, after the steam bath, be sure to blot off excess liquid with a napkin. It is also recommended to wait about ten minutes before starting treatment so that the beneficial substances are absorbed.
By the way, an aroma bath can be performed more often than an unedged manicure procedure. This will make the cuticle and nail folds softer, and at the same time whiten the plate.
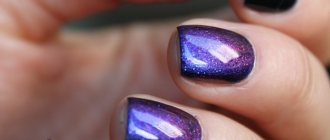
Polishing nails with buff or wax
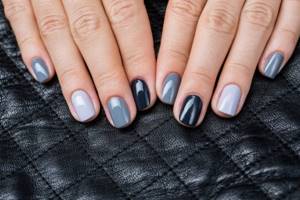
Nails treated with a file with a soft abrasive, buff or wax look healthier and more well-groomed. They even become smooth to the touch. A similar procedure helps to even out nails that have grooves and irregularities.
You will no longer need a means to level them before applying varnish.
The varnish also adheres remarkably well to the nails after this procedure:
- Naturally, the varnish must be removed before polishing.
- Externally, the buff looks like a small block, each side of which is covered with abrasive - from medium to very fine (micro). As a rule, the sides are numbered for convenience.
After polishing, the nails are treated with bio-wax containing silicone and paraffin, as well as nutrients.
- You can also polish your nails with a special nail file. Since it is much softer than usual and is very often made on paper, it should not be wetted. The movements of the tool should be directed only in one direction from the center of the nail plate to its sides. You shouldn't work in different directions, otherwise the nail will become frayed.
- After polishing, the nails are treated with bio-wax containing silicone and paraffin, as well as nutrients. A small amount of the composition is applied to each nail and gently rubbed in with small movements of a file or buffer.
- Since biowax fills even the smallest cracks, nails look just perfect after treatment.
Advice! Regular polishing of nails helps stimulate blood circulation, improves their condition and accelerates growth. However, you should not abuse this procedure and remove too much of the nail layer, otherwise you will get the exact opposite effect.
How often should you do an unedged manicure?
Skin regeneration occurs differently in each person. It depends on the general condition of the body. However, in any case, an unedged manicure needs to be done less often than a regular manicure - about once every 2 weeks. For delicate skin, treatment once a month will be sufficient. So just watch your hands. They themselves will tell you that it’s time to repeat the procedure.

However, in any case, an unedged manicure needs to be done less often than a regular manicure - about once every 2 weeks.
Advice! To prevent your skin from becoming stained after removing bright nail polish, apply any cream, preferably a rich cream, to your hands before the procedure.