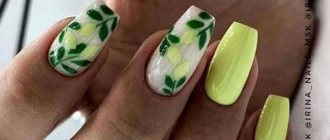
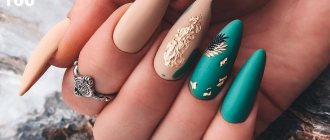
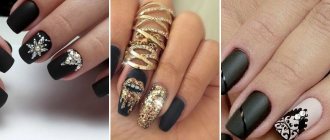
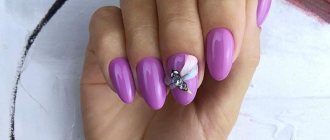
What is special about the form?
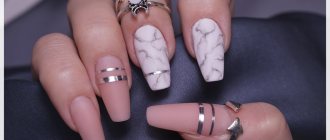
The appearance of the marigold in a “ballerina” style really has a similarity with this character, or rather with her dancing shoes: the marigolds resemble ballet pointe shoes in shape.
Similarity of nail shape with pointe shoes
The main feature of the shape is the perfectly smooth edge of the nail, like a “square”, and the beveled, even edges, like an “almond”. The classic version of the “ballerina” involves inheriting some rules:
- washing into this form is permissible only for artificial plates;
- medium length or longer is ideal;
- clear angles are the key to the correct formation of the nail plate.
With the development of the nail industry and attempts to “tame” this form and adapt it to different nails, the rules have become less strict:
- you can shape your nails to any length, and also use a natural nail plate;
- It is permissible to smooth out strict corners and make them rounded.
If we consider the “ballerina” from a geometric point of view, then the protruding part of the nail is an isosceles trapezoid. This form is convenient to make when the nail is of impressive length: from 3 mm, and only if the width of the nail plate is normal.
“Ballerina” on different shapes of the nail plate
“Ballerina” fits perfectly into strict female images, looks laconic without decorations and does not tolerate excessive decoration. Can be used for natural and extended nails.
How to make a ballerina uniform?
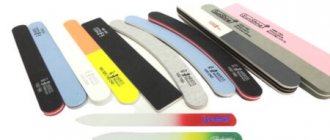
There are no unique tricks for obtaining this form. As in other cases, you only need a file with the optimal abrasive: for natural nails, a fine-grained version is also suitable, but for artificial nails it is more convenient to take a coarse grain.
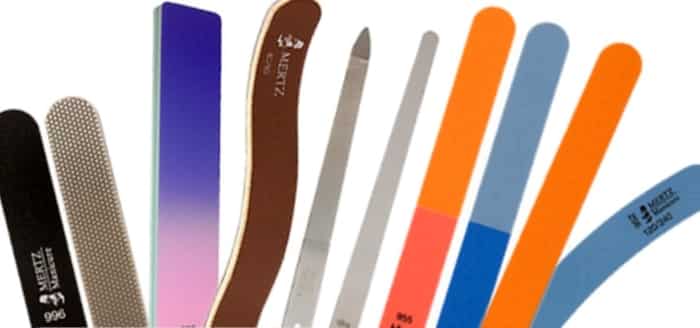
Variety of files for artificial and natural nails
Whatever the length of the protruding part of the nail and its naturalness, the process of creating a “ballerina” will be the same:
- strictly along a straight line, file the tip of the nail as much as the length allows, so that you get a “square”;
- give an almond shape to the side edges.
You can make the shape according to another scheme, starting by filing off the side parts of the nail, then forming the tip and making all nails the same length to get a “square” cut. If the form is made on extended nails, then no additional skills are required during the extension process. The shape is given after the standard procedure of extension with acrylic or gel. But if desired, formation can take place from the very beginning, focusing on form indicators.
Correction of the shape of natural nail plates
It’s good if the cuticle is oval, even in shape, the nail plate is not very wide, and the sides of the nail resemble a rectangle. But what to do if your fingers are short and the nail resembles a trapezoid? You can create a neat manicure with any nail shape if you use the “ballerina” style.
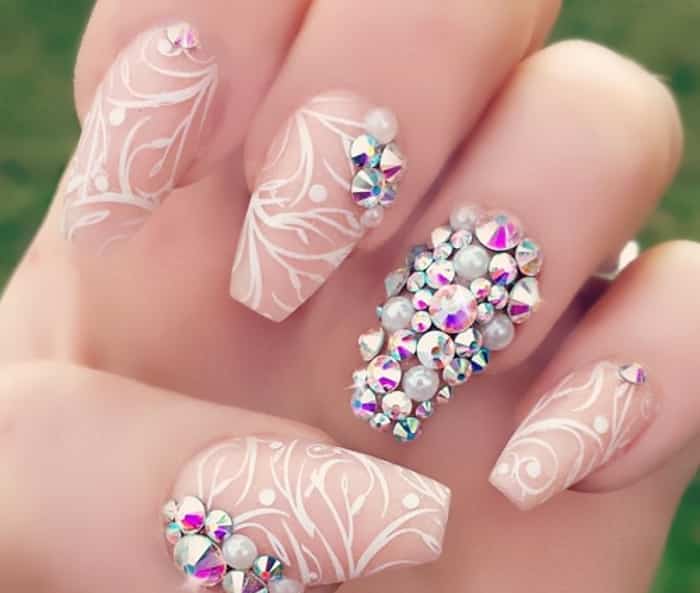
Ballerina shape on a wide round nail plate
This shape will help visually lengthen the nail plate; it looks great on short fingers, but for complete harmony you need to choose the right design option:
- For a wide nail plate with a spade or square shape, you need to grow the nail a little (at least a few millimeters) and then shape it. If you can’t grow it, then it’s better to do extensions;
- For a narrow nail plate of different shapes, you can make a “ballerina” with any nail length, but then you should make the line of the tip of the nail wider.
The “ballerina” shape will not last long on fragile and depleted nails, since such nails may break off and will have to be filed down again. It is important to strengthen thin nail plates with bio-gel.
Visually lengthen natural nails
To make the “lengthening” effect more expressive, it is worth playing with the length of the protruding part of the nail. The larger it is, the easier it will be to correct the nail.
Successfully filed “ballerina” on natural nails
When enhancing natural nails and making a “ballerina” shape on them, you need to adhere to some rules:
- the angles should be as close as possible to the mark of 45 degrees;
- the line of the edge of the nail should be equal to the sum of the lengths of the first and second indentation from the edge of the nail. Too wide a line of the free edge of the nail will turn it into a “square”;
- It is better to make the edges of the nail strictly even, otherwise the shape will look like an oval and the effect of the ballerina’s pointe shoes will disappear.
Artificial extensions with acrylic and gel polish
The dream of long beautiful nails can be realized through extensions. The following materials can be used:
- acrylic;
- gel;
- gel polish (if the natural nail is long, thin and needs to be thicker, can also be used to slightly add length).
Gel polish cannot significantly increase the length of a nail; it will rather save you in a situation where some nails are not long enough for the intended shape. And then, for this you need a special varnish, which will become the basis for subsequent color coating.
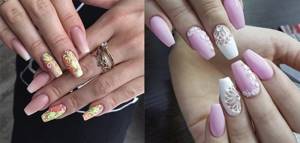
Extended nails in the shape of a “ballerina”
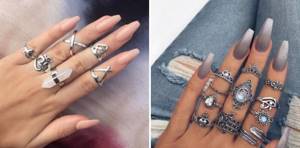
Artificial materials such as acrylic and gel make the nail plate durable and prevent accidental breaking of the nail. To shape such nails, you will need a file with a large grain, and to polish the edges, a file with a medium abrasive.
Dark ballerina design
Despite the sophisticated name, the “ballerina” shape is suitable for bold and shocking ladies . For a woman with a bright, purposeful character, this shape will emphasize her confidence and determination, and will also make her look chic to the very tips of her fingers!
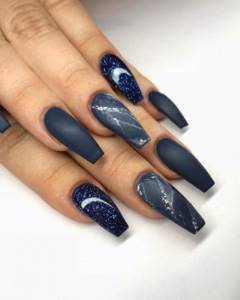
Different hands
In the form of a ballerina, masters practice “different hands” nail design . Even knowing what to do and how to do it, it is very difficult to come up with an interesting design concept for different hand designs.
This design is eye-catching. In addition, it is possible to use your favorite colors. The most important thing is to come up with harmonious color combinations that do not discord with each other.
Foil will be especially appropriate if you have chosen a dark varnish as the main coating. Foil adds brightness to the manicure and makes the design look more vibrant.
Ballerina nail design with rhinestones
Rhinestones make any manicure festive - even the most discreet one. Sometimes they become the missing element, the “cherry on the cake” that completes the perfect composition. In case you want something light but sophisticated, place rhinestones in small quantities. A good option would be to place the rhinestones at the cuticle line and down from it. And if you are an ardent fan of rhinestones in nail art, then follow the link where the most interesting ideas for rhinestones on nails await you.
Return to top
Click to vote!
[Voted: 1 Average: 4]
Ballet manicure design ideas
Original designs for “ballerina” are partially suitable: decoration, painting, and the use of fashion trends and design trends are allowed. But for ballet manicure it is not advisable to use the following design ideas:
- intensive decoration of more than three nails on one hand;
- placement of a large number of different decorations on one nail.
Various manicure designs with ballerina nail shape
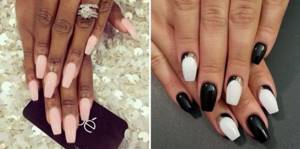
The clearer the design, lines and patterns, the more impressive the manicure will look. Also, priority is given to monochromatic coatings, strict stylish designs, geometric designs, classic French and other techniques.
French and moon manicure
Although fashion seasons dictate different trends, there are manicure techniques that will always be relevant. This applies to French and lunar design. You can paint the free edge of the nail using a gradient, but for the “ballerina” it is better to choose clear color transitions (the shade of the base and the “smile” does not matter, various options are acceptable). It is advisable to choose the shape of a smile not the traditional one, but something more interesting: a triangle (both equilateral and irregular shapes), a diagonal, two triangles, etc.
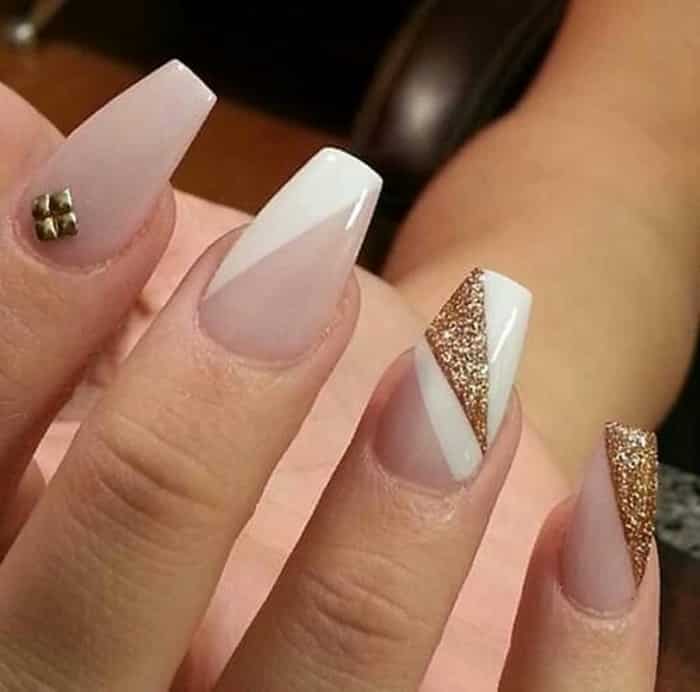
French on a ballerina uniform
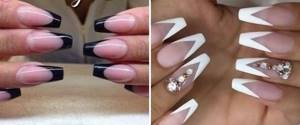
It is best to do a lunar manicure in a non-standard way: choose hole shapes that ideally fit the “ballerina” shape of nails (triangle, elongated oval), and you should also avoid the banal semi-oval.
Lunar ballet manicure
Rhinestone decoration
You shouldn’t overdo it with placing rhinestones on nails with a “ballerina” shape. They should complement the design, and not focus all the attention on themselves. Geometric options look harmonious (a longitudinal line from the cuticle to the tip of the nail, placing rhinestones along the smile line, geometric patterns), and it is better to avoid different scatterings of rhinestones.
Rhinestones and ballet manicure
For a ballet manicure, it is important to choose laconic and discreet designs with rhinestones, and also, depending on the size of the nail, choose their size.
Matte and glossy finish
The first interpretations of the “ballerina” were glossy coatings, but this should not be limited. The manicure looks great with a matte finish in any color.
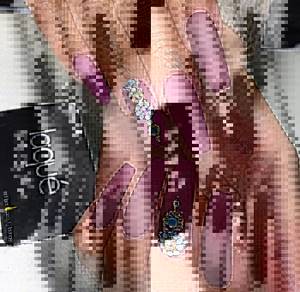
Matte finish and ballerina shape
The trend is to use dark shades: burgundy, blue, green, gray, etc. For light colors, it is important to use pastel colors, nudes and all shades of gray, white, and blue. These colors will look impressive both in gloss and when using matte varnish.
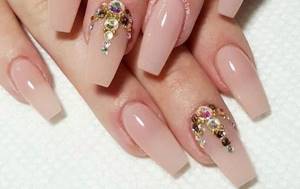
Glossy finish on the “ballerina” design
Exquisite ombre
A light haze on nails always looks beautiful and elegant, even when it comes to such a stylish “ballerina” nail shape. It is better to choose contrasting color combinations for ombre and not focus on shades from different palettes (for example, delicate shades of pink should not be combined with dark green or blue, etc.).
Ombre manicure with a ballerina shape
It is better not to use a large amount of decor for ombre, as this effect is self-sufficient and does not require additional decoration.
Geometric designs
The ideal combinations for a stylish manicure for a ballerina shape are designs in the geometry style. Lines of a contrasting shade, the use of foil tape to indicate geometric shapes, decor with mica, glitter, etc. are relevant.
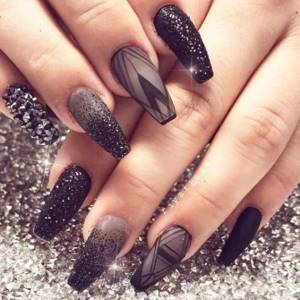
Geometry in manicure with the “ballerina” shape

As with other nail techniques and shapes, the “ballerina” does not use geometric designs on every nail. They are used to decorate selected nails, traditionally the ring and middle nails, but in modern nail art various variations are allowed.
A beautiful manicure is obtained by using several shades of varnish in one manicure, and stylish patterns, lines and other geometric elements will help to refine the design.
Popular nail images for manicure “ballerina nails”
Decorating “ballerina” nails is 100% pleasure, but the decor for this form must be chosen skillfully. For short nails, light and airy designs with light and aristocratic-restrained coatings are preferable. For long nails – bright, rich and dark tones of varnishes and gel polishes. Don’t forget an important rule: the longer the nails, the more laconic the decor. So, what looks were especially in demand this year?
Let’s look at the top 5 popular nail design ideas for the “Ballerina” shape.
- Eternal French classic.
Most often, nails are decorated in this way in the “coffin” style, if the design is planned for natural nails. The French ballerina makes the hands especially graceful and aristocratic, visually lengthening the nails and making the manicure very feminine and elegant. For both artificial and natural nails, ballerina-french looks charming in both matte and glossy versions.
- Ballerina baby boomer.
Another type of ombre stretch, softening the shocking image and giving it charm, lightness and grace. This design can be realized using an airbrush or a more budget-friendly and simpler “Aeropuffing” technique. Feminine and elegant baby ballerinas are decorated with Swaroski rhinestones, pearls or bouillons.
- Coffin-gothic.
An excellent solution for brave people who know how to present themselves to the world. This image is recommended for long nails, and as a decoration, artistic painting or thematic stamping will look most spectacular. The gothic “ballerina” is attractive in a velor (matte) design with minimal decor, when the owner of this work of art can flaunt not only long “claws”, but also well-groomed fingers. The classic color scheme for the Gothic version is black, red and white, diluted with the shine of silver and gold.
- "Volume" ballerina.
A design whose highlight is decorative painting or modeling made with gel paints and gel paste. Quite often, masters combine such nail art with a gradient, neon coatings, rubs or glitter.
- “Ballerina”-picture.
The highest aerobatics among the “ballerina nails” images is the author’s nail art, which turns nails into real paintings with their own scenes and mood. Stylish, bright, memorable images can be created using both watercolor and classic gel polishes. Well, if you don’t have enough skill yet, photo designs and sliders will come to the rescue.
There are a lot of options and ways to make your nails a kind of fashionable, bold, modern and moderately shocking art object. Whatever look you prefer, rest assured that such nail art will become an interesting highlight of your image, will make you stand out among your colleagues, will give you many compliments and will lift your spirits day after day! To complete the look, don't forget to purchase the necessary nail art supplies.
Ballerina shape on short nails
Short nails are not a reason to abandon the fashionable idea of choosing a “ballerina” shape. The only condition when it is impossible to make this shape is that the nails are cut to the root. The length of the nail should be at least a few millimeters, then you can create a ballet manicure without any difficulty.
You can give a suitable shape to short nails using your own potential - your natural nail plate, but if necessary, you can slightly use extensions or bio-gel coating. Then the nail can be shaped as needed, and it will be much stronger.
Features and evolution of the “Ballerina” nail shape
At the same time, delicate and sensual “ballet” nails have been leading among the most trendy designs for many years now. Such popular media divas as Kylie Jenner, Rihanna and Kim Kardashian were able to make them a fashionable outfit for fingers. “Pointe shoes” (a less euphonious name is “coffin nails” (“coffins”) combined two extremes: an extreme length of the nail plate for many, a daring pointed free edge with an elegant shape.
“Ballerina” design on long nails
The “ballerina” shape can often be found on long nails. Ideally, for a high-quality manicure, the nail should be 4-5 mm long. This size of nail can radically change the shape of the nail plate visually and make the fingers more refined. But with an active lifestyle, this form is not practical, especially on long nails.
“Ballerina” on long nails may not last long if they are not strong enough. The shape itself is not streamlined, so there is a risk of getting caught somewhere and ruining the manicure. In this case, it is recommended to strengthen natural long nails with artificial materials. For better wear of this design, the side parts of the free edge of the nail should be filed into an “almond” shape, especially since this is acceptable in a “ballerina” file.
Ballerina nails with gel polish or shellac
An alternative to varnish are gel polish and shellac. They stay on the nails longer, are not very susceptible to the influence of water and do not peel off after a couple of days. Gel polish or shellac can be applied not only to your own nails, but also to acrylic extensions. And the manicure will delight you for three weeks.
Gel polish on ballerina shaped nails
Before applying these varnishes, you should tidy up your nails and give them a “ballerina” shape. If your nails are extended with acrylic, then you do not need to prepare them.
Gel polish has shine. Its advantage over regular varnish is that it is available in all color options. Therefore, you can create ballerina-shaped nails in any design.
Shellac is practically no different from gel polish. But it is easier to remove from the nail and has a different chemical composition. Coating procedure:
- Preparation for coating - processing, shape adjustment (ballerina)
- If it is gel polish, then you should sand the nail
- Next, degrease the nail
- Apply base coat or shellac
- Directly coat the nail with polish and setting gel. Do not forget that these products should be dried in a lamp.
- Remove the adhesive layer
After following these steps you will get the following result
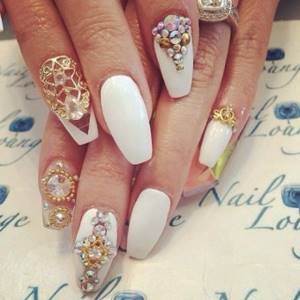
Manicure with gel polish on ballerina uniform
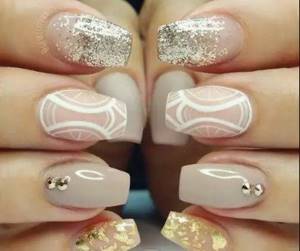
Manicure with gel polish on ballerina uniform
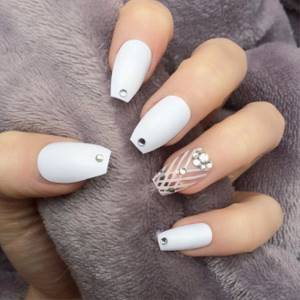
Manicure with gel polish on a ballerina uniform with the addition of rhinestones
