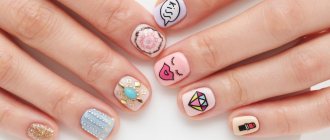
Have you ever wondered how nail art masters manage to paint the most unimaginable compositions on their nails? Few professionals have the innate talents of an artist. Each specialist hones and improves his skills in the process of working with clients’ nails. But before making any drawings, a professional must train in executing the design, using special diagrams and ready-made sketches. This allows you to significantly improve the technique and speed of painting. Today we will tell you how to create beautiful designs on your nails step by step, without the help of a professional.
To improve the quality of your manicure, we recommend that you purchase or simply download training cards on the Internet, which are available in a wide range today. Schemes for drawing on nails should be chosen depending on your initial level of training. Training cards can include patterns of quite large sizes - they are ideal for beginners. Smaller drawings will be more useful to those who already have certain skills. The cards for painting nails show ready-made patterns, and next to them there are translucent sketches or a diagrammatic description of the step-by-step application of the picture. Next, we will show you demonstration photos of drawings that you can easily implement in your manicure.
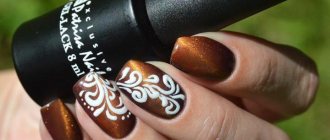
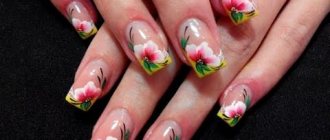
Monograms on nails - nail design, manicure with varnish, gel polish. Photo
Any representative of the fairer sex wants to look beautiful and well-groomed. Particular attention should be paid to a flawless manicure, for the creation of which it is not necessary to visit a beauty salon.
You can make a stunning nail design and learn how to draw original monograms on your nails step by step without leaving your home.
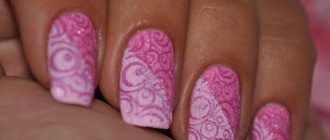
The technique of depicting monograms on nails in the form of thin filigree lines is very interesting. They can be of absolutely any shape and style:
- in the form of curls;
- various bends;
- like petals;
- in all the variety of letters and lines;
- oriental ornaments;
- with Gothic elements;
- lace design;
- exquisite embroidery.
You can perform a wonderful manicure using this technique using different techniques. For example, experienced craftsmen paint curls with a simple brush and ordinary colorful varnish. To avoid smudges, it is necessary to maintain an even application and control the amount of varnish on the brush.
A good option would be to apply a design using shellac, gel polish or acrylic components. They use strips and stencils with monograms, paints of different color palettes.
With plates that have ready-made monograms and having learned how to apply the coating on your nails step by step, it’s easy to create a stunning manicure.
By applying gel polish, you will be able to create a long-lasting manicure that will delight you with a fresh look. This will require more time, but the result will be worth it.
Covering your nails with acrylic paints will surprise you with its variety of shades and delicate work. It is this painting that will create the effect of elegance and chic.
In addition to stencils, they resort to stickers, which greatly simplify the work and have great opportunities for realizing their design ideas. They are glued onto a transparent base or base coat on the nails and secured by applying a final coat of varnish.
The dot technique for drawing monograms involves the use of needles or toothpicks. For greater clarity and expressiveness of the curl design, the ornaments are applied to a varnish base.
Simple and beautiful monograms - red, black, gold
Monograms on nails of a simple type are created step by step with a needle or brush. This will require a little patience. It is advisable to put a dot of one color, and on top put a dot of a smaller diameter and a different shade.
Using a painting tool, decorate from the center to the edges. Beautiful stains are depicted using devices and various paints. They can only be made magnificent by an experienced hand.
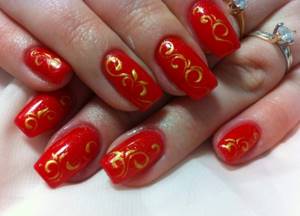
Golden curls look sophisticated, preferably against a bright or rich dark background. Having applied a contrasting tone to the nail, begin to put black stripes on it, drawing out commas and the desired stains.
After drying, coat with gold plating and secure. Black monograms look great on a French manicure. Red monograms can be drawn in any way and combine favorably with white, beige shades interspersed with gold.
Monograms with rhinestones
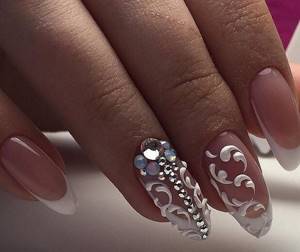
Curls with stones give the design a special style and grace. Professionals recommend a combination of sparkling rhinestones with a uniform background to highlight the shine. You can decorate the center of the monogram with them or place them along the edge of the hole.
Volumetric monograms
When you start making monograms on your nails in a volumetric design, you should follow these steps step by step:
- Give the nail plate the desired shape.
- Glue decorative elements (appliques, figured glitter, various signs or symbols) onto the base base.
- Seal with clear varnish.
A voluminous nail style will require patience to complete and is suitable for any occasion.
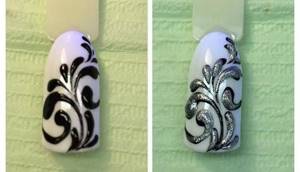
Monograms with French
First, the nails are decorated with a French design, then beautiful weaves are drawn on top. A distinctive feature is the curls drawn on the sides of the nail covering, usually on one edge and with the addition of rhinestones.
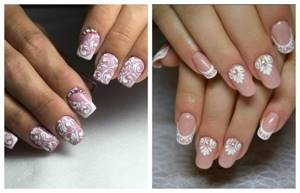
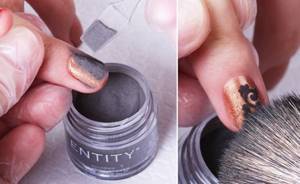
Monograms with acrylic powder and sand
To create such curls you will need acrylic powder and sticky varnish. After completing the drawing, use a wide brush to pour powder, previously coated with sticky paint, onto the nail plate.
The sand particles will be evenly distributed and quickly harden. All that remains is to dry your nails and carefully brush off the remaining sand. This design attracts with silkiness and tenderness.
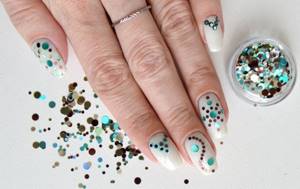
Monograms with glitter
The nails must first be painted over with a varnish base. Having chosen among the many different types of glitter those that are needed, they can be applied with a hairpin or a toothpick moistened with water according to the planned pattern. Dry and apply a colorless sealer.
Monograms and curls
Curls are one of the varieties of monograms; the technique for making them is identical, and they are made in different styles and designs.
Monograms and openwork
The most labor-intensive nail design technique. A very thin lace mesh that is carefully drawn over the entire surface of the nail. To make the task easier, there are stencils.
When working manually with several tones, you should carefully draw the picture. Particular attention should be paid to the harmonious combination of colors and overall gamut. The lines should be clearly visible on the base coating.
Don't miss the most popular article in the section: How to draw monograms on nails step by step for beginners. Instructions with photos.
How to use cards
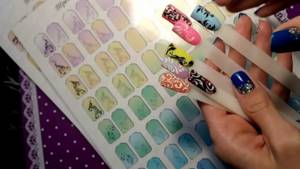
Training cards for painting monogram nails can be divided into several simple subcategories. These are basic elements, simple strokes and lines, squiggles and curls, as well as more complex compositions of them. Subsequently, having undergone some practice, composing various variations of them, the full-fledged patterns in question are obtained. Usually the exercises are designed in such a way as to simply get your hands on, going from simple to more complex, as in any business.
Paper and cards
Download training cards for drawing monograms, and then print them out on paper. It is optimal to select only a high-quality and glossy surface for training, so that the varnish is not absorbed, but also does not spread, as on natural nails. In addition, make sure that the dimensions of the TCs you print do not exceed the usual scale of a nail, otherwise the practice may be useless.
You can make such cards reusable yourself by placing a sheet of paper in a file and securing it securely with, for example, tape. By drawing on a polyethylene surface, you will receive additional benefits, since the designs you like the most can be carefully removed and transferred to your nails, like special templates.
Paints, varnishes and drying
The easiest way to learn how to paint monograms is with regular acetone-based varnishes. However, acrylic paints, which are quite expensive, are intended specifically for drawing. To save money, many masters use old or low-quality gel polishes for training, which they don’t mind. Ideally, you should use exactly the same materials that you are going to use on your nails when painting for a “finish” finish.
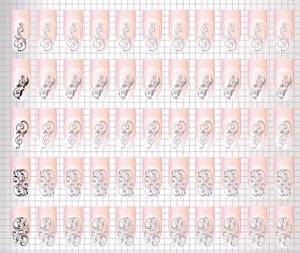
Even if you leave gel polish or acrylic on paper, it will dry after some time, but sometimes you have to wait quite a long time. It is optimal to use a UV or LED lamp to dry the drawings. Anyone who does a manicure with gel polish usually has it in stock.
Brushes and technique
Professional craftsmen say that even if you buy hundreds of brushes, they will still all turn out to be imperfect and it will be difficult to work with them. It is optimal to purchase three of different thicknesses, but not very thin, as they will not hold a drop well. It is best to start training with one brush, constantly adjusting it, modeling, for example, using ordinary scissors. This way you can create your ideal tool, which will be convenient and easy to use.
Drawing is also very simple, the first element is usually drawn most clearly, and you need to start with it. Then those that are paler, following the sequence of actions. Everyone probably remembers how they learned to write according to special recipes at school; learning to draw monograms is no more difficult, the main thing is perseverance and practice.
Schemes and training cards (stencils) for painting nails - drawings on nails step by step
Schemes and training cards for manicure will help you gain experience in applying any patterns. Every female person can easily master the painting technique based on training cards.
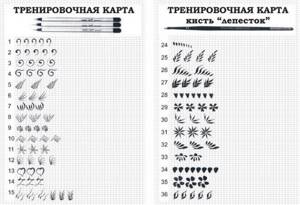
Sample training cards
They differ in varying degrees of complexity, and a large selection of stencils will allow every lady to choose any variation she likes.
To do this you should purchase:
- acrylic varnishes;
- special brushes to provide a high-quality pattern;
- training cards;
- checkered notebook paper and pen.
First of all, you need to try to draw a picture with a pen on paper, then draw the decorations on paper with a brush, and finally you need to draw everything on a map. To more accurately convey the design, it is preferable to use a toothpick or a needle.
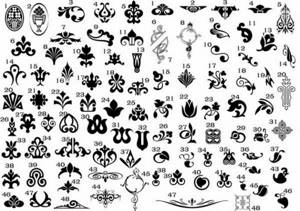
The point of drawing is that, first of all, you need to start with simpler patterns, which will gradually become more complex. For example, to depict a branch of droplets, you should draw thin grains, and gradually increase them, starting with the thin end, and ending a little lower with a thicker rounding.
Don't miss the most popular article in the section: How to extend nails with gel polish. Nail extension instructions for beginners. Photo.
Chinese nail painting technique for beginners
Chinese painting involves creating any designs on nails - flowers, panoramas, landscapes, but using a certain technique. The essence of this process is to draw a separate design detail with one brush stroke. Here you don’t have to paint your nail in several layers; you need to apply the desired colors to the tool, mix them and sweep them over the nail.
Required materials and tools
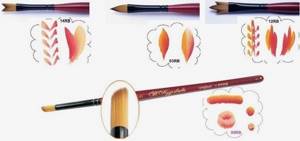
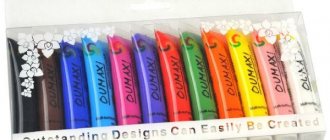
- Acrylic paint is the main component. The material has excellent viscosity and the right consistency so that the design is perfectly applied to the nail. An excellent choice would be water-based acrylic paints with the addition of silicone. This material can be easily purchased at any office supply or art supply store.
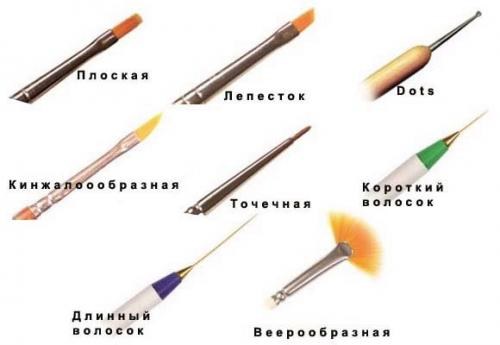
- Brushes. This tool made from natural wool is chosen by real craftsmen because it is durable and easy to clean. For beginners, artificial brushes are suitable for the first time; they are cheaper and more practical. A craftsman should have several types of such tools in his arsenal: flat – for applying smooth patterns;
- brushes - to add texture to drawings;
- liners - for drawing contours, straight lines, thin elements;
- fan - to create a background, single-color fill;
- beveled - for drawing small ellipse-shaped elements.
Execution steps
First of all, you should prepare all the tools and materials that will be required for the job. It is worth taking care of your nails; they should already be well manicured. For test execution of designs with Chinese painting, it is allowed to take artificial false nails that are longer. It is recommended to copy the first images from ready-made pictures in order to analyze the correctness of the design and its similarity to the original. If you need to make a blooming rose using Chinese technique, then the stages of its implementation will be as follows:
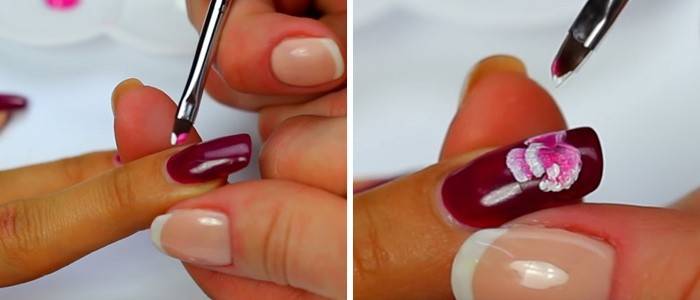
- Take white, red, black acrylic paint and a wide brush. Dip the tool in the first two colors, shade it a little on a piece of glass, in a plastic plate or other container.
- Apply the first round stroke to the nail; it should turn out convex at the highest point. We make the width of the future petal minimal, and its left edge should be lower than the right side.
- We make the second stroke in the same way, but its ending should be located higher than the initial one.
- The next two movements will be similar to the previous ones, but in symmetrical reflection. The first strokes should look a little smaller and be covered by subsequent strokes.
- Add a few more petals using similar movements with the brush, performing wave-like movements (up and down).
- Apply black acrylic paint to a thin brush and draw all the contours that we want to see on the blooming rose. With the same color and tool you can make several closed buds and leaves.
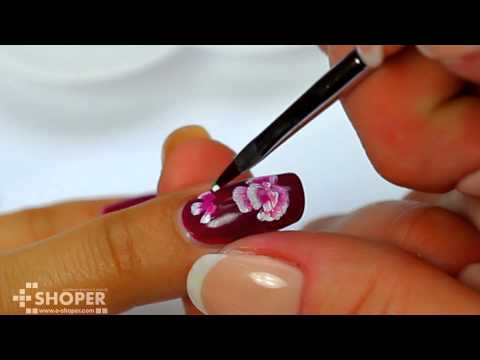
Chinese nail painting for beginners
How to draw monograms on nails
One of the main devices for painting a manicure is a brush. It is advisable to choose an item of excellent quality. When purchasing, you need to pay attention to the following properties:
- the base must hold tightly and not roll along the seam;
- you need to try to pull out the hairs, and if all remain in place, feel free to purchase;
- when wetted, all bristles should fit perfectly;
- a tool with a seamless shell is more convenient to use compared to others;
- It is worth giving preference to handles made of hardwood.
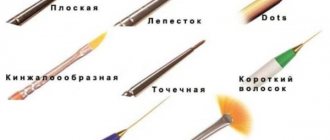
For different line drawings you may need the following brushes:
- with short, thin stubble;
- medium size with a pointed tip;
- thin, small with a sharp end;
- with elongated hairs;
- beveled dauber.
In addition to the brush, you need:
- regular varnish;
- acrylic paints;
- gel polish;
- shellac;
- napkins;
- degreaser;
- lamp for drying the gel coating.
Needles and toothpicks, various stickers and other decorative elements will also come in handy.
For beginners, you can use additional items in the form of stickers and stamping.
Brushes for monograms
When painting patterns by hand, it is advisable to use thin brushes that draw lines well, mark dots, and apply paint uniformly.
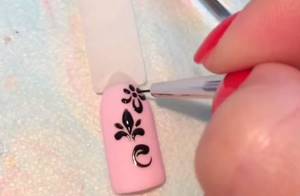
Learning to draw monograms on your nails is not that difficult. Using the right tools and a step-by-step description of the process in numerous photos and videos will help you cope with the task.
When in doubt about choosing a brush, you should listen to the advice of professionals and purchase:
- a special brush with a thin and elongated base that carefully draws lines. It is used for ordinary and more complex patterns;
- a beveled tool is suitable for removing curls;
- column 00, which has short and fine bristles for depicting small details and dots.
Having old varnishes, you can make brushes yourself. To clean them, you need to take several pieces from the bottles, remove any remaining varnish using acetone, rinse in a warm soapy solution and degrease with a solution containing alcohol.
Next, use nail scissors to cut off the excess fibers and give one brush a thin shape, and make a short cut with the other and bevel it. An alternative to a brush can be a needle or a toothpick that has sharp and thin edges.
To design lace monograms, it is best to use stencils, since the web should look very thin and accurately drawn.
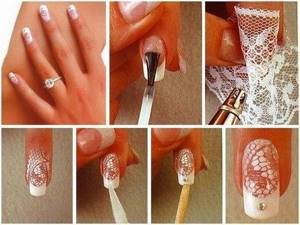
Nail design with openwork mesh
Those who prefer to do a manicure by hand need to be careful and practice using several brushes with different hair contents.
To get the perfect nail design you need to choose the perfect color scheme. The base shade should be in harmony with the pattern and accentuate the precise lines and uniform curls.
Drawing with dots
In case of difficulties when drawing clear small objects on the nails, the manicure industry offers a special design device called “dots”, which is translated from English as “dot”.
Using this tool, it is easy to depict even strips and other small links of different sizes.
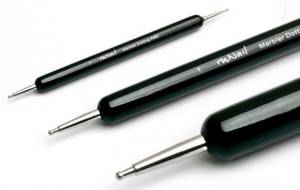
A dot is a small, thin stick with a metal circle at the end, and is made of wood or plastic. There are dots that have balls on both sides, but have different calibers.
Nail salons use whole sets of these devices, but for home use, small and medium-sized dots are sufficient.
Convenient and easy to use, even without drawing skills, you can use it to create beautiful garlands, lace patterns, twigs and straight lines. This occurs due to the gradual decrease of paint at the tip; with leisurely coloring, it lasts longer.
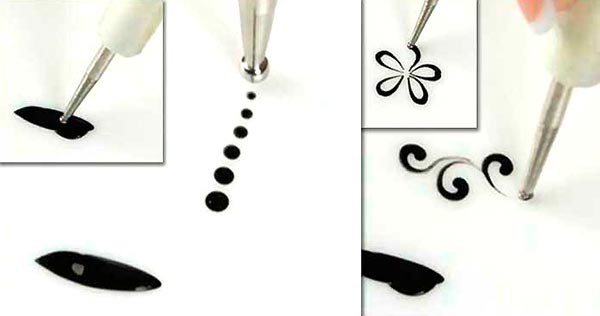
They resort to it when creating additional decor of a small size and when adding streaks with rhinestones.
To create a painting on your nails using dots, you need to:
- Paint your nail with the intended color of polish and wait until it dries.
- Apply paint (preferably acrylic) that matches the background shade. Dip the ball into it, drowning it slightly.
- Next, move the dots like a regular pen, drawing periods and commas. For long strips, drive slowly. You need to wipe the device on a napkin from time to time to get rid of the paint.
Drawing monograms on nails step by step is not difficult. Having mastered the skill, you can safely experiment, and the nails will be original, unique and will delight both the owner and arouse admiration among others.
Methods of applying patterns using a needle
For resourceful girls, a beautiful manicure is not a problem. If you only have a couple of favorite polishes and a sewing needle in your arsenal, you can easily apply spectacular designs on your nails. As an alternative, a regular toothpick will do. The result you get will pleasantly surprise and delight you. In order not to be unfounded, we suggest you see for yourself how easy it is to paint on your nails with a regular needle by looking at the photo.
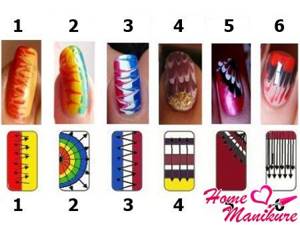
Such painting does not require special knowledge and skills. Working with needles in nail art usually brings only positive emotions. The main thing is to make sure that the nail polish is not too thick, otherwise the drawings will not work out . In addition, you need to have a certain skill to move the needle quickly enough. If it doesn’t work out the first time, don’t rush to despair, try again and again. You can get more detailed information about working with a needle in the feature article on our website.
As for applying patterns with a brush: despite detailed photo examples of training cards, the drawings may not turn out entirely neat. This is often caused by incorrect hand placement. At the school where future nail art masters are trained, special attention is paid to this point. So that you can fully master the technique of drawing, we suggest watching the final video lesson. Learn and enjoy a beautiful manicure without leaving home!
