The main thing in a woman’s grooming is her hands and nails. Therefore, the increased demand in salons for manicures requires new techniques and techniques in nail design. Women have already become accustomed to covering their nails with shellac, varnish, and extended nails; now masters surprise with voluminous designs. Aquarium nail design, how to do it correctly, involves a technique where a transparent gel is applied on top of the nail in a thick layer, protecting the decorative elements.
Details about the “aquarium” design
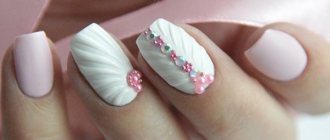
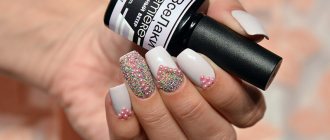
This nail art is simply called an aquarium, because the decor looks like an aquarium through an illusory gel coating, creating a three-dimensional image. Aquarium nail design - how to do it correctly, gives the concept of artistic design using drawings, patterns, sculpting. Nails, under the gel, are decorated with rhinestones, sparkles, and dried flowers. Others like nails with colored sand, logos, feathers, shells and other similar elements. We even learned how to use decoration using photo design. Then the protective layer is polished, making the nails smooth.
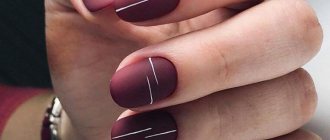
The shape of nails for aquarium design is chosen in accordance with personal preferences and the shape of the brushes. Afterwards it is determined what is suitable for oval plates and what is suitable for squares. Almond-shaped, oval and pointed plates are considered fashionable for aquarium design on extended nails or on tips. Oval and square shapes suit natural nails. When choosing a combination with another manicure, they often opt for French and lunar designs.
What makes a design aquarium different:
- high cost, which does not deter fashionistas who prefer original coatings;
- versatility - you can apply a single-color varnish over the gel and then remove it, which does not harm the pictures;
- manicure is worn for 3 months with proper care and timely correction;
- practicality: voluminous decorative elements are securely hidden under a smooth layer of gel and do not interfere with homework.
In addition, the unusual and original nature of the manicure allows you not to decorate your hands with expensive jewelry.
Technique for extended nails
Artificially extended nails give more room for imagination and allow you to create more complex, original nail art. In essence, the aqua design technique on nail extensions is practically no different from that used for natural nails. The whole difficulty lies only in the procedure itself and the extension technology, which looks like this step by step.
Standard nail extension option
After the sculpting gel has been applied, dried and the nail has been shaped, you can begin decorating, which is no different in process from the step-by-step actions on natural nails. The only thing that distinguishes this design is the ability to place three-dimensional elements for the composition (acrylic modeling, beads, shells, chains, etc.).
The entire placed design is covered with a layer of transparent coating - a special gel that will make the nail more durable and wear-resistant. To make a three-dimensional image in a manicure with an aquarium effect, you can apply a drawing or pattern in several stages: first at the “very bottom” (on the sculptural gel), and then after covering the decor with a transparent gel, adding elements on top of the coating.
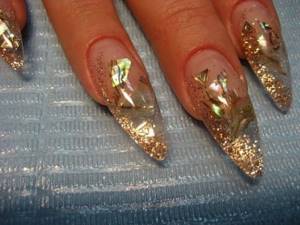
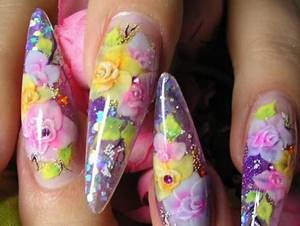
Three-dimensional design using the “aquarium” technique
It is worth considering that the aquarium design style is difficult to correct and makes this procedure longer. If the extension is done with acrylic, then the “aquarium” decor is no different, the only difference is in the materials.
Choosing nail length
Aquarium manicure is suitable for long and short nails. If the short length is not satisfactory, extensions are done immediately.
Extended nails are suitable for decoration by sculpting and painting. Also, the tips of such nails are often decorated with foil, rhinestones and other decor, which is easy to place in such an area. Removable plates are called tips and are recommended for independent design. These plates are first decorated and then glued to the nails, so the result is neat.
Aquarium nail design, how to do it correctly on short nails, warns that the volume created steals the length. Masters advise slightly extending the nail plates. Short nails are not decorated with sculpting and voluminous decorations, so as not to be covered with a thick layer of gel, this is not acceptable.
Fimo in aquarium manicure
Fimo is a specially cut polymer clay from which elements of aquatic nail design are created.
Volumetric elements made of polymer clay on the nails give each nail uniqueness and unusualness.
Clay is universal - you can use it to create any additions to your nail decor.
It is worth considering that this fimo is the smallest clay particles that require good fixation (you need to cover it with acrylic or gel in several layers).
Best used on long nails.
Advantages and disadvantages of a new type of manicure
It’s no wonder that women have taken a liking to the new manicure technique, which suits long and short nails and allows you to decorate the entire surface of the nail or just the edge.
Other benefits:
- nails look unusual and original, attracting attention;
- novelty and use of various techniques;
- using seasonal themes for design, which are now in fashion;
- chips and cracks do not appear on the surface for 3 months;
- it turns out to create an image with a special mood;
- the picture does not fade, growing nails do not need to be filed;
- decorative elements sealed with a smooth layer do not fall off or cling;
- goes well with a wedding dress.
Aquarium nail design and how to do it correctly, if there are no shortcomings. The main thing is that you only need a special gel. If you design your nails the same way, you will get a variegated look. In addition, professional execution is required so as not to create a clutter of elements. When covering the decor, it is difficult to guess the thickness of the gel. When getting a manicure in a salon, it is difficult to sit for 2.5 hours while the master works on your nails. Expensiveness is also considered a disadvantage. It will be a shame if a manicure is done by an uninformed person.
Decor ideas
The lack of artistic ability to create a drawing or pattern can be compensated for by the skillful use of decor.
According to the method of application in aquarium design, they can be divided into 2 groups:
- We can include elements that have characteristics that make it possible to cover them with a transparent layer of material while respecting the architecture of the nail. Their thickness, flexibility, grain size, and material of manufacture do not interfere with leveling. As a result, the decorative elements are sealed inside the nail. The aquarium layer will not hide the beauty of such decor, but, on the contrary, will add volume.
- Combines convex, coarse-grained, volumetric elements. They are used for decoration on the surface of the nail. They complement the created aquarium design. Depending on the size and location on the nail, the technique for attaching them may vary.
Grouping of decor depending on the method of application:
| List of decor | |
| Located under the material. | Located on the surface. |
| stickers/sliders | rhinestones |
| mica/blix | stones |
| foil/Yuki flakes | crystal chips |
| dried flowers | marmalade |
| glitter | pixie |
| kamifubiki | broths |
| fimo | stones |
| sequins (candy) | metal decor |
| shavings | figurines |
Modern stickers and sliders can replace drawings of any complexity. There are even volumetric (embossed) options. They are extremely easy to use and affordable.

There are three main methods of attaching decor:
- To the top. The stickiness remaining after drying is suitable for holding finely ground powder and glitter, foil, flakes, shavings, and sliders. The material is sprinkled on the nail, applied with a brush or sponge.
- On the gel. It is a stronger material. Well suited for attaching small rhinestones, bouillons, large sparkles, dried flowers, various sand and crumbs. After applying the gel and decor, the design is polymerized in a lamp.
- On polygel. Being a mixture of acrylic and gel, the material is able to withstand large rhinestones, stones, and various compositions of them. A small amount of material is applied to the location of the future structure, the stones are strengthened, and polymerized in a lamp. The density of the material does not allow the structure to float on the surface of the nail, breaking the symmetry.
An obligatory step for any fastening technique is covering the result with topcoat. Particular attention should be paid to the area where rhinestones and stones are located. The finishing material should not get on their surface due to possible loss of gloss.
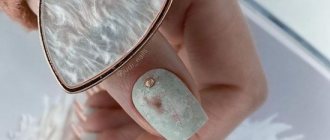
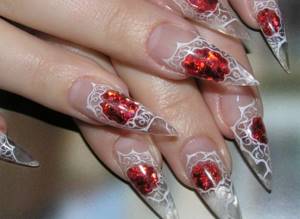
The most complex version of an aquarium manicure is considered to be the design inside, which contains water. When you move your hand, the water flows smoothly, creating bubbles. This technique became possible thanks to the use of rigid construction materials that can quickly harden in the lamp.
A plastic tip is placed on a pre-formed smooth base of the future nail. Its size should be several millimeters smaller than the substrate. The joints are fastened with construction material, leaving free space at the cuticle.
Small sparkles or other selected decor of a suitable size are placed into the resulting cavity. Then, using a syringe, fill the remaining space with distilled water or glycerin. The last step is alignment with the construction of the architecture. The sealed liquid moves the decor as it moves, creating shimmer.
Aquarium design yourself
If you want to create beauty, you will need to find out what aquarium nail design is and how to do it correctly. Then purchase:
- a jar of transparent modeling gel or acrylic with primer;
- nail polish remover;
- UV lamp to dry the coating;
- multi-colored gel paints with an acrylic base and thin brushes;
- decorative elements;
- special glue;
- polisher or soft files;
- tweezers for laying out decor.
Working with natural and extended nails
- File the edges of the nails and give the desired shape. Remove hangnails and cuticles with pterygium. Use a nail file to remove the glossy shine from the plates.
- Wash your hands with soap or treat them with an antiseptic; to degrease your nails, take a liquid that is used to remove polish.
- Apply a layer of primer or base coat and dry for 2 minutes.
- Apply a thin layer of colored or clear gel polish and, without removing the sticky layer, lay out the intended patterns or apply painting. Large elements are laid out as the first layer, then in decreasing order. The layers are also dried for 2 minutes.
- To fix, apply a colorless gel over the decor. After drying for 2 minutes, apply the 2nd layer.
- Soak a lint-free cloth in a special liquid and get rid of the sticky layer.
- Apply a layer of colorless varnish and place your fingers under the lamp.
- Rub moisturizing oil or cream into the base of your nails.
Design with transparent tips
For tips, the nails are treated as in a usual manicure, but cut short, leaving 2-3 cm. The tips are cut to the desired length, then glued to the nail plates. After degreasing, artificial nails are shaped and glossed off. The primer is applied only to living surfaces. Decorate in the same way as natural nails.
Trendy jewelry for design solutions
Winter 2013, just like previous seasons, will be held under the auspices of caviar. A generous scattering of beads, meticulously glued to the nail plate, looks very sexy. The couturiers took care to take into account the interests of the widest audience. Thanks to their imagination, “caviar” is no longer exclusively black: beads can be of a wide variety of shades.

A scattering of beads is a trendy design for the coming autumn and the coming winter
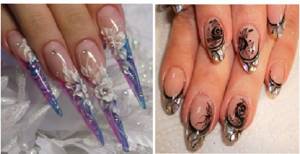
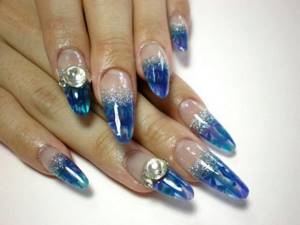
Second on the fashion pedestal this winter will be the design of translucent artificial nails. That's where there is room for imagination! Compositions can be very diverse. A traditional “business” jacket can be decorated with sparkling rhinestones. Volumetric modeling will sparkle with new facets of its exquisite beauty, especially “paired” with elegant beads, lace, sparkling threads. A clear base is a great way to get a 3D effect. The most eccentric and unexpected ideas on “glass” nails look incredibly attractive.
“Glass” nails are an excellent base for 3D manicure
What and how to decorate your nails
Design methods using the aquamanicure technique are influenced by fashion, the desire of the owner of the nails and imagination. Some decorate 10 fingers the same way, others highlight 1-2 nails.
Options for aquarium nail design and how to do it correctly
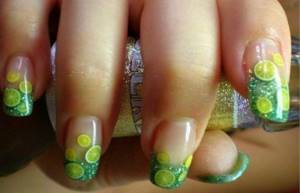
- Fimo is a decoration made from colored polymer clay. For an original summer manicure, the theme is juicy fruit slices, in the fall - bright leaves. To cover the tips of the nails, use acrylic powder of the appropriate color.
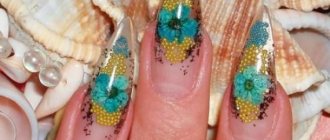
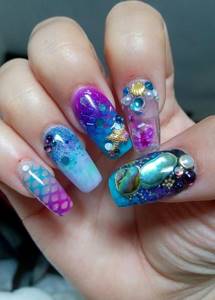
- Summer designs are created from small shells and sparkles, painted with marine-themed paints.
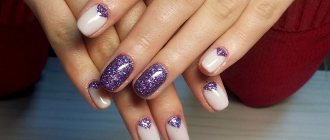
- Rhinestones and glitter along the entire length of the nails on a nude or gradient background. Suitable for an evening look. Sequins or floral designs are sometimes added to sparkles.
- Small feathers with glitter look original under the gel layer. As an addition, it is allowed to insert drawings and rhinestones. This decor is suitable for artificial nails.
- More than 2 layers of gel are applied to bouillons (beads) with sequins to hide the bulge.
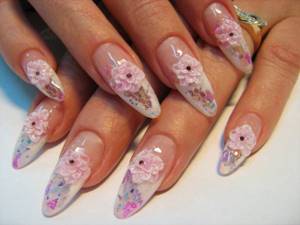
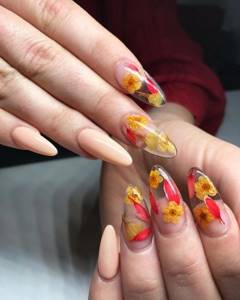
- A recognized aquarium technique is the design of dried flowers on elongated nails. The decor looks gentle and feminine, especially if you add glitter or broth. Suitable for romantic natures.
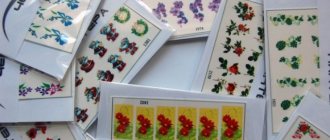
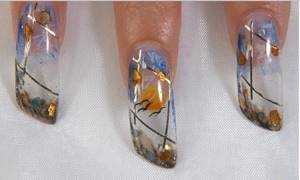
- Artificial nails with paper products pasted on them look unusual: pictures, photographs and even scraps of newspapers or wallpaper. The applied gel covers the images like glass, creating a 3D effect.
- An attractive design is achieved with colored sand.
- A recognized trend in aquarium manicure is decoration with special small beads or halves of beads. This decor is combined with other round elements: kamifubuki, sequins, broths. Stick on extended nails or tips.
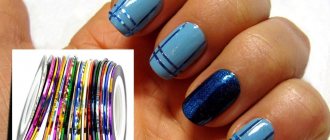
- Manicure foil or mica combined with acrylic powder. This foil is available in two types: after applying the first type, a shiny imprint remains. Another type is glued in cut pieces or strips.
- Decoration with pieces of lace or a lace pattern. In addition, rhinestones, sparkles and other suitable materials are taken. Stamping, stickers or pieces of thin lace are suitable for natural nails.
Options in different shades
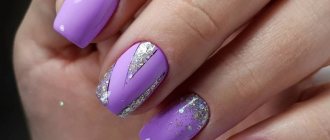
Design using aquarium technology provides nail artists with incredible opportunities for experimentation. This method allows you to create unique masterpieces with a limited color palette. By combining nail polishes, other coatings, and decor with each other, you can expand the variety of available designs.
Ways to combine colors:
- use of contrasting shades;
- applying shades in a similar color range;
- combine materials of different densities (stained glass varnish and pigmented);
- use matte varnishes and shimmers.
A well-known technique among artists is to paint the fingers of one hand in different shades.
This allows you to dilute the monotony of the manicure or create an emphasis on several of them. Aquarium designs work well with other techniques that allow you to combine different shades. The gradient is performed as a smooth transition from one color to another. The technique can use 2 or more shades. This coating serves as the basis for future design. Pastel colors are suitable for everyday wear. They will add romance and lightness. Clients who are open to experimentation can be offered a brighter palette of shades.
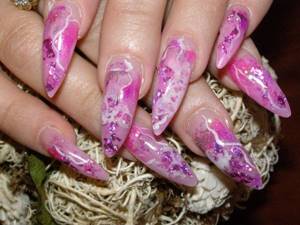
Often, a manicure technique is used with an aquarium, which allows you to combine materials of different shades. It creates an effect similar to marble, haze or ink dissolved in water. The drawing may have a chaotic arrangement or be a complement to the overall idea.
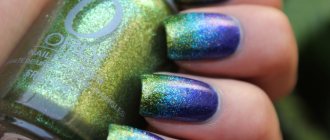
To add shimmer to such designs, craftsmen use varnishes with sparkles, shimmers, and mica. When you turn your hand, the shiny elements shine in the sunlight.
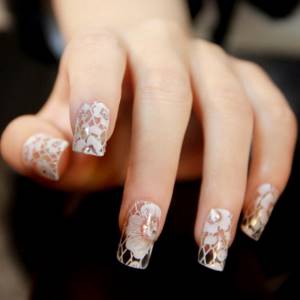
Lace aquarium design options
Lace is often used to decorate underwear, but on nails it looks especially elegant.
Elegant design - option with painted lace on a matte finish in dark or light color.
Black lace, in the form of a veil on a beige base, looks mysterious and enigmatic. Enough to decorate one or two fingers.
The original design is to decorate only the corner of the nail with lace or a strip along the oblique cut.
You can create the illusion of a lace jacket if you paint the lace with thick paint, imitating threads. Gloss coating will add volume.
Lace patterns are decorated with rhinestones and sparkles, adding a mysterious shine. But shiny pebbles need to be attached in moderation so as not to lose their delicate appearance.
Color combination:
A white or black lace pattern on a red background is suitable for a special occasion.
The black background and white lace create an elegant look.
The pattern of white lace on pink nails looks gentle and discreet. To highlight the picture, it is worth adding black, purple or lilac.
Nude shades and lace embody tenderness and innocence. To create an exquisite wedding look, add rhinestones and delicate sparkles.
Gold and silver lace are depicted on stickers that are easy to apply under the gel yourself.
Luxurious lace design
Luxurious and elegant lace, made using sophisticated aquarium technique, looks simply stunning. Pieces of this material can be used both on each nail and on individual fingers. At the same time, this decor can be safely complemented with sparkles, rhinestones and other decorations. When performing such a design on natural nude nails, it is best to choose a very thin material or patterns using the stamping technique.
Advised by professionals
It’s a pity if the time and money spent on a manicure does not live up to expectations and the result disappears before the promised time.
Therefore, it is worth getting acquainted with the instructions given by the masters: “Aquarium nail design and how to do it correctly.” A mandatory and daily activity is hand care with moisturizing and protective creams. To ensure a strong adhesion of decorative elements to the gel, you should not apply cream beforehand. If fabric lint gets on the gel-coated surface, the gloss will prematurely become covered with cracks and detachments will appear, so choose lint-free napkins. The colors are also carefully chosen: without harsh colors, but not faded either. The color of decorative elements should be combined with the clothes that are supposed to be worn. They also choose a nail design to go with their clothes, which should not be “screaming” and provocative; it is better to stick to a classic or casual style.
Short nails are not suitable for three-dimensional designs and decoration of the entire nail plate. The exception is 1-2 nails. If the details protrude too much above the surface, you will have to apply a lot of gel, which will make your nails thick, sloppy and awkward.
Aggressive chemistry of household products and sudden temperature changes negatively affect gel-coated surfaces. Therefore, you should do your homework with rubber gloves and use only warm water.