One of the simplest nail shapes is round. Even a beginner can handle creating its shape. After all, what is, essentially, a round shape of nails? These are very short nails with rounded outlines, the tip of which follows the natural curve of the nail bed. We can say that the round shape is the initial shape that is only possible on the nails, and only then, as the nail grows, can you think about other options - “square”, “oval”, “almond”, etc. The rounded version is acceptable on nails for a short time - the maximum length for them is 2 - 3 mm, then it will no longer look aesthetically pleasing. The round shape must either be constantly maintained at the proper level of length, or, after it grows, it must be transformed into a different shape.
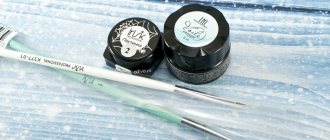
Photo from the site: vk.com/vknailart
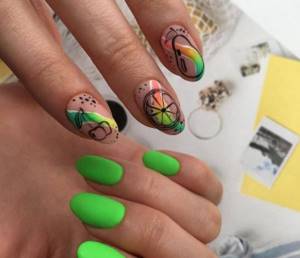
If everything is clear with the shape, then how to choose a nail design for a round shape? This is quite a problematic issue. After all, it is quite difficult to place an interesting filling on a small area of the nail field. Especially for all fans of round tips or for those who have not had time to grow another length, “Ideal Manicure” has prepared a photoset of the freshest and most interesting solutions from nail masters of round nail design.
The essence of the round shape of marigolds
There are no truly round nails. This name means something between an oval and a square. As a rule, nails of this shape are short in length.
This type of pruning is often called “at the root.” The lower border is made streamlined by rounding the edges. If desired, the length can be slightly increased. In this case, a “smile line” is left. The shape becomes more like an oval.
How to shape your nails. Deciding on an option
Photo from the site:
There is a wide variety of nail shapes, both natural and artificial - pipe, age, almond, etc. But they all, at their core, often have the same source. So manicurists distinguish three main forms:
- "Square";
- "Triangle";
- "Oval".
All other forms known to us are formed as a result of variations or combinations of basic forms. Thus, all shapes that have a rounded tip contain an “oval” at their base or in combination (“almond”, “age”, round shape, etc.). The shapes with gradually tapering side edges borrowed the outlines of the “triangle” (“ballerina”, “stilettos” and the same “almond”). The straight tip parallel to the base refers to the “square” shape (“soft square”, “rectangle” and again “ballerina”).
When creating a form, you should take into account the directions of the lines of the side faces and the end. Knowing their basics will help you decide on the correct direction of sawing.
In this review, we will not separately consider how to make a beautiful nail shape for each variation, but will only introduce the general rules and techniques for creating it using individual examples. You can find information on creating the shape that specifically interests you in separate reviews of the “Ideal Manicure”.
Benefits of circle shaped nails
Looking at the photo of a manicure for round nails, it becomes clear that this format is dictated by practicality. Here, a comfortable length is combined with a neat cut line. The option is universal in all respects:
- age;
- Lifestyle;
- appearance features.
These nails can be worn by a little girl or an old woman, a school teacher or a mother on maternity leave. With round nails there is no risk of breaking the plate, dragging on clothes, or scratching. This manicure does not interfere with work and life.
The nuances of processing round nails
A manicure on round nails will not look beautiful if the treatment is skipped according to all the rules. A neat cuticle is considered a prerequisite. You will have to take care of this part of the manicure more often than maintaining its shape. When looking at short nails, it is the condition of the skin near the plate that attracts attention.
The presence of burrs and rough ridges is not acceptable. It is enough to carefully work out the form once. The cut line is rounded, taking care to avoid corners and notches.
Let's start forming
Whatever shape you choose - almond, oval, square, round or any other, you need to prepare for the procedure. What should be done
- Remove old varnish. A special liquid will also degrease the surface of the nail plate.
- Soften and carefully trim the cuticle.
- Disinfect your nails.
Making a "square"
Take your pedicure clippers and cut your nail plate in a straight line. File it down so that the end is completely straight. Check this with a ruler or nail file. File the sides of the nail a little. For a “soft square”, sharp corners need to be rounded with a file. Polish with a soft nail file to make your nails beautifully shiny and smooth. Wash your hands and apply nourishing cream.
Making a “circle” or “oval”
Using pliers or scissors, cut your nails in the same way as in the first option. In order to get a rounded version, make smooth rounded movements with a file, starting from the sides towards the middle. Do not make more than 10 filing movements in one direction. For oval nails, you must first file the sides and then round them. Using a soft nail file, go around the corners and complete the procedure.
Features of the design
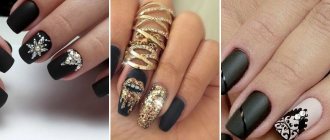
You need to be careful when choosing a manicure design for round nails. For a typical combination of length and shape, complex design is not suitable. It is better to exclude the abundance of decor. Using drawings, take a more careful approach to choosing a picture.
The design should not take up the entire space of the plate. The chosen idea must be fully implemented, taking into account the scarcity of space. A successful solution would be a laconic design. This does not have to be a light or monochromatic coating. Various options are possible.
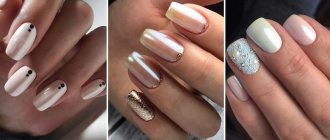
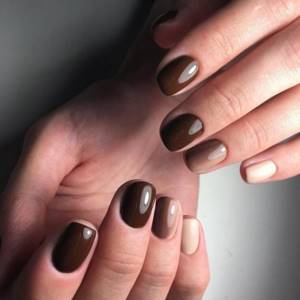
Plain coating in neutral tones
It is impossible to imagine that traditional minimalist design will go out of fashion. Nails with a colorless finish and painted in nude tones remain relevant. For decoration, you can also use any shades of moderate brightness.
Owners of short nails should avoid a single-color coating in dark colors. The coating does not have to be left without decoration. If desired, different methods of decoration will fit into the image.
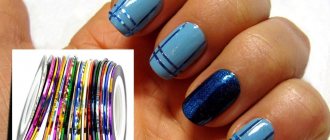
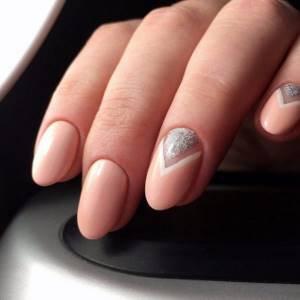
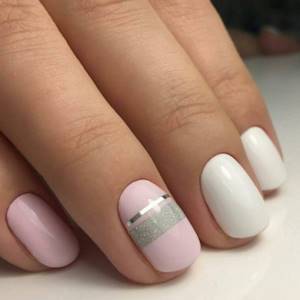
Simple geometry
For short nails, single dots or lines are most often used as a geometric design.
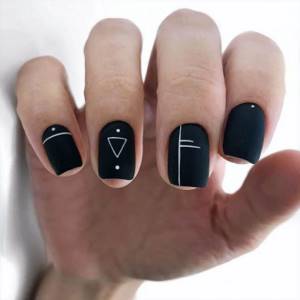
Marigolds with a stripe along the border of the plate look interesting. It is not necessary to perform a classic French style. This can be a bright splash on a neutral background. A vertical stripe is considered an excellent option. It can be held in the center of the plate or moved to the edge.

There may be several stripes, but do not overdo it. Complex geometric shapes are used with caution. A short length does not fit well with various turns and clutter.
Plush manicure
Not long ago, soft manicure came into fashion; its essence is that the nail plate is covered with a special pile, which creates this effect.
This looks interesting, of course, but is not always practical.
So, we strongly advise against choosing this design for people who spend a lot of time in the water. Otherwise, you risk that your manicure will quickly lose its original appearance.
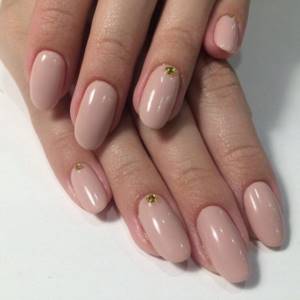
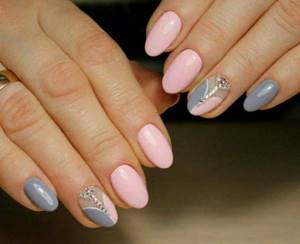
Using Crystals
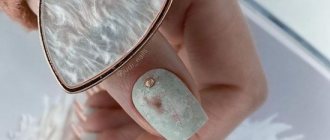
Round shaped nails with a design made of shiny stones look great. You can use beads, rhinestones and other decorative elements. The inclusion of a large, easily attention-grabbing single detail looks beautiful.
Small pebbles can be distributed in bulk or in a clear layout. A design with crystals will be a great idea as a New Year's manicure for round nails.
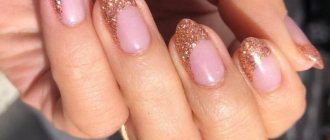
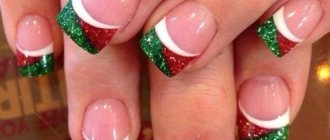
Glitter decoration
Glitter is a good alternative to stones. They are used to perform the design locally rather than covering the entire plate. You can lay out glitter in a pattern or scatter it randomly. When creating a picture, it is permissible to use varnish with a shiny structure. However, it is not recommended to cover the entire surface of the nail with such coatings.
Common mistakes
The most common mistake is completely removing the cuticle. This nail part protects the plate from infections. The more you remove it, the more intense the skin will grow. Therefore, it is recommended to soften it and move it to the nail base.
Amateur struggles with ingrown toenails are common. Sometimes it’s still worth entrusting such a problem to specialists, especially when it has dug deep under the skin and gone deep. When you try to cut it out, you can get an infection, but the problem will remain unresolved. If you treat your nails regularly, then such problems will not happen.
Another mistake is improper polishing. Some people think that using a polishing file will give you shiny nails. In this case, the nail plate loses its layers and becomes thin. It is recommended to use special tools, namely files with an abrasiveness of 900 to 1200 grit. Before polishing, nails and cuticles are treated with a nourishing and moisturizing agent. Using a nail file, it is gently rubbed into the surface. The nail plate gains additional elasticity and acquires a mirror shine.
For processing, it is better to use special nippers that cut the edges of the nail evenly. If you plan to remove a short length, it is recommended to use a file that will evenly file the edges and give the desired shape.
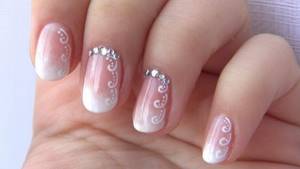
Outline design
Particular attention this season is focused on contour manicure. The design consists of tracing the shape along the contour. It can be a broken or regular line in a single or different colors.

It is acceptable to have up to 3 shades in a nail design at the same time. Each finger can be decorated with different but compatible colors. The line can be turned into a field for drawing, but it is better to leave the center of the nail monochromatic.
Proper filing of extended nails. Nail filing technique! How to give your nails the right shape!
We will look at how to properly file nails when adding extensions. When filing, you need to follow the rules, which you will subsequently follow automatically and without much effort. There are 10 filing lines on the nail.
Line 1. Visually draw a straight line along your finger. This line should be straight and not follow the curvature of the finger. Many people's fingers are far from straight, that's a fact. The master’s task when doing nail extensions is to visually make the fingers straighter.
Line 2. This line is the free edge of the nail. It is sawed perpendicular to line 1. The perpendicularity of the line is checked by pressing the fingertip from the inside.
Lines 3 and 4 are perhaps the most important lines. They create a clear form. To do this, place the file on the edge and, with movements towards yourself without changing direction, file on one side and the other, creating a clear rectangle. At the same time, we monitor the thickness on the sides. It should be at least 0.5 mm. at both sides. Otherwise, the natural nail may open and you will have to add material. These lines run perpendicular to line 2. They begin in the cuticle area, where the cuticle comes out in a straight line. Lines 3 and 4 must be parallel to each other. Their parallelism is checked by pressing the fingertip from the inside. If another shape is provided, for example a stiletto, then these lines are sawed towards the center. Whatever the shape, it is necessary to cut so that the 3rd and 4th lines are symmetrical.
Line 5 - runs parallel to the cuticle line. When laying out the gel, you need to deviate from the cuticle line by 1-2 mm. The gel border at the cuticle line is reduced to nothing. In the cuticle area there should be the thinnest layer of gel, which smoothly passes into the main one.
Lines 6 and 7 - remove the edges formed after cutting lines 3 and 4. The position of the file is the same, but now the file needs to be placed on the surface of the nail. These lines are very important in sawdust. Checking the symmetry of these lines is as follows: look at the nail from the side of the longitudinal arch. Next, scroll the nail and observe the line of the longitudinal arch. It should be even and symmetrical throughout the entire nail. You can also check the thickness of the gel in these areas by pressing on the free edge. It should not bend when pressed in the smile area, like a natural nail.
Line 8. This is not a line, but a section. The highest point on the surface of the nail. This is where the thickness of the material should be greatest. It varies depending on the length of the free edge. If your nails are not long, then the thickness should be about 2 mm. And very long ones can be about 4-5 mm thick.
Line/Zone 9. This is also not a line, but a zone - it is located between lines 6 and 7 parallel to line 1. It starts in zone 8 and runs towards line 2. On line 2, the thickness of the finished nail should be at least 0.5 mm. and no more than 1 mm.
POSSIBLE MISTAKES
Nail from the side of the free edge, looking at the end. No1. In this case, the surface of the nail plate is not completely covered with gel. He is missing on the 3rd and 4th lines. You need to file so that the gel in these places is at least 1 mm. thick.No2. Swells on line 9. The surface is not finished. No.3. Likewise, only swells on lines 3 and 4.
Line 10. Located at the intersection with lines 3 and 4. Line 10 makes lines 3 and 4 on the same level.
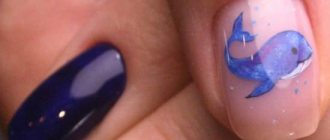
Fantasy in art style
The trend of the season is called art manicure. Here you can see a random design made using different colors. These can be artistic blots, spots, ornate lines, strokes.
There are no rules or restrictions for the master. The emphasis is on a fantasy approach to design. Each manicure in this style looks unique, bright, fresh. The design invariably attracts attention and arouses interest.
Plain nails
There's not even anything to say here. This is an eternal classic that will be appropriate both on weekdays and on holidays, so we advise you to take a closer look at this option. Besides, he will never get tired of it. After all, it often happens that a girl chooses a bright, catchy design, but after a while she gets tired of it.
This definitely won’t happen with plain nails! If you want to diversify them a little, then make a matte finish. It has been in trend for several seasons and is not yet going to leave the fashion world.
This way you will get a fashionable manicure in your favorite color, which you definitely won’t get tired of for several weeks!
Space motives
The theme of space has not been relevant for the first season. They experiment with both makeup and manicure. It is not difficult to come up with beautiful designs on this theme.
Just spray a little white varnish on a blue gray or black background: outer space is ready. Shimmers, glitter or rhinestones are used to form a starry picture. Objects can be drawn: stars, planets, moon.
Animal prints
Designers claim that animal motifs in clothing look vulgar. At the same time, these motifs are often interspersed at fashion shows. On nails, imitation skins of leopard, zebra, and snake do not attract such attention.
The drawing looks funny and can add variety to any look. A monotone print is most suitable for those with medium-length nails. When cutting at the root, it is better to abandon this design.
It won't be difficult for those with round nails to get a manicure. Nail artists have many solutions in their arsenal that correspond to fashion trends.
Round red jacket
To create a bright and fashionable look, many young ladies use red in their manicure. A red jacket emphasizes femininity and sexuality, and allows you to stand out and attract attention. On short and rounded nail plates you can create an elegant and neat red jacket. Aggressive scarlet shades can be smoothed out with classic white. A classic rounded smile is common on short nails. An inverted jacket on this form will look relevant. The lace design will add romance. A red jacket with a pattern looks stylish.