» Beauty » Nails » Nail design » Creating a design with seashells on nails
0
248
Article rating
The “Shell” nail design has many variations; its execution depends solely on imagination and creative skills. If you don’t set yourself too difficult tasks, you will be able to create a neat and beautiful relief on your own. This manicure is appropriate in summer. It will go perfectly with a bright dress and will remind you of the sea coast.
Nail preparation
This manicure is quite difficult to perform.
It is unlikely that you will want to redo it often, so it is very important to properly prepare your nails:
- remove the remnants of old varnish using special products. It is preferable to make a choice in favor of those that contain natural oils;
- give your nails the desired shape with a nail file;
- be sure to soften the cuticle with a salt bath and then remove it with nail scissors;
- Apply the moisturizer with massaging movements, allow it to be well absorbed;
- immediately before applying the varnish, remove any remaining cream with any degreaser;
- Apply strengthening gel to the nail plates - it prevents the nail from splitting and hides all imperfections.
Making a seashell at home
The step-by-step technique for creating a nail design with gel polish with shells is as follows:
- We prepare the nails for gel polish coating: push back and remove the cuticle, remove the natural gloss from the nails and apply a degreaser (primer).
- We apply a gel polish base to the nails and send it to polymerize in the lamp.
- We cover the nails under the shells with white in two layers, drying each of them in a lamp. I used Vogue Nails Snow Avalanche gel polish. Colored gel polish in light colors is applied to the remaining nails until a dense color is obtained. In my case, this is Patrisa Nail gel polish from the Avangard collection number 320, applied in two layers.
- Next, you need to make the surface of the nails matte. To do this, you can use a special matte top for gel polish or buff the surface of your nails by first covering them with a regular top. I recommend the matte topcoat, as it also works as a topcoat, thereby simplifying the work.
- Let's start working with shells. First of all, you need to secure the rhinestones. To do this, apply a transparent top coat with a thin brush, onto which we will attach them. We apply the top only in the place where the rhinestones will be placed. Now we carefully place them in the chosen position. To do this, you can use a special pencil for rhinestones, but I have already gotten the hang of catching them with an orange stick. In my design, I used a combination of Swarovski rhinestones, bouillons and special beads, which remind me very much of pink pearls. After laying out and leveling, we send it to dry in a lamp.
- To secure the rhinestones, we once again pass a transparent topcoat between them and along the edges, and dry them in a lamp.
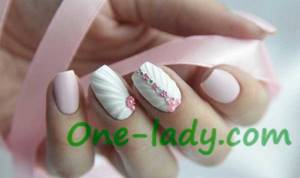
- To draw the lines of a shell, it is best to use a thick gel paint without a sticky layer. If the gel paint has a sticky layer, then the technology requires it to be covered with a top coat, which will smooth out the volume of the design, but we don’t need this. Lines are drawn converging from the edges of the nail towards the rhinestones using a fine nail art brush. When everything is ready, put it in the lamp to dry for 2 minutes. This completes the design.
Using acrylic powder
To create this delicate manicure you need to prepare:
- basis;
- white shellac or regular nail polish;
- thin brush;
- top coating;
- UV lamp;
- acrylic powder.
Instructions for implementation:
- prepare your nails;
- apply varnish to the nail plates and dry them in a lamp;
- as soon as the first layer is dry, apply the second and dry it;
- secure the layers with a top coat and also dry the nails in a UV lamp, remove the sticky layer;
- use shellac to draw straight or curved vertical lines on the nail plates;
- fix the gel polish in the lamp;
- The last step remains - to give relief, apply acrylic powder to the nails, remove the excess with a brush. This way you can give the shell a velvety look.
3D plasticine
This material is used relatively rarely, but it also has its place. It is best to use a brush to apply this decor, but other options are also possible. Before using plasticine, dip your brush in degreaser to prevent the bristles of the brush from sticking to the material. Next, we apply plasticine all over the nail, and in the depressions we press down the plasticine with a brush.
Editor's Choice: Is Gel Nail Polish Harmful: Myths Busted by Professionals
As already written above, it is better not to use classic rhinestones, as they will greatly overload your manicure, and your nails will look very cheap. It’s better to use glitter instead or do without decor at all.
Stylists say that the pearl shell nail design will become a hit in the spring-summer season. It’s not surprising, because such a manicure will suit any outfit and any occasion. If you are thinking about nail design, then take a closer look at this option. Perhaps this is exactly what you need!
Without acrylic powder
To create a pearl shell relief without using acrylic powder, prepare:
- basis;
- gel polish or regular nail polish (white or pink);
- thin brush;
- top coating;
- UV lamp.
Execution steps:
- prepare the nail plates;
- Apply polish to your nails and dry them in a lamp;
- after the first layer has dried, apply the second and dry it;
- Using transparent white or pink gel polish using a brush, draw a shell relief on the nail plates, leaving a small distance between the stripes;
- dry your nails in a UV lamp;
- Complete the manicure with a top coat.
To add some zest to your manicure, you can create a marine-themed design on your ring finger nail.
How to decorate
The manicure will look much better if you decorate the shell with something. In addition, this way you will be 100% sure that your friend will not have exactly the same manicure.
Rhinestones, beads and pearls will look beautiful at the base of the nail, thereby creating the impression that the shell originates from them.
Velvet sand, acrylic powder or rubbing. It is important to note here that you need to be extremely careful with the rub, because if applied incorrectly, it can ruin the entire manicure.
An alternative to all this would be tinting with paints. You can achieve volume using regular transparent gel paint. However, you will need a lot of this product, most likely you will have to apply 3-4 layers before you cover the entire manicure with top coat.
Using a stamp
For girls who prefer not to spend a lot of time creating a spectacular manicure, stamping can be an excellent option. Stencils with shells and a miniature stamp will help you create a beautiful design without unnecessary problems.
You will need:
- clear nail polish;
- stencil;
- stamp.
This manicure is very simple to perform:
- prepare your nails;
- Apply varnish to the stencil and remove any excess with a scraper;
- using a stamp, transfer the patterns to the nail plates;
- secure the resulting images with colorless varnish.
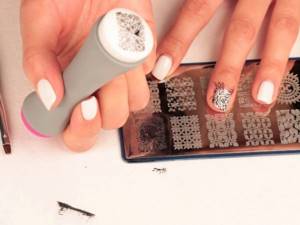
Photo gallery of interesting ideas
Now that you have mastered one of the basic manicure options, we invite you to look at a few photos with new interesting ideas. They will definitely charge you with positivity and awaken your imagination so that you can create your own unique delightful nail art.
In the photo you may have noticed that a manicure with imitation shells looks not only stylish, but also very sophisticated. It emphasizes the beautiful shape of the nails, giving the hands elegance and femininity. So that you have plenty to choose from when performing a stylish marine manicure for the first time, we invite you to watch the final video, in which you will find three excellent options at once.
Design with stickers
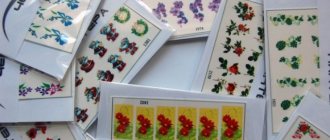
Manicure with stickers is also considered very simple, because everyone knows how to apply them since kindergarten. Seashell decals look great on nails of any length. As for the shape, round and square nails look good with this pattern.
Many stores offer a wide selection of nautical themed stickers.
To create a manicure you will need:
- the basis;
- light-colored varnish;
- seashell stickers;
- nail polish remover;
- cotton buds.
Creating a manicure consists of several stages:
- pre-prepare your nails;
- apply a protective layer on them;
- cover them with one layer of varnish and wait until it dries completely;
- apply a second layer and attach stickers;
- wait until the varnish is completely dry;
- remove excess from the skin using nail polish remover and a cotton swab.
Fashionable beauty trend
This year a manicure with shells will be very fashionable. Beauty experts immediately make a reservation: such an original and interesting design should not be limited to the usual marine shades . The main thing is to create a shell on your nails, everything else is a matter of imagination. A manicure with a shell can be safely complemented with 3D effects, various rhinestones, stones and accessories in the same style.
To create a real masterpiece, pay attention to nude, pastel shades: white, peach, beige, cream and pale pink.
Other interesting ideas
A manicure with shells can be done using different techniques, such as rubbing. In addition, the design with the effect of a broken shell, as well as the use of plastic elements, looks unusual.
Broken shell effect
This design has a very unusual look. To create such a manicure, you do not need to use artistic skills; you just need to buy your favorite small decorations from a specialized store.
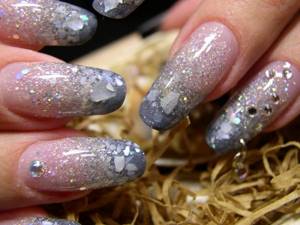
These details are sprinkled on the base coat of the nails, dried in a UV lamp, and at the very end they are secured with a top coat. This manicure has a significant drawback - sharp fragments of shells create scratches on any surface and injure the skin. Therefore, a manicure is definitely not suitable for daily use, but it will be just right for relaxing in a nightclub on the seashore.
Plastic blanks
If you need to urgently decorate your nails, plastic shells will come to the rescue. Creating a manicure with such blanks will not require painstaking work and is almost as stylish as other designs.
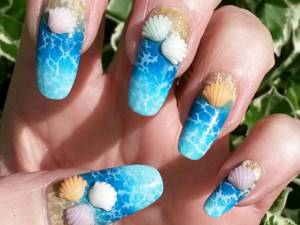
To perform a manicure, you will need to attach a pre-purchased plastic blank to your nail using special glue. This design is in harmony with sea and sandy shades of varnish and small stars.
Advice from the experts
- Choose calm pastel colors for your design. A shell-shaped manicure will look as close as possible to the natural color.
- To make the design more festive, you can decorate it with rhinestones by placing them near the base of the plate. It is not advisable to place additional decorations on the shell ribs. Firstly, they will hide all the beauty of the relief. Secondly, gluing them on a corrugated surface is very problematic, and they will not last long.
- You can cover the ribs of the shell with glitter. You just need to choose the smallest of all existing ones. And do not cover them too thickly. The glitter should be barely noticeable.
- Most craftswomen prefer to decorate one or three fingers on their hand with a three-dimensional design. But it is quite acceptable to do this design on all nails, because it is not too flashy.
- If you don’t have velvet powder on hand, you can do without it. After drying the lines, the standard procedure for applying the topcoat follows. True, in this case the design will be less embossed, but more shiny and smooth.
- As already mentioned, the “Shell” manicure is suitable for hot summer days. Combine it with light sundresses, white trousers and a blouse. It doesn't have to be a seaside holiday. The delicate, not flashy design can be used not only on vacation days, but also for walks in the parks and meetings with girlfriends. It is quite possible to show up with such nails at work.
- You can draw lines straight, slightly expanding the “fan” towards the free edge. Another option involves curling the strips slightly in an arc near the tip for an even more dramatic manicure.
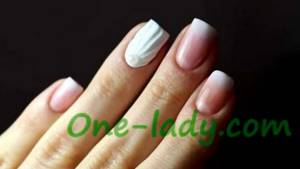
Drawing the relief
Stages:
- We cover the plate with one layer of varnish of the selected color.
- Then carefully draw the lines with a transparent gel . You need to take more product onto the brush. This way you will get a more voluminous relief.
- Then we cover the plate with another layer of gel polish on top . Take the color you used for the base.
- Manicure can be decorated with stars . A shell sprinkled with velvet sand looks great.
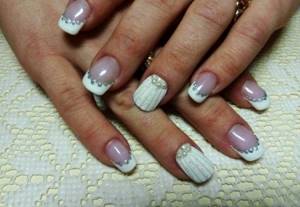
The finished design of your nails will be perfectly decorated with artificial shells. They can be found in a specialty store. Small decor can also be found on the seashore. Before direct application, clean sand from natural shells. It is better to decorate no more than two fingers on one hand with them.
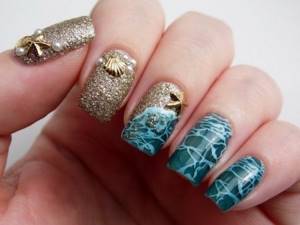
Wedding manicure ideas by color
- White wedding manicure has many different variations. There can be layouts and drawings of any complexity. Often, additional decor is used to diversify it. Fashion trends in wedding manicure involve the use of velvet sand. With its help, an incredibly cozy effect is achieved. This is especially ideal if the wedding is planned for the winter months. This design will go harmoniously with a white or wedding coat.
- Pink wedding design. If you prefer pink, look at the photo of a wedding manicure with this shade. Most often, brides choose the ombre technique. In this case, the white shade smoothly turns into a soft pink color. This design is complemented by the shine of rhinestones. Also, a bright pink shade can become a definite accent if you draw a smile or emphasize the tips of your nails.
- Blue or light blue manicure for the bride. As mentioned earlier, many girls move away from standards and prefer individuality. Therefore, a wedding manicure can be done in bright colors. Blue and navy are very popular colors this season. These shades can be mixed with each other or used separately, complementing the result with suitable decorative elements.
- A delicate beige nude manicure for a bride is an unusual classic, but a real hit this year. After all, it is already known that the new fashion season welcomes naturalness. To emphasize the festive nature of this choice, it is permissible to use a small amount of decorations.
- Red nails for a wedding are far from a standard solution, but it’s a highlight. Today, most newlyweds prefer wedding looks with a mandatory bright accent. The color red is very popular - red butterflies, garlands on the head, earrings, etc. Therefore, a bright red manicure will be more appropriate than ever.

