The length of the natural nail plate is not always enough to create a spectacular manicure with a decorative coating in the form of gel polish, which is why girls have to do extensions when performing home techniques.
A special gel that is used for extensions is not always available, then the search for effective alternatives begins. One of the common questions women have when doing homework is whether it is possible to extend their nails with a base, since everyone who uses gel polish to decorate their nails has it.
How to extend nails using a base?

join the discussion
Share with your friends
Every woman tries to make her fingers beautiful and well-groomed. Often girls use the procedure of nail extensions. In this case, it is possible to obtain strong nail plates of the desired length and shape. Various materials are used for artificial nail extensions. Let's consider a special composition for manicure, called a base.
What you need for nail extensions
If you decide to extend your nails at home, you should carefully prepare. In order to get a good result, you need to take care in advance of purchasing all the necessary tools and materials.
UV+LED lamp
With its help, the material hardens. It is not needed for acrylic extensions (it hardens in air), but for gel and biogel extensions it is necessary - without it the material will not fix on the nails.
show more
Gels for extensions
Requires base and top gel. The basic one allows you to create a model of the future length of the nail. Top gel is used as a coating for shine and fixation of the result.
show more
Files with an abrasiveness of 100−180 grit, intended for filing gel polish
With their help, the shape of an artificial nail is created. 240 grit files make it possible to file a natural nail before adding extensions. In addition, grinders and buffs (a type of file) are needed to prepare the nail plate for coating with gel and gel polish.
show more
What it is?
The product looks like a transparent thick varnish. It is applied to the nail as the first, base layer before the nail extension or manicure procedure.
The stores offer a wide range of base coatings. Recently, base varnishes have appeared that have natural shades. They can replace a color coating if a manicure is applied in natural tones.
The base varnish performs several functions.
- The composition makes the adhesion of the nail plate to the varnish coating, including gel polishes and acrylic, as well as decorative elements, more durable. For nail extensions, applying a base coat is mandatory.
- The application of the composition performs a decorative function. The base varnish evens out the surface of the nail and hides minor defects.
- The product protects the natural nail from the negative, traumatic effects of chemicals. Many components of varnishes and extension compositions are very aggressive. A layer of base varnish is a good barrier that protects the nail.
Popular questions and answers about nail extensions
Every day, nail extensions are rapidly developing and improving: new craftsmanship technologies are being discovered, more professional materials are being developed, new original ways of nail design and modeling their shape are emerging. Of course, many masters have questions about how to properly grow nails using one or another means, how one method differs from another, and which means are more convenient and practical to use.
Our Nayada Nails studio has prepared this page for you, where you can learn the intricacies of nail extensions and, in particular, the tools and equipment necessary to create a flawless manicure. This is where you can find answers to the most popular questions about gel or acrylic nail extensions. We publish only the most current information regarding the most important nuances that every master needs to know. We hope that this will benefit you and help you improve your skills and abilities.
General issues
What is the difference between gel and acrylic extensions?
The main difference, first of all, lies in the materials. In the first case, a gel is used for extensions - a gel-like substance, which hardens only under the influence of ultraviolet rays in a special lamp. Acrylic is a system consisting of two main components - powder and liquid. For the client there is no visible difference between acrylic or gel nails; if you do not see the manicure modeling process, the result will be indistinguishable. But in order for a master to be able to master these two extension techniques, he needs to undergo training. These systems are completely different, and each of them requires specific knowledge and skills.
There is a misconception that gel extensions have become more widespread due to the fact that gel is a more useful material, and acrylic contains harmful components and spoils natural nails. In fact, the popularity of gel extensions is justified by another factor - you can master this technique yourself without studying at school. Acrylic extensions are a more complex and time-consuming process. It is very, very difficult to master this technique on your own, because the science of modeling has stepped far forward, new subtleties and features of extension have appeared. And if you go to a good school, you only need weeks to learn, while trying to master the knowledge on your own can take years.
Which type of extension is better?
Acrylic and gel are one big family of polymers. They can be compared to meat: there is beef, and there is lamb, but both remain meat. So it is with gel and acrylic coatings - both are polymers.
The difference between the coatings is as follows:
- Acrylic nails are more durable and harden quickly in the open air, without requiring additional tools. However, when working with acrylic, certain knowledge and skill are required: the ability to quickly give nails a beautiful and neat shape before the material has time to harden. Also, when mixing acrylic powder with monomer, you must clearly know and follow the technology.
- Gel extensions harden (polymerize) only in a UV lamp. The structure of this coating is not as durable as acrylic, but this does not prevent you from creating beautiful and quite durable nails from it. The gel is not a two-component product like acrylic; the material is produced ready for application.
A competent specialist is able to make beautiful and durable modeling from any of the above means. The final choice depends only on the personal preferences of the customer.
How long do nail extensions last?
If technology is followed and quality materials are used, nail extensions can be worn for many years. Today, when this service is already 35 years old, we can say that the products do not spoil natural nails or thin them. The nail plate feels great under the coating, grows superbly, and does not change color or thickness. Nails do not need to breathe or rest, since nails are a dead structure. However, in order for the extended manicure to maintain a beautiful and aesthetic appearance, corrections must be carried out regularly. Over time, the natural nail plate grows and the manicure loses its attractiveness. The frequency of this procedure depends on the rate of nail growth. On average, adjustments are necessary every 3 weeks.
Why is correction needed?
Correction is a procedure necessary to maintain the aesthetic appearance of a manicure for as long as possible. The nail plate gradually begins to grow, and over time you can notice the border between the cuticle and the place where the material is applied. During correction, the master carefully removes part of the artificial coating and fills the free strip of the overgrown nail with acrylic or gel. Then the nail plate is carefully leveled with a file, and the length of the growing nails is adjusted.
How often is correction of extended nails necessary?
There is no clear deadline; it will be individual for each client. The regularity of the procedure depends on the growth rate of the natural nail. On average, correction is necessary every 3 weeks. In total, 4-5 corrections are allowed, after which it is recommended to remove the old material completely and remodel the nails.
Is it harmful to have nail extensions?
If all extension technologies are performed correctly, the procedure is completely safe and does not deform the nail plate. Moreover, natural nails under artificial material are not subject to negative environmental influences. For example, many home cleaning products contain degreasers and disinfectants, which are very aggressive to the skin of the hands and, of course, to the nails. Nails become dry, brittle, and peeling. Artificial material is an ideal protection for damaged nails. This can be compared to dental procedures: just as crowns are placed on damaged teeth to protect them, the nail plate can be additionally strengthened with gel or acrylic. Moreover, in dentistry, polymers are used for fillings in the same way as in the nail industry. Therefore, we wear acrylic and gel not only on our nails, but also in our mouth.
Are there any contraindications for nail extensions?
Like any cosmetic procedure, nail extensions, whether gel or acrylic, have a number of contraindications. First of all, the procedure cannot be performed for certain diseases and injuries of the hands and nails, namely: fungal and viral infections, damage to the side ridges and cuticle (upon the recommendation and discretion of the specialist), as well as very deep onycholysis. Diabetes, blood clotting disorders, and psoriasis-affected nail plates and ridges are also limitations. During the period of taking antibiotics, undergoing chemotherapy, during pregnancy and breastfeeding, there is a possibility that the material will not have good adhesion to the nails. The procedure itself will not cause harm to health. However, the listed factors can affect the adhesion strength of the material to the nail plate, and the extended nails simply will not hold on.
Should I cut my cuticle?
The procedure itself is delicate and requires certain skills, so it is recommended to remove the cuticle only from professionals. It’s easy to injure delicate skin on your own, and without proper disinfection, this can cause infection. If removed incorrectly, it is easy to damage the nail plate. At home, it is better to avoid cutting the cuticle, it is better to soften it with special products and move it to the base of the nail with an orange stick.
How long can you make your nails?
Marigolds can be grown to any desired length - it all depends on personal tastes and preferences. However, when choosing the length, it is necessary to take into account the everyday factor - for example, when caring for an infant, you should not make your nails too long. The most optimal length is considered when the free edge is equal to half the length of the natural nail plate.
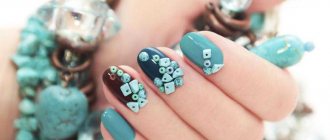
What design can be done on extended nails?
Girls who want to amaze others with a fashionable and stylish manicure can choose for themselves one of the proposed types of designs:
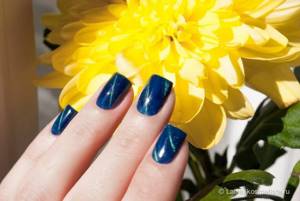
- French (French): the nail plate is covered with the most natural-colored material, while white color is applied to the tip of the nail.
- aquarium: “pictures under glass” effect;
- artistic painting: all kinds of patterns and designs are painted on the nails with a thin brush;
- volumetric: protruding elements are made on the nail plate, nails are decorated with rhinestones and gold leaf.
Today the manicurist has a huge number of offers. Which one you prefer depends only on your tastes and wishes.
About acrylic extensions
What tools and materials will you need when working with acrylic?
In order to carry out acrylic extensions at home, you will need the following materials: antiseptic, degreaser, dehydrator, acid-free primer, acrylic liquid (monomer, liquid), acrylic powder, transparent finishing gel. Necessary tools: buff, file for natural nails (180-240 grit), file for artificial nails (180-100 grit), container with a lid for liquid, natural kolinsky brush. If extensions are carried out using tips, then you will also need special glue.
How to extend nails with acrylic?
The entire extension process consists of several stages:
- Preliminary preparation: disinfection, correction of the shape and length of the free edge, removal of the cuticle, cleaning of the side rollers.
- Treatment of natural nails: filing the surface of the nail plate. The nail is carefully processed with a soft 240 grit file, removing the top gloss.
- Covering with disinfectant, dehydrant, and primer: while the primer dries, forms are installed on the nails.
- Modeling the length and shape of the nail: a small amount of liquid liquid is poured into the working container. The tip of the brush is dipped into the monomer, then gently into the powder, creating a small ball of acrylic powder on the brush. The ball is placed on the nail plate, after which the shape and length of the extended nail is modeled with a brush.
- Acrylic is a self-hardening material that does not require additional drying in a UV lamp. It hardens on its own within 3-7 minutes.
- Adjustment and polishing: after the material has completely hardened, the molds are carefully removed. The surface and free edge of the nail are treated with a nail file, then polished using a buff.
- Consolidation of the result: finished nails are covered with a finishing gel, which will give the nails brightness and gloss.
It is recommended to carry out the procedure in a well-ventilated area with an exhaust hood.
How to properly mix powder with liquid liquid?
Both components are mixed directly on the brush. A small amount of monomer is poured into the container, after which the brush is dipped into it. Then carefully, with one side of the brush, take a small amount of powder. Acrylic, upon contact with liquid, immediately gets wet and becomes a soft and plastic ball. It should be remembered that the state of the acrylic ball changes with every second - when it reacts with oxygen, it begins to harden. Therefore, you only have a few minutes left to apply the material and shape the future nail.
Is a UV lamp necessary when drying acrylic nails?
When applying acrylic nail extensions, you do not need a lamp. The monomer, in contact with acrylic powder, quickly hardens in air and without exposure to ultraviolet rays. It is enough to wait 5-10 minutes. However, if you decide to fix the finished result with a finishing gel or top coat, the last layer must be dried in a UV lamp.
Can I remove acrylic nails myself?
Removal of acrylic coating should only be carried out by a professional! When removing nails, you need to follow no less rules than when extending them. It is on compliance with all the subtleties of technology that the condition of the nails will depend. When performing the procedure yourself, it is much easier to damage your nails than to preserve them. Therefore, only a trained person should remove extended manicure.
How does a master remove nails?
A master with good education and extensive practice will not dissolve nails with special liquids in 90% of cases. No matter how high the quality of artificial turf remover liquid is, any of them contains acetone, which is a polymer solvent. And the most budget-friendly liquids contain cheap solvents instead of acetone, often not even cosmetic ones. Acrylic does not dissolve quickly, during which time acetone dries out the nail plate and the skin of the fingers very much. Nails become fragile, brittle, loose and flaking. A competent specialist removes the material using a special device that carefully cuts off the acrylic from the nails without injuring the nail plates at all.
Is it dangerous to remove material with a device?
A highly qualified master makes up to 95% of all sawdust using a machine, has extensive practice and well-developed fine motor skills. Filing nails with a machine is much more difficult than with a regular file. Removing material with the device takes on average 7-10 minutes. Today this is the most modern and safest method, but of course in capable hands.
Is it possible to use gel polish top and finish gel with acrylic extensions?
Can. However, these products polymerize only under the influence of ultraviolet rays, therefore, a UV lamp is required for this. You should also take into account that the gel cannot be dissolved in the remover, so artificial nails can only be removed mechanically.
Can I use polish or gel polish remover when removing acrylic nails?
Traditional nail polish remover has a slightly different composition and is not designed for long-term contact with the nail. This may damage the natural nail plate or may not soften the acrylic enough. A remover designed for removing shellac is also quite suitable for removing acrylic nails. However, it will take more time to completely soften the material - about 15-30 minutes. Or maybe much more - depends on the thickness of the material.
How long does acrylic nail extension take?
The exact amount of time depends on the individual structure of the nail plate, the modeled length and shape and, of course, the complexity of the future product. The simplest extension takes about 1.5-2 hours. Design work with a complex pattern can take 3-4 hours.
What care is needed for acrylic nails?
Caring for extended nails is simple and not much different from standard hand care procedures. The skin must be moisturized with oil to soften the cuticle. The length can be adjusted as necessary using an artificial nail file.
About gel extensions
What do you need when doing gel nail extensions?
During the procedure you will need the following materials:
- disinfectant,
- dehydrant,
- primer
- clinser,
- gel of the desired shade.
The tools in your arsenal should include files for natural nails (180-240 grit), a file for artificial nails, a grinder, a gel brush, tips or forms, and an ultraviolet lamp.
How to extend nails with gel?
The procedure begins with disinfection - this is a mandatory stage of extension, which in no case should be skipped. Then the cuticle is moved back or removed with a pusher or an orange stick, and the lateral sinuses are cleaned using a hardware method. Then the nails are cut or filed to the required length. An important point is that the free edge should be at least one or two millimeters. The nail plate is filed with a file at an angle of 90 degrees until there is no gloss left on it. The nail becomes slightly rough - this is necessary for better adhesion of the material to the surface. Next, the treated plate is degreased and dried with a special composition. After the products have completely dried, the templates are inserted. Using a special brush, the shape and length of future nails are modeled with sculptural gel, after which this layer is dried in a UV lamp. The sticky layer is removed using a cleanser, the forms are removed, and the nails are dried on the reverse side. Then, using an artificial nail file, the free edge is corrected and the surface is polished. The nails are coated with finishing gel and the finish is polymerized in a lamp. After this, you can paint the finished nails with varnishes, decorate them and decorate them with patterns.
What are the differences between single-phase and three-phase gel? Which one is better to choose?
The three-phase system involves the use of three drugs with different properties at once:
- the base coat fills in unevenness and roughness on the nail plate,
- the length and shape of future nails are modeled with sculptural gel,
- The finishing gel fixes the finished structure, gives the manicure shine and a beautiful look.
In a single-phase system, all these functions are performed by one composition. Due to this, the procedure becomes simpler, faster and more profitable. But it should be remembered that the strength of a three-phase gel is significantly superior to a single-phase one.
Can I use gel, base and topcoat from different brands?
Despite warnings from manufacturers that products from different brands will give lower-quality results, many professionals often use gels, tops and bases from various companies. In most cases, all these means are quite harmoniously combined with each other. However, the extent to which all these materials are compatible can only be understood in practice, which is why the quality of the finished manicure may suffer.
Is it possible to use the same dehydrator, bonder and degreaser for gel extensions as for acrylic extensions?
Products that are used exclusively for preparing nails are considered universal. They are not the main components of the system and do not necessarily require drying in a lamp.
What is sculpting gel?
Sculpting (modeling, constructing) gel is a viscous substance that quickly becomes hard under the influence of ultraviolet rays. Used in the second base of nail extension. The modeling gel is used exclusively with the base and finishing gel.
What is camouflage gel used for?
Camouflage gel is available in a wide range of naturally pink or beige shades. The name of the product speaks for itself - it is necessary to mask the imperfections of natural nails. Thanks to the use of camouflage gel, you can create the effect of a perfectly smooth coating, without any stains, protrusions or other defects. Most often, this product is used to create a French manicure - impeccably smooth and as natural as possible.
What is the difference between color gel and gel paint?
The difference between the means, first of all, lies in density. Gel paints are applied to already extended nails in a thin layer, and are also used to create decor, drawings and all kinds of manicure patterns. Colored gels are thick and form a dense texture after drying.
The second difference between the products is the method of application. Gel paints are applied to a grease-free, smooth surface immediately before applying the top coat, without requiring further sanding. Colored gels are used only on a base or modeling gel without removing the sticky layer. After polymerization of the material in the lamp, the nails are sanded with a file and only then covered with finishing gel.
Is it possible to extend nails directly with colored gel?
As a rule, colored gel is used for the decorative design of already extended nails, which is why it does not have a thick enough consistency. However, today on sale you can find dense structural gels of various shades, which are suitable as the second phase in three-phase extensions. Colored single-phase strips can also be used to lengthen the free edge.
Why file the nail plate before extensions?
The main purpose of the cut is to create an uneven, rough surface necessary for strong adhesion of extension products to the natural nail. When filing, microscopic grooves remain on the surface. The base coat flows into these irregularities and firmly adheres to the nail plate, which ensures the strength and reliability of the entire structure. Also, a surface pre-treated with a file absorbs dehydrator, primer and disinfectant much better.
What is a primer?
A primer is a liquid that is used for preliminary preparation of nails before extensions and acts as a kind of “primer”, ensuring strong adhesion of natural nails to artificial material.
Do I need to dry the primer in a lamp?
No. Drying in a lamp is required only for the main elements of the gel system, namely the base, sculpture, single-phase, color, camouflage and finish gel. Preparatory products (primer, disinfectant, dehydrator) dry quickly in the open air, without any additional exposure.
What are the differences between base and primer?
The primer is quickly absorbed without exposure to ultraviolet radiation. It leaves behind a sticky layer - a thin film that holds the gel and base together. The product has only a short-term effect - its effect stops 20-30 minutes after application. The base hardens only under the influence of a UV lamp, and after polymerization it forms a dense layer on the surface of the nail, which can only be removed by cutting it off.
Is the primer used for three-phase extensions?
These products are a must when creating a gel manicure, regardless of what type of extension system you prefer.
What is the difference between extensions using forms and extensions using tips?
Tips are an artificial base that is applied to the nail plate with a spare free edge, which is then given the required shape.
A form is paper or film that acts as a temporary support for laying out material. The gel fits comfortably on the form, allowing you to model the desired length and tip of the nail without much effort.
How to properly attach tips?
Tips are attached directly to the nail plate using a special hypoallergenic glue. In this case, the tips should be fixed closer to the free edge. So between the cuticle and the tips there should be a gap of approximately ⅔ of the length of the entire nail - this is necessary in order to align the border between the nail plate and the tips itself. After this, the tips are cut to the required length and sanded with a low abrasive file (180-240 grit).
Are regular false nails used for extensions?
Are used. It is only important to choose the right false nails. They should be smooth and even - without patterns, decorations and various decorative elements. However, it is recommended to use special tips with a rounded cutout at the bottom for extensions. They are much stronger, and aligning the border between the tip and the nail is easier and faster.
Are the tips glued before or after applying the primer?
Tips are glued to dry, oil-free nails treated with a dehydrator. An acid-free primer is applied after fixing the tips only to the natural part of the nail plate.
How to place the form correctly?
The form is carefully curled and placed under the free edge of the nail. A correctly placed template will look like a natural extension of the nail plate. It is necessary to ensure that there is harmony between the template and the natural nail, which completely depends on the natural growth of the nail plates. Then you need to squeeze the side rollers with your fingers for a few seconds so that the shape can be fixed. The basic rule must be observed: the edge of the template must be a cylinder, the diameter of which clearly coincides with the size of the nail plate.
Are there rigid forms?
You can find plastic and metal molds on sale. They are reusable and are produced immediately curved. However, working with rigid forms presents certain difficulties - they are quite difficult to adjust to the desired size of the nail, so they are not used by every master. Instead, you can stiffen a regular disposable stencil using special tubes or metal pads.
Which brushes are best for extensions?
Experts recommend using a hard brush with synthetic bristles for the procedure - this will make it easier to work with a viscous and thick gel. The stiffer the brush you choose, the easier it will be to smoothly and evenly distribute the material over the surface of the nails. It is recommended to use nylon brushes No. 4-6. Each master chooses the shape of the bristles depending on his personal preferences. The most popular are oval shaped brushes.
Which lamp should I dry the gel in and how long does it take to dry?
There are marks on the gel packages, by studying which you can understand what type of lamp is needed:
- If there are no marks on the packaging, or it says UV, this means that the material is dried only in hybrids or a UV lamp;
- LED - the product polymerizes under the influence of an LED lamp;
- LED/UV - indicates that the material is universal and suitable for drying in any lamp.
Separately, it should be noted that the LED lamp is not suitable for drying UV gels, otherwise the product simply will not dry.
To polymerize the gel in hybrid lamps of good power, an average of 2 minutes is required. The total amount of time depends on the color and thickness of the coating. Transparent products harden completely faster than colored products. A hybrid lamp gets the job done much faster—just 1-2 minutes is enough. For complete polymerization of transparent gels, 30 seconds are enough.
Is the same lamp that is used for drying gel polish suitable for extensions?
Not always. Only if the lamp has good power (minimum 36 watts). Also, before you start extensions, you need to check whether the labeling of the products matches the type of lamp.
Why do you feel a burning sensation when drying the gel?
A gel is a polymer that requires an activator to polymerize. The activator is UV light. However, ultraviolet light alone is not enough to completely dry the material. A component such as a photoinitiator, which is part of the gel, is also necessary here. The photoinitiator catalyzes the polymerization process, absorbs ultraviolet light and initiates an irreversible polymerization reaction. During the process, a large amount of heat is released, which causes a burning sensation.
How severe the burning will be depends on the following factors:
- gel composition: the more photoinitiators it contains, the stronger the feeling of warmth will be;
- lamp type: you can reduce the burning sensation and shorten the hardening time of the product by using a lamp type that matches the gel labeling;
- depending on the thickness of the coating: a thick layer of gel contains more photoinitiators;
- the presence of a base layer and substrate: the base layer is applied very thinly and hardens quickly, without causing severe pain. And the substrate protects the nails from the heat generated during the polymerization of denser layers of material;
- condition of the nails: damaged and heavily filed nails are more sensitive to the effects of temperature, due to which the pain intensifies.
The burning sensation can be significantly reduced with proper adherence to all extension technologies.
How to reduce burning sensation when drying?
In order for the procedure to take place with maximum comfort, it is necessary to observe all the subtleties and features of the extension: do not file the nails too thin, use only high-quality products, dry the nails in an appropriate lamp, spread the gel as thinly as possible on the substrate. It is also not recommended to carry out the procedure on thin and damaged nails.
What is a sticky layer? When and how to remove it?
A dispersive, or sticky, layer is formed on the surface of gel nails after they are polymerized in a lamp. This film is necessary for better adhesion of all layers of coating to each other. When applying nail extensions, a dispersion layer is necessary:
- between the base and the nail,
- between the base and modeling gel,
- between layers of sculptural and colored gel polishes.
Before applying gel paint and finishing gel, the sticky layer is removed from the surface with a napkin soaked in a special liquid (cliner) or removed with a degreaser. Here it is important to choose lint-free wipes so that there are no unsightly lint or threads left on the surface of the manicure.
Today you can also choose special finishing products without a dispersion layer. Such coatings do not leave a film and, accordingly, nails do not require additional treatment with a clinser.

Why is sanding necessary before applying the finishing gel?
Treating extended nails with an artificial nail file performs two functions at once - it evens out the surface and removes excess thickness of the material. After polishing, the nails must be cleaned of any remaining dust and only then proceed with the finishing gel coating.
How is the finishing coat applied?
Finish gel (corrective, strengthening) is the final component of gel extensions. It is applied to pre-polished and cleaned nails after removing the sticky film. The corrective gel is evenly applied to the surface of the nail plate in a thin layer, after which the manicure is fixed in a lamp and the sticky layer is removed from it. Today on sale you can find finishing coatings without a dispersion layer. When working with such products, you will not need to treat your nails with a clinser.
Is it possible to cover extended nails with manicure or gel polish?
Can. Any coating on artificial nails easily lasts 3-4 weeks.
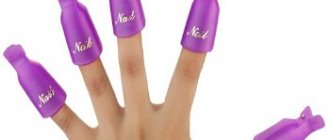
How to properly remove extended nails?
Gel, unlike acrylic or gel polish, cannot be dissolved using a remover.
This manicure is completely filed off, after which the nails are sanded to remove any unevenness, and then they are given shine. In nail salons, this procedure is performed using a professional machine. To make the procedure faster, the free edge of the nails is shortened with a tip cutter or nail clipper. When removing gel nails, you need to wear a mask. Upper Forms Nayada Low Curve 120 pcs. Gel for nail extension Nayada Camouflage Confiture 60 ml Top Forms Nayada Arch Pipe 120 pcs. Nail extension gel Nayada Bubble Ball 6 ml Nail extension gel Nayada Bubble Ball 60 ml
Varieties
In stores you will come across a large assortment of base varnish. Naturally, they are not all the same. Bases differ in their components, action and appearance.
- Base varnish based on rubber. The most common type of this remedy. The rubber elements make the composition very thick and dense. It lays well and evenly on the nail plate, protecting it and providing reliable adhesion. Many manicurists use just such a base to carry out the nail extension procedure.
- Silicone base. Not as dense as the rubber one described above. It is most often produced in the form of a self-adhesive sticker that is applied to the plate. A significant advantage of this base coat is its ease of removal. To remove from nails, you do not need to use aggressive solvents.
- Often, for nail extensions, a base product based on acrylic powder . There are not only transparent, but also colored varieties. The layer of such a frozen base is very durable, but breathable. The composition is more gentle and less traumatic to nails.
- Camouflage base varnish. The product is easy to use, as it immediately combines three components: base composition, top and gel polish. Thanks to the last component, this base is applied very easily and evenly. It can be used at home.
The downside is that the composition does not stay on the nails for very long.
- Vitaminized base products contain a nourishing strengthening complex. This allows you to combine a beautiful manicure with benefits for natural nails. Most often, such bases contain vitamins E, A and D. These substances are necessary to maintain strong and healthy nails. They stimulate the processes of regeneration and natural renewal of nail plate cells.
Varieties
An incorrectly selected base contributes to the appearance of unevenness, delamination, cracks and the formation of white spots. In the modern nail industry there is a wide variety of bases, which can be divided into the following groups:
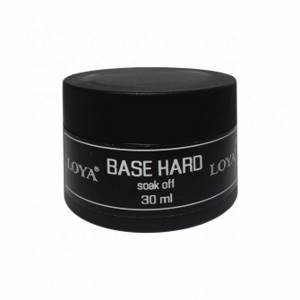
- Solid bases . This material practically does not bend after drying and is characterized by increased strength. This variety is represented by some brands of rubber bases, as well as bases made of acrylic powder. Rubber materials are thick and have good adhesion. Other solid gels, on the contrary, may have increased fluidity during the modeling procedure. These varnishes are only suitable for strong nails with sufficient thickness, otherwise the dense, inflexible layer of the hardened base can damage the natural keratin.
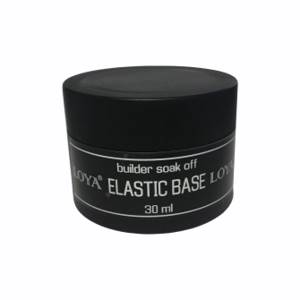
- Elastic bases. More flexible elastic materials that create a remarkable effect of leveling the surface of the plates. These bases are thicker than others, making them easy to apply because they do not flow or spread. The product is suitable for those with thin nails, but it cannot be used for extending long lengths. Typically, such materials are used to correct or extend the free edge. Elastic bases also include silicone bases. Quite often they take the form of stickers or liquid tips that are attached on top of the nails.
- Camouflage bases. Such products simultaneously act as a base, top, and decorative gel polish. Thanks to this, the base is easy to apply, so extensions can be quickly mastered at home. Usually the camouflage base is beige, light pink or cream. There are also bolder colors.

In addition to the listed bases suitable for nail extensions, manufacturers create all kinds of bases with vitamins and minerals that help strengthen nails. Any product must be selected to match the characteristics of natural plates, otherwise extended artificial nails will not last long enough.
Building up
Many people are interested in the question of whether it is possible to extend nails with a base. In principle, most varieties of this product, after hardening, become quite durable and can hold their shape. However, base nail extensions are not possible in all cases.
- Water-based compositions, as well as camouflage combination products, will not cope with this task. They do not have a solid structure even after complete drying.
- If you want a longer artificial nail, then it is better to turn to more suitable materials for extensions: acrylic or gel polish.
- The base can be used to extend a small nail. It is convenient to use this product to “repair” a broken or chipped nail.
- An acrylic-based base is best suited for the procedure of extending short nails.
Repairing a broken nail. Extension with gel base. Photo lesson
Hello!
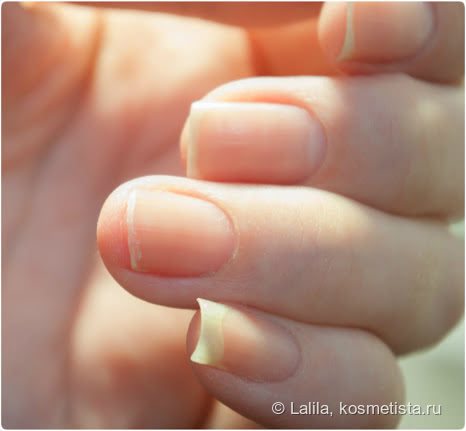
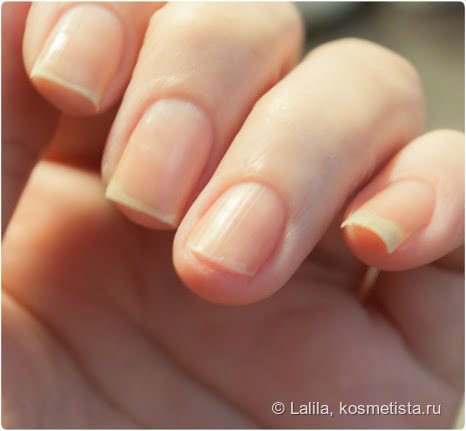
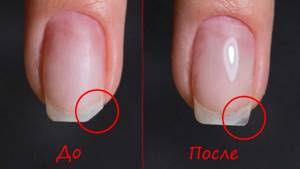
To my great regret, I managed to break a nail, and not just, but right to the root, plus the layering. There are two ways out of this situation - cut off the rest, which I personally didn’t want, and create a new nail. I chose the second option. Please take a look. I’ll say right away that this is the most problematic nail for me - the nail bed is short, which results in a very active pad and high side ridges. This is what my nail looks like before all the manipulations (sorry for the lighting, I took it in the evening)
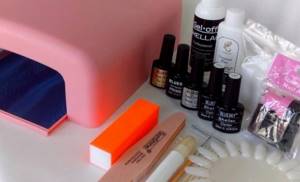
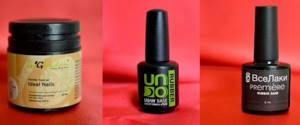
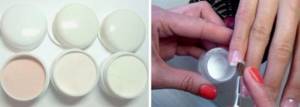
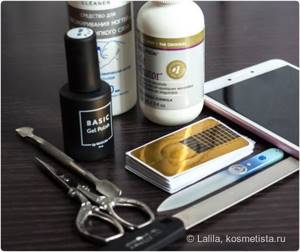
So let's get started. First you need to prepare everything you need: 1. Tools for manicure
, in my case these are files, pusher, scissors, cuticle remover.
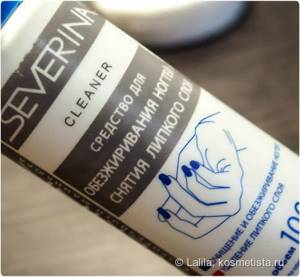
2. Means for degreasing and removing the sticky layer
, I use Severina Cleaner.
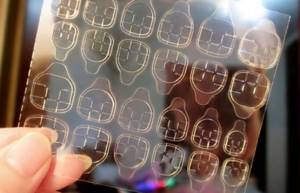
3. Forms for extensions
, I have the most common noname, 20 pieces cost 40 rubles.

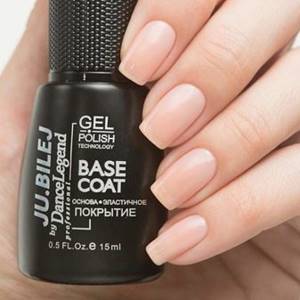
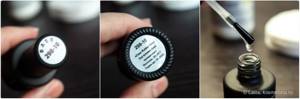
4. Base for gel manicure.
I have this
rubber Masura Basic Gel Polish 298-10.
Not every base will do. First of all, it should be thick and viscous. The base from Masura is just like this, it holds a drop well, does not spread, and self-levels.
5. Lamp.
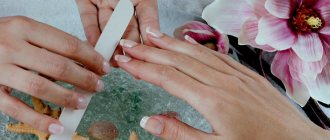
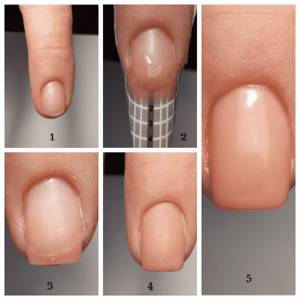
First, you need to perform a regular manicure - treat the cuticle with a remover, file the remaining nails, remove the corners so that they do not interfere in the future, remove the shiny layer from the nail with a buff, and degrease it.
This is what my nail looks like after treatment
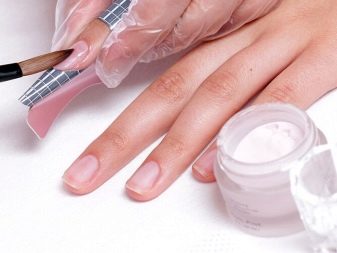
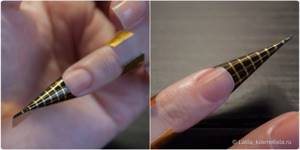
Then you need to fill in the form. There is a nuance here - all success depends on how correctly the form is set up. When I first started using this method, nothing worked for me. Not the first time, not the second, not the third. The first time I applied too much gel, it ran onto the side rollers. The second time I placed the form crookedly, so I ended up with a crooked nail, the third time I rolled it down. And only for the fourth time, taking into account my mistakes, I was able to grow my nails. When placing the form, you need to make sure that it is clearly in the center, do not clamp it too tightly at the base of the nail, and make sure that it does not ride up or fall down. Another important point is to make sure that there is no gap between the free edge of the nail and the form itself, otherwise the gel may leak there. This time I had practically no free edge, I had to push the form, causing myself pain, and still, the gel was a little numb. If the shape does not become straight, it can be cut in the right places, the main thing is that it fits evenly and clearly along the border of the nail.
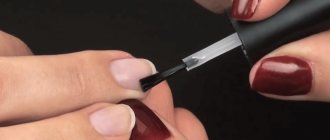
Then I apply the base gel. You can take some kind of flat brush for this, but I apply everything with my own. First, I put a drop of gel on the border between the natural nail and the substituted form and distribute it along the form and approximately to the middle of the nail, reducing the border to the cuticle to nothing. Then I put another drop, distribute it again, make sure that everything is even at the side rollers and put it in the lamp to dry. This particular rubber base from Masura dries in a 36-watt UV lamp for exactly two minutes. Then I remove the form, cover the nail again with the thinnest layer of base, all the way to the cuticle, and dry it.
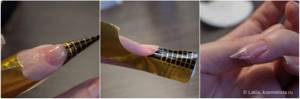
After drying, I remove the dispersion layer and process the extended nail to the shape I need using a file. This base gives an elastic nail, but at the same time strong, it lends itself well to a file - you create an almost complete feeling that you are working with a natural nail. If there is excess thickness, it can also be cut off without any problems.
This is what my nail looks like after filing
Once again I adjust the length, file the sides, remove some blemishes, and the nail is ready for further coating. It takes at most 10-15 minutes to write about everything, I write longer)
Next, I decided to give myself a complete gel coating; for this I used the same rubber base and Masura Tilt Leopard gel polish. Do you see the difference?) This base wears well, the nail itself is not wooden, it can be removed simply by normal soaking.
Thank you for watching) I am Lena. I hope this was helpful. My method is aimed at painlessly growing the free edge of the nail. I don’t advise anyone to grow their nails this way and walk around with them for months, and I don’t do it myself.
Increase
How to perform the procedure?
You can grow your nails yourself using the advice of experts.
- Prepare your nails for a manicure: treat the cuticles, degrease the nail plates, and give them the desired configuration using a nail file.
- Attach special forms for extensions to your fingers. You can also use tips.
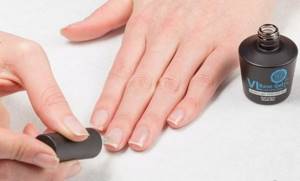
- Apply the base in small drops, distributing them evenly. For application it is better to use a small flat brush. Pay special attention to the border of the natural nail and the substituted form for extensions.
- Dry the first layer of base under the lamp until completely hardened.
- Remove the mold or tips from your fingers and carefully apply another layer of base. Dry your nails.
To learn how to extend nails using a base, watch the following video.
Source of the article: https://vplate.ru/narashchivanie-nogtej/sozdanie/pri-pomoshchi-bazy/
How the procedure is performed
The technology of nail extension or correction using a base is carried out according to the standard scheme. It may vary slightly depending on the type of product used. Typically, the nail extension procedure includes the following steps:
- Prepare the plates and the skin around them well for extensions. To do this, file and sand them, treat the cuticle, and also degrease the surface and apply a primer.
- Secure the form under the free edge of the nail and use a brush to carefully apply the base coat. It is necessary to correctly distribute the product over the entire surface. Starting from the root zone, apply a thin layer, thickening it towards the border of the plate and the future artificial tip.
- Dry your nails under the lamp, then remove the forms. Re-coat your nails with another coat of base coat.
- After hardening, polish the surface of the plates and give them the desired shape. Apply the gel of the desired color or decorate your nails with decorative materials.
In addition to traditional extensions, the base is perfect for correcting or eliminating small defects. The procedure follows the same scheme, only manipulations are carried out on a specific problem area.
Can extension gel be used instead of base?
Only if it is single-phase and has good coupling. Therefore, to be sure that it will stick, it is better to first coat it with a thin layer of base, especially if you use the gel without a base on a natural nail, if the nail is thin, then the material can stand very poorly because the gel is hard and the nail is mobile
It is recommended to use extension gel instead of a base. This replacement is done in cases where the nails are very weak or require additional strengthening. At the same time, you need to consider what consistency the extension gel is. It is advisable to use liquid self-leveling textures. If the gel is too thick, the nails may look rough and uneven.
In extreme cases, it is possible to use extension gel instead of a base if you find that you don’t have a base and you don’t have time to go to the store.
Is it possible to extend nails with a base?
The length of the natural nail plate is not always enough to create a spectacular manicure with a decorative coating in the form of gel polish, which is why girls have to do extensions when performing home techniques.
A special gel that is used for extensions is not always available, then the search for effective alternatives begins. One of the common questions women have when doing homework is whether it is possible to extend their nails with a base, since everyone who uses gel polish to decorate their nails has it.
Types of nail extensions
Nail extension is an artificial increase in their length. The selected material is applied to the surface of the nail, which hardens under the influence of LED lamps and ultraviolet light. There are different types of nail extensions:
Acrylic nail extensions
Acrylic is the first material that was used in the beauty industry for nail extensions. This extension technique appeared in 1970 and came to the industry from dentistry. Acrylic is a durable and flexible synthetic material that allows you to create beautiful designs.
show more
Gel nail extensions
Gel is a soft “jelly” that only hardens when exposed to UV and LED rays. Gels are non-toxic and safe. This type of extension allows you to get a natural effect; the nail plate is thin and flexible.
show more
Acrylic nail extensions
Acrigel is a material that is a cross between acrylic and gel. Its advantage is the combination of strength and flexibility. The material does not spread on the nails or get on the skin, so it is very convenient to work with.
show more
How to perform the procedure
Nail extension with a base is a rather complex technology, since the direct purpose of the composition differs from a special gel or acrylic powder, so you need to use the solution carefully.
Pay attention to the quality of the solution in advance in order to create a dense substrate that will be preserved even under mechanical stress.
What you need
Before starting work, you need to pay attention to the preparation of consumables and tools, since the competence of the manipulations depends on their quality.
Standard set of tools:
- File;
- Pusher or orange stick;
- Nail scissors;
- Buff for polishing;
- Brush for distributing the base (it is recommended to choose thin and thick if it is not included in the kit).
All tools must first be disinfected with an antiseptic, especially for those new to manicure, since accidental damage to the periungual area can always lead to infection in the body.