Manicure services are very popular. Nail extensions are especially in demand. On average, nail extensions in Russia cost 2000-2900 rubles .
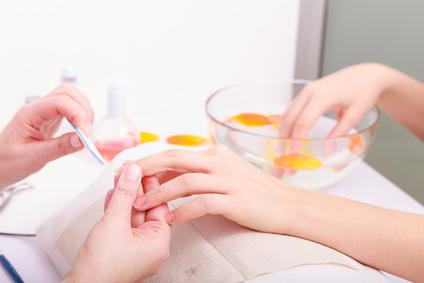
Nail extension is a procedure during which the length of the nail is artificially increased. This service is popular among girls and women. Extended nails look impressive and stylish. To lengthen the nail plates, a special material (gel, acrylic) is used.
The service is relevant in the following cases:
- I want to get a beautiful and neat manicure. You can't increase it on your own.
- The nail plate is deformed. You need to give it a beautiful shape.
- The nail plate is brittle and weak.
Advantages of artificial extension:
- Health safety.
- Low cost.
- Possibility of frequent design changes.
- Quick fixation.

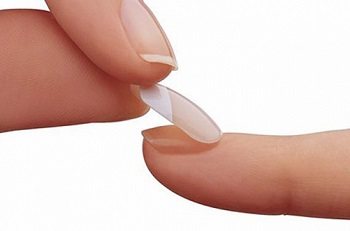
What are false nails
False nails are plates that are temporarily placed on top of natural nails in order to hide their imperfections. The first false nail plates were produced by the American company Broadway in the 80s of the twentieth century. They differ from extensions in that they are more gentle on the natural plate: when creating this type of manicure, you do not need to file down and polish the top layer of your natural nail.
Pros of tips
Fake nails
- Availability and price . A manicure using false nail plates is many times cheaper than a gel or acrylic manicure. There is no need to contact specialists to create it. You can remove the cover plates yourself at any time.
- Easy to use.
- On artificial nails, the varnish is more durable.
- Reusable.
- Diversity.
- Possibility to choose plates with ready-made designs and different colors.
Disadvantages of overlay plates
- Improper application and removal is very harmful to natural nails.
- Substances contained in tips or glue can cause allergies.
Known by gluing method
- Plastic tips - attached with glue.
- Self-adhesive - a sticky layer is already applied to the back of the pad.
- Flexible plates. They are made using Flex technology, their structure is very flexible and they are inferior to conventional plastic ones in strength.
- Hard varnish.
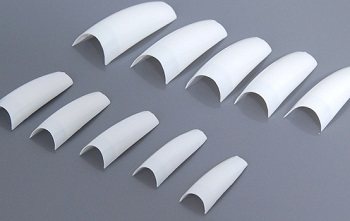
Plastic tips
ABS plastic is widely used for making false nails.
In the formation of voluminous decorations on tips, the following materials can be used: silicone, acrylic, urethane resins, a mixture of acrylic and urethane resins.
Causes of detachments
But not everyone’s nails last as long as stated. What nail extensions look like and how long they last can vary from one person to the next, even if they have the same artist perform the procedure. If you notice that your nails begin to peel off or crack and become dull within seven to ten days after extensions, then this can happen for several reasons.
- Error or negligence of the master. Skipping any important stage and other simplifications (reducing the cost) of the technology always harm the appearance and sustainability of the manicure. However, the effect will be the same if any of the stages are performed poorly. For example, the plate is unevenly sanded, the bond, primer or gel is poorly applied, there are errors in calculating the nail architecture;
- Various violations of the rules of operation on your part also affect how long you can wear extended nails. More details about the operating rules will be written below;
- The presence of infectious or inflammatory diseases leads to the fact that the material begins to be perceived as foreign and is rejected by the body. As a result of this process, detachments and chips occur in the gel;
- The presence of nail diseases, fungus, psoriasis or other deviations from the norm leads to the fact that the lifespan of the extension will be minimal. The same applies to brittle, thin, weakened and peeling plates. With such nails, extensions are not recommended at all;
- Performing a manicure immediately before extensions can also cause early detachments or cracks. It is better to cut the cuticle and do similar procedures at least a day or two before extensions. During this time, the nail will have time to adapt and recover from the process;
- Taking antibiotics and medications of certain pharmacological groups also leads to the fact that the nails peel off, or even completely, the gel completely comes away from the nail. In this case, the gel is also perceived as a foreign material and is rejected. Particular difficulties in this regard can be presented by drugs that accumulate in the nails;
- How long you can wear extended nails also depends on your hormonal status, both during the extension and while wearing it. That is why many specialists do not recommend performing the procedure during menstruation, as well as in the early and late stages of pregnancy and immediately after childbirth. With sudden jumps in hormonal levels, a phenomenon similar to what occurs when taking antibiotics is observed.
Thus, there is no exact time limit for how long you can wear extended nails. The duration of this period depends on many factors. And sometimes, you yourself can become the reason for the short life of your manicure.
[yandex3] [google3]
Design and shape of finished plates
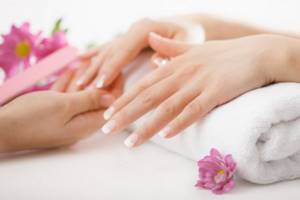
- Transparent plates are suitable for creating your own design, be it a wedding manicure or simply painting over it with varnish.
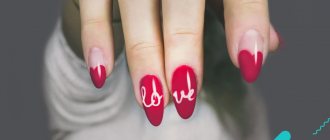
- French manicure on false nails. You don’t have to do anything, since they have already been issued. If you glue rhinestones to them and draw additional lines, the French manicure will look very advantageous.
- Overhead tips in natural shades. The milky and pinkish tones of such plates look very natural; they can be designed and decorated as you like or left as is, complemented with rhinestones and designs.
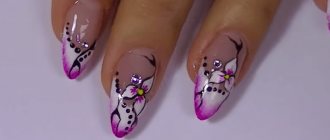
- False nails with painting. Various colors, patterns, lines, geometric shapes, voluminous decorations in the form of precious stones on false nails are created for the greatest convenience and time saving.
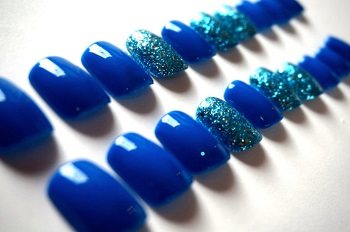
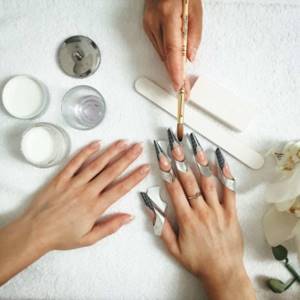
False nails with bright designs
According to their shape, the overlay plates are:
- Oval
- Square
- Acute
You can adjust the shape and length of your nails using a file.
You cannot glue false nails if your natural ones are sick or damaged.
Decide for yourself
The applied varnish on natural nails does not last very long. It constantly needs to be removed and the plate covered again. The same cannot be said if you have extended nails. You already know how long they last. Rich colors and beautiful shape please the eye of its owner for a long time. But it’s very difficult to give natural, even long nails the shape you want. But this seems like a very simple task.
After the extension procedure, natural nails do not become weaker, but on the contrary: under the applied layer of acrylic, gel, or glue, they are not subject to external influences of environmental conditions: they do not freeze, interact well with chemicals, do not scratch, are not afraid of water, and do not lose their color. In addition, most of the materials used for nail extensions contain strengthening and healing substances.
Dear representatives of the fair sex, let's delight ourselves and our stronger half of humanity with our charming fingers!
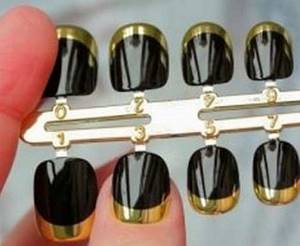
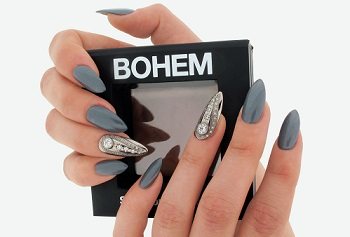
Sets with false nails
It is better to buy false nails in a specialized store, paying attention to the name of the manufacturer: it should be well-known, such as Broadway Nails, Victoria Nails or Abella. Then you automatically avoid the risk of spending money on low-quality false tips that spoil your natural nails.
Set of false nails
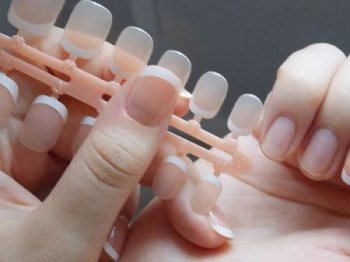
You need to choose tips according to the shape that best suits you, then they will look natural and beautiful.
Packs usually contain 20 or 40 colored or natural tips.
Which ones to choose depends on the preferences of women: you can buy them with a ready-made design or without a design, and decorate them at your discretion.
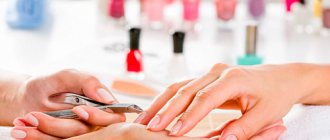
Preparing nail plates for gluing false nails
- Remove nail polish, if any.
- Move the cuticle with an orange stick.
- Trim burrs.
- File your nails to their minimum length.
- Run a soft file over the surface of the nails until rough. This is necessary so that natural nails adhere better to false nails (they will last longer).
Necessary tools for gluing nails:
Set of false nails with French design
- set of artificial nails,
- small pliers for cutting tips,
- files with an abrasiveness index of 240/180,
- orange stick and cuticle liquid,
- special glue.
How to find the right glue
You should use glue only for false nails; under no circumstances should you experiment with household superglues : when they are used, it is very difficult to restore damaged nails.
To touch up your manicure on false nails, use a liquid that does not contain acetone.
Execution technology
The technology of modeling nails with acrylic is more difficult than other techniques. The acrylic extension system consists of powder and liquid monomer. The peculiarity of the last component is a sharp and very nasty smell, so it is important to think about an exhaust hood in the room where the procedure is taking place. At home, do your manicure in a ventilated room.
To do this, use a special brush, which is moistened in monomer and dipped into the powder. It absorbs liquid and becomes a dense soft drop, which is applied using the same brush to the nail plate and distributed with kneading and stretching movements to create a shape. It is very important to do this without delay so that the acrylic does not harden at the wrong moment. Yes, yes acrylic requires a lot of professionalism. The main thing is to practice and not despair.
Step-by-step extension instructions
Let's look at an example of acrylic extensions in the French style step by step. To perform the modeling, you will need an acrylic fixer and powder of three colors: white, pink and camouflage. You can see the remaining tools and materials in the suggested list above. Let's begin!
- Wash your hands
- Using a pusher, we push back the cuticle and clean out the trimmings.
- Use a file to file down the free edge area.
- Using the same nail file, we remove the shine from the nail plate, carefully and gently. Remove any remaining dust with a brush.
- Now we apply Bond to the natural plate.
- Next, take the primer and apply a small amount only to the natural nail.
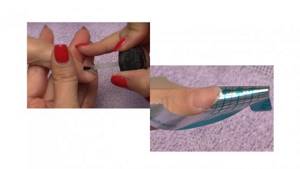
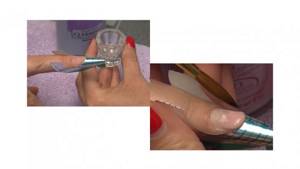
- Place the form tightly against the rollers, under the nail. Glue the wings from below, press them to the side areas.
- Pour the monomer into the container.
- Take a brush, dip it into a container with monomer and pick up camouflage-colored powder.
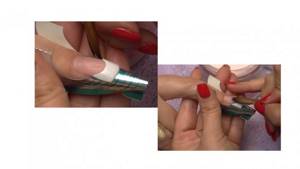
- Place the acrylic ball on the edge of the nail plate and gently blend it with soft, pressing movements. Correcting the smile area.
- Next, dip the brush into the monomer, pick up a ball of white powder and shape the free edge, pushing it towards the camouflage acrylic that is already laid out on the nail.
- If you need to complete the shape, then take small balls and apply them.
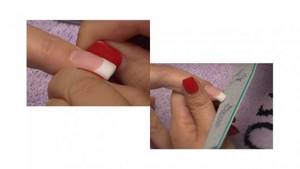
- Using the technology described above, we take pink acrylic and distribute it on top of camouflage and white acrylic. We form the nail to the end.
- Carefully remove the form from below. Checking how hard the acrylic is. We bend it in two planes with our nails.
- When the acrylic has polymerized, we file along the edges, giving the desired look. We use a file along the plane of the nail to achieve a smooth surface.
- We polish with a buff.
- We paint with a special acrylic fixative.
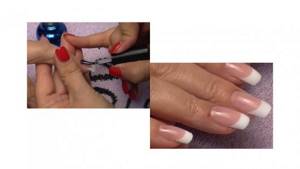
- Apply oil to the cuticle to soothe and moisturize the skin.
- We repeat the whole process on the remaining nails.
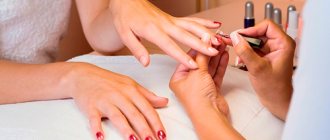
Step-by-step instructions for gluing false nails
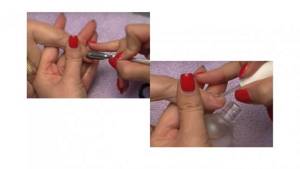
Plastic nails
- Choose nails that are close in width to natural nails.
- File the overlay plates if necessary.
- Put them in order.
- Apply a little of the linings.
- Apply to natural nail and press lightly for 10 seconds . Glue the rest of the nails in this way.
- You should wait until the glue dries and then start decorating them.
Manicure with plastic nails
Watch the video for a step-by-step tutorial on gluing tips onto natural nails using glue:
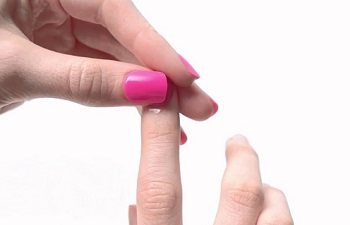
Self-adhesive nails
- Remove the adhesive film from the surface of the false nail and fix it on the native one. Do this procedure with all nails.
- To make your manicure look impressive, you can decorate them with a variety of rhinestones, varnishes, and special stickers.
A manicure with self-adhesive nails is incredibly easy and convenient; see how to do it in the master class:
Hard varnish
Hard varnish
Hard varnish - self-adhesive plates that are attached to the nails when exposed to the heat of the hands. The hard varnish is easy to use and has minimal harmful effects on natural nails.
- Wash your hands and remove old polish.
- File natural nails to minimum length.
- Sand the surface of the nails with a buff and degrease them.
Before gluing, choose smaller plates; under the influence of the warmth of your hands, they will increase.
- Remove the protective film from the inside of the plate, press it to the nail , then smooth it out . The material will take the shape of the nail from the warmth of your hands. To remove hard varnish, just pick up its edge with an orange stick and remove it.
Disadvantages of gel extensions
We already know how long gel nail extensions last. This is their huge advantage. But it's time to mention the shortcomings. Compared to acrylic coating, gel is more brittle and fragile. Even if an acrylic nail can be easily corrected or simply repaired, then if the gel plate breaks this issue disappears by itself, because it cannot be repaired. The broken nail will simply need to be removed and a new one made. The gel also cannot withstand very sudden changes in temperature conditions; it instantly begins to crack. Popularly, gel tip extensions are called reinforced concrete, which means it will be very difficult to remove such luxury. Only the filing procedure will help - long, tedious, and very careful so as not to damage the natural nail.