Polygel is also known as acrygel, acrylic, polygel and combigel. Despite such a variety of names (here the manufacturers have really tried to confuse everyone!), this is the same material that combines the best properties of gel and acrylic powder for nail extensions. The material borrowed strength from the acrylic system, and plasticity from the gel system. The result of this exceeded all the expectations of the masters.
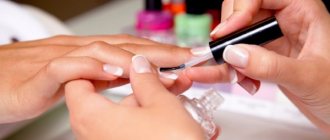
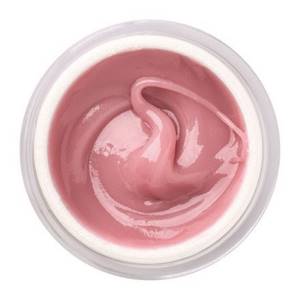
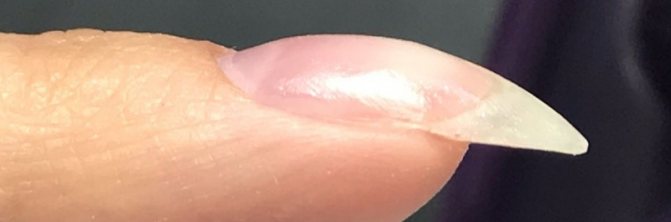
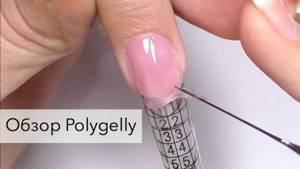
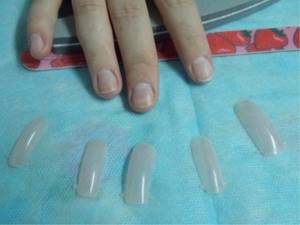
Acrigel is a dense, plastic and viscous material, somewhat reminiscent of plasticine. It can be sold both in tubes (although with them it is more difficult to control the amount of material squeezed out, this is considered more practical, since it prevents the ingress of small particles), and in jars. Due to its plasticity, the polygel does not spread on brushes or nails, and does not get on the skin, so it is very easy to work with it when extending and strengthening nails.
Unlike its “ancestors”, polygel allows:
- Align trapezoidal nails
- Mask chips on natural and extended nails,
- Restore injured nails,
- Strengthen the nail plate.
Its big advantage is that combigel is odorless and absolutely harmless, so it is perfect for people prone to allergies. And as we remember, such problems with nail extensions often occurred before.
Acrylic can be used to extend nails onto both tips and forms (both lower and upper) - the material is truly universal! It does not harden in air as quickly as acrylic, so you can work with Combigel at a free pace, which is very convenient for beginners. This is its consistency:
Masters also note that polygel:
- Requires minimal filing, which reduces time for nail modeling,
- Does not peel off, does not create air pockets or cracks when applied correctly.
All this, as well as an affordable price, has made polygel a leader among materials for nail extensions. Therefore, many beginning craftsmen are trained directly from acrylic.
Basic terms
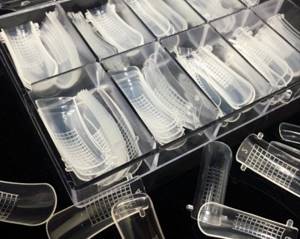
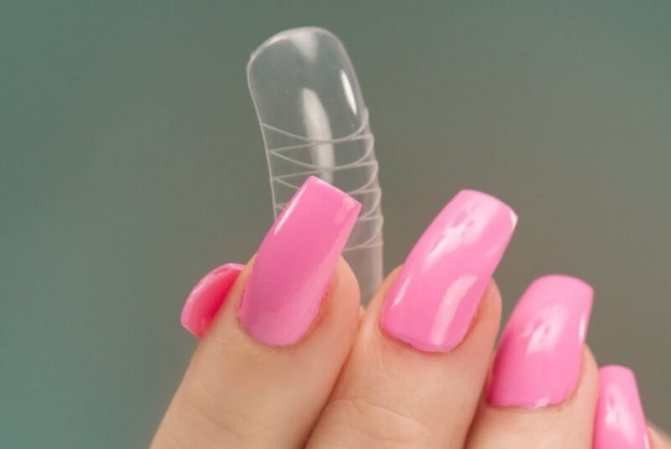
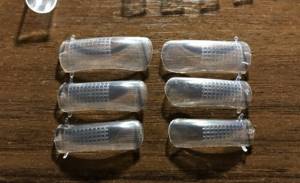
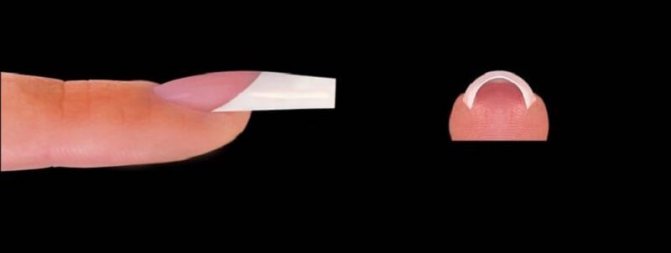
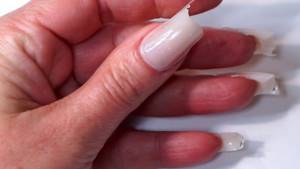
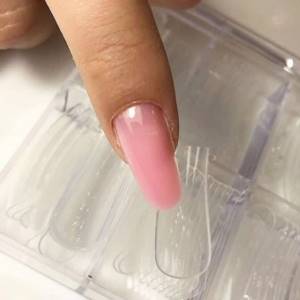
Top forms are a soft plastic product that imitates a natural nail plate and helps create an artificial nail of the desired length and curve.
Unlike conventional blanks, they are installed on the nail, and not under it. Extension on top forms is a procedure for artificially lengthening the nail using top forms and gel material. Extension using this method involves laying out the material inside the form and imprinting it on the natural nail plate.
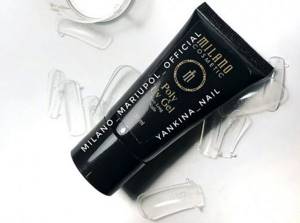
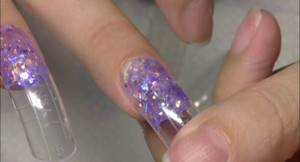
Polygel is an extension material obtained by combining acrylic and gel formulas.
The product is odorless and has increased density, which makes it an excellent material for modeling artificial nails. Available in tubes or jars with a lid.
Nail care at home and in the salon
Healthy nails look great even without an elaborate design. The use of various decorative means for decoration often leads to a deterioration of their condition, so taking care of the nail plates should become a regular habit. Home care is based on several rules:
- High-quality manicure tools are the main condition for healthy nails. For natural nail plates, glass, ceramic, and crystal files are the safest. They need to be filed in one direction.
- Care products should include hand cream, cuticle oil, and strengthening product.
- Regular warm oil baths for hands made of olive, almond, castor oils with the addition of lemon juice. Dipping your fingertips into lemon pulp will help whiten your nails.
- Intake of nutrition from food containing vitamins C, D, B, A, E. Food requires a sufficient amount of zinc, iron, iodine, magnesium, calcium, biotin, folic acid.
Salon nail care procedures: professional manicure, paraffin therapy, sealing, various types of extensions.
Kinds
Depending on the bend, there are 3 types of upper forms:
- Natural . Light bend, close to natural;
- Classic . More convex in the center of the structure;
- Standard . The most convex. The result is a nail with a slightly drooping tip.
The specific type is selected based on the data of the natural nail - the bending of the transverse and longitudinal arch is assessed, as well as the desired shape of the extension.
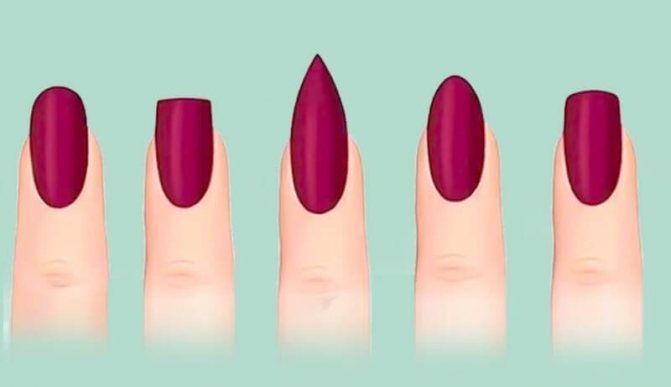
- A natural curve is used for the final result, a crisp or rounded square;
- For the future nail shape Almond is standard;
- For an oval – classic.
But this relationship is conditional - you can use any bend, but in some cases this may increase the operating time.
A few important points:
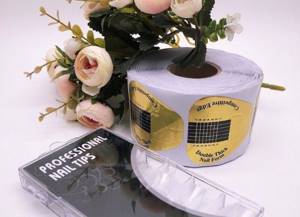
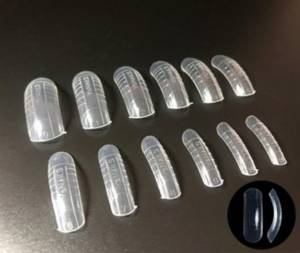
- The upper forms have their own size range, which is determined by the numbers embossed on the plastic. The larger the number, the smaller its size. Depending on the manufacturer, the largest figure may vary. Common numbering of sizes is from 1 to 10;
- Depending on the manufacturer, it can be with or without printed lines. The marks on the plastic are intended to determine the length of the future nail and carefully lay out the material. Forms with markings are offered by dozens of manufacturers, for example, PNB, Formula Profi, Monami, Vogue Nails;
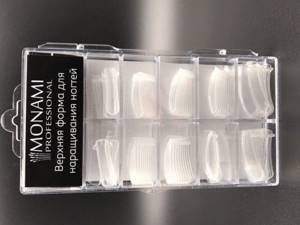
- There are small handles at the ends of the plastic blanks - they help separate the plastic without damaging the artificial nail. Find forms with handles from the brands Monami, Vogue Nails;
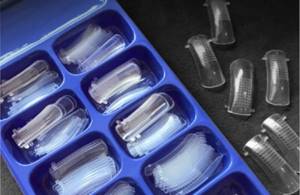
- On the upper forms, extensions are done with any type of gel. But most often it is polygel that is used, since it has a dense texture and does not “roll off” from the sides. When choosing a product, pay attention to the brands Canni, Vogue Nails or Patrisa Nail.
Advice from professionals
To grow your nails at home correctly, you need to listen to the advice of professionals.
A few recommendations on how to ensure high-quality extensions:
- You need to be careful when choosing materials and equipment, and not skimp on them;
- It is advisable to start with extensions using tips, as this is one of the easiest methods;
- Hands and tools should be thoroughly disinfected before work;
- There is no need to neglect the initial examination of hands and nails to make sure there are no contraindications for extensions;
- The material must be in stock;
- If tips are used, they should be selected in advance to the desired shape.
The difference between the upper forms and the usual ones
The usual forms mean tips, liquid tips and disposable templates for extensions.
- The upper ones are reusable. After polymerization, the material separates effortlessly and leaves no marks on the workpiece, so it can be used until it loses its bending. Approximate service life – 2 years;
- The upper forms do not polymerize along with the coating, but are removed immediately after the material has hardened;
- The technique of working with forms allows you to save material and create nails that are close in thickness to natural ones;
- The extension procedure is halved and takes from 1 to 1.5 hours including decoration;
- The end result requires almost no modification. After polymerization, you only need to remove the excess and polish the resulting nail.
- Unlike liquid tips, where the material is applied only to 2/3 of the natural nail, top forms involve laying gel over the entire nail plate;
- There is no need to add material after removal.
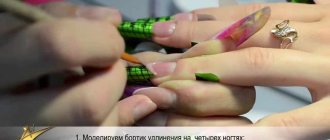
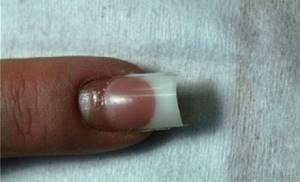
Description of extension technology on conventional forms:
Nail extension with tips: materials, step-by-step instructions and nuances
What is polygel
One of the completely new materials on the beauty services market for nail extension and strengthening is polygel. This is a natural acrylic that allows you to create beautiful nails in a glossy or matte finish that will make all your girlfriends delighted and envious.
Acrigel combines the properties of two popular materials: acrylic and gel. High level of density, reliability, durability are just some of its advantages.
Acrylic is used for these purposes as an independent unit for nail extension. Simple gels of various compositions look attractive, but wear off faster and are less reliable.
Polygel is a mixture where acrylic is one of the key components. Working with the mixture is simple; it does not require special skills, preparation or conditions for application and strengthening. Polygel has a number of advantages , among which it is important to note:
- Polygel nail extensions are distinguished by their durable surface. It looks natural, and to make your nails beautiful, smaller amounts of the substance are required than, for example, acrylic alone;
- The substance does not have an unpleasant odor, no chemical odor, so after working with it you do not have to ventilate and thoroughly wash off any foreign “aroma”;
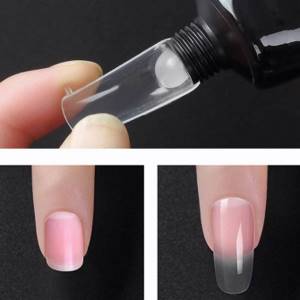
- Such nail extension products do not harden without special exposure to ultraviolet radiation, so you can take your time and give your nails any shape and appearance you like;
- Klenser is a liquid that simplifies application. It does not allow the polygel to spread over the nails, harden and makes the process of applying the substance uniform;
- The skin around the nails does not suffer, since the high viscosity of the substance does not allow it to get where it is not needed. Polygel in its hardened state is durable, so it is impossible to damage the extended nails with polygel.
Common problems with hair extensions

- The natural nail plate is completely flat or its edge tends upward. In such cases, the stress zone is difficult to form and most often remains the weakest in the extended nail.
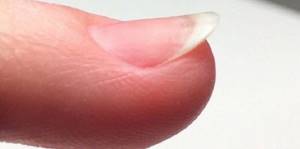
What to do: Before printing the material, drop a little polygel in the center of the stress zone. The ball should be no more than 1.5 mm in height and no more than 1 mm in width. Dry the ball in the lamp and start printing. This technique will help keep your shape at the desired level and prevent it from falling below the required level.
- A very arched nail. When looking at the end of the free edge of a natural nail, a strongly rounded arch is visible. In this case, it will not be possible to press the workpiece tightly, since the transverse arch of the workpiece will not be so rounded.
What to do: before imprinting the form, add a little polygel to the natural nail in the cuticle area. This technique will help smooth out a steep arch.
- Nails grow downwards. If the nail plate tends downwards, the edge of the workpiece at the cuticle will constantly move away.
What to do: Place a small layer of polygel near the cuticle, as well as drops in the center of the stress zone. Only after the layering has polymerized, start printing.
- Large gap between cuticle and mold. There is no need to install the workpiece tightly to the cuticle, but there should not be a large gap. The maximum indentation is 1 mm. What to do: File the plastic blank on the sides so that the edges do not interfere with moving it closer to the cuticle. You only need to cut down a little bit so that there are no gaps in the side sinuses.
- There is no free edge. To work with top forms, it is best that the natural nail has at least minimal regrowth. The distal edge will help avoid material leakage and also increase the strength of the structure. What to do: Before modeling, complete the free edge with polygel. You can do this on disposable paper blanks.
Peculiarities
The material under discussion is a hybrid of gel and acrylic. Initially, manicurists had to mix them manually, carefully selecting the proportions. But now such a product can be bought ready-made, which makes the work much easier.
When preparing a polygel, a high-quality construction gel is mixed with a minimal amount of acrylic powder. The resulting product has a consistency similar to plasticine.
Main features of the material (in descending order of importance):
- The nail extension process takes place without a pungent aroma (unlike pure acrylic), and after treatment with a lamp the plates become very dense and do not break (unlike the usual gel).
The material does not cause allergies and is suitable even for people suffering from asthma.
- The polygel is easily leveled, and the remaining product is instantly removed and can be used further. As a result, the time spent on the entire extension process is significantly reduced.
- Initially, the material was intended exclusively for working with upper forms. But today it is successfully used to build up the lower ones. Interestingly, the product is laid out almost in the same way as acrylic.
Only it does not harden instantly, but retains its plasticity until processed in a lamp. The main thing is to properly prepare your nails.
- When working with the material correctly, various errors are completely eliminated. For example, detachments and “pockets” filled with air. These problems are common with acrylic.
- In sawdust, the material is harder than gel, but softer than acrylic.
- Polygel does not lag behind the nails in the free edge.
- Without polygel, it was difficult for the craftsmen to work with the upper forms. When regular gel was placed on them and transferred to the lamp, it began to flow out heavily. And then it could form unsightly bumps in the cuticle area that needed to be cut out, which severely injured the delicate skin.
Such problems do not arise with the new product.
Modeling using the Ombre technique
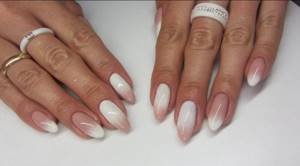
Thanks to the unique technology and simplicity, extensions can be done immediately with the design. One of the common varieties is ombre modeling.
To work you will need:
- Polygel: white and camouflage;
- Orange stick and brush;
- File and buff;
- Top.
- Prepare for extensions: do a manicure, apply primer;
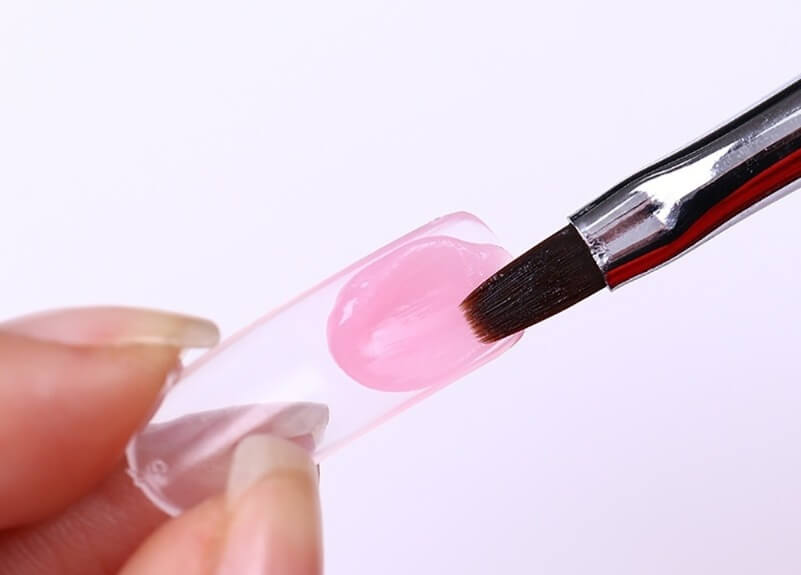
- Place a small amount of camouflage in the center of the workpiece with an orange stick and spread it with a brush in a thin layer. When distributing the polygel, “smooth” it to a thin, almost imperceptible layer;
- Place the form in the lamp for 7 seconds so that the camouflage “sets” slightly;
- Using an orange stick, place white polygel in the place where the white color is planned for ombre;
- Distribute the polygel, carefully blending it onto the camouflage where the color transitions;
- Dry for 7 seconds in a lamp;
- Lay out a little more camouflage - this layer will become the main thickness of the future nail;
- Distribute the gel, forming a thickened stress zone, a free edge with its future shape, a cuticle zone and side ridges;
- Print the form with the material onto the nail, remove the excess, complete the missing pieces with camouflage;
- Place your hand in the lamp for 10 seconds;
- Using a clamp, pinch the distal edge and growing points, remove the workpiece and install a clothespin;
- Dry the material in a lamp;
- File down the free edge, remove any imperfections and polish the surface of the nail with a buff. When polishing, avoid the color transition area so as not to simply file it off;
- Wipe your nails with degreaser and apply top coat.
Gradient manicure: preparation, ideas, materials, 6 methods of execution
Additional reinforcement
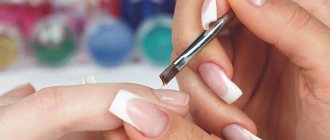
The process of strengthening nails with polygel is simple and includes the following steps:
- It is necessary to carry out a clean manicure, wipe the nails with a dehydrator;
- Apply base and dry under lamp;
- Moisten the brush and spread the acrygel in a thin layer over the surface of the nail. Dry under a UV lamp.
All that remains is to file your nails and give them the desired look.
How to remove polygel
When new nails have turned into old ones and you want to remove them, then there will be no problems with polygel. Nails can be removed easily using a very ordinary 160-200 grit file or a special manicure cutter.
French lay-out
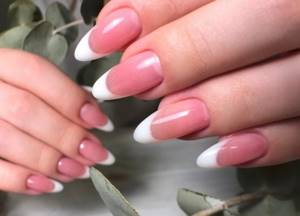
In order not to draw the smile line and not suffer with a clear joint, use the lay-out technique. In this case, everyone can get a French manicure.
- Carry out standard preparation - manicure, polishing, degreasing and primer coating;
- Place camouflage polygel into the mold and form a curved smile line. This part will be pink, so leave an imaginary margin for the white tip;
- Stamp a camouflage shape onto your nail. Look at the structure from above - if the gel shows through, pull the workpiece off and start over. The layer should not be too thick, but it should not be visible either.
- After installing the form with polygel on the nail, send it to the lamp for 10-13 seconds;
- Reach out with your hand, pinch the free edge, remove the workpiece and put on the clothespin;
- Dry the polygel in a lamp;
- Take the mold again and put white polygel there. Stretch it as much as the length of the future nail should increase. Don’t pay attention to the smile line - the joint with the camouflage will be smooth in any case;
- Secure the blank on the nail, moving it from the free edge to the junction with the camouflage;
- Check the antennae. The lines going to the lateral sinuses should be smooth and filled. If you find any gaps, fill them with white polygel;
- Place your hands in the lamp for 15-20 seconds;
- Pinch the nail, but only where the white color is completed. Attach a clothespin and send your nails to dry;
- File the form, check for empty cavities and polish the nail plate to remove excess streaks of white polygel onto the camouflage;
- Cover your nails with top coat.
Design options for a French jacket - a selection of ideas
conclusions
Girls are used to growing their nails with acrylic powder or gel, which are used in almost all salons, but both options have significant drawbacks that spoil the visual result of the manicure and the health of the nails.
However, relatively recently a new material has appeared to strengthen and lengthen the free edge of the plate - polygel. The foundation is easy to work with because you don’t need to spend a lot of time distributing it, which is why many girls use it to do their own extensions.
Aquarium manicure
- Carry out standard preparation of nails for extensions;
- Take the mold and cover the inside with a small layer of clear polygel. The layer should be such that design elements are “sunk” in it;
- Lay out the desired design using an orange stick. Almost anything can be used as decoration - rhinestones, bouillons, kamifubiki, sparkles;
- Dry the form with the future aquarium in a lamp for 10 seconds;
- Lay polygel on top of the decor in the color of the future coating - camouflage or a bright shade, if desired;
- Distribute the material according to standard rules - less at the cuticle and on the sides, more in the stress zone and on the free edge;
- Stamp onto the nail and remove excess material;
- Dry for 15 seconds, pinch, remove the mold and dry completely;
- Cover the design with a top.
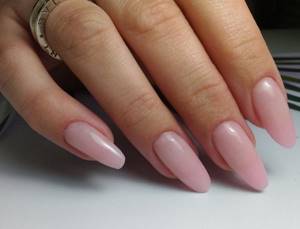
Polygel nail modeling on top forms is becoming the most popular technique.
If you haven’t tried this on yourself yet, don’t put it off. Any questions? Ask in the comments. Comment
Advantages and disadvantages of gel extensions on forms
This type of extension makes it possible to:
- It is enough to lengthen short nails;
- give them the desired shape and elegance;
- improve appearance and match natural colors;
- to grow wide nail pads, although it is difficult to do on your own, only professionals can do it;
- quickly carry out the process, unlike, for example, when building up with tips.
The main thing is to get used to it. Disposable paper forms are quite suitable for the job. Although experts advise using Teflon or metal. The main thing is to thoroughly disinfect both materials and nails after each procedure.
The good thing about this method is that it is non-hazardous, does not cause allergies, and does not violate the integrity and structure of the nail plates. The gel stays on the nails for quite a long time after extensions, acquires a natural shade after drying and is odorless.
Nevertheless, artificial extended nails require careful handling. They can quickly break from an accidental blow and do not withstand mechanical stress.
On the other hand, artificial nails can always be restored; you just need to change the stencil and start the procedure again. The gel will give your nails elasticity and visual similarity in color to natural ones. The main thing is to choose a durable material for adhesion, a beautiful stencil, and skillfully apply the selected design.
Coating your nails with gel and adding nail extensions to forms is a simple procedure, but it will require skill and time to achieve the perfect manicure.
It is important to first prepare the nail plates, select high-quality materials for work, and not be distracted during the process. In the future, protect the nails from mechanical damage and contact with abrasive chemical elements.
Varieties
Today, two types of upper forms are known. Depending on the cost, they can be either with or without markings to facilitate the work process. The first option is especially convenient for beginners who are getting acquainted with nail extensions using such templates.
The markings on the forms may differ; in some places they are arched stripes, in others they are a grid.
The set has the same arch and length, as well as markings with the indicated dimensions. Based on the marking lines, it is easier to align the length and adjust the edge. There is no need to tediously adjust an identical shape, since it already exists.
The upper forms are classified as reusable types of extension templates. They differ from arched counterparts and liquid tips.
How to choose?
When buying top forms for nail extensions, you should pay attention to a number of nuances. For example, the inside of templates is very important. It should not have visible defects; a quality product will leave the desired gloss on new nails.
Typically, such frames are enough for 40-50 extensions. It is better to buy a frame with markings, especially for novice craftsmen.
When choosing the required option, you should take a closer look at the shape of the templates, which may differ. Sometimes it is more curved, sometimes the difference may be in the height of the arch. It is better to take the option in which the manicure hatchet can fit in the space between the form itself and the nail plate.
It is recommended to purchase sets with a large number of elements - this will allow you to select the required sizes as accurately as possible.
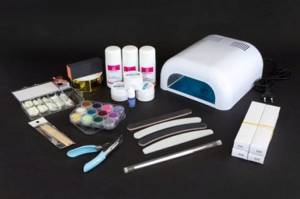
Depending on the type of sculpting product, when applying extensions to silicone top molds, you may need gel products, as well as base, top and acrylic. In addition to them, you need to prepare the templates themselves, primer material for coupling (primer), cuticle oil, glossy coating, dispersion layer remover, brushes, files, orange stick and dehydrator.
What base should I use for acrylic?
Which base to use - this issue must already be decided based on the brand of polygel that you are using, however, it should be noted that the material is well compatible with base coats of different brands.
Working with acrylic does not require applying a base; it adheres perfectly to the natural nail plate; preliminary application of a primer will be enough. Using a database is acceptable, but not a required step.
What else is needed for acrylic extensions?
There will be no additional costs for instruments (for example, brushes or preparations). Polygel can be applied with a gel or acrylic brush. For some manufacturing companies, together with the polygel, you will have to purchase a special liquid - a clinser, which will be as compatible as possible with the modeling material.
These nuances pale in comparison to the mountain of benefits that we will receive by choosing acrylic extensions.
How to choose acrylic? What do polygel manufacturers offer us?
The nail industry market is developing dynamically and constantly pleases with new products for both design and modeling. Therefore, the variety of polygels will be constantly updated with new types and brands. At the moment, there are two main directions in the range of polygels:
Acrylics, which in their texture are very similar to the acrylic mass, which was obtained by mixing powder and monomer.
There are even small particles of acrylic visible in them, the structure of the material is paste-like, very thick, the material is distributed by pressing movements. As a rule, these are polygels made in the USA or Germany, since acrylic technology is more popular in Europe and America, and craftsmen are more accustomed to working with acrylic textures. An example of this format is polygel TM GGA Professional.
Polygels, which in texture resemble a very thick gel soufflé or gel jelly.
They are also very thick, but the structure is more like a gel, there are no visible acrylic particles in them, the texture is more like a soufflé than a paste. Most of these materials even have surface self-leveling properties (that is, the material does not spread over the edges, but surface irregularities are smoothed out during modeling).
Such materials are produced mainly in China or Korea, since in these regions the gel extension technique predominates and the gel texture is more common in use.
Also, it was from China and Korea that the technology of polygel nail extensions on top forms came to us. An example of this type of acrygel is Canni polygel, which can be purchased in our online store.
We recommend the most flexible material with excellent performance qualities and a varied palette of shades.
The choice of a subtype of polygel and its brand is a matter of preference of the master: which texture is more familiar and comfortable to work with is up to you to decide. The most important thing is the end result and the pleasure of wearing it: durable and most natural nails, durability of the manicure before correction, safety and environmental friendliness of the material.
Polygel has these properties 100%, you just have to choose your “favorite”!