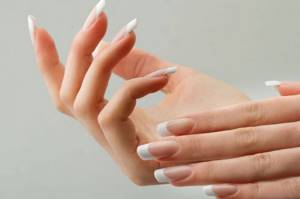
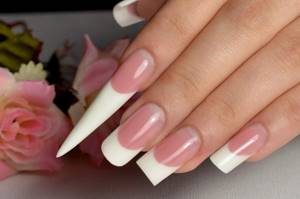
It’s hard to imagine a modern woman without a beautiful, stylish manicure. Nail service professionals in salons offer a wide variety of nail design options. In addition to coating, a popular service is nail modeling. Let’s take a closer look at what it is, how it is carried out, and what its features are.
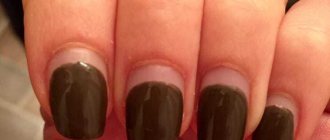
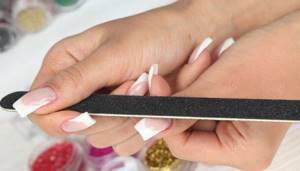
Nail modeling example
Basic glossary of terms that a beginner encounters when building
While studying the instructions for gel nail extensions and watching videos on the same topic to learn the nuances, you will come across several popular terms. Let's look at and explain each of them.
Base, camouflage and finishing gel . Modeling systems can be one, two or three component. Depending on this, they include one or more types of gel.
- The basic one will be required for the first stage - forming the base of the artificial nail. It is translucent and has the densest texture of the three.
- Camouflage has a delicate pink color and a less dense texture. It is needed at the stage of form modeling and architecture creation.
- The finishing one is the lightest in texture and serves to final consolidate the already obtained extension result.
Acid and acid-free primer is a must-have product for extensions.
The primer lifts the nail scales, degreases it and ensures stable adhesion to the gel. For extensions with a gel system, it is recommended to use an acid-free primer, and with acrylic – an acidic one.
The product also prevents the development of fungus and pathogenic microflora between the natural surface and the artificial material.
Tips and forms for extensions . The lower forms are thick stencil stickers with markings, which are sold in rolls of 500 or more pieces. Disposable. They are placed and secured under the natural nail to form a free edge using gel and a brush.
The top forms are reusable . Gel is applied to them, then pressed onto the nail and dried in a lamp. Next, the form is removed and the architecture is already formed on the created substrate using a camouflage agent.
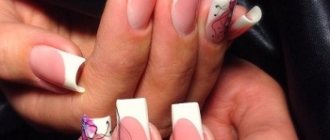
Extensions on top forms with examples and instructions
Tips are plastic overlays that are used as a base or substrate for extended nails. Sold in sets of different shapes and sizes. They are selected for each nail, then attached with gel to the free edge and after that, the further architecture of the plate is built on their basis.
Nail extension with tips: materials, step-by-step instructions and nuances
FANTASTIC! What else can surprise you in creating an art manicure?
ABOUT! We will definitely write about this further. For art we have everything and even more! And there will be so much more!
In the meantime, two more builder gels.
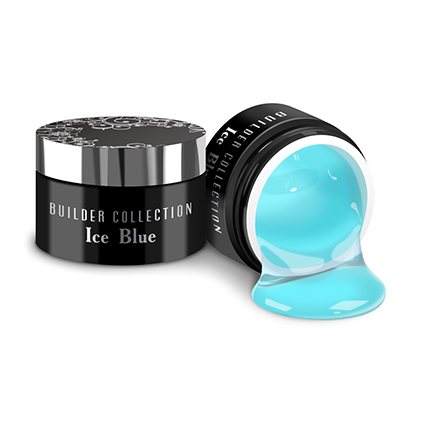
Ice Gel Blue . Transparent blue bildergel for laying out in sculpture and as a substrate. Good for aqua designs and aqua jackets. Ideal in combination with cool gel colors and design materials. Medium viscosity.
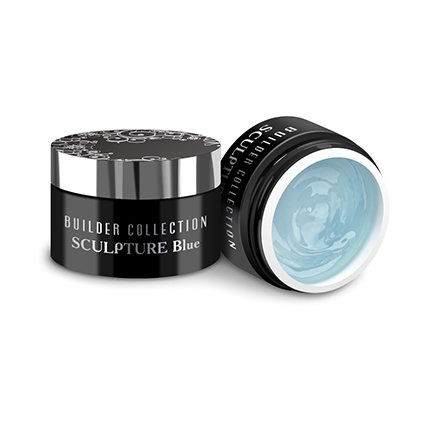
And the second gel for nail art manicure is Sculpture Blue . Transparent blue high molecular weight acid sculptural buildergel with a high degree of viscosity. Very good for interrupting the shade of yellowness during wear and for creating aquarium designs, as it emphasizes the depth of materials in nail design.
Types and brands of extension gels, how to choose the best option
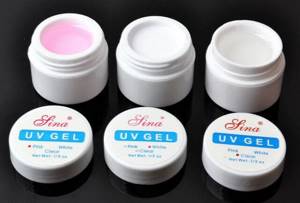
Before buying a gel you should decide:
- Will it be a one-component, two or three-component system. It will be easiest for a beginner to master one or two-component.
- The second criterion is drying in a UV or LED lamp. Different brands can polymerize under different types of radiation. There are UV gels, biogels and LED gels. The first two are dried in a UV lamp.
When choosing a brand, you should study the reviews and recommendations of experienced craftsmen, and then try several options to choose the most suitable one for yourself. To get started, take a look at popular brands: Kodi, RuNail, My Nail, PNB, IBD Gel, Masura, Naomi, Formula Profi. They provide professional level quality.
Expert advice
Experienced masters have created a small list of recommendations that can be called the secrets of a flawless manicure. The rules are as follows:
- Trimming manicure should be carried out at least three days before the modeling procedure.
- On the day of the procedure, you should not use fatty nourishing creams.
- To correct the shape, it is prohibited to use scissors; you can only use a nail file, but under no circumstances a metal one.
- It is necessary to take care of the cuticle and apply a nourishing cream.
Modeling nails using special materials is a rather difficult process for a master. The resulting result will allow a woman to gain self-confidence, look beautiful and impeccable, because hands are the calling card of every lady.
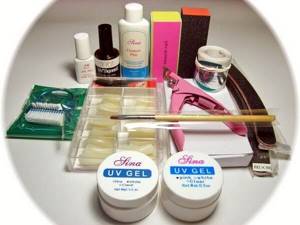
Basic starter kit for extensions
To successfully perform modeling, a beginner will need a set of materials and tools. You can assemble it yourself or purchase a ready-made one recommended. To build you will need:
- UV or LED lamp, a combined option is possible
- Milling machine with a set of attachments
- Basic and camouflage gel for extensions
- Primer acid-free
- Base, finish
Base coatings: types, selection criteria, review of the best - Files for natural and artificial nails, polishing buffer
- The brush is medium and thin for correcting corners
- Forms and types, depending on the chosen technique
- Degreaser, dehydrator
- Liquid for removing the sticky layer, lint-free wipes
What is the sticky layer and means for removing it - Clip-clamp for arch formation
- Dust brush
- Pusher or orange stick.
Manicure trends 2021-2022
This season it is fashionable to create nails with gasoline, hologram shimmers! BUILDER ILLUSION collection of gels comes to the aid of the master ! We simply have no right not to talk about it! The base is a thick and strong builder gel. A million shimmering flakes in each jar, together with the density of concentration, allow you to cover every millimeter of nail modeling with fragments of dazzling shine. It's like nothing else. If only for a fairy tale! There are 5 shades in the collection, each unique in its own way.
In this article we tried to describe in detail the unlimited possibilities of using body builder gels. With them you can simply strive at the speed of your inspiration and imagination! And the gels themselves will give you super speed of work, crystal transparency where necessary, and where you want color, neon and sparkles. WELCOME!
Instructions for gel extensions at home
Let's consider two popular extension techniques - on paper forms and on disposable tips.

Extension on forms step by step:
- Use an orange stick or pusher to carefully push back the cuticle. You can pre-cut or combined manicure
- Use a diamond cone tip to remove the pterygium. This stage is very important, since uncleaned pterygium most often becomes the cause of detachments
- Using a file, we completely remove the length of the nail, polish the surface, removing only the shine
- Degrease
- Apply primer and dry
- We set the forms and fix them
- Using a brush, apply the base gel in a layer of medium thickness, paying special attention to the areas of the cuticle and contact with the free edge of your nail. Distribute using trampling and leveling movements
- Make a shape and choose the length. It’s better to immediately make it 1-2 mm longer, then the excess can be removed with a file
- Dry in a lamp for 30-60 seconds until the nail plate begins to warm up.
- We take it out, fix the bend of the arch with a clip-clamp and send it to the lamp to dry for another 60 seconds.
- Apply a second layer of camouflage agent. We form the thickness, apex and fold zone, dry in a lamp for 60 seconds
- We take it out, clamp the arch again with a clip and send it to dry for another 60 seconds.
- Removing the sticky layer
- We file down the thickness and shape, grind
- Apply gel polish, finish without a sticky layer
- We treat the cuticle with nourishing oil.
Extension on tips step by step:
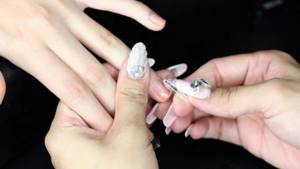
The main stages will coincide with the technology of extension on forms, with the exception of working with tips.
- We process the cuticle area, remove the pterygium
- We select tips of the desired shape and size, if necessary, file them down immediately so that there are no gaps between your nail and the artificial overlay
- One at a time, apply the tips to your nail and use a base gel to connect the edges, dry in a lamp for 120 seconds or in accordance with the instructions for the gel
- Apply a camouflage agent, form an apex, a fold line, dry in a lamp for 60 seconds
- We take it out, use a clip to form an arch, and dry it for another 60 seconds.
- Remove the sticky layer, file it down, sand it
- Apply gel polish, top coat, cuticle oil
Advantages and disadvantages
The technique is now quite common, besides the fact that it is done in almost all salons; many have gotten used to doing it themselves at home.
Modeling has several positive aspects:
- The nails become straight. The use of thick formulations helps fill cosmetic surface defects to prevent deterioration of quality even if the nail plate is severely damaged. This effect cannot be achieved only by applying a decorative coating;
- Preventing surface damage. A durable layer of a fixed base reduces the mechanical impact on the nail, which reduces the risk of damage due to this, the occurrence of detachments and other problems;
- Possibility of independent implementation. Many applied bases tend to self-level, so they are gradually evenly distributed over the nails;
- Possibility of creating any shape by extension. Regardless of the length of the nail bed, it can be transformed;
- Long-term preservation. The simulation result remains the same for up to a month.
Modeling makes life easier for girls with problem nails, since they do not have to constantly pay attention to their quality and correct them.
However, keep in mind that some compositions for the procedure have a toxic composition, which causes a number of problems:
- Acrid odor that does not disappear quickly;
- Risk of damage to the nail plate after removal of the work. This is due to complete blocking of the natural manicure;
- The risk of an allergic reaction if the solution gets into the periungual area.
Consider the disadvantages of cosmetic technology before performing it. It is recommended to do it first in a salon to understand whether the modeling method is right for you, and only then, if desired, switch to home correction.
Step-by-step instructions for correcting already grown nails
The recommended intensity of correction is once every 3, maximum 4 weeks. You should not tighten it, as the growing edge begins to “peck”, the area of the apex or the highest and strongest point shifts and the risk of injury to the extension and your own nail increases.
During correction, there is no need to completely remove the material if there are no visible detachments. This will save both time and consumables.
The correction is performed in accordance with the following steps:
- We remove the old gel polish (if necessary) and the top layer of the extended nail along with the length using a diamond cutter or file
- Remove dust and degrease
- Apply an acid-free primer to the grown edge of the natural nail.
- Next, using base and camouflage gel, we form a new edge on the forms or tips.
- Dry each layer in a lamp for 2 minutes
- Remove the sticky layer and file the mold on top
- We cut out our nails and level the material from below with a diamond cutter
- We seal the transition from our nails to the extended nails with a base or top coat in the lower part. This will help avoid detachments and snags during further wear.
- We apply gel polish and make a design
- We treat the cuticle with nourishing oil.
These simple recommendations and step-by-step instructions will help even a beginner cope with extensions.
It will take patience, inspiration and 2-3 hours of your time. What stages do you think will be the most difficult? What difficulties have you already encountered while growing and how did you manage to overcome them? Share with other beginners in the comments. Comment
Everything is there, look!
Stained glass gel, sculptural - COLOR GLASS SCULPTURE . This is as many as 37 rich shades of colored “glass” for modeling! Perfect compression of the arches, holds them tightly for 5-6 weeks, or even more! How does the client tolerate it? The material is of medium viscosity and self-levels well. You can combine several shades with each other and make a range of colors - from dark to light! It turns out simply fantastic!
The trend of the season for neon nails will be supported by our builder gel COLOR NEON SCULPTURE . 6 juicy, brightest shades! They are used both as a backing and for laying out the jacket in height. Will give a glow in UV (clubs, bars, etc.) Setting time 7-8 sec. Pressure 15 sec. Complete polymerization in UV 90-120 seconds. They do not fade during wear. All colors in the series blend perfectly with each other through layer-by-layer fixation in the lamp. It also holds the arches firmly and for a long time!
And the third series of gels, which will give the client an impeccable colored jacket with a chic arch, is COLOR SCULPTURE . 7 shades, 2 classic and vital colors for a master, black and red! And 5 shades filled with mother-of-pearl, fine shimmer and mica! DELIGHT GUARANTEEED!