The idea is extremely simple: why spend an hour or two creating drawings if there is a ready-made solution? We are talking about stickers: small decals can be used to decorate both “bare” nails and a colored coating, thereby decorating a manicure. Of course, like any handmade work, nail art, in which every line is drawn by a master, is valued higher. But we understand that in a couple of weeks any artwork will still have to be erased. In this sense, a manicure with stickers is much more practical. We’ll tell you more about its creation and offer a selection of photos with manicure options with stickers for short and long nails.
©Getty
Basic principles
Self-adhesive manicure pictures have the following advantages:
- decorative elements are inexpensive;
- Can be applied even at home without a lamp;
- nails do not deteriorate from such an accessory;
- easy removal without additional tools;
- Suitable for any finger shape;
- does not stick to surfaces, so there are no design problems.
But this idea also has disadvantages:
- lasts for a week without gel polish or shellac;
- short nails with a lot of bright designs often indicate a lack of taste;
- if the base of the underwater type of accessory is acrylic, you need to take into account the speed of adhesion, since it is impossible to change something without damaging the film.
Before applying the accessory, it is carefully cut out so that it looks smooth and neat on the nail plate. When using decorative elements that do not completely cover the surface, they are cut out with nail scissors so that the shape is maintained.
If a film is expected to cover the surface of the canvas, you need to be careful. Pay attention to the edge of the self-adhesive adjacent to the cuticle. A plate is cut out as close in shape as possible to the nail plate, since this can hardly be corrected later.
If there is a need for correction, the edge is filed with a glass file.
DIY stickers? Everything ingenious is simple
Sometimes there are situations when you come up with a nail design in your head, but it’s difficult to depict it yourself. And as luck would have it, there are no such stickers for sale. What to do in this case? Of course, create them yourself!
Nail stickers are quite easy to make yourself.
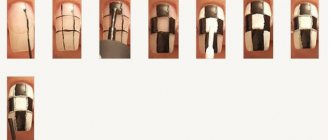
Take regular thick polyethylene and apply clear varnish to it. Immediately drip a different color on top. After the varnish has dried, remove it from the polyethylene. Using nail scissors, cut out the desired shape of the impromptu sticker and attach it to the base of the nail plate prepared in advance.
Nail stickers are quite easy to make. When you have thought through the design of the nail plate in detail, proceed to action. Take regular thick polyethylene and apply clear varnish to it. Immediately drip a different color on top. To, for example, get a flower, add a few more suitable shades of varnish and draw the petals with a needle. Add a rhinestone as decoration.
After the varnish has dried, remove it from the polyethylene. Using nail scissors, cut out the desired shape of the impromptu sticker and attach it to the base of the nail plate prepared in advance. Be sure to cover the image with clear varnish on top.
Self-made stickers will completely reflect your mood
Imagine and you will succeed!
Advice! To ensure that the sticker lies evenly on the nail, make 2-3 small cuts on each sticker in advance and, after application, smooth it with an orange stick.
What are there
There are many types of self-adhesive films:
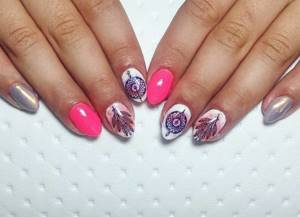
- Lace in the form of thin patterns that practically do not cover the plate, but are only applied in small lines. Most often applied to decorative coatings.
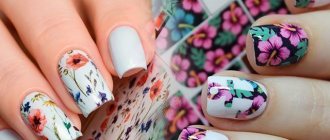
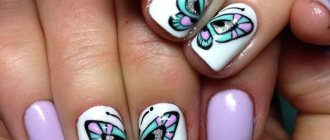
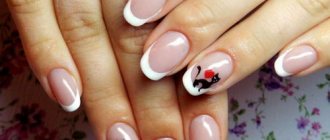
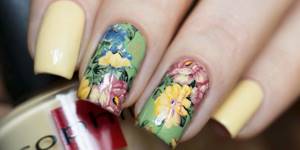
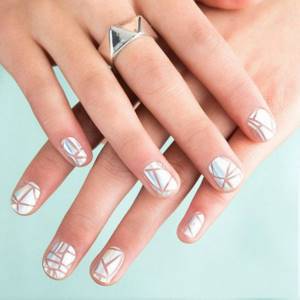
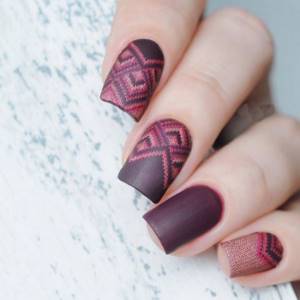
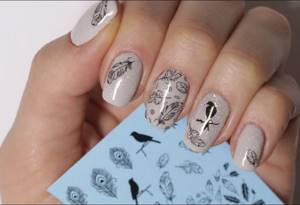
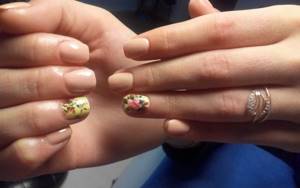
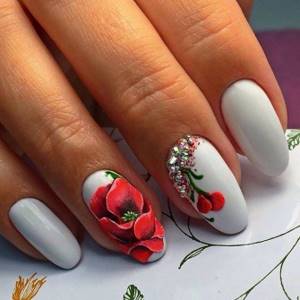
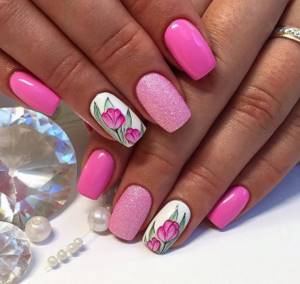
- In the form of drawings. The peculiarity of this decorative element is that it makes up more than half of the nail and is applied on top of the varnish. Ideas include abstract patterned designs, simple elements or geometric shapes. Images of flowers and animals are also allowed. Such ideas are intended for those who do not know how to paint beautifully with a brush.
- Photo design . Self-adhesive films that fully cover the perimeter without an additional base. Photo design is an image that is correctly cut to the required size and glued.
There is also a classification depending on the method of creating the idea: self-adhesive part, water-based, and adhesive-based. Each of these types has its own characteristics in creating an idea, as well as advantages.
Self-adhesive
These nail stickers are used without the addition of a varnish base. To transfer the image to the surface, it is cut out, carefully removed from the paper base and the remaining film with the image is glued to the plate.
Next, a clear varnish is applied on top as a sealer. To ensure that the design lasts a long time, gel polish is used to secure it.
Compatibility testing with the material used will be required. There are often cases when the gel corrodes the adhesive base, after which the pattern is corroded.
Water based
The water type is easier to deal with on your own. A manicure is created using water stickers in several stages.
- Varnish base. It is acceptable to use a colored or transparent substance. But it is recommended to use regular high-quality varnish in this case, and not gel.
- Next, warm water is poured into a deep plate, the required sticker is cut out and placed in the liquid for half a minute.
- Next, the image is taken out of the water with thin tweezers, the paper base is moved with the tip of the tweezers and the film of the design is separated.
- Next, you need to press the image with a soft sponge or cloth, and then remove the remaining moisture.
At the last stage, the obtained result is fixed with any transparent base. An important point is taken into account: the edge of the plate is painted well to avoid water getting under the varnish and damaging the design.
Adhesive base
These types of self-adhesives are great for practicing your first manicure using patterns and other images. They are inexpensive, have an attractive appearance, so people work with them to create them themselves.
At the first stage, pictures are cut out according to the shape and tried on the nail. It is important that the drawing accurately follows the shape; you need to take into account the dimensions. Next, the varnish is applied, and until it dries completely, the desired picture is removed from the paper base, and the drawing is transferred to the surface with thin tweezers.
The decorative element is carefully pressed so that the varnish is not touched. After a few minutes the base will dry for further application of the sealer. This design will take about half an hour, but the result will be summery and colorful.
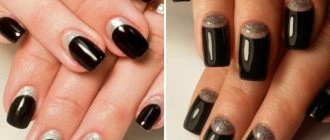
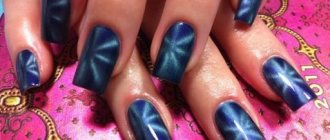
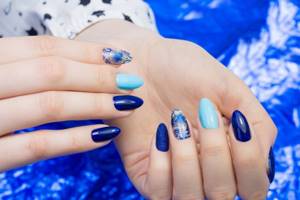
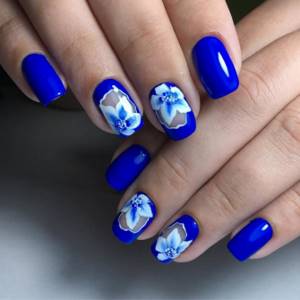
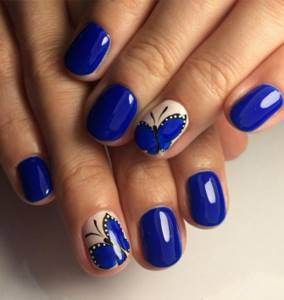
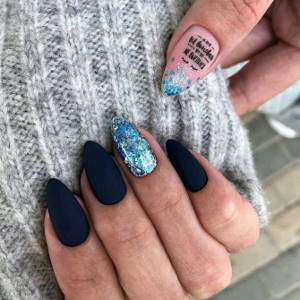
Blue palette theme
Manicures with blue flowers evoke associations with the theme of the sea, outer space, and New Year's holidays. This ability is fully in demand by designers to demonstrate their virtuosity in creating real masterpieces on the small surface of the nails. There are a lot of options.
Blue varnish is complemented using a wide variety of techniques with original decoration items:
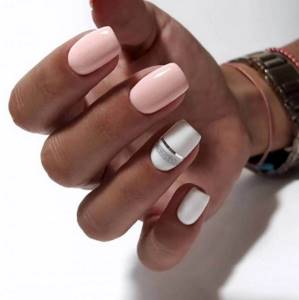
- Matte varnish surface of manicure;
- Execution of "French";
- "cat's eye"
- Iridescent sparkles, etc.
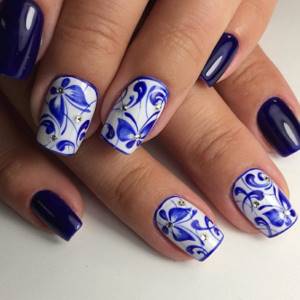
The greatest success was caused by the decision of the masters in 2022 to cut out a small hole on the cobalt blue surface of long nails.
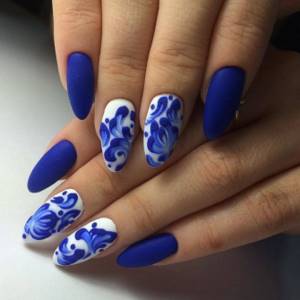
For the spring-summer season, stylists recommended a combination of blue shades with black. Also at the peak of popularity is the idea of making a gradient, where a bright blue varnish is complemented with small sparkles.
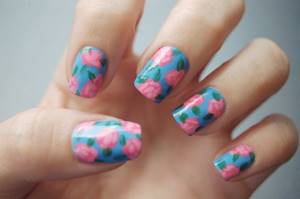
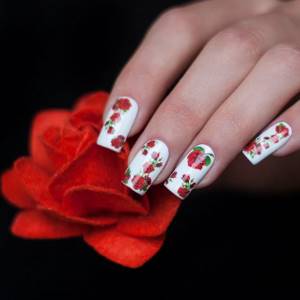
The popularity of manicures with flowers on nails at any time of the year is understandable. It is especially good in the summer, being both gentle and very effective. Drawings of flowers always emphasize beauty and charming femininity, giving joy and perfectly uplifting the mood.
Secrets of applying gel polish
Before you start designing your manicure, you select the type of decor, coating, shade of gel polish and idea. The varnish is selected taking into account the main patterns. But it is recommended to select transparent or light shades so that the picture is clearer.
Features of applying gel polish include the following steps:
- Preparation.
- Application.
- Strengthening.
The procedure takes up to 2 hours. Additionally, you can watch the video:
Preparatory stage
Regardless of what type of accessory and covering material is selected, hands are prepared before application.
The old coating is carefully removed, and then the nail plate is processed:
- The cuticle moves back.
- A layer of skin is cut off
- Shape is given.

This stage of the procedure is carried out taking into account the length of the plate, the shape and the lunula located at the base of the nail. If this part is damaged, the nail will not grow well, and the application process itself will be painful.
Women with short fingers make an almond-shaped nail from the free edge. This allows you to visually lengthen your fingers.
Application
When applying gel polish, take a soft file that removes shine, and degrease the surface using a special substance. Linen rags or manicure napkins are suitable as materials. Cotton wool is not recommended for use, as it leaves a fine pile that can lead to chipping.
- At the next stage, you will need a dehydrator to remove excess moisture from the plate, then you will need a primer that ensures good adhesion of the gel polish and the surface.
- After this, the coating is applied. Each applied layer of base requires good drying under ultraviolet rays for the time specified in the instructions. This usually takes no more than two minutes. If the layer is not sufficiently dried, early chipping will begin.
- This step is followed by the application of stickers. If these are water-based designs, it is moistened in warm water, then pressed against the nail and the transparent detachment is removed with tweezers. For uniform application to the canvas, small cuts are made on the bend of the nail.
These are mandatory steps when working with gel polish, since in the presence of a small foreign object, air accumulations may occur. This idea is sloppy, so it can delaminate in a week.
Consolidation
The last step will require the application of a topcoat. There is a small side gap left for the substance before transferring the self-adhesive. This will allow the top to adhere to the nail plate, otherwise the manicure will quickly collapse.
Before applying the topcoat, you need to seal the edges in several layers to ensure good adhesion. Each layer will require drying.
How to glue stickers on nails at home: step-by-step instructions
When the nails are ready for the process, and all the tools are nearby, you can proceed to gluing the accessories. To do this, follow the following step-by-step recommendations:
- Using an orange stick, carefully remove any remaining skin and work around the sides. Polish the surface with a special buff, removing roughness.
- Degrease the plates with cotton wool and alcohol. To do this, moisten a cotton pad with alcohol and treat the surface. You can also apply a protective agent that will protect against the influence of glue.
- If your manicure requires it, paint your nails evenly with a base polish of the desired color.
- Adjust the size of each slide by placing it on your nail. This is done before the backing is removed. Use scissors to trim off excess material. Note for yourself which side you will need to glue the product.
- If you are going to use water stickers, dip them in water for a few seconds. For stickers, you will need tweezers to evenly pick up the sticker and apply the sticky layer.
- Apply the nail stickers to the nail plate on your hands or feet and carefully smooth them out with a cotton swab. Cover with protective varnish.
Try to carry out all application steps as carefully and thoroughly as possible in order to get an excellent result and enjoy the beauty of your manicure for a long time.
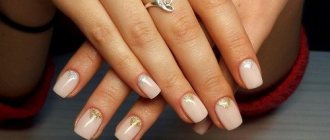
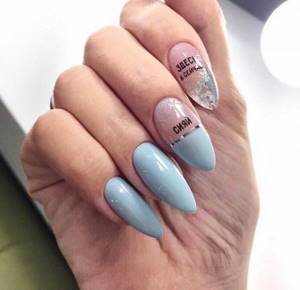
Design for short nails
Girls with designs on long nails have the following problems:
- this length is handled carelessly, resulting in chips;
- some professions require short nails;
- Excessive brightness does not look aesthetically pleasing.
A manicure for short nails that has stickers of any type with a design looks more attractive.
It is easier to create yourself and is natural. Bright prints look beautiful: red, orange, blue. For this, metallic or French is selected. Small stickers in the form of figures and animals, with stripes. These types of elements do not load the nail.
A good idea in this case would be a French manicure. This can be done using a camouflage base coat, which allows you to speed up the design and give the surface a more natural look.
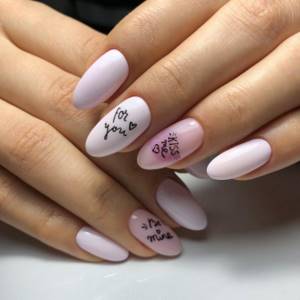
Previously, this style was complemented by flowers, snowflakes, branches and other classic images. But inscriptions appeared that changed the idea of fashion.
Some tips for the owner of a short manicure:
- the shape is selected taking into account the structure of the fingers;
- the plate is not cut short;
- additional details complicate the idea and make it unaesthetic;
- if the bed is too wide, you don’t have to paint over the edges too much so that the shape is visually lengthened.
Quite often a jacket is created that combines text or graphic elements. Foreign inscriptions symbolizing something are popular.
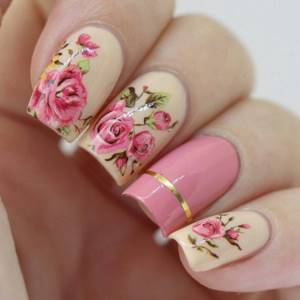
Manicure for long nails
If a woman prefers a long manicure, she may not limit herself in possibilities. The design solution can consist of a large sticker with an ornate pattern, as well as entire canvases.
Long plate fits any design. It is allowed to use various small pictures and full-length canvases decorated with ornaments around the entire perimeter.
In 2022, nail experts advise replacing the transparent base with a more delicate one. This will highlight the length and shape of the nail bed that has grown or been extended. Pink gel polish can be used, but not bright.
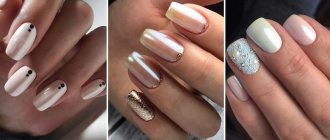
The use of additional decorative elements is not excluded. What can be applied:
- rhinestones;
- "eggs";
- manicure wire;
- foil.
The matte top coat creates an unusual blurred effect at the bottom. And when you apply the top twice, you get “aquarium” effects. Flowers are suitable for such a bold decision: pictures with lavender, tulips, roses or daisies.
It is not recommended to pile up the plate so that such a bright image does not look too out of place.
Combination with other types of design solutions
Manicure with stickers has so many variations that it is impossible to find an image with which it cannot be combined. Having reviewed the latest fashion trends, we can make several recommendations.
- Stickers of fruits and different designs are best suited for summer manicure and summer looks. Short light sundresses, shorts, sandals and bright manicures with stickers are ideal for vacation or holidays.
- For a business look, a manicure with simple geometry and lace is suitable. A black trouser suit, black matte manicure with golden lace - this combination will help you look strict and serious, but does not deprive you of femininity. In the evening, the suit can be replaced with a dress, and the manicure will again become the highlight of the look.
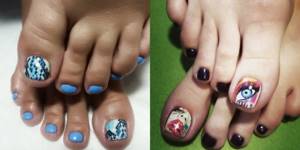
- You can also use stickers in pedicures. It is best to decorate the thumb with the same pattern as on the hands, as if putting together pieces of one puzzle.
Stickers have become so popular recently due to their ease of use. They are convenient, practical and practically no different from real drawings. Or maybe they will soon replace nail salons for us altogether?