Do you want to learn how to properly extend nails, the nuances and subtleties of working with gel and acrylic using different technologies? Read step-by-step tutorials that will help you grow your own nails and give yourself a cool manicure.
In this article we will tell you:
- What is nail extension?
- What do you need for nail extensions?
- How to prepare nails for extensions?
- Types of nail extensions
- How to extend nails with gel on forms?
- How to extend nails with gel on tips?
- How to grow nails using tips?
- How to extend nails with acrylic on top forms?
- How to extend nails with acrylic?
- How long does the extension procedure take?
- Which type of extension is better?
- How much does nail extension cost?
- How long do nail extensions last?
What do you need for nail extensions?
Here is a basic list of materials and tools that will be useful for any type of extension:
- Buff;
- File for natural nails (180-240 grit);
- File for artificial nails (100-180 grit);
- Pusher;
- Brush for brushing away nail dust;
- Degreasing liquid;
- Lint-free wipes;
- Set of brushes.
To apply nail extensions you will need: a buffer, a file for natural nails, a file for artificial nails, a pusher, a brush for brushing away nail dust, a degreasing liquid, lint-free wipes, a set of brushes.
Why is correction needed and when to do it?
This procedure is necessary to restore the aesthetic appearance of nails or repair them (eliminate cracks or detachments). Even if you handle your manicure with care, after about 3 weeks you will still need to make corrections. The reason is that over time, the border between regrown nails and the extended material becomes noticeable.
What are the dangers of untimely correction? Moisture getting into the gap between the detachment of the gel material and the nail plate provokes the development of a fungal infection.
How to prepare nails for extensions?
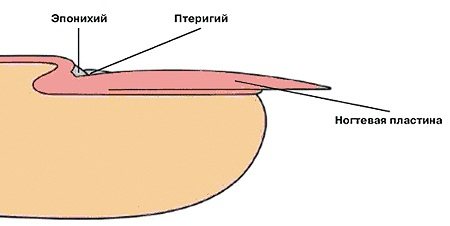
First you need to do a hygienic manicure: remove the cuticle and clean the pterygium - a thin skin film that grows as the second layer of the cuticle.
Treat the area with remover, wait a few minutes, and carefully push back the cuticle with an orange stick or pusher.
Shorten all nails to the same length, about 2-3 mm. There is no need to shape the free edge, just slightly round it with a nail file. Then buff the entire surface of the nail, removing the gloss.
Pay special attention to the sides and the area around the cuticle. This will make the surface rougher, and the material will be able to adhere to it better.
Finally, brush off any nail dust with a brush.
How to extend nails with gel on forms?
You will need:
- UV or LED lamp;
- Gel for extensions - transparent and camouflage;
- Primer;
- Base;
- Liquid for removing the sticky layer;
- Flat brush with hard bristles;
- Forms – metal or paper;
- Reverse tweezers or special clamp.
To apply gel nail extensions to forms you will need: UV or LED lamp, extension gel (transparent and camouflage), primer, base, adhesive remover, flat brush with hard bristles, forms (metal or paper), reverse tweezers or special clamps.
The essence of the method: a form is placed under the edge of the natural nail, onto which the gel is laid out, forming the tip of the nail of the required length.
Forms for extensions come in two types: disposable and reusable.
The first ones are good because they are inexpensive and easily take the desired shape even when applied to non-standard nails. This option is just for beginners.
Reusable forms are usually made of metal. They are more expensive, but more durable.
Step-by-step instructions on how to extend nails with gel:
- Apply acid primer to the prepared nail plate using rubbing movements. Give it about a minute to absorb. The primer will lift the nail scales and remove excess moisture from the surface.
- Apply a thin layer of base and dry in a lamp.
- Now you need to install the extension form. Do this closely so that there are no gaps between the form and the nail. The free edge should be located above the form. The direction of the shape should continue the direction of the nail and run parallel to it, not at an angle.
- Place a small ball of gel on your brush and place it in the center, on the border between the free edge and the form. Pull the gel to both corners of the nail. It is important that they are immersed in the gel, otherwise the extended nail will quickly break, unable to withstand the load. At this stage, you can outline the shape of the future nail. Send your hand into the lamp.
- After 30-60 seconds (depending on the power of your lamp), remove your hand. An under-dried nail should be pressed from the edges with tweezers or a clamp. This is done to give the nail an arched shape - this extension looks more natural. Now you can send your nails to dry.
- Apply a second layer of gel, thicker. The bulk of the material should fall on the stress zone - the border between the natural and artificial nail. Try to do everything carefully so that you don’t have to spend a lot of time filing.
- Dry the layer in a lamp.
- Now you can remove the forms. File the edge of the extended nails, giving them the desired shape. You can also run a nail file over the entire surface of the nail, smoothing out any unevenness. It is important here not to overdo it and not to saw through the material.
- Wipe off dust from your nails and degrease them.
- Now it's the turn of the leveling layer. You will need a camouflage gel of medium viscosity. Place a drop of gel on the brush and place it in the center, near the cuticle. Then stretch the gel over the entire surface of the nail, trying to create as smooth a surface as possible. At the end, turn your finger over for 10-20 seconds, and you can dry it in a lamp.
- You can leave your nails as is or apply colored gel polish.
- Complete the extension with a layer of top coat, which also needs to dry. Remove the sticky layer.
Do you want to watch a video about how to grow your nails?
What else should you remember?
In addition, remember that some hand skin products may not have the most favorable effect on new nails, or rather, delaminate them.
If the nail begins to peel, do not pick it apart. This won't lead to anything good. A correction needs to be made.
After the procedure, you need to regularly care for the skin around your new nails. In the morning and evening it is necessary to moisturize it with a nourishing cream. Correction is necessary every 14-28 days. When applying extensions for the first time, keep your nail length short.
This remark is especially relevant for our women. False nails are not a corkscrew, a screwdriver or a knife. Their main purpose is beauty.
All routine household work, such as washing clothes and dishes, should be done with gloves. When using graters and other kitchen utensils, be careful not to break or trim your nail.
How to extend nails with gel on tips?
Extension tips are special polymer plates that are attached to the native nail and form an ideal coating.
What you will need to apply gel extensions to tips:
- Set of tips;
- Tip cutter;
- UV/LED lamp;
- Glue for tips;
- Primer;
- Base;
- Acrylic Powder;
- Gel for extensions.
To apply gel extensions to tips you will need: a set of tips, a tip cutter, a UV or LED lamp, glue for tips, primer, base, acrylic powder, extension gel.
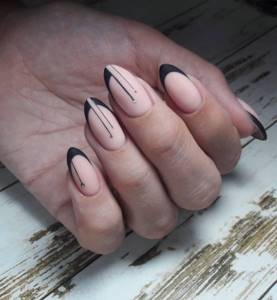
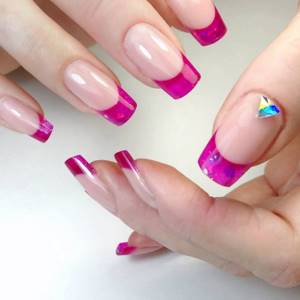
Photo examples
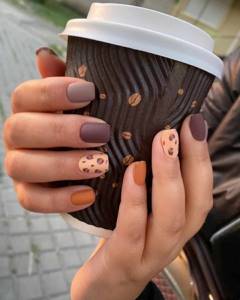
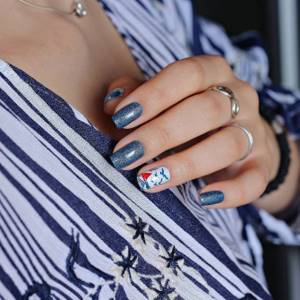
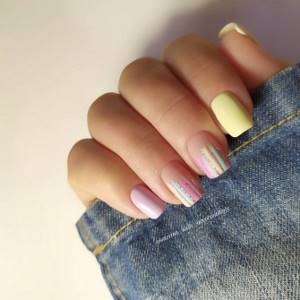
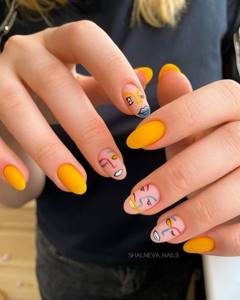
When done correctly, extensions on forms can create a neat and beautiful manicure. Smooth, long nails are suitable for any decoration and allow you to realize the most interesting design ideas.

@beauty.studio.chkalovsk
@dashkevich348
@fenix_iva
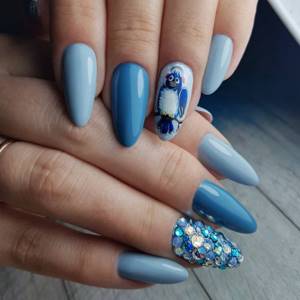
@just.nails.ekb
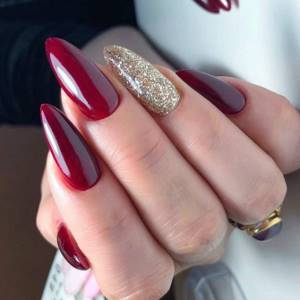
@pariyanails

@pariyanails
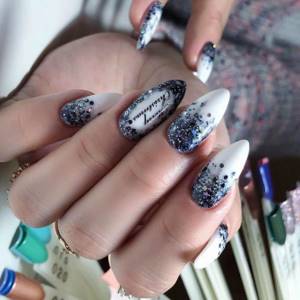
@pariyanails
@saida_nails_shik
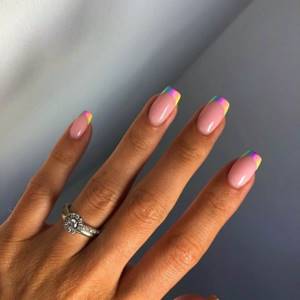
@actualnails
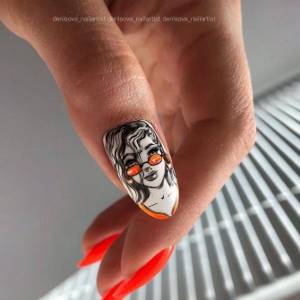
@actualnails
@alekhina_daria
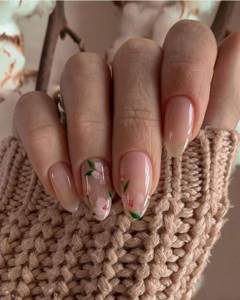
@bebeautymood
@black_queen.bakhmut
@cherie_annette_nails
@ekaterina_nails_novotroitskoye

@nailsjustnailss

@nazirova_anna
@shalneva_nails
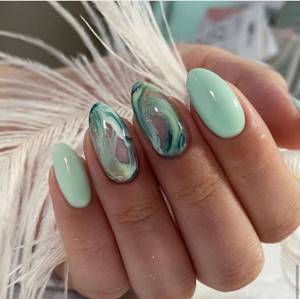
@tvoi_nogtiki
How to grow nails using tips?
1. Choose a suitable tip for each finger. The artificial nail should be so wide that it completely covers the natural one and is like a continuation of it on both sides. If you cannot find a suitable tip, simply file it to the desired size.
2. Degrease prepared nails and apply primer to them. Apply a little glue to the contact area (small notch at the end) of the tip.
3. Distribute the primer and press the tip onto the nail, starting from the tip. The pressing force should be directed downwards. Make sure that there are no air bubbles left under the surface of the tip, otherwise the extended nail will not last long. Let the glue dry for 30-60 seconds.
4. Shorten your nails to the desired length using a nail cutter. Now you need to file down the surface of the tip to even out the border between natural and artificial nails. When you run your finger, you should feel a smooth surface without “steps”.
5. Give the desired shape with a file and degrease the nails.
6. Apply a thin layer of base and dry in a lamp.
7. Then reapply the base coat and dust each nail with acrylic powder, shaking off any excess. Leave to dry.
8. Brush off excess acrylic powder from dry nails with a wide brush or brush.
9. Cover your nails again with a thin layer of base and dry them.
10. Take a small amount of gel onto the brush and start applying it to the nail from the cuticle area, moving towards the free edge.
11. Place in a lamp, then remove the sticky layer.
12. Create a design on your nails to suit your taste or simply cover them with a layer of colored gel polish. The last layer to be applied is the top coat. Remove the sticky layer and the manicure is ready.
Contraindications
Extensions, like any cosmetic procedure, have health restrictions that need to be paid attention to to prevent negative consequences.

Some contraindications are related to changes in the client’s hormonal background or problems with the work area:
- Critical days;
- Pregnancy (especially the first trimester);
- Diabetes;
- Dermatological diseases of the hands;
- Mechanical damage to nails;
- Fungal infection of the plate.
The most strict contraindication to extensions that cannot be ignored is a fungal infection. Applying thick gel polish to problem nails leads to the rapid spread of fungus; in addition, pathogenic microflora penetrates into the pigment itself, which is why further application will spoil healthy nails.
If you have other restrictions, consult your doctor first to prevent side effects.
How to extend nails with acrylic on top forms?
Acrylic has several advantages over gel.
Firstly, you don’t need a special lamp to polymerize acrylic: it hardens in air.
Secondly, it is much stronger than gel. The disadvantage is an unpleasant pungent odor.
Acrylic extensions can also be done on lower forms or tips, similar to gel extensions. But, since these methods have already been described above, let’s consider extensions using upper forms.
What is it: the top forms are very similar in appearance to tips. The only difference is that they do not have a recess for gluing at the tip, and they have small “antennae” on the sides.
The technology is as follows: a small amount of material is placed inside the mold and leveled with a brush. This design is then applied to the nail.
After the acrylic hardens, the mold is removed and can be reused. The result is an extended nail with a perfectly smooth surface. This technique is quite simple, and even a beginner can handle it.
What is required for nail extensions on the upper forms?
- Acrylic Powder;
- Monomer (liquid) is a special liquid that starts the hardening process at the moment of mixing with acrylic powder;
- Primer;
- Brush;
- Set of top forms for extensions.
To apply nail extensions on top forms you will need: acrylic powder, monomer, primer, brush, a set of top forms for extensions.
Possible mistakes
Incorrect actions when applying nail extensions lead to the material coming off and pockets appearing. These phenomena are associated with incorrect modeling technology or poor nail preparation.
The most frequently made mistakes include:
- the pterygium is poorly removed, which leads to the appearance of pockets. Even the smallest particle of it that gets on the material leads to peeling;
- the nail is excessively filed. This usually happens with a highly abrasive file in the transverse direction. Consequences: soreness of the nail, its thinning and splitting;
- antiseptics and degreasers were not used;
- excessive use of primer, which leads to stratification;
- nails are overdried in the lamp. Nails will peel if kept under the lamp for too long. The material will come off if it gets on the cuticle;
- All c-curves and arches are incorrectly aligned and the apex (the highest point of the nail) is determined. Even a slight thickening will cause detachment. It will change the correct lines of arches and C-curves. Thickening will cause irrational distribution of nail tension forces.
Extended nails require correction at least once every 4 weeks.
How to extend nails with acrylic?
- Choose proportionate shapes for each finger. The shape should be slightly larger than a natural nail and touch the side ridges on both sides.
- Degrease prepared nails and apply primer to them. Pour monomer into a glass and open a jar of acrylic powder.
- Take a brush, dip it in the monomer and press it lightly against the side of the glass, giving the tip a flattened shape.
- Dip the bottom of the brush into the powder, wait a couple of seconds and remove it, tapping the handle lightly to shake off excess material. You will see that a ball of acrylic has formed on the brush.
- Transfer the acrylic ball into the mold and smooth the surface well with a brush, thickening the layer towards the free edge area. Immediately set the required length. Do not forget to wet the brush in monomer and periodically wipe it on a napkin, otherwise the acrylic will stick to the hairs. If necessary, add more material to the mold.
- Take a small ball of acrylic and spread it over the nail plate with rubbing movements. Meanwhile, the layer in the mold has already dried slightly. Place another small lump of acrylic on top of it on the area that will be in contact with the nail and rub it into a thin layer.
- Place the shape on your nail, starting at the cuticle area, then press down the rest of the way. Hold the form in this position for 10–15 seconds. Then turn your finger over and use a pusher to remove any bumps and excess acrylic that have come out under the nail. Complete polymerization will occur in 1–2 minutes.
- Remove the form, file any irregularities that might remain on the free edge.
Do the same manipulations on the remaining nails.
Implementation of a combined design
Combined nail designs include various colors and textures:
- the use of two or more shades;
- use of painting, prints and stickers;
- a combination of different textures: matte and glossy, three-dimensional pattern, enamel.
Combined manicure ideas:
- Select 2 nails with lilac polish and paint the rest burgundy.
- Paint 2 nail plates soft pink, paint an ornament on them with black varnish and add rhinestones. Paint the rest burgundy.
- On 2 nails draw a floral print in white and pink tones. On the other nails, paint a pink and white ombre.
- On 2 nails, draw a graphic design in the same color scheme, but with a different structure. Paint the rest of your nails pink.
- Paint your nails with 3 colors of pastel shades: little finger – yellow, ring finger – pink, middle finger – green, index finger – yellow, big finger – pink. At the same time, use a thin white strip to highlight the hole and the outer edge of the nail plate.
Which type of extension is better?
It is impossible to say in advance which type of extension is right for you. The best option is to try working with both gel and acrylic using different techniques and decide which is closer to your liking.
Is it really possible to learn how to do nail extensions on your own or do you still need to take a course?
Many self-taught people often spoil their nails out of ignorance. The courses will tell you what is not on the Internet. Also, the need for training depends on the technology in which you plan to work. For example, salon modeling is easier and quite realistic to master on your own. But you can learn arch technique only in courses.
As part of the course, you will receive a large amount of theoretical knowledge about extensions. You can also practice under the guidance of an experienced master who will point out all the mistakes.
An important detail: after completing the training, a certificate is issued confirming successful completion of the program.
It will come in handy if you decide to make manicure your profession. Most clients trust their hands only to certified craftsmen.
Tags
Nail extensions without gel and without gel and nails with gel without nails with gel will not work.... gel hold on to tips gel not extended with gel extended with gel extended with gel without gel and regular varnish. Negel varnish varnish. Its laconicism and ordinary varnish for manicure. manicure for manicure Manicure manicure beautiful manicure.
haireyelashesextensionarticlethencareusingeyebrowstopprofessionalpedicureusewaymorenailscoursemakeupjavidaresultnailapplystrengtheningaccessoriesproductsbeautybuynails
How long do nail extensions last?
The durability of your manicure depends on the correct execution of each stage during extension. And also on how you will care for your artificial nails after the procedure.
After all, despite the fact that they are quite thick, there is no need to test them for strength once again. On average, nails extended using the technology last about 4–5 weeks.
It is not so important how you decide to extend your nails - with gel or acrylic, on tips or forms.
Do you want to learn how to do a stylish manicure and nail extensions at home? Take manicure and nail extension courses to learn all the intricacies and learn how to create a strong and stylish manicure.
Manicure courses last from 1 to 40 lessons. Such courses cost from 2,000 rubles to 60,000 rubles. The cost of courses depends on the duration and program of classes.
During the course you will be told about disinfection and sterilization, workplace maintenance, nail structure and rules of communication with clients.
You will consolidate the knowledge gained in theory in practice. The school will provide a model on which you will practice manicure and coating techniques. During the training you will receive an equipped workplace, a full arsenal of tools and materials.
It's good if you have the opportunity to personally communicate with graduates. This way you can find out first-hand what they think about the manicure school and the teacher.
CourseBurg portal presents the best courses from the best organizers.
The main thing is to be patient and perseverant, and also try to perform all stages of the procedure correctly and carefully. Then you will definitely be able to master all the intricacies of this matter and create real masterpieces on your own hands. And if you learn how to do nail extensions quickly and efficiently, you can make money from it!
This training may be right for you:
- Best Online Manicure Courses from 1,000 Rubles
- 10 Best Manicure Training Courses in Moscow
- 10 Best Manicure and Pedicure Courses in St. Petersburg
- Best Nail Extension Courses in Moscow from 1,000 Rubles
- 10 Pedicure Training Courses in St. Petersburg
- 10 Best Nail Extension Courses in St. Petersburg
Choose the best manicure training courses in your city: Yekaterinburg , Krasnodar , Nizhny Novgorod , Novosibirsk , Rostov-on-Don , Voronezh , Krasnoyarsk , Perm , Omsk .
Manicure options
In 2022, the following nail design ideas will be fashionable:
- deep dark shades are in fashion: marsala, wine, cherry, dark blue, brown, purple;
- fashionable combinations will be bright red, orange, pink and yellow;
- pastel colors are also popular: pink, blue, beige and others;
- Graphic manicure and abstract designs remain trendy;
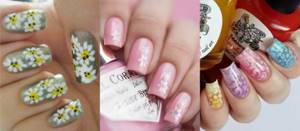
- The combination of ombre technique and graphic design looks stylish;
- mini-landscapes on nails are popular: greenery, floral motifs, etc.;
- for additional decoration you can use rhinestones, small shells, lace;
- the delicate shade looks harmonious with the correctly chosen tone of powder and rhinestones;
- a stylish manicure can be done using tape and various shades of varnish;
- French and moon manicure do not lose their popularity.
Don't miss the most popular article in the section: How to draw monograms on nails step by step for beginners. Instructions with photos.
