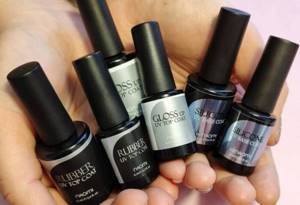
The task of the top coat (from the English top coat - top layer) in a three-phase system consisting of a base, colored gel polish and top is the final alignment of the color of the nail plate, and the creation of an ideal, even highlight. Nail service professionals have access to materials with different consistencies and properties, designed to solve a range of problems - from leveling to fixing decorative elements.
Let's look at the features of choosing a top coating for the job, and also review the 10 most popular brands on the market.
What is a gel polish topcoat?
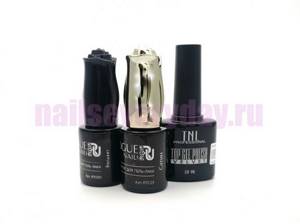
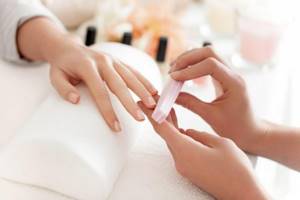
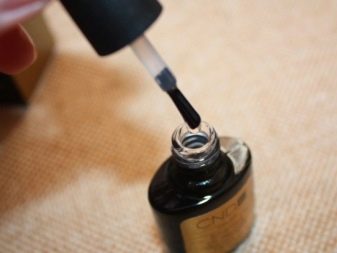
Top or finish, fixer, top coat is the top coat, the third phase in a three-phase system, the final stage in the procedure of applying gel polish to nails. First, the nails are covered with a base coat, then with colored gel polish and finally a top coat is applied. Each layer is polymerized separately. The finish is applied in a thin layer or with a slight leveling of highlights, but it is never used to strengthen the nails. Sometimes a design is made on top of the finishing coating, for example - gel modeling, three-dimensional painting, convex decor, loose glitter, etc.
Is it possible to apply shellac without a base and top?
Some girls read on the Internet or heard from friends that base and top coat are optional for shellac. The authors of such words claim that this is a waste of time and money (considering how much gel nail polish costs). Many even decided to test this statement through personal experience and, as they say, they got a normal manicure. If you can do without such funds, then why are they needed at all? Today we will look at the question: is it possible to make shellac without a base and top? But first, we’ll tell you why these cosmetics are needed.
What types of nail tops are there?
Classification of finishing coatings is made on several grounds, that is, on a number of unrelated characteristics. They affect the speed and ease of working with the material, the application technology and the range of tasks to be solved. The most important signs are:
- Glossy top or matte;
- With or without residual sticky layer;
- Elastic or hard;
- Thick or liquid;
- Turns yellow or blue;
- Whether it bubbles or not;
- Resistant to damage and rubbing or not;
- Specialized or general purpose;
- Decorative top or classic fixative.
Glossy and matte top: is there a difference in application?
Classic fixatives in the gel system have a glossy shine. Manufacturers are competing for the hearts of craftsmen, developing materials with an ever brighter and more durable gloss. The brighter the gloss and the smoother the highlight, the more expensive the manicure looks. Therefore, clients often choose the specialist whose coating shines better and lasts longer.
A few years ago, matte tops . And here, too, a wide choice is provided - the degree of matte varies from a smooth satin shimmer to the velor effect of an anti-slip surface. You can find names like these: satin, velvet, corduroy, velor, cashmere.
The nuances of using a matte finish. How to properly apply matte top over gel polish
- Often this finish serves only a decorative function. Therefore, before applying it, for reliability, it is better to cover the nails with a regular gel polish fixer with residual stickiness, dry, remove the stickiness and apply a layer of matte top;
- Matte finishes actively absorb dyes and fats, rub off and begin to shine after just a week of wear, so they require care. They are not suitable for colorists, chefs, artists and anyone whose hands are subject to heavy workload. If the matte top gets dirty, you can clean it with a cotton pad soaked in alcohol. Do not use acetone, it will dissolve the gel polish.
- The more velvety the matte top, the more it feels on your hands, like it’s “braking” the entire surface. For girls with high sensitivity, we recommend choosing satin tops - they will provide a fashionable lack of gloss and will not irritate.
Manicure stages and possible mistakes
Today there are 3 main types of manicure:
Combined and hardware manicure must be done using a special manicure apparatus, but before using it, it is better to undergo training, since improper operation of the apparatus can lead to damage to the nail plate, for example, cuts. For beginners, it is better to do a classic manicure at home.
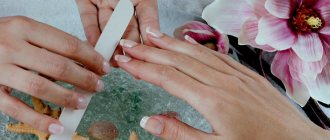
Stage 1. Shape filing, cuticle processing
Before applying gel polish, you need to put your nails in order: treat the cuticle, file the shape.
What do we do at this stage?
- Use a natural nail file to give the nail the desired shape.
- Apply a special cuticle remover to the cuticle and side rollers.
- Place your hand in a bath of warm water for 3-4 minutes. We wipe our fingers and start manicure.
- Use a pusher to push back the cuticle.
- We remove the cuticle with scissors (tweezers, nippers).
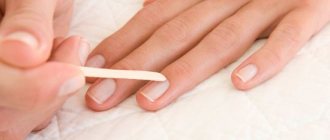
- With an orange stick dipped in water, we go along the contour of the nail and clean the pterygium.
Stage 2. Preparing the nail plate for coating
The next stage is preparing the nail plate for coating with artificial material. This stage is very important! Errors in preparing the nail plate can lead to deterioration of the adhesion between the natural nail and the artificial surface.
Finish with or without tack. What is the difference
“Sticky” - the dispersion layer consists of material components that were not included in the polymer and did not evaporate in the lamp, but remained on its surface.
Tops for gel polish with a sticky layer
Classic gel polish finishes - soak off top coat, finish gel. In conventional topcoats, the dispersion is not sticky, but rather slippery, it has no functional load and must be removed.
Do not wipe off the sticky layer as soon as you remove your hand from the lamp - let the top cool a little. Otherwise, you can leave unsightly marks from the napkin on the hot surface.
The dispersion should be washed off carefully, without smearing it on the skin around it. For each nail, use a clean, lint-free tissue or the unused side of it.
After moistening it in liquid to remove the sticky layer or in alcohol, apply the napkin to the surface of the nail for a couple of seconds and remove it towards you. Due to such careful removal of the dispersion, the risk of allergies is reduced.
In specialized finishes, for example, tops for sliders, the dispersion can be very sticky - it helps to fix the decor and is preserved by covering it with another layer of a regular finish on top.
Gel polish tops without sticky layer
Widely used family of finishing coatings. No wipe top coat, no cleanse top coat, non-cleansing gel top, finish gel without sticky layer, top without l/s - all these are variants of the names of the material, all components of which are part of the final polymer, without the formation of a dispersion layer on the surface.
The no-tack finish has a brighter shine and is quicker to apply as there is no time required to remove the dispersion. Previously, such materials were considered fragile, but thanks to the development of technology, this problem has gone away. The main thing is not to overdry them much longer than the time recommended on the bottle, since with every minute in the lamp they become more compacted and stretched. You can safely choose them as the main fixative and enjoy the acceleration. Also, rubs are rubbed into such tops, broths and voluminous decor are secured with them.
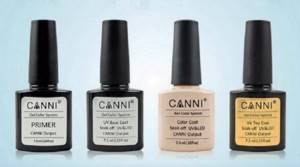
Kinds
The choice of top coating will largely be dictated by the tasks that the master needs to solve with its help.
Topcoats fall into 3 main categories:
- With a sticky layer;
- No sticky layer;
- Matte.
In each of the categories, you can choose a material with different characteristics, consistency, UV filters, plasticity and the ability to turn blue or yellow during wear. Let's look at all types of finishes and their characteristics in more detail.
We recommend looking at the layers of coating in manicure:
Layers of coating in manicure - what are they, how to apply them correctly
Fixer for gel polish: hard or elastic
Just like the base, the finish gel can have varying degrees of elasticity. Hard, rigid fixatives - hard top - can only be applied to artificial nails reinforced with hard materials or extended ones. If the base is soft and the top coating is hard, then with use it will crack like chocolate icing on jelly. Cracks and chips will appear, which will trap dust and dirt, which will greatly ruin the aesthetics.
Stretch tops are more versatile than hard tops as they can be applied to any surface. If you don’t know whether your finish is hard or plastic, you can check it this way: apply a strip of material to the film, polymerize it, separate it from the film and try to bend it. The hard one will break, the elastic one will crumple.

Is it possible to apply shellac without a base (expert answer)
If for one girl using a base coat is not necessary, for another it is unacceptable. The first one has naturally healthy, strong nails, which allows her to change her manicure every day. The other one cannot afford it. For this reason, certain rules have been outlined for creating a manicure with gel polish.
Usually the nail itself is smooth. And without proper treatment, a shellac manicure will not last long due to poor adhesion (grip). You can, of course, file your nails, but why subject them to such a traumatic procedure. The base for shellac is precisely the basis thanks to which your manicure will be beautiful and durable.
Source of the article: https://salonnails.com.ua/mozhno-li-nanosit-shellak-bez-bazy-i-topa/
Liquid or thick top. Which one for what
Liquid top for gel polish
Forms a drop on the brush in 1-2 seconds. Self-levels quickly, lays down in a thin layer and is suitable for experienced craftsmen who save time. Not suitable for fixing voluminous decor such as bouillons, rhinestones and studs. Beginners and those who apply the coating themselves often experience problems with leakage into the nail cavity.
Medium consistency top coat for gel polish
It forms a drop in 3-5 seconds. It is applied in a medium thickness layer and self-levels well. It can be called universal, as it is easy to use at any level of skill, on nails of any length and volume.
Thick top for gel polish
Forms a drop on the brush in 6-8 seconds. It is applied in a fairly thick layer, at least 0.5 mm, which adds volume to the coating and takes a long time to self-level. As a main fixative, it is interesting for complete beginners with no experience, as it does not spread and is suitable for slow motor skills. Experienced craftsmen use it to secure rhinestones, bouillons, studs, and for local application.
Nail base: which is better, rating based on artists
The ranking of the best databases is presented in the table.
| View | Name | Description | Price |
| Out of competition | Beautix Royal UV base gel | Long lasting, hypoallergenic, liquid | From 900 rub. |
| Out of competition | UNO Base Gel | Easy to apply, long lasting, suitable for all nail types | From 600 rub. |
| Out of competition | CND Creative Play Base Coat | Thick, evens out well, easy to apply | From 770 rub. |
| Rubber | Klio Professional Extra Rubber Base | Thick, flexible, self-leveling | From 650 rub. |
| Rubber | In'Garden Ideal Nails | Single-phase, very thick, with good adhesive properties | From 590 rub. |
| Rubber | TNL Rubber Base | Easy to apply, does not burn nails in the lamp, does not chip | From 300 rub. |
| Regular | Belle Fille base | Durable, compatible with varnishes from many brands, almost odorless | From 150 rub. |
| Regular | Danchel Gel Base | Thick, has pleasant shades, suitable for leveling | From 120 rub. |
| Regular | Lily angel professional nail base coat top | Dense texture, does not spread, eliminates unevenness | From 250 rub. |
| Camouflage | Vogue Nails Ultra | Thick, difficult to spread, has beautiful shades | From 550 rub. |
| Camouflage | Runail Elastic base | Easy to apply, does not conflict with varnishes from other companies | From 280 rub. |
| Camouflage | POLE Color base | Does not flow and distributes well, gives a fairly dense color | From 350 rub. |
| Vitaminized | In'garden Base-Hybrid So Naturally | Universal, provides durability to the coating, easy to apply | From 550 rub. |
| Vitaminized | MASURA Vitamin Base | Liquid, but spreads well and is easy to remove | From 240 rub. |
| Vitaminized | TARTISO Vitamin Base Gel | Medium texture, easy to apply, long lasting | From 350 rub. |
| Self-leveling | In'garden Base gel Super easy off | Easy to spread, holds firmly, easy to remove | From 560 rub. |
| Self-leveling | Patrisa Nail Kautschuk-Basis | Thick, with a high degree of adhesion, strengthens nails | From 380 rub. |
| Self-leveling | Grattol IQ Rubber Base Gel | Easy to apply, long lasting, does not cause allergies | From 400 rub. |
Which nail base is better in a particular case should be looked at by their condition, that is, strength, presence or absence of defects, length, ability to keep the coating on for a long time. Even how wet your hands are matters.
The gel polish top turns yellow or blue. Which finish to choose for black and which for white?
Any topcoat can turn yellow, regardless of the signs described above. Typically, yellowing becomes noticeable when applying a leveling finish over a light gel polish, when thickness appears. Yellowness can be either an intrinsic property of the material or the result of pigments from bright gel polish entering it. So, when red shades overlap, residual color dispersion gets onto the top brush, and as it accumulates in the bottle, the transparent material acquires a yellowish tint. This happens approximately in the second half of the bottle. We recommend wiping your brush after bright colors or getting a separate bottle of finish for light shades.
The “blue” finish is usually the opposite, on dark and bright colors and only in natural light, which contains ultraviolet light. This is due to the presence of UV filters in the material. Black gel polish can turn blue under bright sunlight, brown - purple, scarlet - crimson, etc. Therefore, for dark shades, we recommend choosing a top without UV filters. Whether it turns yellow or not does not matter.
For the cleanest and freshest jacket possible, as well as white and all light shades, get a strong blue top with UV filters. For example, without l/s: Bagheera Nails B-5 Lite or Uno Supershine. For black, dark and bright colors, choose a top without a UV filter, which may yellow slightly - it will not be noticeable. For example, top with l/s NeoNail Hard Top.
How to remove artificial material correctly and why is it important?
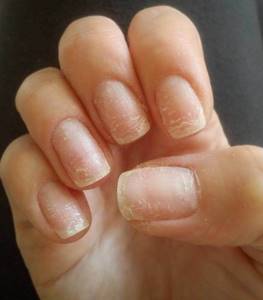
You've probably heard that gel polish spoils your nails, making them thin and brittle. It is a myth! It's not the material that ruins your nails! One of the reasons for damage to the nail plate is improper removal of the artificial coating, so this procedure must be approached with special responsibility!
Is it possible to remove gel polish yourself at home without damaging your nails? What materials and tools are needed for this? Let's figure it out.
How long can you wear gel polish?
First, let's figure out what period of wearing the coating is optimal. Often girls wear gel polish for a month, or even longer. However, they do not understand that they can damage the nail plate.
Technologists advise walking with the coating for no more than 2-3 weeks. Prolonged wear puts stress on the tip of the nail plate, its root suffers from the weight of the coating. All this can lead not only to breakage, but also to deformation of the nail plate.
How can you not remove gel polish?
RULE 1: Under no circumstances should you pick at the gel polish or tear it off the surface of the nail plate, because this can cause serious injury! If you are careless, you can remove the top layer of the nail along with the material, and this can lead to thinning and, at a minimum, painful sensations when in contact with water and various surfaces.
RULE 2: do not file away partially peeled off gel polish. In this case, you also risk cutting off the top layer of the nail and ruining it.
What other consequences might arise?
- There is a possibility of tearing not only the gel polish from the nail, but also the nail plate from the nail bed.
- You peel off the artificial coating, and the nail plate becomes thinner and thinner each time.
- Those with thin nails may feel unbearable pain during coating - the base will burn strongly in the lamp. They can also get a burn to the nail plate, which in turn can lead to onycholysis - separation of the nail plate from the nail bed. It will take quite a long time to treat onycholysis.
- You will have to strengthen the nail plate, and this will require additional time for the manicure procedure.
- You will have to buy materials to strengthen the nail plate: acrylic powder, gel or polygel. And these are additional financial expenses.
- Thin nails become mobile and weak, so the coating may be worn less than usual. You will have to try very hard to avoid detachments and chips.
We hope these reasons are enough to convince you not to peel off the coating from the nail plate and do the gel polish removal according to the rules!
By the way, the peeling process itself is quite painful, it’s hardly worth it!
The gel polish top is bubbling. Who is to blame and what to do
Air bubbles in gel polish are a serious problem, since they do not disappear during polymerization and look sloppy on the surface of the material, like garbage. They appear due to sudden movements of the brush in the bottle, forcing air into the material. If you do not want to have aesthetic defects in the coating, then get used to smooth and neat, precise movements. Do not throw the brush into the bottle, do not shake the gel polish, do not stir it right before use.
There are materials that are more prone to the formation of bubbles; you should be extremely careful with these. There are less sensitive exceptions, but even with them you should not allow yourself unnecessary sudden movements. Check for bubbles before polymerization and, if found, carefully burst each one. To do this, lightly poke the bubble with the tip of a thin brush or orange stick.
How much does nail base cost?
Nail base costs from 150 rubles. up to 1500 rub. per bottle of 7-15 ml. The price depends on the quality and brand. The most expensive ones are foundations from Foundation, Orly, CND, Beautix, Entity, Oniq, Gloss, Nano Professional, they cost 800-1500 rubles. The middle segment and the most used - Kodi, TNL, UNO, RuNail, Sophin, Klio, Vogue, Kapous, Grattol, it’s 500-600 rubles. Cheap, but of acceptable quality - IRISK, Bluesky, Domix, Rio Profi (15-350 rubles).
We recommend reading the article about the difference between gel polish and shellac. From it you will learn what is the difference between gel polish and shellac, what is better and what is more harmful, and also how to extend the wearing period. And here is more information about how to remove shellac at home.
The variety of bases for gel polish makes it possible to choose, but also makes it difficult. Sometimes you find your remedy through trial and error. And yet, if you are unsure of the choice, you should use rubber bases; they are suitable in most cases.
Gel polish top is rubbed off
Absolutely any top will be rubbed off . Glossy becomes matte, and initially matte begins to shine over time. Finish coatings from the premium segment retain an attractive appearance for up to 4 weeks of wear, while cheap ones can lose it after just a couple of days. This process occurs most quickly on the nails of the working hand: for right-handers - on the right, for left-handers - on the left. On the thumb, index and middle fingers. You can slow down the loss of appearance by strengthening your nails with hard materials: gel, acrygel, hard base. This will make the free edge motionless, which means it will bend and rub less. Strengthening will also prevent cracks, chips and detachments.
Special purpose finish
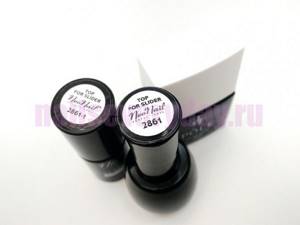
NeoNail Top for Slider and Pole thick top for fixing volumetric decor
These topcoats are designed to secure the decor. They produce tops for sliders, for rubbing, for attaching rhinestones, bouillons, etc. All their properties are best selected to solve a specific problem. For example, the finish for fixing volumetric decor will be without a sticky layer, thick and as transparent as possible. The slider top will be medium thick, with a very sticky dispersion and a little yellowish (which is okay). Typically, such coatings are not used as basic and universal ones.
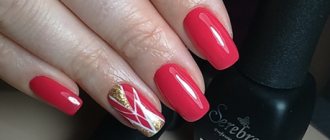
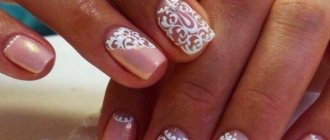
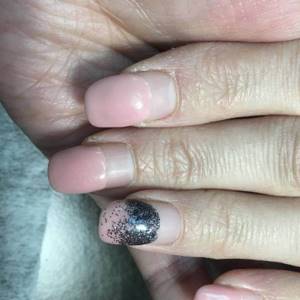
Decorative tops for gel polish
Decorative gels include finishing gels, to which manufacturers have carefully added various decorative elements. For example, there are both glossy and matte finishes, which contain a variety of glitter, yuca flakes, magnetic cat-eye pigment, different-sized white and black flakes to create the effect of a quail egg, reflective particles, dried flowers, gold leaf, mother-of-pearl, camouflage pigment, etc. We recommend checking how even and smooth the surface of such a top coat polymerized on the nail is. If decorative elements protrude, then it is better to lightly go over the surface with a buff, degrease and cover with another layer of your usual, favorite topcoat.
Top Coat for nails: what is it, how to choose and use?
join the discussion
Share with your friends
- Purpose
- How to apply?
- Varieties
- Features of choice
Top Coat nail product is a special finishing gel that is used to cover the finished nail during a manicure. The coating is used when applying gel or acrylic. This is the so-called last layer that completes the manicure.
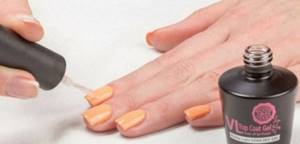
Purpose
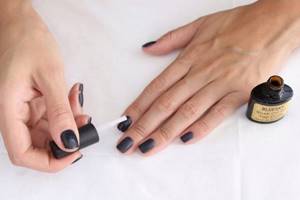
As a rule, the process of designing a nail during a professional manicure consists of three stages: base – color – top. The top coating, Top Coat, performs a protective function. The last, finishing layer prevents paint and other decorative elements from clinging to household items, taking this “blow” upon itself. This gel has a rather dense and thick structure, and applying it to the nail plate is not so easy; this requires experience and skill.
The final coating not only performs a protective function, but also gives the nail a glossy shine and shine.
A nail coated with Top Coat shines beautifully in the sun. Some products contain mica, glitter, and shimmer, which give the nails an additional design. The top evens out the surface of the nail plate, prevents chips and cracks, and prevents fading of the varnish coating. In addition, the top helps the varnish dry quickly.
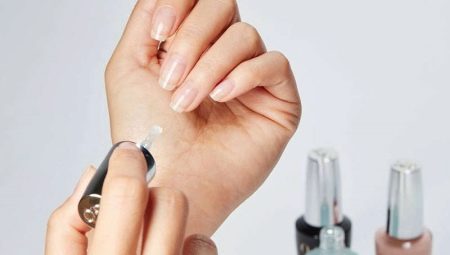
How to apply?
When using a topcoat, please read some guidelines.
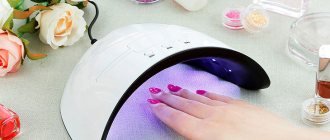
- Each layer - base and color - requires careful drying in a UV lamp, but this is not enough, so each type of manicure ends with the application of a top coat. Apply a thin layer of topcoat to your nails and let it dry for at least 3 minutes.
- Do not shake the bottle of fixative, as this can cause bubbles that are difficult to get rid of. In general, it is advisable not to move the bottle from its place once again, otherwise unevenness may be noticed on the nails after drying in a UV lamp - this is what burst bubbles look like.
- The master should first decide on the amount of product that needs to be coated on one nail. If the drop seems too large to cover the nail plate, then it is better to scoop up a new portion, since too large a layer can lead to poor hardening. This manicure quickly becomes unusable.
- Do not apply Top Coat to the nail at an angle as this may cause unevenness in the color of the polish. For example, spots of light shades may appear on a dark background.
- The correct application of the finishing gel is from the cuticle upward, but not smearing, but pressing onto each area of the nail plate. This technology will allow your manicure to last for a long time. The cuticle itself cannot be touched with the product.
- It is worth carrying out the procedure very carefully and making sure that the gel does not flow over the edges of the nail.
Over time, the gel that accidentally gets outside the boundaries of the nail will begin to peel off.
Varieties
Modern cosmetic studios and online stores offer different types of top coating.
- Top with a sticky layer. The dispersion is removed with a specialized compound or a lint-free cloth.
- No sticky layer. A more convenient option that does not require additional actions.
- Top dry. Designed for quick drying of varnish.
- Top with a glossy or matte effect.
- Top with the inclusion of design elements: glitter, holographic effect, cat-eye effect, Party Top - the one that glows in the dark.
- Universal. Combines the functions of base and top coats and adds shine.
Features of choice
For each manicure option, you should choose a top gel with a specific structure. Take advice from professionals on choosing Top Coat.
- For gel polish. Try to choose a product that is not too liquid in consistency, as the watery substance will flow outside the nail. This reduces the quality of the procedure; besides, drying in a lamp if the top gets on the skin can be painful. Don’t pass by “two-in-one” products that combine base and top – this product will allow you to save on your purchase. Otherwise, buy base and top coats from the same brand. Give preference to a topcoat without dispersion; when using it, there is no need to remove the sticky layer.
- For regular varnish. UV Top Coat is unlikely to be suitable in this case, so you should pay attention to varieties that contain vitamins A, B5, E and silk. A home manicure using a top will last much longer than usual.
- For extension. If you plan to use the product for nail extensions, then you need to choose a product with a viscous texture, but not very thick.
In this case, Top Coat performs strengthening, leveling and decorating functions in relation to the nail plate.
How to apply the top correctly, watch the video below.
Frequently asked questions or FAQ for beginners
Which top coat for gel polish is better?
The one that is more convenient to work with and copes with the tasks that you set for it. Uno Supershine is recognized by craftsmen as almost universal: without a sticky layer, elastic, medium in thickness, has a bright gloss, rubs off slowly, does not bluish much, does not yellow much, does not bubble, dries quickly, you can rub rubs into it and fix small decor with it.
Why does the top fit with bald spots?
There are several reasons for this. This often happens when covering with a top coat without l/s in two layers, or applying it over a gel paint without l/s, or when applying a matte finish to a finish without l/s. This may also be due to sebum or cosmetics getting on the surface to be coated - degreasing it with nail prep will help. Or the colored gel polish you are applying the top on has too much greasy dispersion - then remove the sticky layer and try again. Or, on the contrary, the color/paint/finish has no dispersion and the material rolls off a too smooth surface - then lightly buff the color to make roughness appear. And also, one should not rule out simply the low quality of the material, especially purchased from Chinese online stores.
Is it possible to apply gel polish and gel paint to the top?
Can. But it is better to choose a top coat with residual stickiness for such techniques, remove the stickiness and paint on top with gel polish or gel paint in a not too thin layer, otherwise chips are possible. If you need to completely cover the finish on top with colored gel polish, then first buff it, degrease it, and then cover it. And cover the top again with a layer of sealer.
Rubber top for gel polish. What is it and why
These are very thick materials with good adhesion. They are suitable for fixing volumetric decor, but are not convenient for completely covering nails, as they spread slowly and self-level.
Is it possible to use a top instead of a base?
No need. These materials are created to solve different problems. The base ensures adhesion to keratin, strengthening the natural nail, and the finish fixes the color and prevents it from fading in the sun and rubbing off under mechanical stress. They are not interchangeable.
Hypoallergenic top for gel polish
Any artificial material can cause allergies. Its risk can be reduced due to its quality and lack of contact with the skin. Choose a top without residual dispersion from the premium segment.
How to replace top coat for gel polish
Single-phase transparent gel (it will be hard) or single-phase 3 in 1 gel polish. In a three-phase system, base, color and top are not interchangeable.
Recommendations for application
The top coat ensures the durability and strength of the manicure, but only if the rules for its use are followed.
The top must be stirred before use. But do not shake - bubbles may appear that interfere with the quality of the coating. It is better to gently warm the bottle by rolling it in your palms.
The finish is applied at the final stage of the manicure in an even thin layer over the entire surface of the nail. It is necessary to ensure that during the process no foreign elements, even lint, get on the coating. For greater strength, you can apply several layers, drying everything in a lamp one by one. The product is applied to a sticky layer of colored coating (previously dried in a lamp).
Be sure to seal the free edge of the nail - this will protect the varnish layer from delamination and extend the life of the manicure.
Particular attention should be paid to the area near the cuticle - apply the top in a dense layer and distribute evenly. Otherwise, the coating may crack and begin to chip off.
The finish should complete the manicure - nothing is applied on top of it. An exception may be large rhinestones, bouillons, sequins, which are attached to the top undried layer and then polymerized.
When drying in a lamp, it is advisable to follow the instructions on the bottle - insufficient polymerization time can affect the strength, shine and brightness of the color coating.
It is quite difficult to carefully place all fingers in the lamp at the same time, so first dry the nail on the big toe, then on the rest. This way you can be sure that the coating will dry evenly and will not slide to the side.
When using a topcoat with a dispersion, after drying in a lamp, you must carefully remove the sticky layer with a cleanser, degreaser or nail polish remover without acetone. Finally, it is advisable to apply a care product to the nails and cuticles, which will protect the skin from drying out and prevent the appearance of hangnails.
If you follow the application technique, the sequence of layers and the duration of polymerization, the manicure will last in excellent condition for as long as possible.