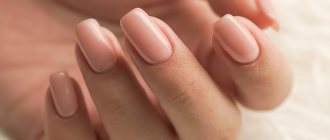
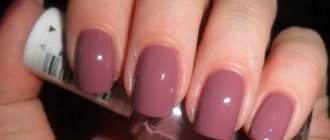
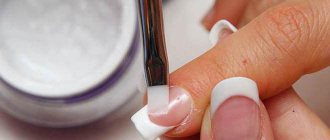
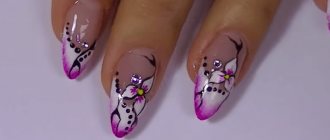
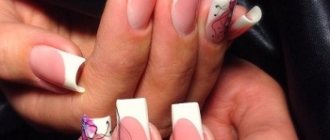
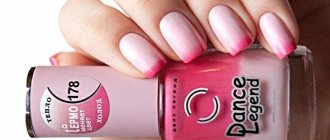
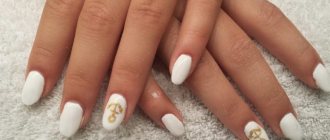
Durable, fairly elastic and ideally shaped acrylic nails make it possible to correct a thin, brittle nail plate, disproportionate shape, and also make an effective design, including voluminous ones.
Acrylic manicure can be done both in a salon and at home. It will take two to three hours, but the result will please you for three to four weeks.
What is acrylic, what are the stages of the acrylic manicure extension procedure and answers to other questions from beginners later in the article.
What is acrylic
Before moving on to studying the technique of acrylic extensions, it would be a good idea to get acquainted with such a material as acrylic. It consists of acrylic powder and a liquid acrylic composition ( monomer ).
Acrylic Powder
These two substances form a special isoplastic polymer. It initially found its application in dentistry. A special manufacturing technology makes acrylic an incredibly plastic, hygienic and resistant to mechanical damage material.
The acrylic extension procedure involves combining a polymer with catalysts to form a plastic, quickly hardening mass. Once the acrylic hardens, you can begin to give it the desired shape and make drawings. High-quality extension is possible only with full compliance with the technology. If you want to get the highest quality extensions and watch a nail service specialist work, you can contact Ola centers. Excellent masters work there, performing manicures and designs of any complexity.
Pros and cons of acrylic extensions
Benefits of acrylic nail extensions
Experienced professionals usually include the following advantages of such extension:
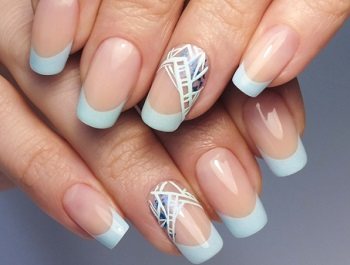
Acrylic nail extensions
- Possibility of creating any length and any design.
- Strength and plasticity of extended nails.
- If cracks appear on the acrylic surface, it can always be repaired using special glue. If the extension was done using gel, it will no longer be possible to repair the nail.
- Acrylic nails are easy to remove. They do not need to be cut down, you just need to use a special liquid.
- Acrylic nails look natural.
- They are very easy to care for. They are hygienic.
- With acrylic nails, you can do absolutely anything around the house. They are not susceptible to chemicals.
Disadvantages of acrylic extensions
But acrylic technology also has its disadvantages:
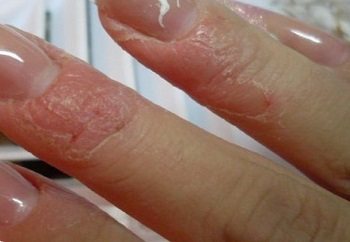
Allergy to acrylic
- You will always have to have a repair kit on hand: a special file and glue.
- Acrylic causes allergies in some people. You can find out if you fall into this category from a specialist.
- If your nails grow too quickly, corrections will have to be done very often: once every two weeks.
- Working with acrylic is not that easy. It is dense and viscous. The more experience, the better.
Advantages and disadvantages of the procedure
An interesting fact is how this technology has penetrated into nail salons. It was primarily dentists and stomatologists who used acrylic in their work, since its hardness is ideal as a dental material.
Over time, namely in 1957, the idea of nail extensions was born, and then leading specialists tried this material in order to introduce something new and spectacular into the manicure field. Until today, this technology is one of the leading ones in working with nails.
There are many benefits of acrylic nails:
Acrylic adds elasticity and therefore naturalness to manicure.
- this material gives elasticity , and therefore naturalness to the manicure;
- thinness and, at the same time, strength of nails due to the absence of toxic methyl methacrylate in the composition;
- insensitive to temperature;
- more durable than other materials that are used for the same purpose (gel for example);
- can be easily removed if necessary (in a special solution);
- versatile design (artistic, aquarium, volumetric);
- easy restoration in case of breakdown.
At the same time, we will not hide some of the disadvantages of such a procedure:
- “lifelessness” of the nail , which is under the influence of acrylic;
- "dental" smell;
- possibility of temporary loss of natural shine;
- the need to first use a base varnish and only then an acrylic material to give the desired color;
- the need for leveling and sanding after application;
- Possibility of allergy to the material.
With cosmetic procedures, everything is not always so simple; there are always pros and cons. But most of these disadvantages when working with acrylic manicures can be avoided if you use the technology correctly, which we’ll talk about next.
Materials and tools for acrylic extensions
Materials for extensions
The material for extensions is acrylic powder, it can be either regular or camouflage. You will need the following tools:
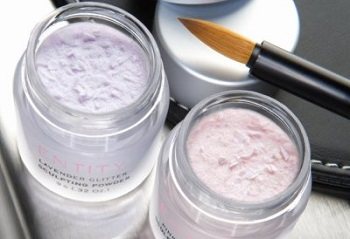
The main material for extensions is acrylic powder
- liquid monomer (liquid);
- glue for tips;
- top;
- bonder (also called a degreaser);
- primer;
- cuticle remover;
- cuticle oil.
Tools for acrylic extensions
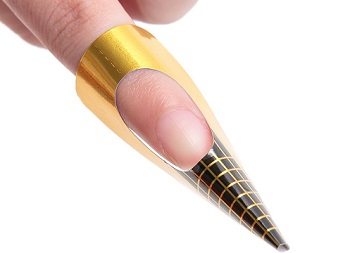
Nail extension mold
- cutter;
- tips;
- forms;
- a respirator, as acrylic has a strong odor;
- nail clippers;
- tweezers;
- buff with medium abrasiveness;
- brush to remove dust;
- container for acrylic;
- pusher or orange stick;
- clothespins to clamp the stressed part;
- paper towels.
Choosing acrylic powder
When choosing acrylic powder, pay attention to the following indicators:
- The color can be any. If you are doing extensions professionally, then you should have as many different colors of acrylic powder as possible.
- Polymerization rate . The speed of hardening depends on the speed of polymerization. Powder with a high polymerization rate is suitable for professionals.
- Matte powder is ideal for aquarium manicure and French coating. Transparent powder is suitable for edge correction and sculpting.
- Camouflage powder is suitable for creating a perfectly smooth surface with a natural shade. Can also be used for broken and deformed nails.
- Stained glass powder is suitable for creating a manicure with a “candy” design. And also to create a crystal effect.
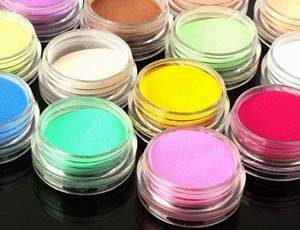
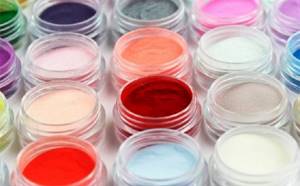
Colored acrylic powder
Pay attention to the plasticity of the powder. The more plastic it is, the easier and more comfortable it will be to apply. This indicator is important for both beginners and professionals in the acrylic extension technique.
Types of acrylic powder. Which to choose?
Today on the shelves of manicure stores you can find several types of acrylic powder. Let's figure out how they differ from each other and what they are intended for.
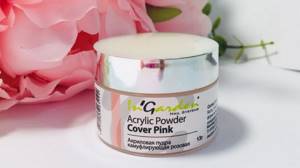
Transparent acrylic powder is usually very finely ground. It does not stand out at all on the natural nail plate. Universal. This type of powder is used to create a base layer, strengthen, and build up the nail plate. With its help you can eliminate unevenness of the nail and model the tip. It is also suitable for designs.
Acrylic Powder Expert Clear NeoNail 30 g
Camouflage powder is opaque, similar to the natural shades of the nail plate. It has a denser texture and is more flexible. Even its thin layer perfectly masks nail imperfections: unevenness, yellowness, white spots, grooves and other defects.
Acrylic camouflage peach powder Cover Peach InGarden 20 g
Matte powder hides imperfections in the nail plate and visually evens it out. Suitable for base coat when strengthening and extending the nail plate.
Colored powder is used to create designs. There is a huge palette of colors on the market to suit every taste. Using colored powder, you can create different designs on your nails and achieve the “sugar nails” effect.
Neon powder comes in bright, rich shades and glows when exposed to ultraviolet light.
Glitter powder can come in different textures and grinds. Accordingly, the size of glitter (sparkles) varies. Great for finishing coats or creating bright, sparkling designs.
Summarize:
- to strengthen and correct the shape of the nail tips, choose transparent acrylic powder;
- in order to achieve a smooth surface of the nail plate and hide imperfections, use camouflage powder;
- To create designs, colored, neon powder, and glitter powder are suitable.
INTERESTING!
Acrylic powder is ideal for creating a textured, voluminous manicure. Want to create contrasting textures? Make the design with powder on a glossy base. Want to achieve the effect of “sugar” marigolds? Cover the nail plate completely with powder. You can also make a “knitted” manicure using powder.
What to choose as a basis: tips or forms
Forms in acrylic extensions refer to special patterns. With their help it is convenient to model the future nail. Disposable paper forms are used. Tips are made of plastic and are special blanks that imitate natural nails. They are thin, strong, and easy to file.
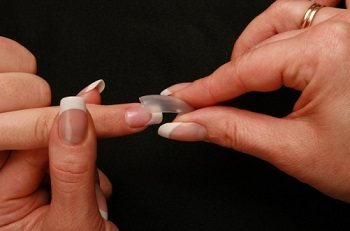
The process of nail extension on forms
- If you are growing almond-shaped or oval-shaped nails, then it is possible to use both bases of your choice.
- If a person regularly bites his nails, it is better to do extensions using tips with a small contact surface.
- When extending trapezoidal nails, you should take forms with a small contact surface.
- For flat nails, you can use both tips and forms. However, if the width of the nail is too large, it is better to take forms, since the tips may not correspond to this width.
- If the nails are curved down, then only forms can be used for extensions.
Common problems with hair extensions
- The natural nail plate is completely flat or its edge tends upward. In such cases, the stress zone is difficult to form and most often remains the weakest in the extended nail.
- What to do: Before printing the material, drop a little polygel in the center of the stress zone. The ball should be no more than 1.5 mm in height and no more than 1 mm in width. Dry the ball in the lamp and start printing.
This technique will help keep your shape at the desired level and prevent it from falling below the required level.
- A very arched nail. When looking at the end of the free edge of a natural nail, a strongly rounded arch is visible. In this case, it will not be possible to press the workpiece tightly, since the transverse arch of the workpiece will not be so rounded.
- What to do: before imprinting the form, add a little polygel to the natural nail in the cuticle area. This technique will help smooth out a steep arch.
- Nails grow downwards. If the nail plate tends downwards, the edge of the workpiece at the cuticle will constantly move away.
- What to do: Place a small layer of polygel near the cuticle, as well as drops in the center of the stress zone. Only after the layering has polymerized, start printing.
- Large gap between cuticle and mold. There is no need to install the workpiece tightly to the cuticle, but there should not be a large gap. The maximum indentation is 1 mm.
- What to do: File the plastic blank on the sides so that the edges do not interfere with moving it closer to the cuticle. You only need to cut down a little bit so that there are no gaps in the side sinuses.
- There is no free edge. To work with top forms, it is best that the natural nail has at least minimal regrowth. The distal edge will help avoid material leakage and also increase the strength of the structure.
- What to do: Before modeling, complete the free edge with polygel. You can do this on disposable paper blanks.
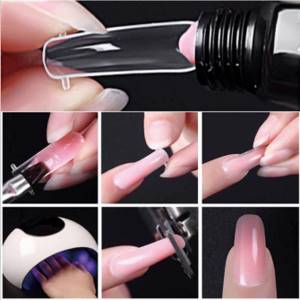
How to prepare nails for acrylic extensions
You should not use hand cream the day before the procedure. Also, acrylic extensions are not suitable for women in the first trimester of pregnancy. As for special preparation before extensions, it is necessary to soften and then remove the cuticle using special oil and a cuticle stick. Shorten the nail with a file and sand thoroughly. How to cut them correctly? It all depends on what shape is planned for the extension. Do not file them in a circular motion.
Step-by-step instructions for acrylic extensions
There are three options for nail extensions using acrylic: on the upper and lower forms, on tips. If you decide to do extensions on the lower forms, then follow the following instructions. The acrylic extension process can be quite labor-intensive and takes about three hours on average.
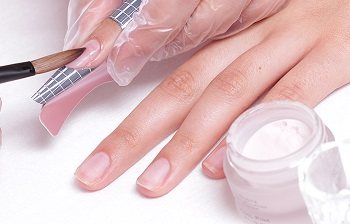
Acrylic nail extensions
- Of course, you need to start with preparing the nail plate . First disinfect it, and then file and thoroughly sand the surface.
- Next, the cuticle is pushed back using an orange stick in the shape of a spatula.
- Now you can proceed to using the form . It is put on the finger so that it is located exactly at the corners of the plate. The finger bends. After the form is correctly placed on the nail, you need to press it carefully and firmly, connecting the tips without closing it so that the nail does not turn out to be an irregular shape. If the mold is positioned incorrectly at this stage, the acrylic may crack after extension.
- At the next stage, a primer . This must be done very carefully so that it does not end up on the skin.
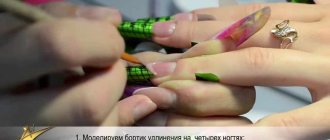
- Now you need to apply the already made white acrylic ball to the mold (by mixing acrylic powder and monomer). A smile line is immediately formed using a brush dipped in liquid.
- A pink acrylic ball to the nail plate that is not covered with a form . This should be done so that the white and pink colors partially overlap. Do everything carefully so that a smooth surface of the nail is formed. This means that the subsequent filing process will be easier and faster.
- When the acrylic has dried , you can remove the form and proceed to filing the resulting surface . To level the side surfaces, they are filed using a coarse file, then the edges are processed in the same way. Afterwards, you can finally process the nail with a fine-grained file. You need to work with it from top to bottom.
- Next, you need to apply cuticle oil to the skin and proceed to final sanding to smooth the surface and eliminate scratches that were caused by the file.
- The last step is to apply a layer of clear varnish .
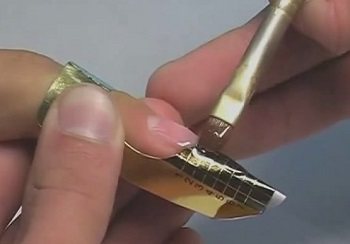
Acrylic extension process
Extending nails with acrylic powder is a complex process with many nuances; a professional manicurist shares his secrets in this video tutorial:
Similarly, you can perform extensions on the upper forms and tips. To apply extensions on the upper forms, remove the cuticle and apply a bonder . For nails, choose the appropriate shapes . Afterwards, a primer , and then an acrylic ball is placed on the form and carefully distributed over it.
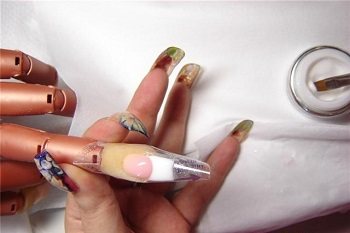
Nail extension on top forms
The next step is to attach the form to the nail using slight pressure. When the acrylic dries, the mold can be removed and proceed to leveling with a file and subsequent polishing. All further actions do not differ from the sequence when building on lower forms.
To build using tips, you should also take into account the step-by-step instructions given above. Just to begin with, you will need to select tips that suit the shape of the nail, then file their free end with a coarse file. The end where the tips will be attached also Then the nails are covered with a disinfectant solution and primer , and then tips are attached using special glue .
The length in this type of extension can be absolutely any. To ensure that the place where the nail and tip are glued together is not visible, you need to file it down or apply a special product. In the future, the process does not differ from building on forms.
Also, acrylic extensions can be carried out without using tips or forms, and how this procedure goes, see the video master class on nail extensions without forms:
How to use acrylic gel
There are many companies that produce this base for extensions. Everyone calls the product differently, but this absolutely does not affect the effect that is noticed after polygel extensions.
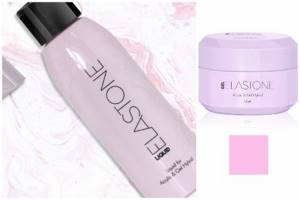
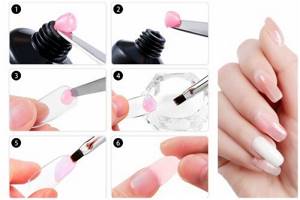
In order to get beautiful nails you need to follow the instructions:
- Contact a specialist or do a manicure yourself.
- Remove the fat layer on the treated surface.
- Treat with primer.
- Apply base coat.
- Set the form on which the gel will be applied.
- Place some acrylic on the mold.
- Pre-degrease the brush and distribute the gel evenly.
- Dry in an ultraviolet lamp.
- Give the desired nail shape.
- Having figured out how to extend nails with acrylic gel, you can begin training on models.
Secrets of perfect acrylic extensions
- In order for an acrylic nail to last as long as possible, it is necessary to properly treat the natural nail with an antiseptic and primer, reliably degreasing it. Then the marigolds will last a long time and will delight the owner with a neat appearance.
- Buy materials only from reputable manufacturers.
- To remove acrylic nails, only a special liquid without acetone is used.
Please note that acrylic is contraindicated for allergy sufferers, pregnant women (especially in the first trimester) and those who suffer from fungal diseases.
Extensions should be carried out in a well-ventilated area, and after extensions you should wash your hands thoroughly with soap.
In order for acrylic nail extensions to be perfect, it is necessary to take into account many nuances; watch the video about typical mistakes made by inexperienced nail technicians when performing this procedure:
Possibilities of polygel in manicure and nail design
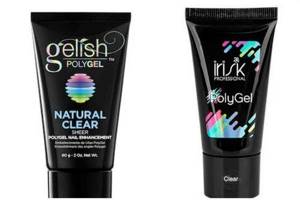
Acrigel combined varnish and acrylic polymers, oligomers and made the manicure service area more diverse. When using acrygel, the master not only lengthens and strengthens the nail plate, but can also eliminate defects and surface injuries.

Polygel nail extensions are carried out if:
- the client suffers from increased fragility of nails, which also have a trapezoid shape;
- if correction of the nail surface is required.
Step-by-step instructions for correcting nails with acrylic
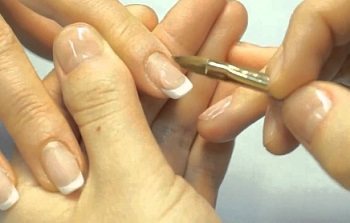
General correction is carried out approximately once a week and takes about 2 hours. As soon as you notice that an overgrown natural nail has appeared between the artificial nail and the skin, you need to immediately make a correction.
The correction procedure is as follows:
Correction of acrylic nails
- First, the nail polish is removed and the cuticle is removed .
- The nail surface between the acrylic and the cuticle is carefully filed and polished .
- A primer is applied to the natural nail .
- Next you need to make a small ball of acrylic powder . It is applied to the regrown nail without touching the cuticle.
- Acrylic is applied alternately, first to the left and then to the right hand.
- When the acrylic hardens , you need to sand the surface and move on to the design.
Acrylic nail care
- Before extensions, it would be useful to test for an allergic reaction . To do this, apply a little acrylic to the nail. If blisters and red spots appear on the skin, then it is worth replacing acrylic with gel.
- Despite the strength of acrylic, it must be handled with care. Natural nails are not so strong, and any damage to the artificial plate always negatively affects the condition of the natural one.
- acetone to remove acrylic . He can give an unpredictable reaction.
- Do not apply polish on artificial nails too often . Otherwise, they will stop breathing and will gradually begin to deform.
- Do not use nippers and scissors , which severely injure the nail plate. Use special files.
- If your nails grow quickly, file them to the desired length with a nail file and coat them with varnish. The latter must be of very high quality.
Beautiful extended nails
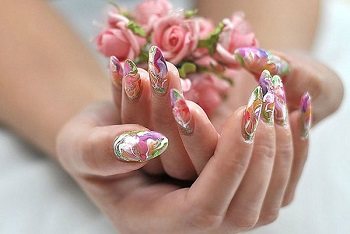
Acrylic nail extensions have many advantages. But the result of the procedure can only please you with strict adherence to the technology and high-quality care for the extended nail plate.
More interesting articles:
Contraindications and restrictions
Despite the fact that acrylic powder is absolutely safe for nail health and hypoallergenic, nail technicians do not always recommend extensions to prevent damage to the surface.
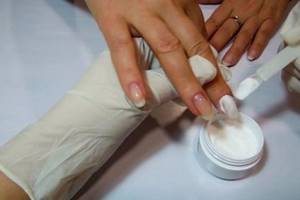
Contraindications are prescribed in the form of recommendations from cosmetology, so the client himself decides whether to comply with them or not:
- Diabetes;
- Pregnancy (mostly early stages);
- Undergoing chemical therapy;
- Taking antibiotics and hormonal drugs;
- Allergic reaction to acrylic;
- Hormonal imbalances due to stress and depression.
Failure to comply with the master’s restrictions can lead to a premature decline in the effect of manipulation, which is associated with changes in the girl’s hormonal levels. However, keep in mind that the presence of allergies to the products used can affect the client’s health, so it is important to take this parameter into account.
You can first test for the presence of acrylic powder by applying it to a sensitive area of the skin for 30 minutes. Despite the hypoallergenic composition, sometimes women experience individual intolerance to it.
However, there are factors that can affect the health of natural nails:
- Fungal infections of the plate;
- Damaged nails (increased thinness, brittleness);
- Damage to the sensitive skin of the fingers under the plate.
If you apply nail extensions or regular decorative coating in the form of gel polish for a long time, the structure of your nails may begin to deteriorate. To prevent this, it is recommended to periodically take a break after the last correction for 1.5-2 months. During this period, the nails will recover and partially grow back.
